
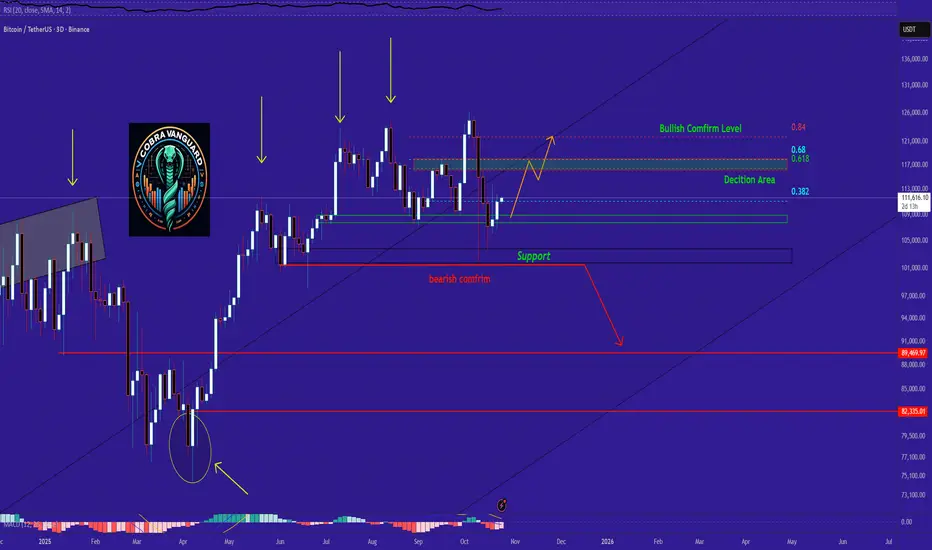
📉 Stage 1 – Bearish Reversal Zone
The red zone and areas below it signal a potential return to the downtrend.
Stage 2 – Launch Zone
The desicion zone between 111,300 to 111,500 could trigger a sharp breakout move.
📈 Stage 3 – Bullish Extension
If price breaks through the 115,000 to 117,000 range, there’s a high probability of reaching 121,000 to 122,000.
The red zone and areas below it signal a potential return to the downtrend.
Stage 2 – Launch Zone
The desicion zone between 111,300 to 111,500 could trigger a sharp breakout move.
📈 Stage 3 – Bullish Extension
If price breaks through the 115,000 to 117,000 range, there’s a high probability of reaching 121,000 to 122,000.

Publicações relacionadas
Aviso legal
As informações e publicações não se destinam a ser, e não constituem, conselhos ou recomendações financeiras, de investimento, comerciais ou de outro tipo fornecidos ou endossados pela TradingView. Leia mais nos Termos de Uso.
Publicações relacionadas
Aviso legal
As informações e publicações não se destinam a ser, e não constituem, conselhos ou recomendações financeiras, de investimento, comerciais ou de outro tipo fornecidos ou endossados pela TradingView. Leia mais nos Termos de Uso.