

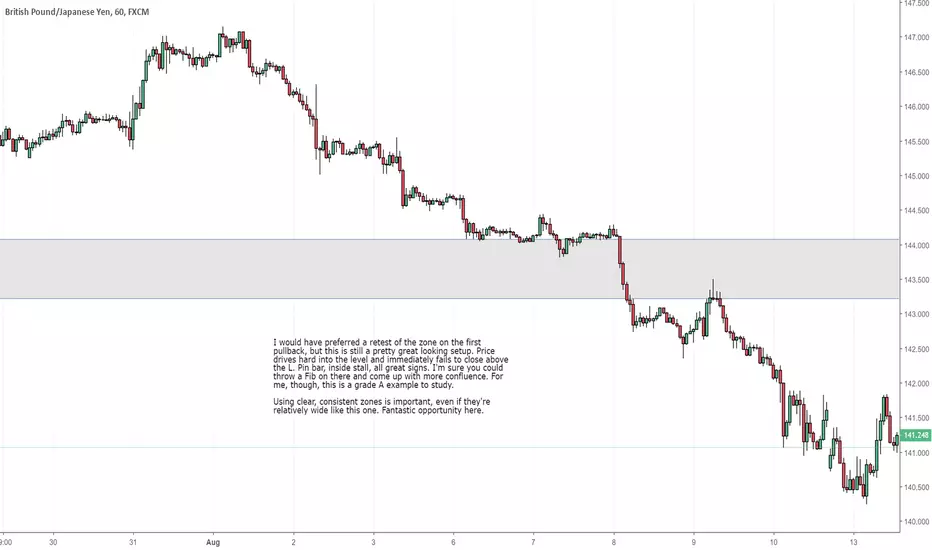
Here's the setup on the H1.
Apply this to any time frame. If you're using important levels and trading at the right times, most healthy breakouts involve some version of this shape. Strong, confirmed breakout with a clear close past the level, a weak but steady pullback to the level, and then an immediate fail at support-turned-resistance.
Apply this to any time frame. If you're using important levels and trading at the right times, most healthy breakouts involve some version of this shape. Strong, confirmed breakout with a clear close past the level, a weak but steady pullback to the level, and then an immediate fail at support-turned-resistance.

Publicações relacionadas
Aviso legal
As informações e publicações não se destinam a ser, e não constituem, conselhos ou recomendações financeiras, de investimento, comerciais ou de outro tipo fornecidos ou endossados pela TradingView. Leia mais nos Termos de Uso.
Publicações relacionadas
Aviso legal
As informações e publicações não se destinam a ser, e não constituem, conselhos ou recomendações financeiras, de investimento, comerciais ou de outro tipo fornecidos ou endossados pela TradingView. Leia mais nos Termos de Uso.