指标

Trade Coach-JournalEvery trader knows they should journal. Almost nobody does it, and the ones who do
mostly end up with a spreadsheet of numbers they never open again.
The problem isn't discipline. It's that a journal tells you what happened last month,
and the moment you actually need it is right now — with your finger over the button,
about to take a trade at 2pm on a Thursday after two losses, which is exactly the
combination that has cost you money forty times before.
This puts your journal on the chart and reduces it to a verdict that changes as your
day does. At 9:50am it might say:
GOOD WINDOW
this is when you trade best
By 2:15pm, after a loss, the same panel says:
STOP · DONE TODAY
weak window and you're coming off a loss
Nothing in between those two moments came from the market. It came from you, forty
trades ago, doing the same thing.
THE PART THAT ACTUALLY CHANGES THINGS
Timing patterns are useful. Knowing your afternoons win 30% is worth something. But
you can't decide to make afternoons behave differently.
You can decide to stop chasing.
So every trade can carry tags — words you invent, starting with #. Log a trade you
chased as:
8/17 13:35 S 29140 14:10 29168.75 #fomo
Do that twenty times and the panel stops talking about the clock:
TOP FIX
#fomo trades win 18% (n=22)
→ stop taking #fomo entries
That's a different kind of sentence than "your Tuesdays are weak." It names a habit,
it's yours, and you can change it tomorrow morning. Tag findings outrank timing
findings in the panel for exactly that reason.
Use whatever vocabulary fits how you actually trade — #plan, #revenge, #late, #news,
#tired, #a+. The only requirement is honesty. Putting #plan on a trade you chased
makes the whole thing useless, and nobody sees this but you.
LOGGING A TRADE
One line, in the settings:
8/17 9:45 L 29048 10:15 29096.5 #plan
August 17th, 9:45am, long from 29048, out at 10:15 at 29096.50, planned setup.
The parser tries hard not to make you think about formatting. These four lines are
the same trade:
8/17 9:45 L 29048 10:15 29096.5
8/17, 9:45, L, 29048, 10:15, 29096.5
08-17 0945 LONG 29048 1015 29096.5
2026-08-17 09:45 buy 29048 10:15 29096.5
Dates take 8/17, 08-17, 2026-08-17, 0817 or 20260817. Times take 9:45, 09:45 or 0945.
Side takes L/S, LONG/SHORT or BUY/SELL in any case. Spaces and commas both work. The
year is set once in settings so you're not retyping it. Exit time is optional — leave
it out and you keep every statistic, you just lose the line drawn on the chart. An
exit time earlier than the entry is read as an overnight hold.
Times should match the clock on your chart's time axis.
WHAT YOU SEE
Under the verdict, the panel is deliberately short:
now: pm ▰▰▰▱▱▱▱▱▱▱ 30% n=20
form ●●○○●○○○●○
equity █▇▆▄▅▃▂▁
today 3 trades · -2.1R
Four lines, and the third one is the one that hurts. Your form dots can look fine
while the equity sparkline slides down the page — that's the shape of winning often
and losing big, and it's the most common way a trader who looks profitable isn't.
The footer says the same thing in numbers:
40 trades · 67% win · -0.12R avg
A green win rate sitting next to a red R average is worth more than any entry signal
you'll read this year.
Every statistic carries its sample count, and rows stay grey until they've earned an
opinion. A grey row means the script doesn't know yet — more honest than a confident
percentage built on six trades.
Turn on "show full detail" for the full breakdown: morning against afternoon, long
against short, after-loss, average winner against average loser, worst losing streak,
and every tag ranked by how often you use it.
On the chart itself each trade draws where it happened — a triangle at the entry, a
line to the exit, the R result labeled, tags in the tooltip.
ALERTS
The panel only helps if you're looking at it, and the moments you most need it are
the moments you're not.
Entering a weak window
Daily stop hit
STOP for today
Set them once. Then the coach speaks first, and you don't have to remember to ask.
ON THE NEURAL NETWORK IN GROUP 4
There's a small neural network in the advanced settings that trains on your logged
trades and estimates whether a trade taken under current conditions would win. Most
of the time it says this:
verdict not significant
vs control 58% vs 62%
That second line is the whole reason to trust it. Alongside the real network, the
script trains an identical one on deliberately shuffled labels — a model that cannot
possibly know anything. If the real network can't clearly beat that, its opinion is
suppressed and the panel says so.
A network with this many parameters needs several hundred trades before it can
separate a pattern from a coincidence. It will probably read "not significant" for a
long time, and that's the safeguard working rather than the tool failing.
Nothing in the verdict, TOP FIX, or the pattern tables involves the model. That's all
plain counting, which is why it becomes usable around 20 trades and trustworthy around
40 — while the network is still deciding whether it knows anything at all.
IF SOMETHING LOOKS WRONG
The panel tells you which of three things went wrong rather than making you guess:
⚠ 3 lines unreadable (line 12)
Line 12 didn't parse. Usually a missing price, a typo in the date, or a side it
didn't recognize.
⚠ 8 trades off-chart — check timezone
The timestamps don't land on a loaded bar. Either scroll left for more history, or
your times aren't in the exchange's timezone.
⚠ 5 trades too early on this chart
The script needs 220 bars of warmup before it can read market context. Load more
history or move to a higher timeframe.
If it reads "0 of 40," everything was rejected or fell outside the chart. Work
through those three in order.
This is a review tool. It reports patterns in trades you've already taken, generates
no entry signals, and makes no claim about future results. What it shows you is your
own history. 指标

Divergence Confirmation Oscillator [Pineify]Divergence Confirmation Oscillator
Overview
This RSI divergence indicator starts from one timing fact: a pivot is knowable only after its right-side bars close. It scores regular and hidden events, showing both the formation location and the later confirmation time.
Problem Definition
A divergence line drawn back to a pivot can look actionable there, although several bars were still required to confirm it. Binary markers also give equal weight to shallow disagreements and well-separated price/RSI moves. The failures are timing ambiguity and absent evidence quality. This script exposes the delay and ranks completed events; it does not assume divergence predicts reversal.
Design Rationale
Price pivots are the anchors, with RSI sampled on those exact bars. A solid diagonal shows formation; a dotted track from the second pivot to the confirmation bar shows knowledge time. Quality combines spacing, ATR-normalized price movement, RSI movement, threshold context, and RSI departure by confirmation. ATR avoids raw-point scale dependence. Unconfirmed turns would appear earlier, but would break the timing invariant. The chosen tradeoff is delay and selectivity for auditable events.
Key Features
Confirmed regular/hidden bullish and bearish divergence.
Adjustable 0–100 quality gate.
Pivot bridge plus confirmation wait track.
Bounded follow-through, invalidation, or expiry state.
Four close-confirmed alerts and optional dashboard.
How It Works
RSI uses closes. Price highs/lows become pivots only after the configured bars on both sides; processing occurs when the right-side bar closes.
Regular bullish means lower price low and higher RSI; hidden bullish means higher price low and lower RSI. Bearish definitions are symmetric at highs.
Only consecutive confirmed pivots inside the separation range interact. Each new pivot becomes the next reference even if no event passes.
The score weights spacing 25%, ATR-normalized price displacement 25%, RSI displacement 25%, threshold context 15%, and departure from the second pivot 10%. Price ATR and RSI delta inputs define full component scores.
Passing events receive a solid bridge, a dotted pivot-to-confirmation track, and a REG/HID label with Q at confirmation. Nearby labels rotate through three vertical lanes.
After confirmation, the watch records favorable ATR movement or RSI midpoint reclaim as follow-through, a buffered close beyond the pivot as invalidation, or the time limit as expiry. Circles and crosses mark these later outcomes without duplicate edge text; they are not alert signals.
Warm-up requires valid RSI, ATR, and pivot history; invalid spacing suppresses events.
How Multiple Indicators Work Together
Price pivots supply auditable anchors; RSI measures momentum there; ATR normalizes price distance; the score ranks the completed disagreement; and the lifecycle observes only later evidence. Removing any part changes the result: without pivots timing is undefined, without RSI divergence disappears, without ATR price scale leaks into quality, and without the wait track confirmation delay is hidden. This is one causal chain, not an unrelated mashup.
Trading Ideas and Insights
Regular events show price extending while RSI disagrees; hidden events show price holding structure while RSI pulls back. Compare the confirmation bar, Q, and lifecycle before forming a thesis. Repeated invalidation suggests retuning the pivot scale. The indicator supplies no entry, stop, size, or expected return.
Unique Aspects
Confirmation geometry is the structural contribution. The diagonal shows where the relationship formed; the dotted track and label show when it became knowable. Five score components rank evidence without altering RSI, and the bounded lifecycle keeps later behavior separate. A historical bridge is therefore created at confirmation, not proof of availability at the pivot.
How to Use
Start with defaults. Cyan/green lower labels show bullish confirmations; orange/red upper labels show bearish ones. Nearby labels rotate through three lanes. Follow the dotted track to confirmation and read Q. Triangles mark events; circles/crosses mark later outcomes named in the dashboard. Use the four close-confirmed alerts.
Customization
Short pivot sides reduce delay but admit noise; long sides select broader swings and confirm later. Separation limits choose pivots. Price ATR, RSI delta, quality, and context calibrate scoring. Follow distance, buffer, and window control lifecycle. Label spacing sets the clustering window. Visual layers and retained events are switchable.
Assumptions and Limitations
Confirmed does not mean correct or profitable. Pivots lag, and historical bridges are drawn only at confirmation. Events and lifecycle changes require a closed bar. ATR is scale, not probability. Consecutive-pivot logic can miss a relationship that skips an intermediate pivot. Trends may invalidate regular divergence; ranges may create many pivots; gaps, thin trading, parameters, and synthetic chart prices can distort results. The script uses chart OHLC only, requests no external or lower-timeframe data, infers no order flow, and performs no execution backtest.
Conclusion
The oscillator makes RSI divergence auditable through confirmed anchors, scale-aware quality, explicit knowledge time, and bounded follow-up. It exposes delay and evidence while preserving uncertainty.
指标

指标

TRMSF (Trend / Range Market-State Filter) v1.0The Trend / Range Market-State Filter is a TradingView Pine Script indicator designed to label XAUUSD and BTCUSD market conditions as BULLISH, BEARISH, or SIDEWAY. It gives your webhook system a market-state rule that decides whether BUY and SELL signals should be delivered to the Telegram group or paused.
The script combines two technical tools. First, it uses the Directional Movement Index (DMI). DMI provides the Average Directional Index (ADX), which measures trend strength, plus the positive and negative Directional Indicators (+DI and -DI), which indicate directional pressure. A BULLISH condition requires ADX to be above the trend threshold and +DI to be above -DI. A BEARISH condition requires ADX above the trend threshold and -DI above +DI. The default trend-strength threshold is ADX above 25.
Second, the script optionally uses the Choppiness Index (CHOP). CHOP does not determine bullish or bearish direction. Instead, it checks whether price action is relatively directional or ranging. Low CHOP readings support a trend, while high readings support a sideways market. With the default settings, CHOP below 38.2 confirms a directional trend and CHOP above 61.8 supports a SIDEWAY classification.
The script labels a market SIDEWAY when ADX is below 20 or CHOP is high. It intentionally keeps the last market state when readings fall in the middle zone, such as ADX between 20 and 25. This prevents frequent switching between states when the indicators hover near their thresholds.
A state change is confirmed only at the close of a candle. When the state changes, TradingView can send one of six exact webhook messages: BULLISH, BEARISH, or SIDEWAY for either XAUUSD or BTCUSD. BULLISH and BEARISH pause BUY/SELL messages for it; SIDEWAY re-enables them. XAUUSD and BTCUSD remain independent, so a BTCUSD pause does not affect XAUUSD signals. 指标

CCI Divergence Volume Breakout [josseliani]CCI Divergence Volume Breakout combines confirmed CCI divergence with a relative-volume candle level. It waits for a confirmed close beyond that candle's high or low before displaying a BUY or SELL signal, and it can optionally map Entry, a volume-candle-based stop, 1R, and historical R-reach statistics.
The default settings are tuned for XAUUSD on the 7-minute chart, but the indicator can be adapted to other instruments and timeframes. The statistics dashboard updates for the current symbol, timeframe, loaded chart history, and selected inputs, making it easy to see how different settings affect the sample size and historical R-reach rates.
→ HOW I USE IT
The default settings are the configuration I currently use for XAUUSD on the 7-minute chart.
Seven minutes is the favorite timeframe of my wonderful wave-analysis teacher. I built this version around the way he studies the market: first CCI divergence, then a meaningful volume spike. After that, he moves on to his own wave-analysis methods, including trendlines, wave count, structure, and broader market context. This indicator does not reproduce or replace his complete method. I use it as a supporting tool within my own wave analysis.
With the default settings, the script first searches for a confirmed CCI divergence. It then selects a qualifying volume candle connected to that divergence. The first search covers the divergence span; if necessary, it checks the area around the second pivot and then watches the post-confirmation candidate window. A qualifying candle must have volume of at least 1.5 times its 20-bar average.
For a bullish divergence, the high of the selected volume candle becomes the confirmation level. A BUY signal appears only after a candle closes above that high within the permitted breakout window.
For a bearish divergence, the low of the selected volume candle becomes the confirmation level. A SELL signal appears only after a candle closes below that low within the permitted breakout window.
The optional trade map starts from the open of the candle after the signal. It displays an Entry line, a stop behind the opposite edge of the exact volume candle plus the selected ATR delta, and a 1R reference target.
I use the dashboard to compare configurations rather than to treat one historical percentage as a promise. For example, changing the minimum volume multiple, pivot-matching radius, maximum distance between pivots, candidate-search window, or breakout window changes how often historical observations reached 0.5R, 1R, 2R, and 3R. This helps me see the trade-off between signal selectivity and historical excursion.
→ HOW THE INDICATOR WORKS
→ 1. Automatic CCI pivot scan
The script evaluates confirmed CCI pivots using strengths 3, 5, 7, and 9. The first pivot must be beyond the selected extreme threshold. The second pivot may form closer to the center of the oscillator.
A bullish divergence requires price to form a lower low while CCI forms a higher low. A bearish divergence requires price to form a higher high while CCI forms a lower high.
CCI pivots require bars on the right to become confirmed. For that reason, divergence lines are anchored to their historical pivot candles only after confirmation. They do not represent information that was available on the original pivot candle. BUY and SELL signals are evaluated only on confirmed closes after the divergence has been confirmed.
→ 2. Price-pivot matching
CCI and price do not always turn on exactly the same candle. Price Pivot Match Radius searches on both sides of each CCI endpoint for the corresponding price high or low.
Maximum Price/CCI Span Difference then checks that the two price pivots and the two CCI pivots describe approximately the same market swing. Lower values require tighter alignment; higher values allow more flexibility.
→ 3. Relative-volume candle selection
When a divergence becomes confirmed, the script first searches its pivot-to-pivot span for qualifying volume candles and selects the qualifying candle with the greatest reported volume. If that search finds none, it also checks the area around the second pivot. Search After Divergence then defines how many new bars after confirmation may supply a qualifying candidate. Volume is measured relative to its moving average:
Relative volume = candle volume / average volume
The default requirement is 1.5 times the 20-bar average. Candle direction is not used. For a bullish setup, the selected candle's high becomes the level. For a bearish setup, its low becomes the level.
Maximum Candidates controls how many qualifying volume levels one divergence may create. You can use up to three qualifying volume-candle candidates for each confirmed divergence. The default is one to keep the chart and signal source unambiguous. With this default, an already selected historical candidate fills the single slot; otherwise, the first qualifying post-confirmation candidate can fill it.
→ 4. Breakout confirmation and signal window
The volume level begins as gray. It changes to the bullish or bearish color only when price closes beyond it on a confirmed candle:
Bullish divergence: confirmed close above the selected volume candle's high.
Bearish divergence: confirmed close below the selected volume candle's low.
Breakout Signal Window defines how many bars that exact volume level is permitted to produce a BUY or SELL signal. The count begins when the level is created. Once the window expires, the level cannot trigger a late signal and cannot add a late observation to the statistics.
→ 5. Expired levels
Keep Expired Levels Visible separates signal validity from visual analysis.
When it is enabled, an unbroken level continues as a gray reference after its signal window expires. The expired line is visual only: it cannot produce a BUY or SELL signal and is not reactivated by a new calendar day, exchange day, or session. It remains visible until a newer qualifying volume level replaces it.
When Keep Expired Levels Visible is disabled, the gray line ends when its breakout signal window expires.
This indicator does not carry or re-arm levels according to a calendar boundary or timezone.
→ OPTIONAL TRADE MAP
The trade map is a visual measurement tool, not an automated order-placement system.
Entry: open of the candle following the confirmed BUY or SELL signal.
Stop: opposite edge of the exact volume candle that produced the signal, plus the selected ATR delta.
1R: one initial-risk unit from Entry.
The map helps compare the signal with the user's own execution, market structure, and risk plan. It is not financial advice and does not account for spread, slippage, commissions, or individual position sizing.
→ STATISTICS DASHBOARD
The dashboard reports historical reach rates for the current symbol, timeframe, loaded chart history, and selected inputs. It is designed for configuration comparison.
Completed: observations that reached the stop, reached 3R, or reached the maximum evaluation window.
Reached >=0.5R: completed observations whose maximum favorable excursion reached at least half of the initial risk.
Win Rate >=1R: completed observations that reached at least 1R before the stop.
Reached >=2R / >=3R: completed observations that reached those excursion levels before the stop.
Average MFE: average maximum favorable excursion, expressed in R, across completed observations.
Active / Invalid: observations still being evaluated and observations rejected because a valid positive risk distance could not be constructed.
Only breakouts confirmed while their volume level is inside its active signal window create statistical observations. An expired gray reference does not create a trade in the dashboard.
If the stop and a target fall inside the same historical candle, the script gives the stop priority because OHLC data cannot reveal the intrabar sequence. This is intentionally conservative.
These figures are descriptive historical measurements, not a backtest equity curve, not a profit factor, and not a forecast of future results. They can change with the data provider, symbol, timeframe, available history, and settings.
→ DEFAULT XAUUSD 7-MINUTE PRESET
CCI Length: 20
CCI Source: Typical Price (HLC3)
First Pivot Extreme Level: +/-150
Maximum Bars Between Pivots: 60
Price Pivot Match Radius: 7
Maximum Price/CCI Span Difference: 35%
Volume Average Length: 20
Minimum Volume x Average: 1.5
Search After Divergence: 15 bars
Maximum Candidates per Divergence: 1
Breakout Signal Window: 40 bars
Keep Expired Levels Visible: On
Show Entry / SL / 1R Markup: On
→ ALERTS
Bullish CCI Divergence: fires when a bullish divergence becomes confirmed.
Bearish CCI Divergence: fires when a bearish divergence becomes confirmed.
CCI Volume Long Signal: fires after a confirmed close above an active bullish volume level.
CCI Volume Short Signal: fires after a confirmed close below an active bearish volume level.
→ ORIGINALITY
This script is not a standard CCI divergence plot and not a generic volume-spike marker. Its purpose is to connect four separate stages in one workflow: multi-strength confirmed CCI divergence, price-pivot alignment, relative-volume candle mapping, and close-confirmed breakout authorization.
Candidate search, signal lifetime, visual reference lifetime, trade measurement, and historical R-reach analysis are kept separate. This makes it possible to change one part of the workflow and see how it affects signal frequency and the historical statistics without confusing an expired visual level with an active signal source.
→ LIMITATIONS
CCI, volume, and divergence are analytical tools, not guarantees of reversal or continuation. Pivot confirmation introduces an intentional delay. Historical volume and results can differ between data providers. Signals should be evaluated with market structure, liquidity, volatility, wave context, and personal risk management. The default preset was developed for how I analyze XAUUSD on 7 minutes; other markets and timeframes require independent testing.
指标

IPDA Year Map (M1D)IPDA Year Map draws the window the Interbank Price Delivery Algorithm is said to reference — the 20, 40 and 60 day look-back highs and lows — and puts it on a year of quarterly dividers rather than on a rolling snapshot. Every level carries how many sessions it has left before the candle that set it ages out of that window and stops being a reference at all.
The idea it implements is simple and it is the reason for every design decision below. The algorithm does not see a chart. It references days as data points inside a fixed look-back, and once a level falls outside 60 trading days it is purged. So the useful questions are which levels are still inside the window, where in the window they sit, and when each one leaves. Most range tools answer the first. This one answers all three.
The data range
Three nested look-backs, computed on daily closes: 20 days for the near-term read, 40 for the intermediate, 60 as the outer edge of what is still referenced. Each contributes its high and its low, drawn from the candle that actually set it and running forward to the current bar. Six extremes, and that is the whole object — the script does not go hunting for additional pools, order blocks or gaps to decorate it with.
The levels come from the daily timeframe regardless of what the chart is showing, so a 60-day window exists on a 1 minute chart where only a fortnight of chart candles is loaded.
Each level's origin is found from the offset back to the extreme candle, not from watching the value change. Those are different things and the difference is visible. A rolling minimum moves for two reasons: a lower low prints, or an older and deeper low ages out of the window and the minimum steps up to whatever is left. Only the first is a candle forming a level. Anchoring on "the value changed" attaches the line to the day the old low expired, which can be months after the candle that actually set the price.
One price is one line
A high made inside the last 20 sessions is simultaneously the 20, 40 and 60 day high. Drawn as three separate levels that is three lines and three captions stacked on a single row of pixels, and the top of the chart reads as one anonymous level while the lows — which genuinely differ — read as three.
Levels at the same price are drawn once, captioned with every window that shares them, as in 20·40·60d high. Each side of the range then shows exactly as many lines as it has distinct prices. The caption also tells you when a level stops being the tightest one: a shared high loses the 20 from the front of its name the day the 20-day window moves on without it.
Levels that are merely close rather than identical still collide on screen, so each caption steps out to its own lane along the right of the chart until it is clear of the ones above it. No two captions share a row at any zoom.
Equilibrium
Each window can carry the midpoint of its own high and low — the premium and discount divide of that range. Three switches, one per window.
They are drawn dotted and neutral. Dotted because an equilibrium is a calculated reference and not a price that traded, and neutral because a midpoint is neither bullish nor bearish. Each runs from its own window's left edge rather than from a candle, since no single candle sets a midpoint.
The roll-out countdown
Every level and every equilibrium carries the sessions it has left inside its window, printed on its caption as out 12d. When the count reaches its last session the caption reads out next instead.
The arithmetic is the window length less the level's age, both in trading days. A high set yesterday sits in the 20-day window for 19 more sessions; one set 19 sessions ago leaves at the next close. This is also why a 60-day level can date back around 83 calendar days — 60 trading days is twelve weeks, and 24 of those days are weekend.
Two things it states rather than glosses over. The count is measured from the last completed daily close, so today's session is one of them. And it is the origin candle leaving that is counted — the printed level only actually moves if nothing else still inside the window matches that price.
For a level shared by several windows the countdown belongs to the widest one, because that is when it stops being referenced at all. An equilibrium's countdown is the sooner of its two extremes, since it moves the moment either side of it ages out.
The shift, and the sixty day budget
A market structure shift here is a liquidity raid: a day taking out the highest high, or the lowest low, of the days before it. The look-back is an input. Raise it to ignore the smaller shifts inside a range and find only the major one — in ICT's framing the real shift can sit two or three months back, so a reading of no shift found is an instruction to widen the search before concluding there isn't one.
A confirmed shift stands for its full 60-day budget. A later raid in the same direction inside that budget is a mini shift within the range and does not restart the clock; only a raid in the opposite direction, or one arriving after the budget is spent, places a new anchor. Without that rule a trending market would reset the count every few sessions and the budget would never be seen counting down.
The raid is marked with a vertical, and three more are projected forward from it at 20, 40 and 60 trading days, weekends skipped. The last is the point at which the 60-day budget from that shift is spent. The projection counts weekdays; the panel counts sessions the symbol actually traded, so a weekday the exchange was closed puts the chart marker one session ahead of the panel's count, and the panel says so.
The panel reports the same thing in numbers: when the shift happened, sessions elapsed, and sessions left of the 60. Its header reads IN BUDGET while the count runs, DUE SOON at five or fewer sessions left, and BUDGET SPENT past 60 — at which point the projections come off the chart rather than being extended into a window that no longer exists.
There is only one forward boundary and the arithmetic is worth seeing, because it looks like two:
today + (60 − elapsed) = (shift + elapsed) + (60 − elapsed) = shift + 60
The cast-forward target and the budget expiry are the same date. Drawing both would be drawing one fact twice.
Anchored to the minute
A raid found on chart candles lands on the chart's own grid, so on a 1 hour chart the shift marker can sit up to 59 minutes away from where the level was actually taken. The raid candle is re-read at 1 minute resolution and the marker placed at the first minute the prior extreme was genuinely exceeded.
TradingView only serves intrabar data for recent history. Where it is not available the marker falls back to chart-candle resolution, the tag carries a ~ mark, and the panel says which of the two it used. It never claims a precision it did not get.
Open interest
Where the instrument publishes an open interest series, the panel reports its change over a set window — 20 trading days by default, matching the innermost look-back — against price over the same window, and states a reading only where the arithmetic supports one: a fall of 15% or more on flat price, both falling together, both rising together, or no clear read. Open interest is a daily series whatever the chart shows, so the reading is the same on a 1 minute chart and a daily one.
The two sign readings compare only the direction of two changes, so they sit behind a floor: the open interest change must be abnormal and price must not be flat. The default floor of 10% was measured rather than chosen. Over 400 sessions with the quarterly roll weeks removed, the 90th percentile of the 20-day open interest change was about 14% on NQ and about 7% on ES; 10% sits between them. NQ's open interest runs roughly twice as noisy as ES's, so a chart dedicated to one instrument may want the floor moved.
The contract roll is refused outright. A continuous contract's open interest collapses by a third to a half in a session as the front month is abandoned, then rebuilds over the following week, and a window that spans one cannot be read for positioning. The panel fetches the largest one-day jump inside the window and, above 12%, reads contract roll instead of a signal until the window has cleared it.
Most instruments publish nothing. On those the panel names the symbol it looked for and says the reading is unavailable. It does not print a zero, and it does not infer open interest from volume or anything else.
The year map
Quarterly dividers run across the loaded history and project forward, so the year reads as quadrants rather than as one rolling window. Two spacings are offered — three month and four month — because ICT's IPDA material carries both as worked examples anchored at different points. They are the same rule applied from different places, not rival calendars, which is why this is a choice of grid rather than a claim about which one is correct. The 60-day look-back and look-forward is measured from wherever a shift actually sits, independently of the grid.
Keeping it readable
The vertical tags ride two rails outside the range — budget markers on the inner rail, the calendar on the outer — offset by a fraction of the 60-day range rather than by ATR. On a chart spanning a year an ATR cushion is a rounding error, which puts the tags inside the candles and on the same row as the level captions.
Because the range is the unit of measurement throughout, the spacing holds on any instrument and any timeframe without tuning.
By default every extreme is drawn black. The six levels are liquidity, and liquidity is neither bullish nor bearish — a level tinted by the direction of the last shift would be a bias call the script has no basis for. Which window a level belongs to is in its caption.
Each line family carries its own colour and width: the 60, 40 and 20 day levels, the equilibriums, the shift verticals and the calendar dividers. The defaults are set for a grey chart, where the usual light-grey neutral is the background itself and vanishes, so the secondary families use a dark slate instead. A level shared by several windows takes the colour and width of its tightest one. The panel header field has its own colour.
Non-repainting
Every daily figure is read from confirmed candles. Nothing is revised once its candle has closed, and no level, count or projection moves in hindsight. The lines extend rightward to the current bar while they are live — that is the drawing tracking the present, not its history changing.
Alerts
Three: a new shift confirmed and the 60-day budget restarted, fired on the close of the bar that placed the anchor; five or fewer sessions left of the budget; and the budget spent. The last two are evaluated once per day.
What it will not do
It places no entries, exits, stops or targets, and it does not size a position. It draws no bias, no trend and no projection of where price is going. A shift marker says a level was taken on that day; it does not say what happens next.
It does not rank the levels against each other or tell you which one price is drawn to. Whether a level inside the window is worth trading is a judgement about context this script does not have — session, higher timeframe draw, and what the day has already done.
It has no opinion on open interest where none is published, and no opinion on direction where the arithmetic does not support one. Both are stated as unavailable rather than filled in.
Settings
Quarterly dividers with their spacing and how far forward they project; the 20, 40 and 60 day bands each on their own switch; equilibrium on its own switch per window; the shift clock panel with its raid look-back and its minute-anchoring toggle; open interest with its comparison window and abnormal-move floor; and label size, tag rail offset, whether tags sit above or below the candles, right offset, the panel header colour, and a colour and width for each line family.
Attribution
IPDA, the 20/40/60 day look-back and the market structure shift are concepts from ICT's public teaching material. This is an original implementation of them. No third-party code is used.
Disclaimer
This is a decision-support tool for discretionary ICT trading. It is not financial advice, and no market's past behaviour is indicative of future results. 指标

Liquidity Sweep Detector Liquidity Sweep Detector is a price-action based indicator designed to identify potential liquidity sweeps around recent highs and lows and highlight subsequent directional confirmation.
The indicator focuses on a simple market behavior: price may temporarily move beyond a recent high or low, take available liquidity, and then return inside the previous range. After detecting this event, the indicator monitors the following candles for confirmation of a potential directional move.
## How It Works
The indicator calculates recent highs and lows using a configurable lookback period.
A bullish liquidity sweep is identified when price moves below a recent low and then closes back above that level.
A bearish liquidity sweep is identified when price moves above a recent high and then closes back below that level.
After a sweep occurs, the indicator monitors a configurable number of candles for directional confirmation. A bullish confirmation requires price to move above the previous candle's high, while a bearish confirmation requires price to move below the previous candle's low.
## Main Features
• Recent liquidity high and low levels
• Bullish liquidity sweep detection
• Bearish liquidity sweep detection
• Sweep zones for visual reference
• Directional confirmation signals
• Configurable confirmation window
• Optional candle-body confirmation
• BUY and SELL markers
• Alert conditions for sweep and confirmation events
• Adjustable visual settings
## Settings
Liquidity Lookback controls how many previous candles are used to identify recent highs and lows.
Confirmation Window controls how many candles the indicator monitors after a liquidity sweep.
Minimum Sweep Wick controls the minimum relative wick size required for a sweep to qualify.
Strong Candle Body can be enabled to require stronger directional candle confirmation.
Visual settings allow users to display or hide liquidity levels, sweep labels, sweep zones, and confirmation markers.
## How to Use
The indicator is intended to help traders study price behavior around recent liquidity levels.
A typical bullish sequence is:
Recent Low → Liquidity Sweep → Reclaim → Bullish Confirmation
A typical bearish sequence is:
Recent High → Liquidity Sweep → Rejection → Bearish Confirmation
Users can combine these observations with their own market analysis, timeframe context, and risk-management approach.
## Limitations
Liquidity sweeps can occur without producing a sustained directional move. A confirmed signal does not guarantee a particular market outcome.
The indicator is based on historical price data and should be treated as an analytical tool rather than a prediction system. Market conditions can change rapidly, and users should independently evaluate each setup.
This script does not guarantee profits, accuracy, or future performance.
## Originality
The indicator combines recent liquidity-level detection, sweep recognition, configurable confirmation logic, and visual sweep zones into a focused price-action tool. Its purpose is to provide a clear framework for observing liquidity events and subsequent price behavior without relying on excessive chart elements.
This publication is intended for educational and analytical purposes and is not financial advice.
指标

Confirmed Swing Ledger [BSL]Confirmed Swing Ledger is a confirmation-aware market-structure ledger
for studying how swings become known in real time.
WHAT IT DOES
- Detects pivot highs and lows only after the configured right-side
confirmation window has closed.
- Separates the pivot's historical origin bar from the later confirmation bar.
Confirmation markers are the default; optional hollow origin dots are
retrospective and clearly labelled.
- Maintains an alternating ledger of accepted highs and lows, classifying them
as HH/LH and HL/LL.
- Applies an optional ATR-distance filter to reduce near-duplicate swings.
Same-side candidates may replace an existing extreme without inventing a new
alternating swing.
- Tracks the latest confirmed upper and lower levels.
- Distinguishes strict close breaks from wick rejections. A break requires the
close to cross a known confirmed level; a wick through the level that closes
back inside is counted separately.
- Freezes state on non-standard chart types instead of presenting synthetic
bars as ordinary OHLC evidence.
- Exposes hidden numeric streams for confirmed swings, level updates, breaks,
rejections, dual rejections and bias. These are selectable sources in Signal
Audit Lab .
- Includes alert conditions for accepted swings, confirmed-level close breaks
and confirmed-level wick rejections.
TIMING MODEL
With the default 3/3 left/right settings, a candidate that originates at bar
`t` can only become a usable event at `t + 3`. The script never relocates a
tradeable event back to the origin bar. Optional origin dots are visual
context, not realtime signals.
DEFAULTS
- Pivot left/right: 3 / 3
- ATR length: 14
- Minimum alternating swing distance: 0.5 ATR
- Panel: Compact
DESIGNED FOR AUDITABILITY
The panel reports current confirmed levels, classification, structural bias,
accepted/replaced/filter/ambiguity counts, break/rejection totals, chart-type
guard status and open-bar hold state. Historical state changes occur only on
confirmed bars.
This tool describes confirmed structure; it does not predict future price,
guarantee performance or provide trading advice. Validate behavior on your own
symbols, timeframes and execution assumptions before making decisions.
Open-source Pine Script® v6. Educational use only.
指标

Execution-Aware Trend [BSL]Execution-Aware Trend is a deliberately ordinary trend-and-breakout strategy
whose main product is visible testing discipline. It answers “what did this
exact ruleset simulate after declared costs, next-tick execution and a fixed
sample split?” It does not predict the next move and does not claim an edge.
This is an original BarState Labs implementation created from an independent
written specification. It does not reproduce another publication’s source,
defaults, interface, chart grammar or report.
HOW IT WORKS
Trend qualification uses a fast and slow EMA. A long setup requires the fast
EMA above the slow EMA and the slow EMA above its value at the configured slope
lookback. The short rule is symmetric. Equality qualifies neither side.
Entry and exit channels always exclude the current bar:
`entryHigh = highest(high , entry length)`
`entryLow = lowest(low , entry length)`
`exitHigh = highest(high , exit length)`
`exitLow = lowest(low , exit length)`
A confirmed close beyond the prior entry channel creates a market-entry
intent only when the matching trend filter qualifies. There is no pyramiding
and no same-calculation reversal.
The close-risk line uses ATR and confirmed closes. For a long position, the
highest observed close is tracked and the line is the greater of its previous
value and `peak close - ATR multiple × ATR`. It therefore never loosens. The
short rule is symmetric and never rises. A channel breach or a confirmed close
through the risk line creates a market-close intent.
EXECUTION MODEL AND COSTS
Orders are not processed on the signal bar’s close. The strategy keeps
TradingView’s normal next-tick behavior, which on historical bars normally
means a fill at the following bar’s open. The declaration includes:
- 0.10% commission per filled order;
- 2 ticks of slippage per market fill;
- 10% of equity order size;
- no pyramiding and no simulated leverage;
- no calculation on every tick or on order fills.
These are generic examples, not estimates for a particular broker or market.
Users must replace them in Properties. The panel cannot detect a manual
Properties override, so it labels them declaration defaults. Simulated fills
do not model liquidity, spread variation, queue position, rejected orders or
market impact.
SAMPLE WINDOWS
The same signal parameters can be viewed as Full history, In-sample or
Out-of-sample. The default split is 2024-01-01 UTC. In-sample ends immediately
before the split; out-of-sample begins at the split. No entry is allowed
outside the selected window, and an open position is closed by a normal delayed
market intent when the window ends.
One visible split does not prove that a user avoided tuning after seeing the
result. The script exposes the boundary; it cannot enforce research behavior.
A visible 100-closed-trade gate is a sample-size warning, not statistical
proof.
CONFIRMED AND STANDARD-CHART BOUNDARIES
New orders require a confirmed bar and `chart.is_standard`. On Heikin Ashi,
Renko, Kagi, Line Break, Range, Point & Figure and other non-standard charts,
the script displays `NON-STANDARD — NO ORDERS` and creates no trades.
The script uses only the current chart symbol and timeframe. It makes no
external requests, uses no lookahead and does not force same-bar-close fills.
Exchange or broker feed corrections can still rebuild historical standard
OHLC after reload.
OUTPUTS
The chart shows fast and slow EMAs, optional prior-bar entry and exit channels,
the active close-risk line, optional sample background and confirmed intent
markers. Compact and Full panels expose state, sample, split, fill model,
declaration costs, closed trades, the 100-trade gate, net result, average closed
trade and maximum drawdown.
Hidden machine-readable plots expose:
- Confirmed entry intent: +1, -1 or 0;
- Confirmed exit intent: +1, -1 or 0;
- Selected sample: 1 or 0;
- OOS flag: 1 or 0.
Order calls contain explicit alert messages, so TradingView order-fill alerts
can identify the simulated action, size, ticker and resulting strategy
position. They are diagnostics, not recommendations.
LIMITATIONS
- Positive net profit is not a design requirement or evidence of robustness.
- Results depend on symbol, feed, timeframe, loaded history, Properties and
inputs.
- Close-confirmed risk exits can gap on the next simulated fill.
- Commission and slippage defaults are not a complete transaction-cost model.
- One in-sample/out-of-sample split is not walk-forward validation.
- The 100-trade gate does not establish significance or future performance.
- Backtests are simulations and are not trading advice or expected returns.
VALIDATION
The candidate passed 16 deterministic Python fixtures and a 16/16 live Pine
harness. Manual TradingView checks covered BTCUSDT and AAPL on daily and
intraday charts, 187 BTCUSDT 30-minute and 103 AAPL hourly trades, unchanged
parameters across IS/OOS, higher costs, reload parity, realtime confirmation,
daily Bar Replay, zero orders on Heikin Ashi, the order-fill alert dialog,
390 × 844 rendering and Pine Profiler. The profiler observed 32,614 executions
on DJI daily history with 0.6 seconds total runtime.
The validation intentionally retains unfavorable evidence: BTCUSDT 30-minute
Full history returned about -3.70%, AAPL hourly Full history about -2.63%, and
AAPL daily OOS about -1.83%. No parameter was retuned after these observations.
ORIGINALITY AND SOURCE
Category demand was selected from dated popularity metadata. No protected,
invite-only or closed source was accessed, and no compared script’s source was
imported. EMA, ATR, prior-bar channels and sample splitting are standard,
transparent building blocks. The implementation is released under MPL 2.0.
CHANGELOG
v1.0.0
- Initial open-source release candidate.
- Symmetric confirmed-close trend and prior-channel entries.
- Non-loosening ATR close-risk line with delayed market exits.
- Explicit commission, slippage, sample split and standard-chart guard.
- Compact/Full evidence panels, signed intent exports and order-fill messages.
策略

Stretch z distance from session VWAPStretch z — distance from session VWAP, normalised
Ten dollars from VWAP means something completely different on a dead Tuesday than it does thirty seconds after a number drops. Most "distance from VWAP" tools don't know that — they plot the raw dollar gap and leave you to eyeball whether it looks big today. This pane won't plot a number until it's been made to mean the same thing on any day, in any volatility regime, on any instrument.
The problem with a dollar amount
Raw distance from VWAP isn't comparable across sessions, let alone across symbols. A given point distance on gold during a quiet Asian session and the same point distance thirty seconds after a data release aren't the same event, even though the ruler says they are. The fix is standardisation: divide the raw distance by a measure of how far price normally sits from VWAP right now, and the number stops being "$10" and starts being "how unusual is this, given what unusual looks like today." Do that consistently and the reading also becomes portable — the same z = 2 means roughly the same thing on GC and on NQ, without retuning a single input between them.
Two normalisers, two different claims
You get an explicit choice, because the two options aren't interchangeable and I didn't want to hide that. Dividing by the rolling standard deviation of the spread produces an actual z-score — a statement about how many typical deviations price currently sits from VWAP, with the probabilistic interpretation that implies. Dividing by daily ATR instead produces a distance expressed in units of a familiar, point-based measure — easier to reason about at a glance, portable across timeframes you already think in ATR terms, but it is not a z-score, and the same band thresholds mean something different depending on which one you picked. The tool doesn't pretend these are the same thing wearing different clothes.
Don't trust a variance estimate you just started counting
There are two ways to estimate "normal" dispersion, and each has a real cost. A rolling window (60 bars by default) gives a stable estimate built on a real sample size, but it can straddle a session boundary — at 09:35 that window is still mostly measuring yesterday's regime, not today's. A session-anchored estimate restarts at the open and builds its variance forward, bar by bar, from a running sum and sum-of-squares (with Bessel's correction applied for a proper sample variance) — statistically cleaner, because it only ever describes the session you're actually in, but noisy and untrustworthy for the first handful of bars, when "normal dispersion" is being estimated off three or four data points. Rather than plot a confident-looking number built on a sample too small to support it, the pane suppresses the reading — and the alerts — until the estimate has enough bars behind it to mean something.
A parametric score deserves a non-parametric gut check
A z-score's "how unusual is this" framing leans on the reading behaving roughly like a normal distribution, and a futures spread doesn't always cooperate with that assumption. So alongside the z-score itself, the readout reports where the current |z| ranks against its own trailing 500-bar history — the same question, asked empirically, without needing the distribution to be well-behaved. If the two ever disagree meaningfully, that disagreement is informative on its own.
The bands aren't decorative — they're calibrated
Distance from VWAP isn't universally good or bad; what it means depends entirely on what you're trying to do with it. The readout scores the same z-band differently for three separate trade setups, and the weighting isn't monotonic in the same direction for all three — one setup scores highest when price sits close to VWAP and falls off as stretch increases, while another actually peaks in the 2–3σ band rather than near zero, which lines up with what earlier backtesting on that setup already found. Treating "how stretched is price" as a conditioning variable that different setups respond to differently, rather than a single filter everyone reads the same way, is the actual point of the table — a live, at-a-glance version of a relationship that was originally found by looking backward, not a number invented for the chart.
How I actually use it
Before taking any of the three setups this table tracks, I check the band and the points column, not just the raw z-score — a "big" z-score isn't automatically good or bad news, and the table already tells me which setup it favors and which it doesn't. The percentile column is my sanity check against the regime itself: a 2–3σ reading on a slow, thin session is a genuinely rare event; the same reading thirty seconds into a volatile one might barely be top-quartile, and the percentile is what tells the two apart when the z-score alone can't. The two band-cross alerts do the actual watching — I don't need to sit on the pane all session waiting for the reading to become interesting; it tells me when it has.
(Default window length and weights are set to match a scoring workbook I built earlier in this framework — you don't need that workbook to use this pane, but if the defaults look oddly specific, that's why.)
No time travel
Session VWAP is a standard, non-repainting session-anchored calculation. Daily ATR is retrieved through a security request with lookahead explicitly disabled and offset by one bar before the request, the documented non-repainting pattern for higher-timeframe data. Nothing on the pane, and no alert it fires, depends on information that wasn't available at the time.
What's proven, and what isn't yet
The normalisation logic and the small-sample discipline are sound on their own statistical merits — that part doesn't need a backtest to justify it. The per-setup weights are a different matter: they encode a relationship I'd already found in earlier research on this framework's setups, not a fresh statistical test run by this indicator itself, and the three band edges (1σ, 2σ, 3σ) are conventional defaults rather than something optimised inside this script. A companion scoring workbook in the same framework carries Monte-Carlo-validated adaptive thresholds; this pane trades that adaptivity for a lighter, always-on read, and it's worth knowing which tool you're looking at if the two ever disagree.
Limitations
Runs on any TradingView plan — unlike footprint-based tools, this only needs price and volume, not order-by-order data.
Built for standard candlestick charts; since it emits alertconditions, treat it like any signal-generating script and avoid Heikin Ashi, Renko, or other synthetic chart types.
Session-anchored mode needs roughly 20 bars into the session before its reading is trustworthy; the pane stays blank until then rather than show a number that isn't earned yet.
Default bands and setup weights are tuned for the framework and instrument I built this on; treat them as a starting point, not a universal constant, on a different symbol or session. 指标

Squeeze Regime Map [BSL]Squeeze Regime Map classifies volatility contraction, confirmed release and
directional expansion as explicit states. It answers “what volatility regime
is the current chart in?”, not “what trade should I take?”
This is an original BarState Labs implementation built from an independent
written specification. It does not reproduce another publication's formula,
defaults, interface, chart grammar or source code.
HOW IT WORKS
Normalized volatility is Wilder ATR divided by close and expressed as a
percentage:
`nATR = RMA(True Range, ATR length) / close × 100`
The current nATR is ranked inside the latest complete rolling window using an
inclusive percentile:
`VOL PCTL = 100 × count(window values <= current nATR) / window size`
Inclusive ties are deliberate. The implementation uses this explicit bounded
definition rather than relying on an opaque rank function.
Directional impulse is displacement over the selected momentum length,
normalized by current ATR and then EMA-smoothed:
`impulse = EMA((close - close ) / ATR, smoothing)`
Impulse labels the direction of a confirmed release only when its magnitude is
at least the configured minimum. A weak release is recorded as unresolved
instead of being forced up or down.
STATE MACHINE
- Compression begins when VOL PCTL is at or below the compression-entry level.
- Compression persists until the separate release threshold is reached. This
hysteresis prevents repeated threshold chatter.
- The first qualified exit is a one-bar Release Up or Release Down state and a
one-bar +1 or -1 machine-readable pulse.
- A weak exit returns to Neutral and increments the unresolved ledger.
- On the next bar, a directional release becomes Expansion only when volatility
reaches the expansion threshold and impulse keeps the same qualified
direction.
- Expansion persists while volatility remains above the release threshold and
direction agrees. Otherwise the state returns to Neutral.
- A new compression always takes transition precedence.
The default thresholds are 20 / 40 / 70 percentile. They must satisfy
`compression < release <= expansion`; an invalid order renders `CONFIG ERROR`
and freezes committed output until corrected.
CONFIRMED-BAR BEHAVIOR
State, duration, release plots, diagnostics and alert pulses commit only on
confirmed bars. On an open realtime bar, the panel says `OPEN BAR — HELD` and
retains the previous confirmed values. Historical, elapsed realtime and Bar
Replay bars use the same transition order.
This does not prevent upstream exchange or broker feed corrections from
changing rebuilt history after reload. The script makes no external data
requests and uses only the current chart symbol and timeframe.
OUTPUTS
The pane contains:
- volatility percentile and declared threshold guides;
- a visually clipped impulse histogram;
- optional confirmed regime backgrounds;
- optional confirmed release markers;
- Compact and Full evidence panels with state, duration, normalized metrics,
release counts, unresolved events and readiness.
Hidden machine-readable plots expose:
- Regime code: -3, -2, 0, 1, 2 or 3;
- Compression score: 100 minus VOL PCTL;
- Confirmed release: +1, -1 or 0.
The Confirmed release plot can be selected directly as Signal Audit Lab's
Event source with the Signed pulse decoder. In the validation run, BSL-002's
18 up and 19 down releases matched BSL-001's 18 long and 19 short accepted
events exactly.
ALERTS
Four alert conditions are provided:
- Confirmed volatility release up;
- Confirmed volatility release down;
- Confirmed directional expansion up;
- Confirmed directional expansion down.
Release alerts use the same one-bar booleans as the exported pulse. Expansion
alerts fire only on entry into expansion.
LIMITATIONS
- This is a regime classifier, not a forecast, entry/exit system or strategy.
- A release direction is a normalized momentum label, not evidence of future
return.
- Percentile and state depend on the loaded symbol, timeframe, feed, history
and settings.
- Warm-up requires a complete percentile window and valid momentum history.
- The maximum 500-value percentile window is bounded but intentionally more
expensive than the default 126-value window.
- No optimization, multi-symbol scan, multi-timeframe request, order model,
position sizing or profitability claim is included.
VALIDATION
The release candidate passed 14 deterministic reference tests, a 14/14 live
Pine harness, BTCUSDT/AAPL × 1D/1H runtime checks, exact reload parity,
realtime and replay gates, valid/invalid threshold boundaries, four alert
conditions, 390 px rendering, BSL-001 signed-source integration and a 32,137
execution Profiler run at the maximum 500-bar window.
ORIGINALITY AND SOURCE
Category demand was selected from a dated metadata corpus. No protected,
invite-only or closed source was accessed, and no source from a compared open
publication was imported. The script uses standard true-range, Wilder RMA,
percentile-count and EMA calculations and is released under MPL 2.0.
CHANGELOG
v1.0.0
- Initial open-source release candidate.
- Explicit compression, release and expansion state machine with hysteresis.
- Inclusive rolling volatility percentile and normalized directional impulse.
- Confirmed +1 / -1 release export for Signal Audit Lab.
- Compact/Full evidence panels, four alerts and visible limitations.
指标

Failed Auction Detector Failed Auction Detector — footprint-confirmed rejection at swept reference levels
Every push through a level is the market asking a question: is there real business up here, or was that just noise wearing conviction's clothes? Most of the time nobody answers the question properly. A wick forms, the candle closes back inside the level, and every "stop hunt" or "liquidity sweep" indicator on the platform declares victory — because that's all they ever look at: the shape left behind, not what actually traded while it was being made.
That's the gap this script was built to close. A market is a two-sided auction. When price extends beyond a reference level — a swing extreme, a session high or low, the prior day's high or low — the auction is testing whether new business exists at the new price. It either finds acceptance and the range expands, or it finds nothing and snaps back. The candle can't tell you which one happened; the volume that traded during the extension can.
The problem with wicks
A wick past a level that closes back inside is a necessary condition for a failed auction. It is nowhere near sufficient. Thin resting liquidity, a single oversized print, plain noise — all of these can leave the exact same shadow on a chart with no real shift in who was willing to transact at the new price. Build a rule on candle shape alone and you're building a rule that mostly detects candle shapes, not auctions failing.
How a signal earns its place
I decomposed "failed auction" into three conditions, checked in order, not one threshold:
Sweep — price trades through a reference level you've enabled (a confirmed swing pivot, the developing session high/low, and/or the prior day's high/low; run any combination at once).
Rejection in the footprint — the part that actually does the work. "Rejection" isn't one observable event; it's a state that several distinct microstructure mechanisms can each produce on their own, so instead of one blanket volume-and-range test, the script checks four independent ways an auction can lose its nerve: an aggressive imbalance stepping in against the move, exhaustion of the side that pushed the extreme (its own volume thinning out relative to the session's point of control), absorption (heavy volume at the extreme that produced no further ground given), or an outright reversal in net delta at the extreme itself. A signal needs the sweep and reclaim plus any one of these four — alternative evidence for the same event, not four boxes that all have to tick, because real failures don't always announce themselves the same way twice.
Reclaim — the bar closes back inside the level. The extension didn't hold.
Conviction, not a coin flip
Two failed auctions can carry very different weight, and collapsing that to a plain yes/no throws away exactly the information that separates them. Every confirmed signal earns a 0–6 score from reclaim distance in ATR, rejection-wick size, whether the footprint imbalance fired, whether any rejection mechanism was present at all, volume significance against its recent average, and confluence with the prior day's level. That resolution is what lets a score bucket be tested against forward outcomes later, instead of trusted on faith because it's printed on the chart. Score ≥ 5 gets marked separately as high conviction.
You choose which levels are worth defending
Not every reference level deserves the same attention on every instrument. Rather than hardcoding one definition, the level itself is a checkbox input — swing pivot, session extreme, prior-day high/low, any combination. That turns "which level construction actually produces the more reliable signal" into something you get to test on your own market, not an assumption baked into the code before you ever loaded it. A freshness filter keeps the script from re-flagging a level the market is only drifting through, and each level fires once until it's freshly swept again, so the chart doesn't fill with the same tired flag on a level nobody's testing anymore.
Where the real work is: levels that hold, and levels that give way
The script reads buy and sell volume off each traded price row directly from TradingView's footprint engine — not the bar's high or low, the actual rows underneath it. That's the difference between a level that's genuinely protected (swept, then rejected by real opposing size) and one that was merely visited on the way through. The script signals only the protected case, on purpose: when a level is swept and the footprint shows the opposite picture — the aggressing side still winning at the extreme, no imbalance, no exhaustion, no absorption — that's the auction finding real business at the new price, and it isn't a separate detector, it's the same evidence read the other way. I use that same row-level data, sitting in the on-chart table and the data window, to make that read myself.
From evidence to a trade
The shaded zone on each signal and the dotted reclaim line aren't decoration — their edges are built from the same executed volume the detection ran on, so they sit exactly where the auction actually failed, not where a candle makes it look like it failed. That gives two of the three numbers a trade needs, for free:
Invalidation sits beyond the genuine sweep extreme — the specific high or low the market actually rejected — instead of a generic ATR multiple bolted on afterward with no connection to the real event.
Entry is typically the reclaim itself, or a retest of the reclaimed level, because that's the exact price where the failure got confirmed.
The same table reporting the signal also reports the trade data behind it — bar delta, delta at the extreme, top or bottom-zone volume against the point-of-control row, whether the imbalance flag fired — so a given entry's conviction is graded from real orderflow, not taken on the label's word alone. "Precise" here means anchored to where actual buying and selling happened. It isn't a claim about win rate, and the next section is exactly what would earn the right to make one.
No time travel
Swing levels use a confirmed pivot lag, never the current unconfirmed bar. Session levels reference only bars before the current one. Prior-day levels come through with lookahead explicitly switched off. Every plotted value and every signal only ever sees what was actually knowable at the time it fired.
What's proven, and what isn't yet
This is a rule-based detector, not a validated statistical signal — an honest hypothesis about how orderflow behaves at rejected levels, not a claim that it has forward-return content. That claim gets earned with a conditional event study: forward returns at several horizons for every fired signal, split by score bucket, testing whether score actually rank-orders the outcome instead of just looking like it should — plus a placebo run of the same logic against price levels that were never real reference points, to make sure the signature isn't just "high volume happened here" dressed up in more specific language. Until that's done, treat this as what it is: a discretionary confirmation tool that flags a failed auction with a graded conviction score, not a system that manages your entries, stops, targets, or size. A level's past reaction is not a promise about its next one.
Limitations
Requires a TradingView Premium or Ultimate plan — the footprint API is gated to those plans.
Built for standard candlestick charts. Sweep and reclaim logic will misread the market on Heikin Ashi, Renko, or other synthetic chart types.
Default thresholds for imbalance, exhaustion, absorption, and volume significance are tuned for a liquid futures instrument; thinner symbols or very low timeframes may need the detection inputs adjusted.
指标

Signal Audit Lab [BSL]Signal Audit Lab measures what happens after numeric events emitted by another
indicator. Connect one external plot, define how its values become long and
short events, and inspect the resulting sample on the current symbol and
timeframe.
This is a measurement tool. It does not generate signals, simulate orders, or
claim that an observed event has a trading edge.
HOW IT WORKS
The script reads one numeric `input.source()` series. Four decoders are
available:
- Signed pulse: positive and negative event pulses such as +1 / 0 / -1.
- Threshold cross: crossings above the long level or below the short level.
- Long-only edge: the first qualifying long value after a non-qualifying value.
- Short-only edge: the equivalent short-only rule.
Events are committed only on confirmed bars. Held values are deduplicated into
one edge. Optional cooldown and conflict rules make rejected events explicit.
An `na` transition cannot create an accidental first event without a prior
valid observation.
MEASUREMENT
The event-bar close is the anchor. Direction-adjusted forward returns are
measured after 1, 3, 5, 10 and 20 bars by default. Each horizon has its own
completed and pending sample count, so unfinished observations never enter the
denominator.
The round-trip cost input subtracts a user-defined basis-point amount from each
completed return. It is a sensitivity adjustment, not a fill, spread, slippage,
or execution model.
The panel reports:
- completed and pending observations;
- mean raw and cost-adjusted directional return;
- hit rate, return dispersion, and a Wilson 95% interval;
- separate aggregate, long, and short results;
- mean favorable and adverse excursion at the longest horizon;
- a payoff proxy based on mean positive versus mean negative net outcomes;
- longest-horizon session and normalized-ATR volatility splits;
- accepted long/short counts, cooldown rejects, conflicts, `na` skips, and
configuration status.
Samples below 30 observations are highlighted. Compact mode keeps aggregate
horizons, excursion/payoff, and diagnostics readable on narrow charts. Full
mode adds directional detail, raw-to-net values, Wilson intervals, dispersion,
and the split tables.
SESSION AND VOLATILITY SPLITS
The session split classifies the event bar using the selected session and
timezone. The defaults are 09:30–16:00, Monday–Friday, America/New_York.
Volatility is normalized ATR (`ATR / close`) compared with its moving-average
baseline. Defaults are ATR 14 and baseline 100. LOW is below 0.8 times the
baseline, HIGH is above 1.2 times the baseline, and values between those
boundaries are MID. Events before the baseline is available are UNCLASSIFIED.
The exact settings remain visible in Full mode.
SETUP
1. Add an indicator that exposes a numeric plot. TradingView strategies cannot
provide an external source plot.
2. Add Signal Audit Lab and select that plot under Event source.
3. Choose the decoder and levels that match the producer's numeric contract.
4. Enter a clear source label, then set horizons, cost sensitivity, session,
and volatility boundaries.
5. Read the sample count and diagnostics before interpreting percentages.
For a continuous oscillator such as RSI, Threshold cross is the natural
decoder. For a producer that exposes +1 / 0 / -1 pulses, use Signed pulse.
OUTPUTS AND ALERTS
Optional chart markers show accepted confirmed events. A hidden +1 / 0 / -1
plot is available for inspection or data export. Alert conditions are provided
for “Accepted long event” and “Accepted short event”; they use the same
confirmed booleans as the statistics.
REPAINT AND DATA BOUNDARY
Signal Audit Lab does not commit its own events before bar close. Historical
and realtime tests confirm that an unconfirmed source flicker is excluded from
the statistics until confirmation.
This boundary cannot certify the upstream source. A connected indicator may
still repaint, use future-looking data, revise history, or change behavior after
an update. Reload and Bar Replay should be repeated for the specific producer
before relying on a result. The panel therefore labels source stability as
unverified.
LIMITATIONS
- Results describe the loaded chart history, symbol, timeframe, settings, and
upstream plot. They are not universal and can change when any of these change.
- Close-to-close forward measurement is not an order-fill simulation or a
strategy backtest.
- The cost input does not model spread, slippage, liquidity, partial fills,
position sizing, pyramiding, or portfolio interaction.
- MFE and MAE use chart OHLC values inside the forward window; they do not prove
an executable path through intrabar prices.
- Session and volatility splits are descriptive. Small or imbalanced buckets
should not be treated as stable regimes.
- The script does not optimize settings, predict prices, or validate the logic
of the connected producer.
Use the Lab to form a better question, then verify that question with a proper
execution model and out-of-sample process.
ORIGINALITY AND SOURCE
This is an original BarState Labs implementation built from an independent
written specification and deterministic acceptance fixtures. No protected,
invite-only, or closed-source implementation was used. The script uses standard
forward-return, variance, Wilson interval, excursion, and ATR calculations and
is published under the Mozilla Public License 2.0.
CHANGELOG
v1.0.0
- Initial open-source release.
- Four explicit event decoders with confirmed-bar commitment.
- Five configurable forward horizons and cost sensitivity.
- Aggregate, directional, excursion, session, and volatility evidence.
- Compact and Full panels, accepted-event markers, and two alert conditions. 指标

指标

Kamote v1.0Kamote v1.0 gives traders a clear, color-coded decision system that tells them the current market regime and the single highest-probability strategy to use—or when to stay out—across Intraday, Day, and Swing horizons.
It does this by combining five independent, hysteresis-protected filters into one coherent recommendation engine, displayed in a clean status matrix with fully configurable alerts. The result is fewer forced trades in dead or chaotic conditions and higher-confidence entries when the conditions actually align.
### Core Value: One Dashboard That Replaces Guesswork ###
Most indicators show isolated signals. Kamote synthesizes volatility regime, higher-timeframe trend direction, trend efficiency, volume behavior, and horizon-specific strategy scoring into a single, actionable output. Traders see at a glance:
Whether volatility is Dead, Healthy, or Extreme
Whether the higher-timeframe linear-regression slope is Bullish, Bearish, or Flat
Whether multi-timeframe Kaufman Efficiency Ratio confirms real trend strength
Whether volume is Expanding, Contracting, or Flat
The optimal strategy (Trend Long/Short, Pullback Long/Short, Momentum Long/Short, Breakout, Mean Reversion) or “Stay Out / None”
Color coding makes the matrix instantly readable. Green supports action, red signals caution or exit, yellow flags transitional states.
### How the Engine Works ###
Kamote runs a single higher-timeframe data request (automatically set by the chosen trading mode) and blends it with chart-timeframe calculations. All regime classifications use percentile ranks plus hysteresis bands so the status does not flicker on every minor bar.
Volatility Regime (ATR Percentile + Hysteresis)
ATR is ranked over a lookback window. Dead (< low percentile), Extreme (> high percentile), or Healthy. Hysteresis prevents rapid oscillation between states. Extreme + contracting volume + weak efficiency is treated as structural noise and forces a “Stay Out” recommendation.
Higher-Timeframe Trend Filter (ATR-Scaled Linear Regression Slope)
Slope is calculated on the higher timeframe, normalized by ATR, and classified Bullish / Bearish / Flat. The threshold itself scales with volatility so the filter stays relevant in both quiet and explosive markets.
Multi-Timeframe Efficiency Ratio
Kaufman’s Efficiency Ratio is computed on both chart and higher timeframes, then blended with user-adjustable weights. A minimum threshold gates whether the move is efficient enough to support trend or momentum strategies.
Volume Regime (Percentile + Hysteresis)
Volume is ranked and classified Expanding / Contracting / Flat. Expanding volume supports breakouts and trend continuation; contracting volume favors mean-reversion or short-side setups depending on direction.
Horizon-Aware Strategy Scoring
The script first checks for hard invalid states (extreme volatility + contracting volume + weak efficiency, flat slope + weak efficiency + flat volume, or swing-mode + flat slope + extreme ATR). If any invalid condition is true, the recommendation is “Stay Out.”
Otherwise it scores eight strategy candidates using eligibility gates and horizon-specific weights:
Trend and Pullback strategies are favored on Day and especially Swing horizons.
Momentum strategies are favored on Intraday.
Breakout receives a boost on Intraday and a discount on Swing.
Mean Reversion is favored on Swing and discounted on Intraday.
The highest-scoring eligible strategy is displayed. Confidence modifiers (healthy ATR, volume alignment, weak prior efficiency, etc.) further refine the score so the recommendation is not binary.
### Designed for Real Trading Workflows ###
Three preset modes (Intra / Day / Swing) automatically adjust higher-timeframe, efficiency length, volume lookback, slope threshold, ATR window, and hysteresis. Users can still fine-tune every parameter. Layout can be horizontal or vertical and placed in any corner. Alerts fire only on confirmed state changes for ATR regime, slope direction, efficiency cross, volume regime, and strategy recommendation—keeping notification noise low.
### Why Traders Adopt It ###
Kamote does not claim to predict the future. It enforces discipline by making regime and edge explicit. When the matrix is green and a strategy is named, the conditions that historically support that style of trade are present. When it says “Stay Out,” the market is offering no edge. That single piece of information—knowing when not to trade—is often more valuable than any entry signal.
The script is pure Pine Script v6, overlay=false, and designed to sit alongside price action or other tools without cluttering the chart. It is built for discretionary traders who want a systematic regime filter and for systematic traders who need a clean, multi-factor permission layer.
Install Kamote v1.0, select your trading horizon, and let the status matrix tell you what the market is actually offering right now. 指标

STOC - EMA + RSI Pullback TraderThe STOC – EMA RSI Pullback Trader is a long-only trend-following indicator designed to identify potential entries during bullish trends and controlled pullbacks.
Instead of chasing price after a large upward move, the indicator looks for opportunities when price returns toward the faster trend average while the broader trend remains positive.
How it works
The indicator combines:
* 20 EMA for identifying short-term momentum and pullback areas.
* 50 EMA for determining the broader trend.
* RSI for confirming that momentum remains bullish.
An initial Buy signal can appear when the 20 EMA crosses above the 50 EMA and RSI confirms positive momentum.
After the bullish trend is established, a Pullback Buy signal can appear when price revisits the 20 EMA and subsequently confirms strength above it while RSI remains above the selected bullish threshold.
Exit methods
The indicator provides three selectable exit methods:
* 20 EMA crossing below the 50 EMA.
* Price closing below the 50 EMA.
* Either condition, whichever occurs first.
The “Either Condition” setting offers more defensive trade management, while the EMA crossover exit generally gives the trend more room to develop.
Key features
* Initial EMA crossover entries.
* Trend-continuation pullback entries.
* RSI momentum confirmation.
* Adjustable EMA and RSI settings.
* Optional requirement for rising RSI.
* Multiple pullback-confirmation methods.
* Selectable exit logic.
* Buy, Pullback Buy and Exit labels.
* Active-trade background highlighting.
* Trend and trade-status dashboard.
* TradingView alert conditions.
* Dynamic JSON messages for webhook integration.
* Works across equities, indices, futures, forex and cryptocurrencies.
How to use
The indicator is best used on instruments displaying a clear directional trend.
A valid bullish environment generally exists when:
* The 20 EMA is above the 50 EMA.
* Price is trading above the 50 EMA.
* RSI is above 50.
The initial Buy signal identifies a possible new bullish trend. Pullback Buy signals identify potential re-entry opportunities after price returns toward the 20 EMA without invalidating the broader trend.
Avoid treating every signal as an automatic trade. Consider confirming the setup using:
* Higher-timeframe trend direction.
* Support and resistance.
* Breakout structure.
* Volume expansion.
* Relative strength.
* Overall market and sector conditions.
Suggested timeframes
* Daily and weekly charts: positional and swing trading.
* 1-hour and 4-hour charts: shorter-term swing trading.
* 5-minute and 15-minute charts: intraday trading with additional market and volume confirmation.
Alerts
Create a TradingView alert using “Any alert() function call” to receive the indicator’s dynamic Buy and Exit messages. Standard Buy and Exit alert conditions are also available.
Disclaimer
This indicator is provided solely for educational and informational purposes. It does not constitute investment advice, financial advice, trading advice or a recommendation to buy or sell any security or financial instrument.
Trading and investing involve substantial risk, including the possible loss of capital. Historical signals and past performance do not guarantee future results. Always perform your own analysis, apply appropriate position sizing and risk management, and consult a qualified financial professional when necessary. 指标

Momentum Candle By SkyroothMomentum Candle By Skyrooth highlights expansion candles — the bars where one
side takes control decisively — and filters out the ordinary bars that only look
big because volatility happened to be high at the time.
WHAT PROBLEM THIS SOLVES
Most price action methods depend on a single instruction: "wait for
displacement". A break of structure only counts if the candle that caused it was
decisive. An order block only counts if the move leaving it was strong.
The problem is that "strong" is usually judged by eye, and the eye is unreliable.
A 40 point candle is large on a quiet morning and unremarkable during a news
release. Traders end up calling the same candle valid or invalid depending on
what they want to see.
This indicator applies one fixed measurement instead.
HOW IT WORKS
A candle is marked when all of the following are true:
1. BODY DOMINANCE — the body is large relative to the total range of the bar, so
the close finishes near the extreme rather than in the middle. This is what
separates a decisive bar from a bar that spent the session being rejected.
2. RANGE VS RECENT VOLATILITY — the range is compared against a rolling average
of recent ranges, not against a fixed point value. This is what makes the
measurement adapt: the same threshold works on a quiet session and a volatile
one, and on gold as well as an index.
3. VOLUME CONFIRMATION — the bar is compared against its own recent volume
average. Expansion on thin volume is usually a liquidity gap rather than
participation.
4. DIRECTIONAL AGREEMENT — the bar's direction is checked against the prevailing
trend, so continuation bars are separated from isolated spikes.
Bars meeting the conditions are coloured and marked on the chart. Everything
else is left alone.
HOW TO USE IT
This is a filter, not an entry signal. It answers one question — "was that move
decisive?" — and nothing else. There is no entry, stop or target here.
Typical use:
- CONFIRMING A STRUCTURE BREAK. When price breaks a swing high or low, check
whether the breaking candle is marked. An unmarked break is more likely to be
a liquidity sweep that reverses.
- VALIDATING AN ORDER BLOCK OR IMBALANCE. The candle that leaves the zone should
be marked. If the departure was weak, the zone is weak.
- AVOIDING CHASING. A marked candle means the move already happened. Wait for a
retracement into the area the candle originated from rather than entering at
the extreme.
SETTINGS
- Body ratio threshold — minimum share of the range the body must occupy.
Raise it for fewer, cleaner signals.
- Volatility lookback — number of bars in the rolling range average.
- Volume multiplier — how far above its own average the bar's volume must be.
Set to zero to disable the volume condition on instruments with unreliable
volume data, such as spot forex.
- Trend filter — enable to keep only bars aligned with the prevailing direction.
NOTES AND LIMITATIONS
- Signals are confirmed on bar close. An intrabar candle can meet the conditions
and then lose them before closing.
- Volume conditions depend on the feed. Centralised futures volume is reliable;
spot forex volume is broker specific and often is not.
- A marked candle describes what already happened. It carries no claim about
what happens next, and no win rate is implied.
- Works on any symbol and timeframe, though the volume condition is most
meaningful on instruments with genuine exchange volume. 指标

Variance-Weighted Regression Trend [BackQuant]Variance-Weighted Regression Trend
Overview
Variance-Weighted Regression Trend is a rolling linear-regression trend indicator that adjusts the influence of observations according to the estimated variance of their regression residuals.
The script first calculates a standard ordinary least-squares regression across the selected window. It then measures the squared residuals around that fit and uses those residuals to estimate how variable the regression error has been through the sample.
Those variance estimates are converted into relative weights. Lower estimated residual variance can receive more influence, while higher estimated residual variance can receive less. A second weighted regression is then calculated using those weights.
The indicator also includes:
EMA, RMA or rolling-average residual variance.
Configurable inverse-variance weighting strength.
Weight regularization and upper/lower weight limits.
Weighted R² and slope-quality diagnostics.
Two regression-channel methods.
Optional trend-flip quality confirmation.
OLS comparison.
Linear regression projection.
Trend colouring and alerts.
Calculation
The basic process is:
Fit an ordinary least-squares regression over the Regression Length.
Calculate the squared residual of every observation around that fit.
Smooth those squared residuals to estimate local residual variance.
Add a regularization floor to reduce unstable extreme weights.
Convert variance into relative observation weights.
Clamp weights between the selected minimum and maximum.
Calculate a second weighted regression.
The weighted line is therefore influenced more by observations receiving larger relative weights and less by those receiving smaller ones.
Variance Weighting
The weighting is based on regression residual variance , not ATR, trading volume or raw price volatility.
For each point:
Residual = Source - OLS fitted value
Squared Residual = Residual²
The squared residuals are then processed using the selected Variance Model.
EMA
Uses exponential smoothing and responds more quickly to recent residual changes.
RMA
Uses a slower recursive smoothing process.
Rolling Mean
Uses a finite moving average of squared residuals.
Weight Power
Weight Power controls how strongly estimated variance affects the regression.
The raw weighting relationship is:
Weight ∝ 1 / Variance^Weight Power
0 gives equal weighting, making the final fit behave like the OLS regression.
1 applies standard inverse-variance-style weighting.
Values above 1 increase the difference between low- and high-variance observations.
Higher settings can make the regression more selective, but can also concentrate too much influence in a small part of the sample.
Variance Regularization
Very small variance estimates can otherwise create extremely large inverse weights.
The script therefore adds a fraction of the window's mean squared residual to each local variance estimate.
Higher regularization makes the weights more uniform.
Lower regularization allows stronger differences between observations.
Minimum and Maximum Relative Weight
Raw weights are normalized relative to their average before being clamped.
A relative weight above 1 means the observation has greater-than-average influence.
A value below 1 means it has less.
The Minimum Relative Weight prevents high-variance observations from effectively disappearing from the regression.
The Maximum Relative Weight prevents very low-variance observations from dominating the entire fit.
Weighted Regression
Once the final weights are calculated, the script solves a weighted linear regression:
Y = Intercept + Slope × X
The displayed line is the current endpoint of that rolling weighted regression.
Each new bar shifts the regression window and recalculates:
OLS.
Residuals.
Variance estimates.
Weights.
Weighted slope and intercept.
OLS Comparison
The optional OLS line shows the endpoint of the initial equal-weight regression.
This makes it easy to see how much the variance weighting is actually changing the result.
If Weight Power is set to 0, the weighted regression and OLS should be effectively aligned.
As the weighting becomes more aggressive, the lines may separate depending on the residual structure inside the window.
Trend State
Trend direction comes from the sign of the weighted regression slope.
Positive slope = bullish.
Negative slope = bearish.
A bullish flip occurs when the stored trend changes from bearish to bullish.
A bearish flip occurs when it changes from bullish to bearish.
Quality Confirmation
Quality Confirmation can be enabled to prevent weak slope changes from immediately flipping the trend state.
When enabled, an opposite slope must also satisfy:
Minimum Weighted R².
Minimum Slope / Standard Error.
If those conditions are not met, the existing trend state remains active even if the current slope temporarily changes sign.
Weighted R²
Weighted R² measures how well the weighted straight-line regression describes the current sample.
Higher values indicate that the weighted observations are more closely aligned with a linear fit.
Lower values indicate a less orderly linear relationship.
R² does not determine trend direction and should not be interpreted as a forecast of future performance.
Slope / Standard Error
The script calculates the absolute weighted slope relative to its estimated standard error:
|Slope| / Slope Standard Error
This is used as a practical slope-quality measure.
Higher values indicate that the fitted slope is larger relative to the estimated regression error.
It is used by the optional Quality Confirmation setting and is not presented as a formal significance test.
Regression Channels
Two channel-width methods are available.
Weighted Residual RMS
Uses the weighted root-mean-square distance of observations from the fitted regression.
This reflects the general amount of scatter around the line.
Regression Standard Error
Uses the calculated standard error of the fitted current regression value.
This normally represents a different and often narrower measure than residual RMS.
The Channel Multiplier scales whichever method is selected.
Expand During Poor Fit
When enabled, the channel becomes wider as Weighted R² decreases.
This is intended to visually reflect greater uncertainty when the current window is poorly described by a straight line.
The expansion affects only the channel width.
It does not alter the regression or trend calculation.
Projection
The Projection extends the current regression slope forward by the selected number of bars.
It is simply:
Current fitted line extended using the current slope.
It is not a separate forecasting model.
As the regression changes on new bars, the projection also changes.
Current Relative Weight
The Data Window shows the final relative weight assigned to the newest observation.
A value:
Above 1 = greater-than-average influence.
Below 1 = less-than-average influence.
This can help show how the current observation is being treated by the variance-weighting model.
Effective Sample Size
The indicator also reports:
Effective N = (Sum of Weights)² / Sum of Squared Weights
This provides a simple measure of weight concentration.
If weights are similar, Effective N remains close to the full Regression Length.
If a smaller group of observations receives most of the weight, Effective N falls.
This is useful when experimenting with aggressive Weight Power or wide weight limits.
Trend Strength
Trend Strength is used only for the regression glow.
It combines:
60% Weighted R².
40% normalized Slope / Standard Error.
It does not affect the regression or signals.
ATR(14) is used only to scale the visual width of the glow and flip bloom to the instrument.
Input Guide
Regression Length
Controls the size of the rolling regression sample.
Projection Bars
Controls how far the current fitted slope is extended visually.
Variance Length
Controls how quickly the residual-variance estimate changes.
Variance Model
Selects EMA, RMA or Rolling Mean smoothing of squared residuals.
Weight Power
Controls the strength of inverse-variance weighting.
Variance Regularization
Reduces extreme differences between weights.
Minimum / Maximum Relative Weight
Limits how little or how much influence any one observation can receive.
Channel Width
Selects Weighted Residual RMS or Regression Standard Error.
Channel Multiplier
Scales the regression channel.
Poor Fit Expansion
Optionally widens the channel as R² deteriorates.
Quality Confirmation
Requires minimum regression fit and slope quality before allowing trend flips.
How to use it
The indicator can be used as:
A regression-based trend filter.
A comparison between ordinary and variance-weighted regression.
A way to study how residual-based weighting changes a rolling trend estimate.
A trend-quality filter using R² and slope strength.
A regression channel for visualizing fit dispersion.
The OLS Comparison and Data Window values are particularly useful when testing the weighting settings, because they show whether the extra weighting is materially changing the regression or simply producing a result close to ordinary least squares.
Limitations
The variance estimates are derived from OLS residuals inside the same rolling window.
The model is a custom two-stage weighted regression rather than a full generalized least-squares procedure.
Higher Weight Power can concentrate the fit in a relatively small part of the sample.
Linear regression cannot represent every type of market structure.
High R² does not imply future trend continuation.
The forward projection is only a linear extrapolation of the current fit.
Quality Confirmation can reduce weak flips but can also delay genuine changes in direction.
Data Window
The script exposes:
Weighted Slope.
Weighted R².
Slope / Standard Error.
Weighted Residual RMS.
Regression Standard Error.
Current Relative Weight.
Effective Sample Size.
Trend Strength.
Alerts
The indicator includes:
Variance-Weighted Regression Bullish: trend changes from bearish to bullish.
Variance-Weighted Regression Bearish: trend changes from bullish to bearish.
Variance-Weighted Regression Flip: either transition occurs.
Summary
Variance-Weighted Regression Trend starts with a normal rolling OLS regression, measures the residual variance around that fit, and uses those estimates to assign relative weights to the observations in a second regression.
The weighting strength, variance smoothing, regularization and weight limits are all configurable, making it possible to move from essentially equal-weight OLS to a much more selective fit.
The final weighted slope controls the trend state, while Weighted R² and the Slope / Standard Error score can optionally be used to filter weak reversals.
Regression channels, OLS comparison, forward projection and the visual strength system provide additional context around the core weighted regression without changing the underlying trend logic.
指标
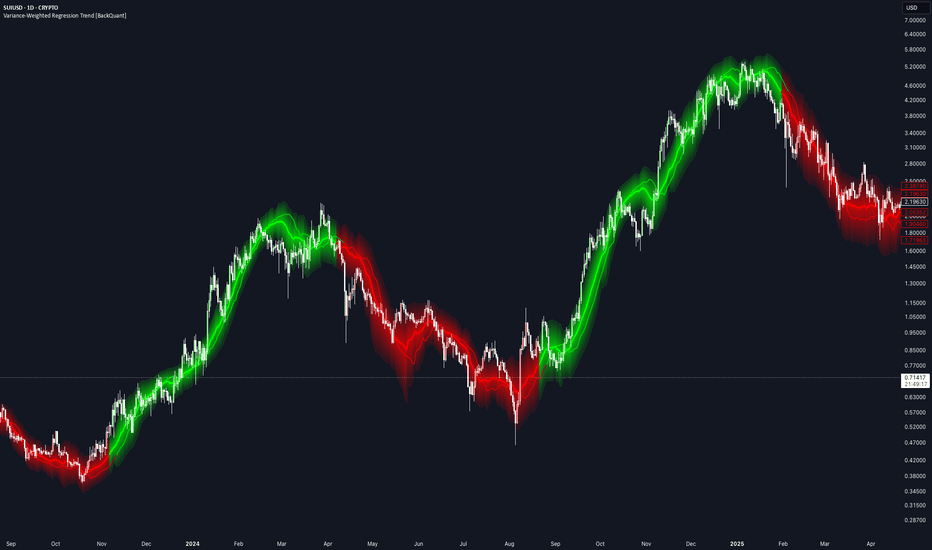
Cross-Asset Session Impulse Engine [PhenLabs]📊 Cross-Asset Session Impulse Engine
Version: PineScript™ v6
⚠️HEADS UP⚠️
Click the three dots on the right of the indicator after adding it to your chart and click pin to scale to make sure it is displaying properly
📌 Description
Cross-Asset Session Impulse Engine waits for the session opening range to lock, then asks a simple question before you take the break: did correlated markets print the same impulse, or is this chart running alone? A k-of-n basket (crypto, dollar, indices — you pick) must confirm in the same direction, with invert flags for assets like DXY that move against risk.
The engine is built for every TradingView plan. There is no footprint feed, no lower-timeframe history wall, and no silent crash when a basket symbol or volume field is missing. If the basket cannot load, the dashboard switches to chart-only and you still see the opening range. Confirmed signals, named alerts, and Pine Screener columns are included.
🚀 Points of Innovation
Opening-range break is gated by live cross-asset breadth instead of a single-chart close
Per-symbol invert flags so DXY-up can confirm a risk-off short without extra scripts
All-plan design: same-timeframe request.security only — no Premium-only data path
Dead basket symbols return na and drop out of the vote instead of aborting the script
Missing volume skips the optional gate and labels Vol N/A instead of refusing to load
Named bullish/bearish confirmed alerts plus Screener plots for breadth, signal, and armed state
🔧 Core Components
Session clock: New York, London, Tokyo, or a custom session/timezone pair
Opening range: first N session bars freeze ORH/ORL; later confirmed closes beyond those rails are impulses
Basket voter: up to four input.symbol contexts, each with its own opening range on the same clock
Confirmation gate: min k live same-direction votes, or chart-only when every basket feed fails
Projection: ATR targets from the broken rail and invalidation at the opposite side of the range
Dashboard: OR state, chart break, breadth, per-symbol arrows, data mode, signal
🔥 Key Features
Preset sessions so you are not locked to US cash hours
Enable/disable and invert each basket symbol; unused inputs stay hidden
Optional relative-volume filter that degrades to off when the symbol has no volume
Unconfirmed chart-break markers are hidden by default to keep price readable
One confirmed signal per session, both directions, with alertconditions
Screener-ready numeric plots (breadth net, signal +1/−1, armed)
🎨 Visualization
Dashed ORH/ORL rails and a translucent opening-range box on the session
Dotted ATR targets and a dashed invalidation line after a confirmed signal
Triangle markers for confirmed impulses; optional faint circles for unconfirmed chart breaks
Top-right dashboard: session, OR lock, chart state, breadth, basket tape, data mode, signal
📖 Usage Guidelines
Session Preset — Default: New York — NY 09:30–16:00, London 08:00–16:30, Tokyo 09:00–15:00. Custom unlocks session and timezone.
Opening Range Bars — Default: 6 — Range: 1-48 — On 5m this is ~30 minutes (classic ORB). Raise it on 1m, lower it on 15m.
Min Basket Confirms — Default: 2 — Range: 0-4 — 0 fires on the chart break alone. Keep this ≤ the number of enabled live symbols.
Enable Symbol 1–4 — Defaults: BTCUSDT on, ETHUSDT on, DXY on (invert on), ES1! off — Use distinct tickers. Invert for inverse assets.
Require Relative Volume — Default: false — When on, confirmed bars need volume ≥ Min Rel Volume × SMA. No volume → gate skipped, dashboard shows N/A.
Show Unconfirmed Chart Breaks — Default: false — Turn on only when you want to see the raw OR break before breadth arrives.
Table Size — Default: Small — Tiny / Small / Normal. Visible only while the dashboard is on.
✅ Best Use Cases
Intraday ORB on indices, FX, and crypto during NY, London, or Tokyo
Filtering fake session breaks that do not show up in BTC, ETH, DXY, or ES
Risk-off reads: DXY invert on so a dollar spike confirms shorts on the chart
Watchlist screening via the XSIE Signal and XSIE Breadth Net columns
⚠️ Limitations
Designed for intraday session charts. Daily bars often sit outside a cash-session window and will show OR as OUT.
Basket symbols that match the chart ticker are skipped so the chart cannot vote twice.
Confirmation can arrive after the chart break (late breadth). That is intended; the armed state stays until session end or confirmation.
One signal per session. Opposite-range invalidation flags the trade; it does not flip and re-fire.
Pine Screener itself is a paid TradingView product. The script only exposes plots — it does not unlock Screener on a free account.
💡 What Makes This Unique
Cross-asset k-of-n is the confirmation, not a decorative correlation table
All-plan data path with an explicit chart-only fallback when the basket is dead
Invert-aware votes treat DXY as a risk switch instead of a same-direction clone
⚙️ Under the Hood
Same-timeframe request.security basket : four unrolled tuple calls fetch OHLC on timeframe.period with lookahead_off and ignore_invalid_symbol=true. Invalid tickers return na and drop out of breadth instead of throwing. This is not lower-timeframe volume and not footprint — every plan sees the same engine.
Opening-range state machine : each context (chart + basket) freezes ORH/ORL after N session bars. A break is the first confirmed close beyond the frozen rail. The lock bar cannot break because its high/low still define the range.
Invert mapping : when Invert is on, an upside OR break on that symbol votes for a downside chart impulse (and vice versa).
Data mode : no plan-gated feed is used. The Data row reports All-plan, live/enabled count, Vol x.xx or N/A, vol gate skipped, or basket failed · chart-only.
Screener and alerts : plot XSIE Breadth Net, XSIE Signal (+1/−1 on the confirmed bar), and XSIE Armed. alertcondition titles are “XSIE Bullish Impulse Confirmed” and “XSIE Bearish Impulse Confirmed” — not a generic “extreme event”.
🔬 How It Works
The session clock marks bars inside the chosen window. A new session resets range, votes, drawings, and the fired flag.
The first N bars build ORH/ORL. After lock, a confirmed close beyond a rail arms bull or bear on the chart.
Each live basket symbol builds its own range on the same clock and casts an up or down vote (optionally inverted).
When armed direction reaches min confirms — or the basket is entirely dead and chart-only mode is on — the engine fires once, projects ATR targets, and sets invalidation at the opposite rail.
A confirmed close through invalidation flags INVALIDATED. The next session starts clean.
💡 Note:
Best on 1–15m charts with the session that actually trades your market. Seed the basket with assets you can actually resolve on your TradingView plan and region; failed symbols simply show ✗ and the rest keep voting. This is an analytical aid, not financial advice.
指标

Streak statisticsAfter four red bars, what actually happens? Your chart already knows.
Description
Counts every run of consecutive up closes and consecutive down closes on the loaded chart and reports, for each exact streak length, how often that streak extended by one more bar. The instrument's own base rate of up and down closes is shown alongside, so every continuation frequency can be read against what an ordinary bar does rather than against an imagined 50%.
How it calculates
Direction is close against prior close. Each time a streak reaches a length, that length's denominator increments; each time it extends by one more bar, the numerator increments. The figure at length three therefore answers exactly: of the streaks that reached three, what share became four. The final row pools every resolved opportunity at or beyond the configured cap.
Right-censoring is handled correctly. A streak enters a denominator only when its next bar is known, so the unfinished streak sitting at the chart edge is never silently counted as a failed continuation. Reset boundaries censor the preceding streak rather than treating the boundary or the overnight gap as a failure. A flat close terminates a streak without extending either side.
The sample is a precise rolling number of observed comparisons rather than an unknown quantity determined only by your chart plan's history allowance, and the date range actually in the window is reported in the header tooltip. The window is rebuilt when the sample changes, once per bar close, not on every price tick.
Each continuation rate carries its sample size and an optional 95% Wilson interval. A separate base-rate-centered stabilized estimate is available and is never substituted for the empirical frequency; both are shown.
How to read it
The first row shows the current streak and, when a resolved sample exists for that state, its historical continuation, opposite, and flat shares plus the lift against base. The base row shows the share of all observed moves that were up, down, and flat. Each length row shows the continuation share, the sample size, the interval, and the stabilized estimate, per direction, with the lift in percentage points beside it.
Emphasis marks a cell that is both materially different from its base rate and interval-separated from it. It marks a departure in either direction; the sign is carried by the lift column, never by colour alone.
Repainting
Closed bars do not repaint. The live bar never enters the sample.
Timeframe requirements
Any intraday timeframe when a reset mode is active. Calendar-day reset and custom-session reset both require an intraday chart, because on daily or higher a calendar-day reset would exclude every bar. Set reset mode to Never to run on daily and above.
Originality and attribution
Run counting is elementary probability. What is original here is the treatment: continuation frequency by exact streak length and direction, conditioned so each length's denominator is the number of streaks that actually reached it, correct right-censoring at the chart edge and at reset boundaries, a bounded rolling sample in observed moves rather than in chart history, and base rate, interval, and sample size shown rather than implied. This is not derived from and does not reuse code from any existing published script.
Honest limitations
Descriptive frequencies are not forecasts, signals, or proof of an edge.
Serial dependence means the Wilson intervals are descriptive uncertainty bands, not a complete market-microstructure hypothesis test.
Looking across many rows creates multiple-comparison risk. Emphasis requires both interval separation and a minimum effect you set, but that does not eliminate data-mining risk.
Rare long streaks stay rare. Stabilization reduces visual overreaction; it cannot manufacture information that is not in the sample.
Close-to-close direction counts overnight gaps unless a reset mode is on.
The rolling window is measured in observed comparisons, not clock time. 指标

Level survival trackerEveryone trades PDH. Almost nobody knows their own numbers on it.
Description
Tracks six session reference levels every day: prior day high, prior day low, overnight high, overnight low, opening range high, opening range low. For each, over a rolling window of sessions, it reports the probability the level gets tested, the probability it breaks given a test, how failure probability changes with repeated tests, and the median rejection distance and time from first touch to break.
How it calculates
Prior day levels come from the last completed exchange daily bar via the documented non-repainting request idiom, or optionally from the previous custom chart session. Overnight high and low accumulate outside the session and freeze at the open; the opening range freezes when its window completes, and the bars that built it cannot also test it. A touch is a bar overlapping the level within a tolerance frozen at the session open, counted in episodes. A break is a confirmed close beyond the level plus tolerance, after a touch. A session whose open is already beyond a level, or where price closed through it without any bar ever overlapping it, is recorded as opened-beyond and excluded from every rate, because that level was never fairly testable. Completed sessions are written once, after the session ends.
The tolerance can be defined in ticks, points, a fraction of prior daily ATR, or a fraction of chart ATR. Statistics can be conditioned on the session's opening gap against the prior daily range, or on prior daily volatility versus its own 20-day mean. The break rate can display a 95% Wilson interval so the uncertainty is visible next to the point estimate. Break rates and touch-failure rates require their own minimum number of actual tests before anything is shown.
How to read it
Today's column shows each level's live state: untested, testing with its touch count, broke with the touch it broke on and the time, or opened beyond. P(test) is tests over eligible sessions. P(break | test) is breaks over actual tests, with the interval underneath if enabled. Touch failure answers: of past sessions that reached this many touches on this level, how often did the level eventually break. Reaction and time are the median rejection distance in points and the median minutes from first touch to confirmed break. Every figure carries its sample size, and figures below the minimums show the count instead of a percentage.
Repainting
Closed bars do not repaint. Touches and breaks are decided on confirmed bars only, and a session's outcomes enter history only after the session completes.
Originality and attribution
The levels are common knowledge. What is original is the survival accounting: episode-counted touches, conditional failure by touch number, opened-beyond exclusion, frozen per-session tolerance, regime conditioning, and interval-honest break rates with sample sizes shown. This is not derived from and does not reuse code from any existing published script.
Honest limitations
These are empirical frequencies, not forecasts or trade signals.
Intrabar path is unknowable from OHLC bars. A same-bar touch and break records as a first-touch break with zero measured rejection.
Overnight rows need extended-hours bars on the chart.
The session must not cross midnight in the chosen time zone.
Previous-RTH prior levels need one completed chart session to warm.
The chart timeframe must divide the session start and length exactly, so bars align to the session boundaries. For a 09:30 to 16:00 session that is 1, 2, 3, 5, 6, 10, 15, or 30 minutes. This is not a fixed ceiling: it follows your session. A session starting on the hour, such as 09:00 to 16:00 or 08:00 to 17:00, also accepts 20 and 60 minutes. Misaligned timeframes are refused rather than measured against fuzzy session boundaries, because a bar straddling the open would corrupt the opened-beyond classification, which reads the session-open price.
The opening range is rounded up to a whole number of chart bars, so no bar can straddle its boundary. On a 2-minute chart a 15-minute range becomes 16. The effective value is in the table header tooltip.
Results depend on instrument, session, tolerance, timeframe, and sample. Change any one and the numbers change. 指标

SMI Ergodic Oscillator PROSMI Ergodic Oscillator PRO
The SMI Ergodic Oscillator PRO is a momentum indicator designed to help traders identify changes in the strength and direction of price movement.
The indicator displays a histogram, making momentum behavior easy to visualize:
🟢 Green/Lime: momentum is gaining strength or positive slope.
🔴 Red: momentum is weakening or showing negative slope.
Larger bars: indicate stronger momentum.
Smaller bars: may indicate declining momentum and a possible loss of strength.
The main purpose of the indicator is not to generate trades by itself, but to help confirm market direction and identify potential changes in momentum.
How to Use
1. Trend Confirmation
During an uptrend, look for a sequence of consistent positive bars. Sustained momentum can provide additional confirmation that the current move remains strong.
During a downtrend, look for persistent negative bars.
2. Momentum Changes
A change in histogram color can highlight a potential shift in market momentum.
Red → Green
May indicate improving bullish momentum.
Green → Red
May indicate weakening bullish momentum or increasing bearish momentum.
Color changes should be evaluated together with price action, market structure, and the overall trend.
3. Loss of Momentum
When histogram bars begin to decrease in size, even while remaining on the same side, this may indicate that the current movement is losing strength.
This can be used as an alert to:
Reduce exposure
Protect an existing position
Wait for additional confirmation
Monitor for a potential reversal
Parameter Settings
The indicator provides three main parameters:
Parameter Practical Function Effect
Long Length Controls the longer-term sensitivity Higher values = smoother response
Short Length Controls responsiveness to recent price movements Lower values = faster response
Signal Length Controls signal smoothing Higher values = less noise
Suggested Settings
Balanced — 20 / 5 / 5
A good starting configuration for general market analysis and most timeframes.
Fast — 10 / 3 / 3
More responsive to recent momentum changes. Suitable for traders looking for earlier signals, but it may produce more noise.
Conservative — 30 / 7 / 7
Produces a smoother reading and reduces sensitivity to smaller market fluctuations.
Very Conservative — 50 / 10 / 10
Designed for traders who prefer to focus on larger and more sustained market movements.
Choosing the Right Settings
There is no universal "best" configuration. Parameters should be adapted to:
Asset: Crypto, Forex, stocks, indices, etc.
Timeframe: Scalping, day trading, or swing trading.
Volatility: Highly volatile markets may require more conservative settings.
Trading style: Faster settings can be useful for earlier momentum detection, while slower settings can provide stronger confirmation.
Simple Trading Approach
A practical approach is to use the indicator in combination with price structure and market context.
Potential Long Setup:
Favorable market structure + positive momentum + confirmation from the histogram.
Potential Short Setup:
Favorable bearish structure + negative momentum + confirmation from the histogram.
Avoid: entering a trade solely because the histogram changes color. A color change is better treated as a confirmation or warning signal, rather than an independent trading signal.
Important Notice
The SMI Ergodic Oscillator PRO is a technical analysis tool designed to assist with market analysis. It does not guarantee trading results and should not be considered financial advice. Always combine the indicator with proper risk management and independent market analysis. 指标


