

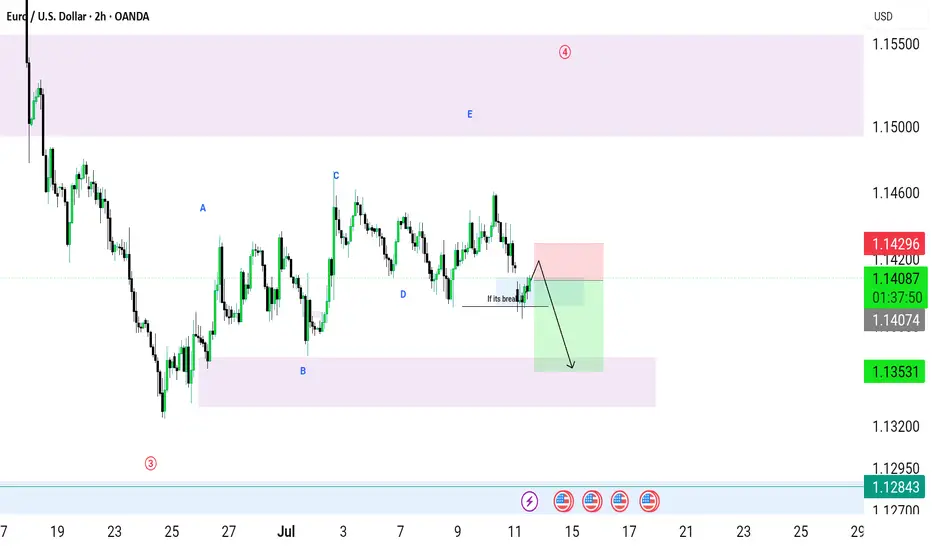
Market Structure
Bias: Bearish
Trend: Lower highs and lower lows
Setup: Break and retest of previous support
Timeframe: 2H
📍Trade Plan
Entry: On bearish rejection from the marked resistance zone
Stop Loss: Above the resistance/swing high
Take Profit: Lower demand zone (purple area)
Risk Management: Risk only 1–2% per trade and wait for candle confirmation before entering.
⚠️ *This is an educational market analysis, not financial advice. Always wait for confirmation and manage your risk properly.*
Bias: Bearish
Trend: Lower highs and lower lows
Setup: Break and retest of previous support
Timeframe: 2H
📍Trade Plan
Entry: On bearish rejection from the marked resistance zone
Stop Loss: Above the resistance/swing high
Take Profit: Lower demand zone (purple area)
Risk Management: Risk only 1–2% per trade and wait for candle confirmation before entering.
⚠️ *This is an educational market analysis, not financial advice. Always wait for confirmation and manage your risk properly.*

Verbundene Veröffentlichungen
Haftungsausschluss
Die Informationen und Veröffentlichungen sind nicht als Finanz-, Anlage-, Handels- oder andere Arten von Ratschlägen oder Empfehlungen gedacht, die von TradingView bereitgestellt oder gebilligt werden, und stellen diese nicht dar. Lesen Sie mehr in den Nutzungsbedingungen.
Verbundene Veröffentlichungen
Haftungsausschluss
Die Informationen und Veröffentlichungen sind nicht als Finanz-, Anlage-, Handels- oder andere Arten von Ratschlägen oder Empfehlungen gedacht, die von TradingView bereitgestellt oder gebilligt werden, und stellen diese nicht dar. Lesen Sie mehr in den Nutzungsbedingungen.