
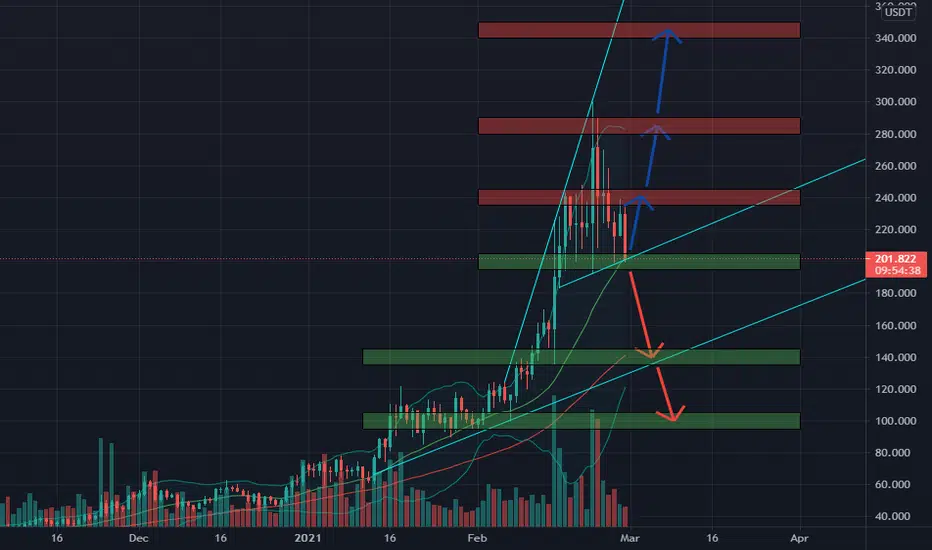
The selling pressure is dominated and very strong, so it may make KSM lose the 200$ support zone, and that would be a bearish sign
If KSM can stop the decline at this 200$ zone, we could see a recovery to 240$ zone, this would be the strongest resistance in this situation
📅NEWS
👉Mar 31 : Kusama Deployment
📈BUY
-Buy: 135-145$. SL if B
-Buy: 95-105$. SL if B
📉SELL
-Sell: 195-205$ if B. SL if A
♻️BACK-UP
-Buy: 195-205$ if A. SL if B
-Sell: 235-245$. SL if A
-Sell: 280-290$. SL if A
-Sell: 340-350$. SL if A
❓Details
Condition A : "If 1D candle closes ABOVE this zone"
Condition B : "If 1D candle closes BELOW this zone"
If KSM can stop the decline at this 200$ zone, we could see a recovery to 240$ zone, this would be the strongest resistance in this situation
📅NEWS
👉Mar 31 : Kusama Deployment
📈BUY
-Buy: 135-145$. SL if B
-Buy: 95-105$. SL if B
📉SELL
-Sell: 195-205$ if B. SL if A
♻️BACK-UP
-Buy: 195-205$ if A. SL if B
-Sell: 235-245$. SL if A
-Sell: 280-290$. SL if A
-Sell: 340-350$. SL if A
❓Details
Condition A : "If 1D candle closes ABOVE this zone"
Condition B : "If 1D candle closes BELOW this zone"

Verbundene Veröffentlichungen
Haftungsausschluss
Die Informationen und Veröffentlichungen sind nicht als Finanz-, Anlage-, Handels- oder andere Arten von Ratschlägen oder Empfehlungen gedacht, die von TradingView bereitgestellt oder gebilligt werden, und stellen diese nicht dar. Lesen Sie mehr in den Nutzungsbedingungen.
Verbundene Veröffentlichungen
Haftungsausschluss
Die Informationen und Veröffentlichungen sind nicht als Finanz-, Anlage-, Handels- oder andere Arten von Ratschlägen oder Empfehlungen gedacht, die von TradingView bereitgestellt oder gebilligt werden, und stellen diese nicht dar. Lesen Sie mehr in den Nutzungsbedingungen.