

Hi!
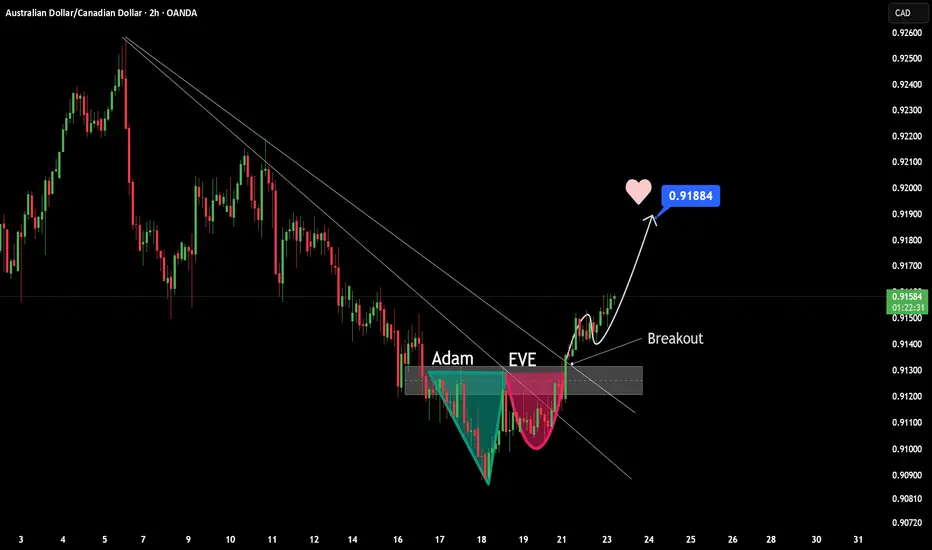
AUDCAD previously traded within a clear bearish structure, forming lower highs and lower lows inside a descending channel. Toward the latter stage of the move, selling pressure began to weaken as downside momentum slowed and price struggled to print new lows, signaling seller exhaustion and early buy-side absorption.
Price then reacted from a key demand zone and broke above the descending trendline, confirming a structural shift. As long as price holds above this demand area, bullish continuation remains the preferred scenario, with the next resistance target near 0.9188. A decisive move back below demand would invalidate this outlook and suggest a return to bearish continuation.
Trade safely.
AUDCAD previously traded within a clear bearish structure, forming lower highs and lower lows inside a descending channel. Toward the latter stage of the move, selling pressure began to weaken as downside momentum slowed and price struggled to print new lows, signaling seller exhaustion and early buy-side absorption.
Price then reacted from a key demand zone and broke above the descending trendline, confirming a structural shift. As long as price holds above this demand area, bullish continuation remains the preferred scenario, with the next resistance target near 0.9188. A decisive move back below demand would invalidate this outlook and suggest a return to bearish continuation.
Trade safely.
Trade active
Trade closed: target reached

Related publications
Disclaimer
The information and publications are not meant to be, and do not constitute, financial, investment, trading, or other types of advice or recommendations supplied or endorsed by TradingView. Read more in the Terms of Use.
Related publications
Disclaimer
The information and publications are not meant to be, and do not constitute, financial, investment, trading, or other types of advice or recommendations supplied or endorsed by TradingView. Read more in the Terms of Use.