

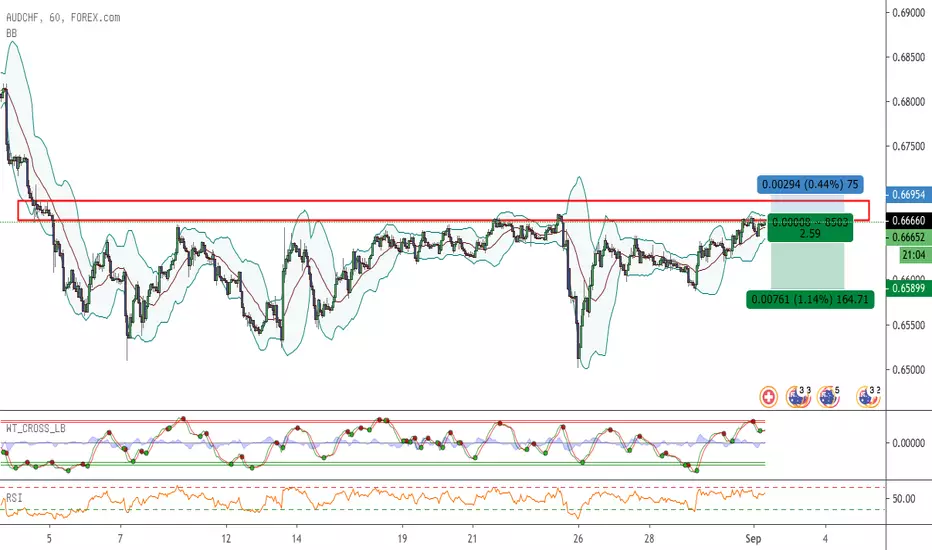
Hier sehe ich die Australier schwächer und warte darauf, das die Schweizer das Ruder übernehmen!
Im H1 sehen wir die Widerstandszone, die bereits Mehrfach bestätigt wurde.
Der Daily Chart ist eher unentschlossen, zumindest was die Indikatoren betrifft:

Ich warte hier auf eine Aussagekräftige Kerzenformation am oberen Bollinger Band, im Widerstandsbereich, bevor ich einsteige!
Im H1 sehen wir die Widerstandszone, die bereits Mehrfach bestätigt wurde.
Der Daily Chart ist eher unentschlossen, zumindest was die Indikatoren betrifft:
Ich warte hier auf eine Aussagekräftige Kerzenformation am oberen Bollinger Band, im Widerstandsbereich, bevor ich einsteige!

Free Trading Education:
discord.gg/EQmck5aU
discord.gg/EQmck5aU
Disclaimer
The information and publications are not meant to be, and do not constitute, financial, investment, trading, or other types of advice or recommendations supplied or endorsed by TradingView. Read more in the Terms of Use.
Free Trading Education:
discord.gg/EQmck5aU
discord.gg/EQmck5aU
Disclaimer
The information and publications are not meant to be, and do not constitute, financial, investment, trading, or other types of advice or recommendations supplied or endorsed by TradingView. Read more in the Terms of Use.