

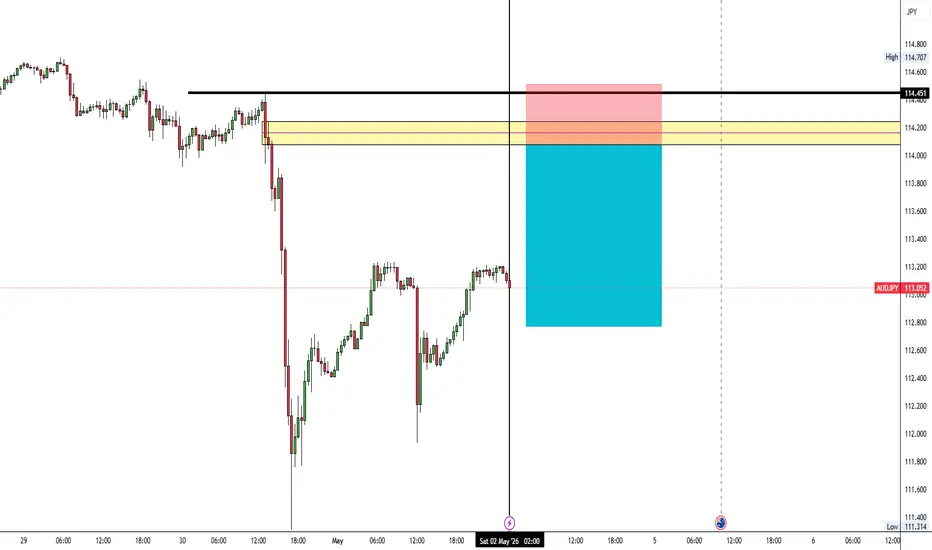
🚨 AUDJPY SELL SETUP 🚨
📍 Supply Zone Rejection
⚡ Clean Institutional Level
🐻 Sellers Waiting at Premium Price
💡 Trade Plan:
➡️ Price taps supply zone
➡️ Rejection confirmation candle
➡️ Execute SELL with discipline
🎯 Target:
📉 Previous Demand / Liquidity Sweep
🛑 Stop Loss:
🔺 Above Supply Invalidity Level
⚖️ Risk Management:
✅ 1–2% Risk Only
✅ Patience Before Entry
❌ No FOMO Trades
🧠 “The market rewards patience, not prediction.”
📊 Strategy:
Zone + Confirmation + Execution
📍 Supply Zone Rejection
⚡ Clean Institutional Level
🐻 Sellers Waiting at Premium Price
💡 Trade Plan:
➡️ Price taps supply zone
➡️ Rejection confirmation candle
➡️ Execute SELL with discipline
🎯 Target:
📉 Previous Demand / Liquidity Sweep
🛑 Stop Loss:
🔺 Above Supply Invalidity Level
⚖️ Risk Management:
✅ 1–2% Risk Only
✅ Patience Before Entry
❌ No FOMO Trades
🧠 “The market rewards patience, not prediction.”
📊 Strategy:
Zone + Confirmation + Execution

Disclaimer
The information and publications are not meant to be, and do not constitute, financial, investment, trading, or other types of advice or recommendations supplied or endorsed by TradingView. Read more in the Terms of Use.
Disclaimer
The information and publications are not meant to be, and do not constitute, financial, investment, trading, or other types of advice or recommendations supplied or endorsed by TradingView. Read more in the Terms of Use.