 Long
Long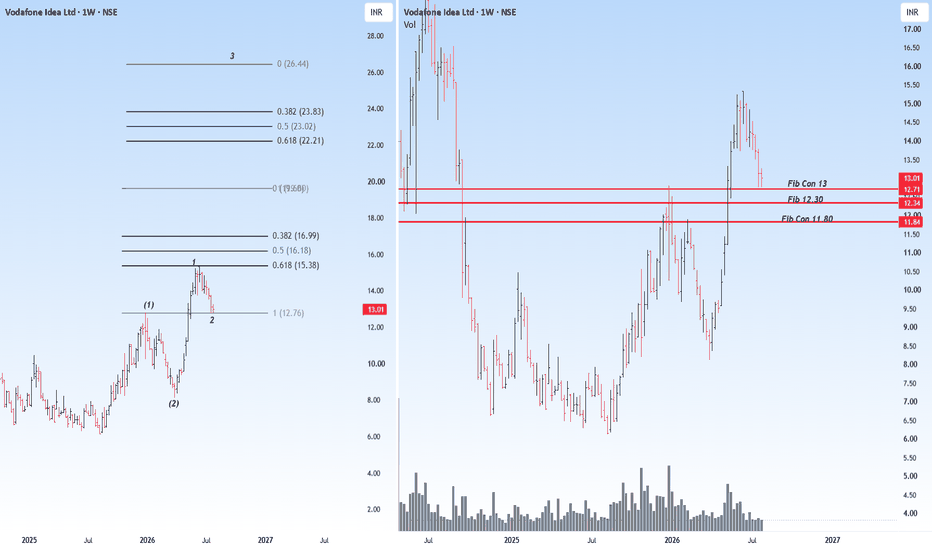
 Long
Long
The First 30 Minutes Can Trap Traders!The opening bell brings volume, speed and emotion. That is exactly why so many traders lose money there.
A large candle appears, price starts moving fast, and the instinct is to enter before the move gets away. But the first push after the open is often the least reliable part of the session. Orders are being matched, stops are being triggered, and both sides are still fighting for control.
Instead of chasing that first candle, let the market build an opening range. Mark the early high and low, then watch how price behaves around those boundaries.
A breakout only becomes interesting when price can close outside the range and hold there. The cleaner opportunity often comes on the retest: broken resistance holds as support for a long setup, or broken support becomes resistance for a short setup.
That retest gives you something the first spike cannot—a logical invalidation point. The stop can sit beyond the retest structure, while the target is planned around the next major level. If price breaks out and never comes back, let it go. Missing one move is better than buying the top of an emotional candle.
The first move shows urgency. The reaction after it shows whether the move has real support.
My advice is simple: wait for the range, wait for the break, then judge the retest.  Education
XAUUSD: 4,100 Rejected Again XAUUSD: 4,100 Rejected Again
Market Context
Gold has been rejected above 4,100 again as Fed-driven volatility continues to control the market. The US Dollar has paused its post-FOMC selloff after new US attacks on Iran, keeping safe-haven demand and geopolitical risk in focus.
Technically, gold still needs a daily close above 4,100 and RSI holding above 50 to fully weaken the bearish outlook. Until that happens, the latest breakout attempt should be treated carefully.
Key point: gold broke out of the downtrend channel, but buyers failed to sustain momentum above the Strong High Supply zone.
Technical Structure
Gold is trading around 4,059 after a sharp rejection from the 4,095 - 4,105 resistance area. This is the Strong High Supply zone, where sellers reacted clearly.
The breakout from the downtrend channel was strong, but the follow-through was weak. Price pushed above the channel, tapped supply, then quickly lost momentum.
The next key area is the Deep Demand Zone around 4,000 - 4,020. If price continues to weaken, this is where buyers may look for a fresh reaction.
As long as gold stays below 4,095 - 4,105, the short-term structure remains vulnerable. Buyers need to reclaim 4,100 with strength before the recovery can continue.
Key Levels
Current Price: 4,059
Strong High Supply: 4,095 - 4,105
Short-term Reaction Area: 4,050 - 4,060
Deep Demand Zone: 4,000 - 4,020
Bullish Confirmation: Above 4,105
Bearish Continuation: Below 4,050
Trading Plan
Sell Scenario
Entry: 4,095 - 4,105
SL: Above 4,125
TP: 4,060 / 4,020 / 4,000
Condition: Price retests the Strong High Supply zone and gets rejected again. Sellers remain in control if gold fails to close above 4,105.
Sell Continuation
Entry: Below 4,050 after breakdown and retest
SL: Above 4,075
TP: 4,020 / 4,000 / 3,980
Condition: Price loses the short-term reaction area, retest fails, and bearish momentum continues toward the Deep Demand Zone.
Buy Reaction
Entry: 4,000 - 4,020
SL: Below 3,980
TP: 4,050 / 4,060 / 4,095
Condition: Price reaches the Deep Demand Zone and forms a clear bullish rejection. This is only a reaction buy, not a confirmed reversal.
Buy Breakout
Entry: Above 4,105 after breakout and retest
SL: Below 4,060
TP: 4,125 / 4,150 / 4,180
Condition: Buyers must reclaim 4,100 with strength, hold the retest, and keep RSI above the neutral zone. Without this confirmation, buying remains risky.
Overall Bias
Gold is not fully bearish, but buyers failed the key test at 4,100. The breakout lost momentum right inside the Strong High Supply zone.
If price stays below 4,095 - 4,105, the next logical move is a pullback toward 4,020 - 4,000. If buyers reclaim 4,105, the structure can shift back toward recovery.
Best approach: do not chase buys after rejection. Wait for either a clean reaction at demand or a confirmed breakout above 4,105.
Will gold defend the Deep Demand Zone, or will sellers use another 4,100 rejection to push price lower?
Short 
Shadowfax Technologies – Is it time to book profits?IPO Case Studies #1
Shadowfax Technologies was listed on 28 January 2026 and began forming its first Elliott Wave impulse almost immediately after listing.
In just over six months, the stock has delivered more than 150% returns from its listing price— a remarkable rally . Based on the current wave structure, it appears that the first impulse wave has most likely completed, making a corrective phase increasingly probable. Is it time to book profits? Let us analyse.
Wave Structure
• Wave 1 completed on 13 February 2026 as a clean five-wave impulse.
• Wave 2 unfolded as a zigzag, retracing approximately 78.6% of Wave 1.
• Wave 3 extended strongly and peaked on 29 April 2026, travelling 2.272× the length of Wave 1.
• Wave 4 formed a small Flat correction, completing on 13 May 2026, maintaining good alternation with Wave 2.
• Wave 5 peaked on 7 July 2026 as another extended advance, reaching approximately 1.0× the combined length of Waves 1–3, a common Fibonacci relationship for fifth-wave extensions.
What comes next?
The developing correction currently resembles an Expanded Flat (3-3-5).
Wave A appears complete as a three-wave decline.
Wave B has likely completed after exceeding the origin of Wave A, a defining characteristic of an Expanded Flat.
Wave C is expected to unfold as a five-wave sequence, which could complete the higher-degree correction.
After a 150%+ rally, the reward-to-risk ratio is no longer favourable.
Investors may consider protecting profits, while fresh long positions are best avoided until the corrective structure is complete.
 Short
Short
 Education

 Education

Education

If $AIOZ This Pattern Repeats, A 11,000% Move Could Be Next Connecting The Dots: Is History About To Repeat For CRYPTOCAP:AIOZ ? If This Pattern Repeats, A 11,000% Move Could Be Next 🚀
This Isn't A Traditional Technical Analysis:
I Was Simply Looking At The Chart And Noticed An Interesting Historical Fractal That Seems To Be Repeating. So I Started Connecting The Dots.
Here's What Caught My Attention 👇
🔰 Cycle 1 (Nov 2021 → Nov 2024):
After Launch, CRYPTOCAP:AIOZ Rallied Aggressively And Printed An ATH Around $1.888.
Then The Market Entered A Prolonged 1→8 Correction Sequence, Exactly As Marked On The Chart.
🔹 ATH: $1.888
🔹 Bottom: $0.01081
🔹 Total Drawdown: -99.4%
Think About This...
If Someone Invested $1,000 At The ATH, By September 2023 That Investment Would Have Been Left With Only Around $9.
The Interesting Part Came After The Correction Was Fully Completed.
Once The 8th Count Was Printed, The Market Completely Reversed.
Price Followed An 8 → A → B → C → D → E Impulsive Structure And Exploded From:
$0.01081 → $1.32766
That's Roughly 123x (12,300%) In Almost One Year.
A $1,000 Investment Near The Bottom Would Have Grown To Approximately $122,800.
What I'm Watching Now:
Looking At Today's Structure, I Noticed Price Is Once Again Respecting A Very Similar 1→8 Counting Sequence.
According To My Interpretation:
✅ Count 1–6 Is Almost Complete.
If This Historical Fractal Continues To Play Out...
The Remaining 6→8 Movement Could Push Price Into The FVG-2 Demand Zone Around $0.018.
That Could Potentially Complete Another Full Correction Cycle.
Then Comes The Interesting Part...
If, And This Is A Big IF, History Repeats Like The Previous Cycle...
The Next Move Could Again Follow:
8 → A → B → C → D → E
Which Could Potentially Send Price From Roughly: $0.018 → $2.00
That Would Represent Approximately 11,000% Upside From The Projected Bottom.
⚠️ Important Note: This Is Not A Prediction And Not Financial Advice.
It's Simply My Imagination Based On Historical Price Action And Fractal Similarities That I Found While Studying The Chart And Connecting The Dots.
Past Performance Never Guarantees Future Results, But Sometimes The Market Likes To Rhyme.
Always DYOR And Manage Your Risk Before Making Any Investment Decisions.  Long
Long
XAUUSD — 4,055 Has to Hold XAUUSD — 4,055 Has to Hold
Gold got hit with fresh selling pressure, but the reaction around 4,055 is the part of the chart I keep coming back to.
Price pushed lower after failing to extend cleanly above the 4,100 area, and that fits the wider story: USD is trying to recover, geopolitical tension is keeping inflation risk alive, and the technical backdrop still has sellers watching closely. But when I slow the chart down, gold is not simply collapsing. It is pulling back into the same area where buyers previously stepped in, right above the FVG zone.
For newer traders, this is where the chart becomes more useful than the noise. A strong drop into a retracement zone can feel bearish, but if price holds around the 0.5 - 0.618 area and starts reacting, it can mean the market is only breathing back into discount before another recovery attempt.
That is why my main view is short-term bullish while gold holds above 4,055.210 and 4,065.315. If buyers defend this zone, the next area price may try to revisit is 4,116.185. A clean break above that would open the door toward the larger order block around 4,145 - 4,160, where the real test will come.
This bullish idea becomes weak if gold loses 4,055.210 and fails to recover. A deeper break below the FVG area around 4,015 - 4,030 would tell me buyers lost the base, and sellers may try to pull price back toward 4,000.
Key price zones to watch
Current reaction area: 4,055.210 - 4,065.315
Main demand / FVG zone: 4,015 - 4,030
Bullish confirmation zone: clean reclaim above 4,065.315
First upside target: 4,116.185
Main upside order block target: 4,145 - 4,160
Major upside liquidity: 4,166.005
Lower support if buyers fail: 4,000
Invalidation: clean close below 4,015
Do you see this 4,055 reaction as buyers defending the pullback, or would you wait for 4,116 to break before trusting the recovery?
Long 
XAUUSD: Bullish wave setup above 4,070Gold is showing a constructive bullish recovery after defending the lower support area near 3,996. From Kelly’s view, the current chart suggests that XAUUSD may be building a new Elliott upside structure, with the latest pullback acting as a healthy correction before the next bullish wave develops.
The key idea is simple: gold is still holding above the buy zone, and if buyers defend this area, the next upside move may continue towards the resistance zones above.
⟡ Market structure
The chart shows gold reacted strongly from the lower support and pushed into the 4,110–4,120 area. After that, price pulled back into the marked Buy zone wave 3 around 4,068–4,075.
This zone is important because it may become the base for the next bullish continuation. Current price is trading around 4,072, directly inside the key reaction area. If price holds here and creates a bullish confirmation candle, buyers may attempt to push gold back towards 4,118–4,120 first.
Above that, the next important resistance is around 4,160–4,165. If gold breaks this zone with strength, the larger Elliott target near 4,220–4,225 becomes possible.
➤ Key levels
◌ 4,068–4,075: Buy zone wave 3 and current reaction area
◌ 4,118–4,120: first upside checkpoint
◌ 4,160–4,165: main resistance zone
◌ 4,220–4,225: Elliott wave completion / Fibonacci 1.618 target
◌ 3,996: major support and bullish structure protection
◌ Below 4,050: area where the bullish setup starts to weaken
⌁ Elliott Wave view
From an Elliott Wave perspective, gold may be forming a new bullish 5-wave structure after the previous decline ended near support.
Wave 1 created the first strong push from the lower base.
Wave 2 corrected back but still respected the recovery structure.
Wave 3 may begin from the current buy zone if price holds above 4,068–4,075.
Wave 4 could appear later as a small pullback near 4,118–4,120.
Wave 5 may then aim towards 4,220–4,225, where the chart marks the Elliott completion zone.
This is why Kelly is watching the current support carefully. If buyers defend this area, the bullish wave count remains valid.
▸ Trading scenario
Preferred scenario: wait for gold to hold the Buy zone wave 3 and show bullish confirmation.
Entry zone: 4,068–4,075 if bullish confirmation appears
Stop loss: below the confirmed pullback low or below 4,050
Take profit 1: 4,118–4,120
Take profit 2: 4,160–4,165
Take profit 3: 4,220–4,225 if wave 5 extends
Alternative scenario: if gold breaks below 4,050 with strong bearish pressure, the bullish setup weakens. In that case, price may retest the lower support around 3,996 before building a new structure.
⌁ Kelly’s view
For Kelly, the current structure still supports a bullish scenario. Gold is pulling back into a key buy zone instead of breaking down aggressively, which means buyers still have a chance to continue the recovery.
The cleanest plan is to wait for confirmation around 4,068–4,075. If this zone holds, gold may continue towards 4,160 first, then the Elliott completion zone near 4,220.
Gold is holding a bullish recovery structure. If the buy zone remains protected, the next Elliott wave may continue higher.
Share your view below. Long 
 Long
Long
Dow Jones Futures Wave 2 Pullback Targets 51,182–49,991Dow Jones Futures (YM) is pulling back to correct the cycle from the 45,430 low in wave 2. The Elliott Wave structure suggests that the index remains vulnerable to further downside in the near term, as long as it stays below the 53,105 high. The decline from the peak completed three swings within wave (w), followed by a corrective bounce in wave (x). This bounce ended at 53,105, and YM has since turned lower again. The current structure suggests that the index is developing another five-wave decline in wave (y), which could complete the larger wave 2 correction.
We expect wave (y) to extend toward the 51,182–49,991 area. This zone represents the 100%–161.8% Fibonacci extension of wave (w) and could provide an important area for the next reaction. How YM responds there will help determine whether the entire wave 2 pullback has ended or whether the current decline represents only part of a larger correction.
In the next 24 hours, we expect any bounce to fail in 3- 7- or 11-swings to continue downside while remaining below 53,105. However, the wave 2 pullback still appears relatively shallow compared with the previous advance from 45,430. Therefore, there is a possibility that the correction could extend further and develop into a larger 7- or 11-swing structure.
For now, the near-term bias remains lower, with 51,182–49,991 serving as the key zone to watch for signs of support and a potential change in structure. AXIS BANK | Swing Long Setup 📌 AXIS BANK – Wave 2 Completion & Potential Bullish Wave 3 Ahead 🚀
Axis Bank appears to have completed its corrective Wave 2 and may now be gearing up for the next impulsive rally — Wave 3, which is often the strongest in Elliott Wave theory.
---
🧩 Elliott Wave Structure
Wave 1: Strong rally from the lows earlier in 2025, showing clear bullish intent.
Wave 2: Completed as a complex W–X–Y correction , ending around the 50% Fibonacci retracement zone (₹1,079), which is a common reversal area in Elliott Wave patterns.
The substructure inside Wave 2 (marked as a–b–c, w–x–y) shows corrective nature, indicating that the broader uptrend remains intact.
---
📈 Current Outlook & Key Levels
Current Price**: ₹1,073 (hovering near 50% retracement level).
Support Zones:
₹1,051 (38.2% Fib) – minor support.
₹1,005 (23.6% Fib) – strong support and Wave 2 invalidation watch.
Immediate Resistance: ₹1,128 (61.8% Fib).
Breakout Trigger : A sustained close above ₹1,182 will confirm strength and open the path for higher targets.
---
🎯 Upside Targets (Based on Fib Extensions of Wave 1)
Target 1: ₹1,238 (100% projection).
Target 2: ₹1,321 (127.2% extension) – strong Wave 3 projection zone.
---
🔍 Indicators & Market Context
✅ Price has respected the 50% Fibonacci retracement, showing early signs of buyers stepping in.
✅ Moving averages are starting to flatten, and a bullish crossover could be on the way once price pushes above ₹1,128.
✅ Volume remains moderate; a spike in buying volume on breakout would add confidence to the bullish scenario.
---
⚠️ Risk Management
> If price drops below ₹1,005 (Wave 2 low), the bullish Elliott count would be invalidated, and deeper correction may follow. In such a case, it's better to step aside and wait for a fresh setup.
---
📝 Summary
> Axis Bank seems to have finished its Wave 2 correction and is preparing for a possible Wave 3 rally. A breakout above ₹1,182 could start the next bullish leg towards ₹1,238 and ₹1,321. Until then, watch the key supports at ₹1,051 and ₹1,005.
---
**Disclaimer:**
This analysis is for educational purposes only and is not financial advice. Please consult a SEBI-registered financial advisor before making any investment decisions.
#AxisBank #ElliottWave #SwingTrading #Wave3 #PriceAction #TradingViewIndia #TechnicalAnalysis
---  Long
Long
NMDC setting the stage for RALLYNMDC looks to be setting up for a potential impulsive rally after completing a corrective wave. The structure suggests strength, with protective levels clearly defined.
🧩 Elliott Wave Structure
• We can see a completed 5-wave move up earlier this year (Wave 1).
• That was followed by a healthy correction (Wave 2), which retraced close to 50% of Wave 1 — a textbook retracement zone.
• Now, price action is forming a new Wave 3 setup, which tends to be the strongest move in Elliott Wave cycles.
📈 Key Levels to Watch
• Current Price: ₹75.87
• Immediate Support: ₹73.60 – ₹73.37 zone
• Protective Stop: ₹71.45 (below recent swing low, Wave 2 invalidation area)
• Upside Path: If price sustains above ₹76, we may see a quick move towards ₹80–82 first, and eventually ₹85+ in the coming weeks.
🔍 Technical Indicators
✅ RSI is rising and trading around 66, showing bullish momentum but still shy of overbought levels.
✅ Moving averages are sloping upward, supporting the bullish bias.
✅ Volume spikes on green candles indicate strong participation from buyers.
📊 Possible Scenarios
1. Bullish Continuation: A breakout above ₹76 could trigger momentum buying, leading to higher targets quickly.
2. Pullback Before Rally: Price may retest the ₹73–74 zone before resuming the uptrend — a healthy retest would make the rally stronger.
Protective stop is marked near ₹71.45. If price falls below this, it may indicate that the wave structure has failed, and deeper correction could follow.
⸻
Disclaimer:
This analysis is for educational purposes only and not investment advice. Please consult a SEBI-registered financial advisor before making any trading or investing decisions.  Long
Long
 Long
Long
Elliott Wave Principle: Understanding Wave 1 ExtensionChartTheWave Learning Series
Elliott Wave Principle: Understanding Wave 1 Extension
This post is a continuation of my educational series on the Elliott Wave Principle. In an earlier lesson, we learnt that any one of the three motive waves—Wave 1, Wave 3 or Wave 5—can extend. While Wave 3 extensions are the most discussed, today let's look at a real-market example of a Wave 1 extension .
A Wave 1 extension occurs when the first motive wave develops into an elongated impulse with five clear internal subdivisions and ultimately becomes the dominant motive wave of the sequence.
What happens after a Wave 1 extension?
In my chart studies, I have often observed that when Wave 1 is the extended wave, the subsequent motive waves (Wave 3 and Wave 5) frequently terminate within approximately 78.6% of the length of the extended Wave 1. While the textbook commonly highlights 61.8%, markets often extend beyond this level while still maintaining proportionality.
Key Takeaway : In the case of Wave 1 extension, do not expect the wave to prolong.
Let's understand this using Aequs Ltd., which was listed in December 2025.
Chart Analysis
Wave 1 – Extended Impulse
Wave 1 developed into an extended impulse with five well-defined internal subdivisions.
Sub-wave 3 extended to approximately 1.272× the length of Sub-wave 1.
Sub-wave 4 found support near the 78.6% Trend-Based Fibonacci Extension (TBFE) level of Sub-wave 1.
Sub-wave 5 extended to approximately 1.414× the length of Sub-wave 1, completing the extended Wave 1.
Wave 2 : Regular Flat (3-3-5) structure.
Wave 3
Wave 3 advanced as a smaller five-wave impulse and terminated at approximately 61.8% of the length of Wave 1.
Wave 4
Wave 4 was a small correction which took support at 50% TBFE of Wave 1.
Wave 5
Wave 5 advanced to approximately 61.8% of Wave 3, resulting in an overall length of nearly 78.6% of the extended Wave 1.
Key Takeaway
One of the common misconceptions among Elliott Wave practitioners is that Wave 3 must always be the largest wave. In reality, any one of the three motive waves can extend. The wave that extends is determined by its internal structure and proportional relationships.
Studying wave subdivisions together with Fibonacci relationships helps build confidence in the wave count as it develops and enables traders to analyse market structure more objectively.
In a future lesson, I'll share another interesting example where both Wave 1 and Wave 3 exhibit extended characteristics—a practical variation that is rarely discussed in textbooks but occasionally appears in live markets.
 Education
 Long
Long
Long 
 Long
Long
 Short
Short


