

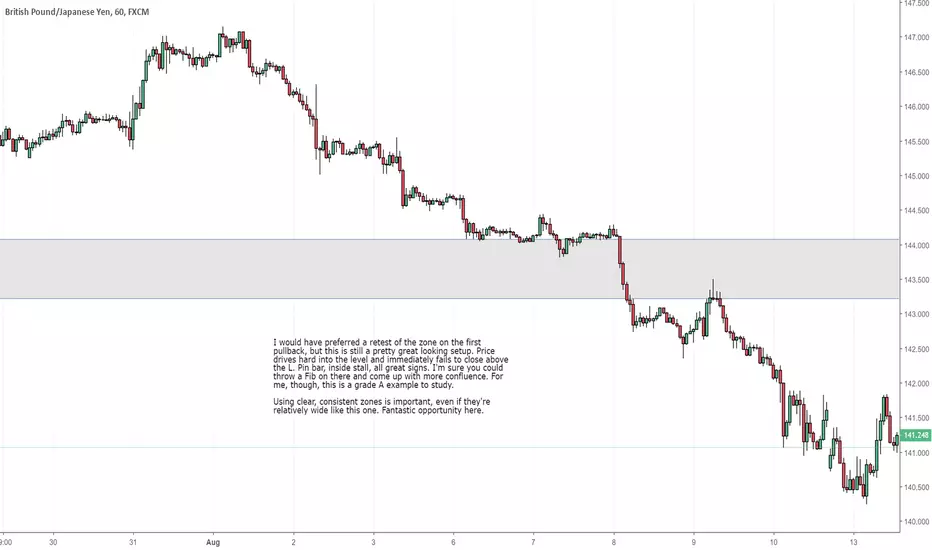
Here's the setup on the H1.
Apply this to any time frame. If you're using important levels and trading at the right times, most healthy breakouts involve some version of this shape. Strong, confirmed breakout with a clear close past the level, a weak but steady pullback to the level, and then an immediate fail at support-turned-resistance.
Apply this to any time frame. If you're using important levels and trading at the right times, most healthy breakouts involve some version of this shape. Strong, confirmed breakout with a clear close past the level, a weak but steady pullback to the level, and then an immediate fail at support-turned-resistance.

Pubblicazioni correlate
Declinazione di responsabilità
Le informazioni e le pubblicazioni non sono intese come, e non costituiscono, consulenza o raccomandazioni finanziarie, di investimento, di trading o di altro tipo fornite o approvate da TradingView. Per ulteriori informazioni, consultare i Termini di utilizzo.
Pubblicazioni correlate
Declinazione di responsabilità
Le informazioni e le pubblicazioni non sono intese come, e non costituiscono, consulenza o raccomandazioni finanziarie, di investimento, di trading o di altro tipo fornite o approvate da TradingView. Per ulteriori informazioni, consultare i Termini di utilizzo.