

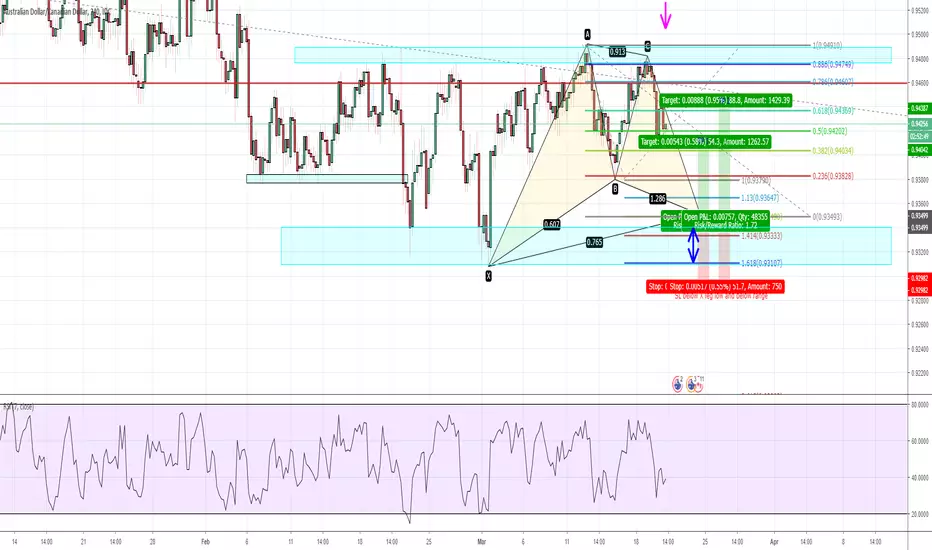
Another nice advanced pattern formation forming on the AUDCAD on the 4HR chart. The D completion is targeted to complete just above the range support structure. This may create some buffer for the price to continue to move down and test structure. Therefore, must ensure stops can cater for the possible move down. Stops are below the range. Must ensure orders are within a 1:1 ratio or greater for trade to be valid.

免責事項
これらの情報および投稿は、TradingViewが提供または承認する金融、投資、取引、またはその他の種類の助言もしくは推奨であることを意図したものではなく、またこれらに該当するものでもありません。詳細は利用規約をご覧ください。
免責事項
これらの情報および投稿は、TradingViewが提供または承認する金融、投資、取引、またはその他の種類の助言もしくは推奨であることを意図したものではなく、またこれらに該当するものでもありません。詳細は利用規約をご覧ください。