
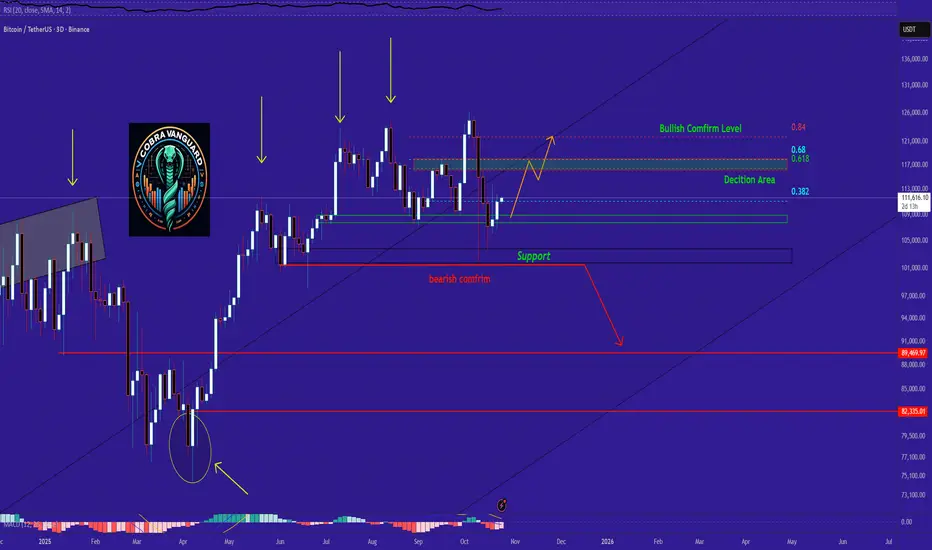
📉 Stage 1 – Bearish Reversal Zone
The red zone and areas below it signal a potential return to the downtrend.
Stage 2 – Launch Zone
The desicion zone between 111,300 to 111,500 could trigger a sharp breakout move.
📈 Stage 3 – Bullish Extension
If price breaks through the 115,000 to 117,000 range, there’s a high probability of reaching 121,000 to 122,000.
The red zone and areas below it signal a potential return to the downtrend.
Stage 2 – Launch Zone
The desicion zone between 111,300 to 111,500 could trigger a sharp breakout move.
📈 Stage 3 – Bullish Extension
If price breaks through the 115,000 to 117,000 range, there’s a high probability of reaching 121,000 to 122,000.

関連の投稿
免責事項
これらの情報および投稿は、TradingViewが提供または承認する金融、投資、取引、またはその他の種類の助言もしくは推奨であることを意図したものではなく、またこれらに該当するものでもありません。詳細は利用規約をご覧ください。
免責事項
これらの情報および投稿は、TradingViewが提供または承認する金融、投資、取引、またはその他の種類の助言もしくは推奨であることを意図したものではなく、またこれらに該当するものでもありません。詳細は利用規約をご覧ください。