
Alright guys, let me explain this step by step so you understand the logic behind the setup.
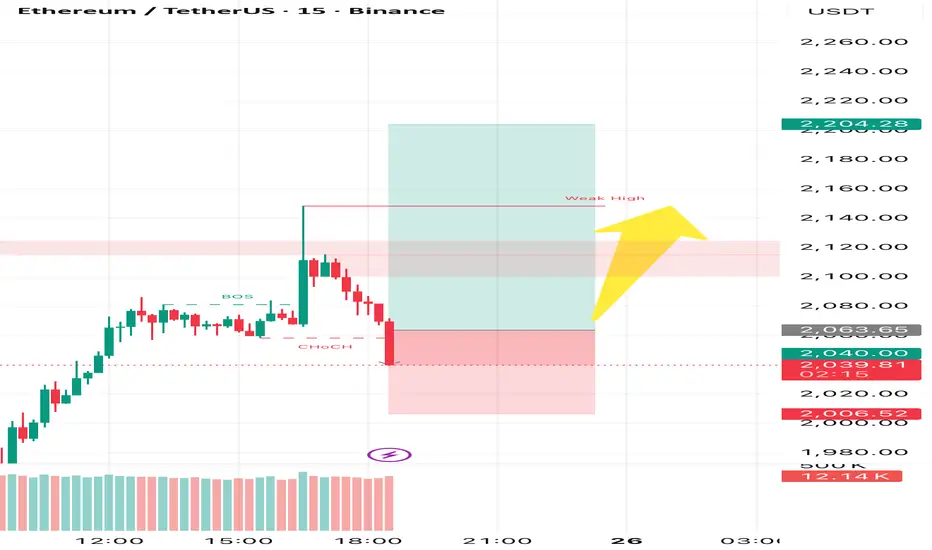
Ethereum is maintaining a bullish market structure on the higher timeframe — higher lows are forming and buyers are defending key demand zones. Liquidity is resting above current price, which makes upside continuation highly probable.
Now here’s the smart approach 👇
Before the expansion move, we can still see a controlled pullback toward the 2025–2055 zone. This is a discount area where smart money could step in before pushing price higher.
So instead of chasing candles, we wait for price to come to us.
Patience creates precision.
📥 Optimal Entry Zone
2025 – 2055
🛑 Invalidation Level
1935 (If this breaks, bullish structure becomes
🎯 Targets
• TP1: 2098
• TP2: 2149
• TP3: 2167
• TP4: 2190
• Extended target: 2200+
📌 Important Lesson:
The simpler you keep your chart, the clearer things will become.

免責事項
これらの情報および投稿は、TradingViewが提供または承認する金融、投資、取引、またはその他の種類の助言もしくは推奨であることを意図したものではなく、またこれらに該当するものでもありません。詳細は利用規約をご覧ください。
免責事項
これらの情報および投稿は、TradingViewが提供または承認する金融、投資、取引、またはその他の種類の助言もしくは推奨であることを意図したものではなく、またこれらに該当するものでもありません。詳細は利用規約をご覧ください。