

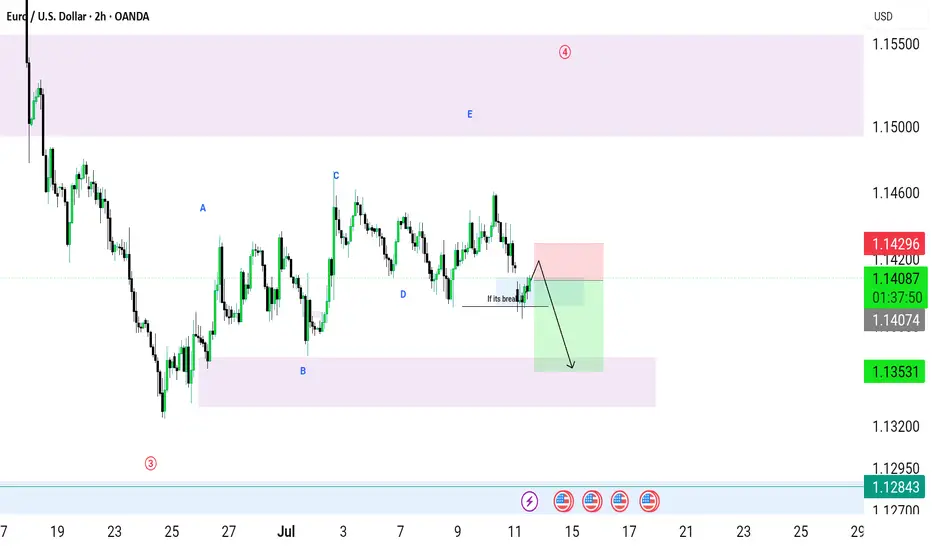
Market Structure
Bias: Bearish
Trend: Lower highs and lower lows
Setup: Break and retest of previous support
Timeframe: 2H
📍Trade Plan
Entry: On bearish rejection from the marked resistance zone
Stop Loss: Above the resistance/swing high
Take Profit: Lower demand zone (purple area)
Risk Management: Risk only 1–2% per trade and wait for candle confirmation before entering.
⚠️ *This is an educational market analysis, not financial advice. Always wait for confirmation and manage your risk properly.*
Bias: Bearish
Trend: Lower highs and lower lows
Setup: Break and retest of previous support
Timeframe: 2H
📍Trade Plan
Entry: On bearish rejection from the marked resistance zone
Stop Loss: Above the resistance/swing high
Take Profit: Lower demand zone (purple area)
Risk Management: Risk only 1–2% per trade and wait for candle confirmation before entering.
⚠️ *This is an educational market analysis, not financial advice. Always wait for confirmation and manage your risk properly.*

関連の投稿
免責事項
これらの情報および投稿は、TradingViewが提供または承認する金融、投資、取引、またはその他の種類の助言もしくは推奨であることを意図したものではなく、またこれらに該当するものでもありません。詳細は利用規約をご覧ください。
免責事項
これらの情報および投稿は、TradingViewが提供または承認する金融、投資、取引、またはその他の種類の助言もしくは推奨であることを意図したものではなく、またこれらに該当するものでもありません。詳細は利用規約をご覧ください。