インジケーター

Break quality: level breaks read against candle structureTwo bars can close in exactly the same place after taking out a recent high. One is buyers absorbing supply. The other is a trap. This reads the bar that did the breaking to tell them apart.
What it does
It watches the highest high and lowest low of the last few bars. When price closes beyond one of them, that is a break, and the script then asks two questions about the bar that produced it: did enough volume show up, and did the bar's own shape agree with the direction it just moved.
A break on strong volume with nothing contradicting it is marked as supported. A break on thin volume is marked as unconfirmed. A break where the same bar printed a reversal pattern pointing the other way is marked as contradicted, in its own colour, because that is the case worth stopping on.
Why these things are in one script
This is not a breakout tool and a pattern scanner merged for convenience. They were two separate scripts and the reason for combining them is that neither answers the question on its own.
A break is a liquidity event. Price trades through a level where resting orders sat, those orders get filled, and the close tells you the level was crossed. It does not tell you who did the crossing or whether they intend to stay. Continuation and a stop run produce the same closing price.
What separates them is visible on the breaking bar itself. Continuation looks like a decisive body with participation behind it. A trap looks like a long rejection wick, or an engulfing bar in the opposite direction, printed on volume that never arrived. That evidence exists for exactly one bar, at exactly one location, and scanning for it independently across the whole chart produces hundreds of marks that have nothing to do with any level.
So the candle structure here is subordinate to the break. It is not reported unless a level was taken. That subordination is the entire design, and it is why this is one script and not two.
There is also a plain engineering reason. Both halves needed relative volume against the same average, and as separate indicators that average was computed twice from identical data on every bar. Here it is computed once and both readings share it.
How it works
The level is the highest high or lowest low of the prior bars, deliberately excluding the current one. Including it would let the level move with the bar trying to break it, and nothing could ever exceed it.
A break is a close beyond that level. In a trending market a new high is set on almost every bar, so only the first break of a run is treated as an event, and a spacing setting stops a strong trend from covering the chart in labels. Bar colouring stays continuous through the run, so you still see the whole move.
Volume is compared to its own moving average. At or above the strong threshold the break is treated as participated; below one times average it is treated as thin.
The candle structure read covers engulfing, hammer and shooting star, piercing and dark cloud, harami, and harami cross. Each family has its own toggle. A shape pointing against the break direction is what triggers the contradicted reading. The doji used by the harami cross is defined by a body no larger than a set fraction of the bar's range, and that fraction is a setting rather than a hidden constant.
The broken level is drawn forward as a dashed line and removed when price trades back to it, because a level that has been revisited has stopped being a reference.
Everything confirms on bar close by default.
How to use it
Works on any symbol and timeframe that reports volume.
The reading to act on is not the break itself but the label under it. Supported, unconfirmed and contradicted are three different situations that look identical if you only watch price close beyond a line.
Contradicted breaks are the reason the script exists. A break that prints a reversal shape on its own bar is not automatically a fade, but it is a break that has not yet proven anything, and treating it identically to a supported one is how breakout traders get taken apart.
Raise the lookback for fewer and more significant levels. Raise the spacing setting if a trending instrument is still producing too many marks. Turn the structure read off entirely and it becomes a plain break-and-volume tool with nothing else changed.
What it cannot do
A contradicted break is a description of one bar, not a forecast. Some traps reverse immediately and some run for days before they do. The label says the evidence on that bar conflicts, and nothing more.
Candlestick patterns are shape definitions with no universally agreed thresholds. The definitions used here are listed above so you can check them against your own rather than trust mine. Piercing and dark cloud are implemented in the strict form requiring a genuine gap beyond the prior bar's extreme, which means they fire rarely on intraday charts where gaps are uncommon.
The level is a recent high or low and nothing more. It carries no weight from prior sessions, no volume profile, no higher timeframe context. A five-bar high on a quiet afternoon and a five-bar high at a weekly extreme are treated identically.
There are no entries, exits, targets or stops in this script, and no performance of any kind is claimed, measured or implied.
On authorship
Swing breakouts, relative volume and the classic candlestick reversal patterns are all public methodology and I have said so plainly. The implementation is not borrowed. Every line is written from scratch and no code in it is copied or adapted from another author's script, on this platform or anywhere else.
Settings
Lookback for the level, confirm-on-close and minimum spacing between marked breaks; volume average length and the strong-participation multiple; a master switch for the structure read plus a toggle per pattern family and the doji body fraction; and display options for the level lines, labels, plotted levels, bar colouring, label size and colours.
インジケーター

Elite CVD: volume delta with directional wick attributionA cumulative volume delta that attributes wick volume directionally instead of splitting every bar down the middle, with all three proxy models exposed so you can compare them yourself.
What it does
Volume delta estimates how much of a bar's volume was buyer-initiated versus seller-initiated, then accumulates the difference into a running total. When that total rises while price stalls, buyers are absorbing supply. When it falls while price grinds higher, the advance is not being paid for. This plots that total, colours each bar's contribution by whether the pressure is building or fading, marks unusually heavy volume, and flags divergences between the total and price.
What is different here
Cumulative volume delta is a public idea with many open-source implementations on this platform, and I claim no ownership of it. What differs is how the volume gets attributed.
Almost every delta proxy splits a bar by where the close sits within the range. That treats both wicks as neutral, which is a choice, and usually an unexamined one. It says the volume in a long lower wick carries the same meaning as volume in a long upper wick.
This one reads wicks directionally. On an up bar, the lower wick is treated as selling that buyers absorbed and overcame, so most of that volume is credited to buyers, while the upper wick is treated as rejection and mostly credited to sellers. On a down bar the reading inverts. The split is 75/25 rather than 50/50, and the body always goes to the direction the bar closed.
Whether that assumption is better than the neutral one is something you should decide rather than take on faith, so the classic model, the directional model, and an average of the two are all selectable from one dropdown. Switch between them on your own instrument and see whether the difference matters. If it does not, use the classic one.
How the parts work together
Four components share one job, which is why they sit in one script rather than four.
The delta engine produces the per-bar reading. The relative-volume layer scales that reading by how heavy the bar was against its own recent average, using a square root so a four-times-volume bar counts double rather than quadruple. That matters because a large delta on thin volume is noise and a moderate delta on heavy volume is participation, and an unweighted total treats them as equal.
The acceleration colouring compares each bar's delta to its own reading a few bars back and dims the histogram when pressure is fading. Pressure that is still positive but decelerating is the condition that precedes most reversals in this kind of data, and a plain two-colour histogram hides it entirely.
The divergence layer compares confirmed price pivots against the delta total at those same bars. Divergences are confirmed rather than live: they appear only once the pivot's right-hand bars have elapsed, so they will always print a few bars after the turn.
How to use it
Built for intraday work on futures, and it functions on any symbol that reports volume.
Start with the reset mode. Session reset gives you the day's accumulated pressure and is the right default for intraday trading. Fixed length gives a rolling window. Running never resets and is only useful over short chart histories.
Read the relationship rather than the level. The absolute number means little on its own, since it depends on how long the total has been accumulating. What carries information is the direction of the total relative to price, whether it sits above or below its signal line, and whether the per-bar contribution is brightening or dimming.
The table reports the current bar's buy and sell split, the bar delta with an acceleration marker, the running total and which reset mode produced it, the signal-line relationship, relative volume, and raw volume.
What it cannot do
This is a proxy and not real order flow. It infers the aggressor side from the shape of the bar. It has no access to bid and ask data, no tick data, and no exchange-reported delta. On any instrument where true delta is available to you, the true delta is better and you should use that instead.
The directional wick reading is an assumption about intent, not a measurement. It is defensible and it is still an assumption, which is why the neutral model remains available.
With relative-volume weighting switched on, the running total is no longer in contracts or shares, because each bar is scaled before being added. The shape of the line stays comparable across time; the units do not. Turn the weighting off if you need the axis to be literal.
The session reset follows the exchange's own daily session, so on futures it resets at the futures open rather than the equity open. That is correct for a futures instrument and worth knowing if you apply the script elsewhere.
Divergences are confirmed, which means late by design. They describe a turn that has already formed. They are not predictions and no claim is made about how often they resolve favourably.
On authorship
Cumulative volume delta, relative volume and pivot divergence are all public methodology and I have said so plainly. The implementation is not borrowed. Every line is written from scratch and no code in it is copied or adapted from another author's script, on this platform or anywhere else.
Settings
Proxy model selection; reset mode with a fixed-length option, signal line length and type; display mode for line, histogram or both, acceleration colouring and its lookback, and the zero fill; relative-volume weighting with its average length, type and spike threshold; divergence toggle with pivot left and right bars; and table position, size and colours.
インジケーター

Daily Sweep Pro: liquidity raid and fair value gap entriesA liquidity-sweep model that refuses to print an entry unless four things happen in the right order, and abandons the setup when any of them breaks.
What it does
It reads daily market structure to decide which direction it is allowed to trade, then waits inside the New York session for price to run a pool of resting orders in the wrong direction, then requires a fair value gap back in the direction of structure, and only then arms an entry on the pullback into that gap. The target is the opposite prior-day level. The stop is the extreme of the sweep.
If any step is missing, nothing prints. If a step happens out of order, nothing prints.
What is original here
The individual ideas are public and widely taught, and I will not pretend otherwise: daily structure, the accumulation and manipulation and distribution session model, sweeps of prior highs and lows, fair value gaps, opening gaps. You can find every one of them explained openly in a hundred places. Nothing here claims to have invented them.
What is not standard is the wiring.
The usual way these ideas get implemented is as separate indicators drawing separate levels, leaving the trader to spot the sequence by eye. This is one state machine with four states, and it enforces causal order. A gap that forms before the sweep is not a signal. A sweep with no gap after it is not a signal. A gap that appears once the session has ended, or once the daily bias has flipped, is not a signal, and the machine drops the setup rather than carrying it forward.
Three specific consequences of that design:
1. The manipulation filter is a directional test against the weekly open, not a location test. In a bearish read the sweep only counts if price is above the weekly open when it happens, and in a bullish read only if price is below it. The trap has to occur on the side of the week's opening price where trapped traders would be, which is the part of the session model that usually gets drawn as a line and then ignored.
2. Every setup is priced before it is allowed to arm. Stop at the sweep extreme, target at the opposite prior-day level, and the reward-to-risk computed from those two. Below your floor, the setup is discarded silently rather than printed with a warning. That means the absence of a mark is information: it can mean there was no sequence, or that the sequence had nowhere to go.
3. There is a hard daily circuit breaker on entries. After the limit, the machine stops arming for the rest of the day regardless of how good the next sequence looks. A model built around trapped liquidity will find a sequence on almost any day if you let it, and the constraint exists to stop that.
How it works
Daily bias comes from pivot structure on the daily timeframe, comparing the last two confirmed pivot highs and the last two confirmed pivot lows. Higher highs with higher lows permits longs only. Lower highs with lower lows permits shorts only. Anything else is neutral and the model stands down entirely.
Liquidity pools are the levels where stop orders cluster: the most recent confirmed intraday swing, the overnight range high and low, the premarket range high and low, and the opposing prior-day level. A raid is the first breach of one of those pools in the direction against the daily bias, detected as a level that was intact on the previous bar and is not intact on this one.
A fair value gap is a three-bar displacement, measured as the distance between the current bar and the bar two back, and filtered by a minimum size expressed in units of recent average range so a one-tick gap on a quiet instrument does not qualify.
Entry is the pullback into that gap, at either the near edge or the midpoint, and it must occur on a bar after the gap formed rather than the same bar.
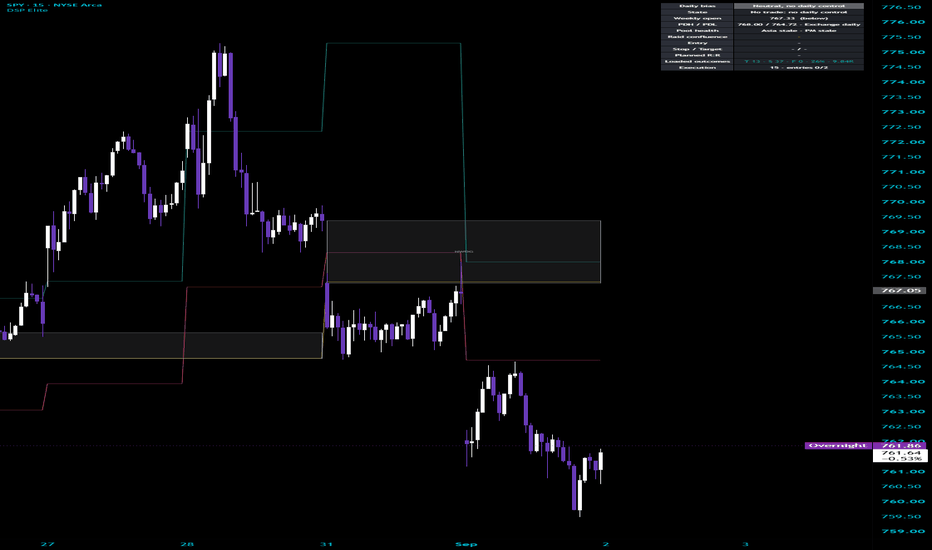
The session ranges, the weekly open, the prior-day levels and the new-week opening gap are all drawn so you can see the context the machine is reading, and a status table reports which state it is currently in and why it is not trading if it is not.
How to use it
Built for the 1H chart and any lower intraday timeframe. Sessions are New York time; change them if you trade another region's hours.
The status table is the point of the tool as much as the marks are. It tells you the current daily bias, which state the machine is in, and when it is standing down it tells you which precondition is missing. Reading that for a week teaches you the sequence faster than reading the marks does.
Start with the defaults. The two settings actually worth moving are the minimum reward-to-risk, which controls how much of the day gets filtered out, and the weekly-open filter, which is the difference between a strict textbook read and a looser one.
What it cannot do
The daily bias is deliberately slow and it will be late at turns. A daily pivot needs its confirmation days on both sides before it exists, and the read is taken from the last completed daily bar, so at the default the structure being used is up to about three days old. That is a structural filter, not a timing tool, and treating it as a timing tool is the main way to misuse this.
A bar that trades through both the stop and the target is recorded as a stop. The bar alone cannot prove which came first, so the pessimistic reading is used rather than the flattering one.
Session ranges persist until the next session of the same type begins, so on a symbol without overnight data, or after a holiday, an overnight or premarket level may be older than the current day.
Nothing here is a backtest and no performance is claimed. The marks show what the rules produced on the bars loaded on your chart. Entries are assumed to fill at the level, and no spread, slippage or commission is modelled, so any reward-to-risk shown on screen is the geometry of the setup and not a result.
It does not predict anything. It describes a sequence that has already completed and prices what that sequence implies.
On authorship
The methodology is public and I have said so plainly above. The implementation is not borrowed. Every line is written from scratch, no code in it is copied or adapted from another author's script on this platform or anywhere else, and it does not reproduce any specific published indicator. Where the vocabulary looks familiar, that is because the vocabulary is public.
Settings
Daily pivot strength and the weekly-open manipulation filter; the three session windows and whether to flatten at session end; which liquidity pools are eligible and the swing strength that defines one; the patience window from raid to gap, the minimum gap size and whether entry sits at the gap edge or its midpoint; the minimum reward-to-risk and the daily entry cap; and display toggles for each drawn element.
インジケーター
Minor H1 BIAS Analyse## 1. Purpose of the Script
The **Minor H1 BIAS Analyse** is designed to determine the short-term directional market BIAS.
It does not provide entries. Instead, it evaluates several trend, momentum, and structure conditions and classifies the market as:
Long
Short
Neutral
The script should therefore be used as a directional filter together with a separate entry strategy.
---
## 2. Structure of the Minor BIAS
The Minor BIAS is based on five components:
EMA Trend
Price vs EMA
Current Candle Direction
Previous H1 High / Low Break
Market Structure Break
Each bullish condition adds one point to the Bull Score.
Each bearish condition adds one point to the Bear Score.
The maximum possible score is:
5 Long
5 Short
---
## 3. EMA Trend
The script uses two exponential moving averages:
Fast EMA: 20
Slow EMA: 50
If the Fast EMA is above the Slow EMA:
+1 Long
If the Fast EMA is below the Slow EMA:
+1 Short
This represents the basic trend direction.
---
## 4. ATR Neutral Buffer
The script uses an optional ATR buffer around the EMAs.
Default settings:
ATR Length: 14
ATR Multiplier: 0.20
The buffer creates a neutral zone around the EMAs.
Price must move clearly above or below both EMAs before the condition becomes bullish or bearish.
This helps filter small movements and market noise.
---
## 5. Price vs EMA
For a bullish condition, price must close above both EMAs plus the ATR Buffer.
Result:
+1 Long
For a bearish condition, price must close below both EMAs minus the ATR Buffer.
Result:
+1 Short
If price remains inside the buffer area:
No Score
The dashboard displays:
Inside Buffer
---
## 6. Current Candle Direction
The script also evaluates the current candle.
Bullish Candle:
Close above Open
+1 Long
Bearish Candle:
Close below Open
+1 Short
Doji:
No Score
This adds a simple momentum component to the BIAS.
---
## 7. Previous H1 High / Low Break
The script checks whether price closes above or below the previous candle.
Close above Previous High:
+1 Long
Close below Previous Low:
+1 Short
No Break:
No Score
This filter can be enabled or disabled in the settings.
The script uses the candle close, not only the wick.
---
## 8. Market Structure
The script also analyzes the previous market structure.
Default Lookback:
5 candles
It calculates:
Structure High
Structure Low
If price closes above the Structure High:
Bullish Structure Break
+1 Long
If price closes below the Structure Low:
Bearish Structure Break
+1 Short
If neither level is broken:
Range
No Score
---
## 9. Score System
The final Minor BIAS is calculated from the Bull Score and Bear Score.
Possible Long points:
EMA Trend
Price vs EMA
Bullish Candle
Previous High Break
Bullish Structure Break
Possible Short points:
EMA Trend
Price vs EMA
Bearish Candle
Previous Low Break
Bearish Structure Break
A minimum of three points is required.
---
## 10. Minor LONG
The Minor BIAS becomes Long when:
Bull Score is at least 3
and
Bull Score is greater than Bear Score.
Example:
Bull Score: 4
Bear Score: 1
Result:
MINOR LONG
---
## 11. Minor SHORT
The Minor BIAS becomes Short when:
Bear Score is at least 3
and
Bear Score is greater than Bull Score.
Example:
Bull Score: 1
Bear Score: 4
Result:
MINOR SHORT
---
## 12. Neutral
If neither side reaches the required conditions, the BIAS remains Neutral.
Example:
Bull Score: 2
Bear Score: 2
Result:
NEUTRAL
Neutral therefore represents an unclear or mixed market situation.
---
## 13. Dashboard
The dashboard shows the current state of every component.
It contains:
BIAS
EMA Trend
Price vs EMA
H1 Candle
Previous H1 Break
Structure
ATR Buffer
It also displays the current:
Bull Score / Bear Score
Example:
4 / 1
This makes it possible to understand why the current BIAS is Long, Short, or Neutral.
---
## 14. Chart Visualization
The script can display:
Fast EMA
Slow EMA
Previous H1 High / Low
Structure High / Low
BIAS Background
BIAS Label
Dashboard
Each visualization can be enabled or disabled individually.
The calculations continue to work even when the corresponding chart elements are hidden.
---
## 15. Alerts
The script includes alerts for:
Minor H1 LONG
Minor H1 SHORT
Minor H1 NEUTRAL
These can be used to receive a TradingView notification when the directional BIAS changes.
---
## 16. Meaning for Trading
The Minor BIAS should not be treated as an entry signal.
A simple trading rule would be:
**MINOR LONG:** Prefer Long setups.
**MINOR SHORT:** Prefer Short setups.
**NEUTRAL:** Wait for clearer conditions.
The actual entry should come from a separate trading setup.
---
## 17. BIAS Strength
The score can also be used to estimate the strength of the current direction.
3 Points:
Valid directional confirmation
4 Points:
Strong confirmation
5 Points:
Very strong alignment
For example:
5 / 0 Long
represents stronger bullish confirmation than:
3 / 2 Long
even though both are classified as MINOR LONG.
---
## 18. Important Timeframe Note
The current script uses the timeframe of the active chart.
That means the calculations are only truly based on H1 when the indicator is used on a **1-hour chart**.
If the script is placed on M5 or M1, the calculations also use M5 or M1 data.
For a true H1 BIAS that remains identical on every chart, the calculations would need to use fixed 60-minute data.
---
## 19. Conclusion
The **Minor H1 BIAS Analyse** is a score-based directional filter.
It combines:
Trend
Price Position
Momentum
Previous Candle Break
Market Structure
At least three confirmations are required for a directional BIAS.
The final result is:
MINOR LONG
MINOR SHORT
NEUTRAL
Its purpose is to identify the stronger short-term market direction before a separate entry setup is considered.
++ This was only used on NQ ++
インジケーター

TZ-REVETZ-REVE is a sub-panel indicator that seeks to provide a concise overview of what is going on in the market dynamics of the instrument in the period shown on the chart, i.e. short- and longer trends, analysis of ranges and volume events all in one visual. Because it has a steep learning curve, an analyis for the last/current candle of all these is also provided in four catchwords.
TZ stands for TrendZones, because depicts the TrendZones situation. TrendZones is a channel indicator which I published some time ago.
REVE stands for Range Extension Volume Expansion, for which I published several attempt's.
In this indicator I used code from their scripts. I tried to improve the visual presentation.
A new feature is the Center Zone with colored patches to indicates short up- and downtrends derived from how a three period moving average moves in relation to a nine period and twenty period MA. This results in five colors:
• White for a situation which I call “transition”, there the 3MA either moves down while above both 9MA and 20MA or moves up while below both 9MA and 20MA or some other non-color situations;
• Transparent Green indicates upward movement, which I called “rise(rising)”, here the 3MA moves up while above 9MA but below 20MA
• Lime green indicates strong upward movement, which I called “soar(soaring)”, here the 3MA moves up while above both the 9MA and the 20MA.
• Brown indicates a downward movement called “drop(dropping)”, when the 3MA moves down while below 20MA but above 9MA.
• Transparent Fuchsia indicates a strong downward movement called “plunge(plunging)”, when the 3MA moves down while below both 9MA and 20MA.
To show this, I created an indicator out of these three MA’s in which the zones in between these lines are colored with the same logic, the thick green line is 3MA, the purple thin line is 9MA, the gray thin line is 20MA: Three MA example:
I refer to the columns pointing upward and downward as ‘ticks’. They represent the range and direction of three last periods. The direction is NOT calculated as close above or below open (like in candlesticks) but as close above or below the highest of the two previous closes. The ticks get four possible colors:
• Yellow for small range up- and downticks
• Gray for ‘normal’ range up- and downticks
• Green for wide range upticks
• Purple for wide range downticks
The length of the Tick Columns is calculated through a comparison of the current True Range with the Average True Range of the last 50 periods, taken as 100 percent. The result is marked as ‘small’ when this current TR is less then 60 percent , ‘wide’ when more then 110 percent, ‘normal’ otherwise.
The TrendZones Situation is depicted with the green and blue thick line above the Center Zone and the orange and red line below it. In fact these are stretches of the same line. This line is calculated as a percent of the distance of the hl2 from the COG where Upper Curve minus Lower Curve is taken as 100 percent. The Situation line is made invisible where the candle or bar crosses the COG.
The colors are:
• Red when the bar is in the red strong downtrend zone
• Orange if the bar is in the orange downtrend zone
• Invisible when bar crosses COG (“sideways”)
• Green for the bar in the green uptrend zone
• Blue when in the strong uptrend zone.
Where the direction of the Tick coincides with the trend, the Tick column is ‘crowned’ with a dot of the same color as the Situation line.
To show this, I have put a TrendZones (updated version) in the example chart:
Trendzones Situation example:
When volume in a certain period is higher than normal, I call this a ‘volume event’. A volume event indicates that the price action is supported with many buyers and sellers. To calculate whether a volume event happened and how big it is, we need to know the ‘normal’ volume. In the case of volume, ‘average’ cannot be used, because outliers in volume are so huge that they make the average too high to find smaller volume events in the following timeframes. To avoid the outlier influence, I use the ‘median’ of fifty periods as ‘normal’, using that as 100 percent. This leads to five cohorts for the current volume:
• 0-120 percent of normal: Unremarkable volume – no marker
• 120-150 percent of normal: Much volume – gray triangle
• 150-180 percent of normal: High volume – orange triangle
• 180-210 percent of normal: Huge volume – red triangle
• 210 and higher percent of normal: Extreme volume – maroon triangle
The Volume Event Triangles are placed in the middle of the Center Zone, pointing in the same direction as the ticks.
In previous versions I tried to calculate the direction of volume markers in a way that not only leads to ‘up’ or ‘down’ but also ‘falter’. Periods with falter are often part of a reversal pattern. For these situations I created a Falter Marker, a black dot on the Center Zone border under the tick column. Although these dots are interesting, they have no practical use in my analysis. They are there because they are a nice feature if the instrument comes without volume, like some indexes.
Because this indicator is crammed with information, it has a steep learning curve. To help understand what is reported by all its features, I created four catch phrases to the right. These concern the last (current) candle or bar.
- On top a catchword for the Center Zone color patches, which represent short up- and downtrend. These can be ‘rising’, ‘soaring’, ‘dropping’, ‘plunging’ or ‘transition’.
- Then a catchword for the TrendZones Situation.
These can be: ‘S uptrend’, ‘uptrend’, ‘downtrend’, ‘S downtrend’ or ‘sideways’
- Then a catchword for Tick column.
These can be
• ‘Fwide up’ which means wide range pointing up with falter marker
• ‘wide up’ wide range pointing up
• Fwide down’ wide range pointing down with falter marker
• ‘wide down’ wide range pointing down
• Fsmall up’ small range pointing up with falter marker
• ‘small up’ small range pointing up
• ‘Fsmall down’ small range pointing down with falter marker
• ‘small down’ small range pointing down
• ‘Fup’ normal range pointing up with falter marker
• ‘up’ normal range pointing up
• ‘Fdown’ normal range pointing down with falter marker
• ‘down’ normal range pointing down
- Then a catchword for volume.
These can be ‘no volume’, ‘normal vol’, ‘much vol’, ‘high vol’, ‘huge vol’ or ‘extreme vol’.
Have fun,
Eykpunter
インジケーター

Kurdistani Style CycleKurdistani Style Cycle
A composite on-chain indicator that identifies Bitcoin market cycle phases
using a weighted Z-score of MVRV, NUPL, and a SOPR proxy. It maps market
conditions into five distinct phases and overlays normalized BTC price.
═══════════════════════════════════════════════════
KEY ON‑CHAIN METRICS USED
═══════════════════════════════════════════════════
1. MVRV (Market Value to Realized Value)
MVRV = Market Cap / Realized Cap
- High values: large unrealized profit, possible market tops.
- Low values: large unrealized loss, possible market bottoms.
2. NUPL (Net Unrealized Profit/Loss)
NUPL = 1 – (1 / MVRV) (derived from MVRV to ensure consistency)
- Strongly positive (e.g., >0.75): euphoria / overheated.
- Negative: fear, potential bottoming zone.
3. SOPR Proxy
Since real SOPR requires UTXO data unavailable on TradingView, a proxy
is built from price position relative to short-term and long-term
highest/lowest bands:
Short-term position (STH):
STH_pos = (Price – STH_low) / (STH_high – STH_low) (range 0–1)
Long-term position (LTH):
LTH_pos = (Price – LTH_low) / (LTH_high – LTH_low) (range 0–1)
Raw SOPR Proxy = STH_pos – LTH_pos
Smoothed SOPR Proxy = 5-period SMA of Raw SOPR Proxy
═══════════════════════════════════════════════════
HOW THE COMPOSITE INDEX IS BUILT
═══════════════════════════════════════════════════
Step 1 – Z-Score Normalization
For each component (MVRV, NUPL, SOPR Proxy) a Z-score is calculated
with a common lookback period L (default 365):
Z = (Value – SMA(Value, L)) / StdDev(Value, L)
Step 2 – Weighted Combination (PnL Index)
User-defined weights w1, w2, w3 (default 0.4, 0.4, 0.2).
If the fraction of non‑null components meets or exceeds the
'Min Valid Weight Fraction' threshold, the PnL Index is:
PnL Index = (w1 * MVRV_Z + w2 * NUPL_Z + w3 * SOPR_Z) / (w1 + w2 + w3)
Step 3 – Bull‑Bear Indicator
The final oscillator removes the long-term trend using a simple moving
average (default length 365):
Bull‑Bear = PnL Index – SMA(PnL Index, 365)
Positive values indicate a bullish regime relative to the long-term average,
negative values indicate a bearish regime.
═══════════════════════════════════════════════════
PHASES – THRESHOLDS & INTERPRETATION
═══════════════════════════════════════════════════
The Bull‑Bear value is classified into five phases using two thresholds:
Overheated Threshold (default +1.5)
Early Bull Upper Limit (default +0.5)
Extreme Bear Threshold (default -1.5)
Phase Condition Interpretation
─────────────────────────────────────────────────────────────────────────
Extreme Bear Bull‑Bear ≤ -1.5 Possible deep bottom, extreme fear
Bear -1.5 < Bull‑Bear ≤ 0 Downtrend / consolidation
Early Bull 0 < Bull‑Bear ≤ 0.5 First signs of recovery
Bull 0.5 < Bull‑Bear ≤ 1.5 Healthy uptrend
Overheated Bull Bull‑Bear > 1.5 Euphoria, high risk of correction
Colors on the histogram:
Extreme Bear → solid blue
Bear → cyan / teal
Early Bull → green
Bull → orange
Overheated Bull → red
No data → transparent gray
Small markers:
A green dot above Early Bull columns
A red dot below Overheated Bull columns
═══════════════════════════════════════════════════
WHAT YOU SEE ON THE CHART
═══════════════════════════════════════════════════
• Gray line: the Bull‑Bear oscillator value.
• Colored columns: histogram displaying the current phase.
• Green horizontal line at zero (neutral boundary).
• Red dotted line at the Overheated Threshold (+1.5).
• Blue dotted line at the Extreme Bear Threshold (-1.5).
• Light gray/white line (optional): Z‑score of log(BTC price)
over the same lookback period, showing how far current price
deviates from its long‑term log mean.
• Information table (top‑right): shows live readings for Phase,
Bull‑Bear value, MVRV, NUPL, SOPR Proxy, BTC price, normalized
price Z‑score, and the composite PnL Index (Z).
• A star (*) next to a metric name and an orange warning dot
indicates stale (non‑updating) data, typically on intraday
timeframes where on‑chain data is not refreshed in real time.
A label on the last bar displays the current phase name.
═══════════════════════════════════════════════════
INPUT SETTINGS (fully adjustable)
═══════════════════════════════════════════════════
- MA Length for Cycle (default 365): moving average length
used to extract the cycle from the PnL Index. Shorter
values increase responsiveness but add noise.
- Z‑Score Lookback (default 365): lookback for mean and
standard deviation when normalizing MVRV, NUPL, and SOPR.
- Overheated Bull Threshold (Z) (default 1.5): Z‑score level
that triggers the Overheated phase.
- Early Bull Upper Limit (Z) (default 0.5): upper bound of
the Early Bull phase; crossing above enters the Bull phase.
- Extreme Bear Threshold (Z) (default -1.5): lower bound for
the Extreme Bear phase.
- STH Lookback (default 155): period for short‑term high/low
in the SOPR proxy calculation.
- LTH Lookback (default 365): period for long‑term high/low
in the SOPR proxy calculation.
- MVRV Weight (default 0.4)
- NUPL Weight (default 0.4)
- SOPR Weight (default 0.2)
- Min Valid Weight Fraction (default 0.5): minimum fraction
of total weight that must have valid (non‑null) data for the
composite index to be calculated. Prevents unreliable signals
when one or more components are missing.
- Show Normalized BTC Price Overlay (true/false)
- Price Symbol (default BINANCE:BTCUSDT)
- Price Normalization Lookback (default 365)
═══════════════════════════════════════════════════
DATA SOURCES & STALENESS
═══════════════════════════════════════════════════
• BTC_MARKETCAP (Market Cap) and BTC_MARKETCAPREAL (Realized
Cap) are fetched via request.security from TradingView’s
internal symbols.
• Price is fetched from the user‑selected symbol (default
BINANCE:BTCUSDT).
• On intraday timeframes (less than 1D), on‑chain data often
does not update on every bar. In those cases a star (*)
appears next to the metric and an orange dot is plotted.
Daily or higher timeframes are recommended for the cleanest
signals.
═══════════════════════════════════════════════════
PRACTICAL USAGE GUIDE
═══════════════════════════════════════════════════
- Accumulation / long‑term entries: Extreme Bear (blue columns)
often marks excellent long‑term buying zones.
- Confirmed trend change: Entering Early Bull (green columns)
after a bear phase provides a higher‑probability entry once
momentum turns positive.
- Holding during uptrend: Bull phase (orange) represents a
healthy market. Consider moving stop‑losses higher but
avoid premature exits.
- Taking profits / reducing exposure: Overheated Bull (red
columns) signals that the market is statistically stretched.
A phased exit or partial sell strategy is prudent.
- The normalized price overlay provides a second opinion: when
both the Bull‑Bear indicator and price Z‑score reach
simultaneous extremes, the signal is stronger.
═══════════════════════════════════════════════════
LIMITATIONS
═══════════════════════════════════════════════════
• The SOPR component is a proxy and not real SOPR data.
• On lower timeframes, stale data may cause slight lag.
• In long sideways markets the oscillator may whipsaw
between Bear and Early Bull. Always combine with other
technical or fundamental analysis.
• This indicator is not financial advice. Past performance
does not guarantee future results.
═══════════════════════════════════════════════════
HOW TO INSTALL
═══════════════════════════════════════════════════
Add the indicator to your chart from TradingView’s “Indicators”
panel. It will appear in a separate pane below the price chart.
Adjust the settings via the gear icon to fit your own cycle
analysis framework. インジケーター

Flow Momentum Composite█ OVERVIEW
Flow Momentum Composite is a modular momentum analysis indicator designed to assess the direction and strength of market movement by combining several complementary elements of price analysis, flow pressure, market structure and historical behaviour.
Most momentum indicators answer only one question. A classic oscillator shows whether momentum is bullish or bearish. A trend indicator defines the broader market direction but may react with a lag. Divergences can point to weakening momentum, while analysis of historical similarities can provide additional information about the probable direction of the next move. Each of these approaches is valuable, but each presents only a fragment of the market picture.
Flow Momentum Composite was designed as a modular system that brings these different perspectives into one coherent framework. The indicator analyses Momentum Core, Balance Line, Flow Pressure, Structure / Trend, KNN Bias and Tension Waves, then combines their readings inside the Composite Score.
The main idea of the indicator is not to rely on a single signal, but to check whether several independent components point in the same direction. The user can control the importance of each element through individual weights, so the final assessment can be adapted to their own analysis style.
The Composite Score is calculated and displayed exclusively relative to the direction of the current candle. Points from individual modules are awarded only when that component agrees with the candle’s colour (bullish candle + bullish components, or bearish candle + bearish components). A high reading therefore represents strong agreement of the components with the current candle’s direction, not an independent oscillator ranging from strong bearish to strong bullish.
The indicator also includes additional analytical layers such as contrarian signals, divergences between price and momentum, and the Signal Confluence Barometer. These elements provide extra context and help distinguish strong directional conditions, weakening momentum and potential turning points.
The result is a multi-dimensional momentum analysis tool that moves from short-term evaluation of price movement and flow pressure, through market structure and historical similarity of conditions, to a final assessment of component agreement.
█ CONCEPTS
Momentum Core
Momentum Core is the main module of the indicator and is responsible for measuring the current strength and direction of price movement.
Instead of using price change alone, the calculation compares the change of the selected price series with ATR, so that momentum is normalised to current market volatility. The result is rescaled to the 0–100 range, where the 50 level represents the central equilibrium.
Momentum Core primarily answers the question:
Is current price momentum bullish or bearish, and how strong is it?
Balance Line
Balance Line uses the same basic momentum measurement concept as Momentum Core, but has its own calculation period and typically slower smoothing.
Its purpose is not to duplicate Momentum Core, but to create a slower reference point against which current momentum can be compared. The relationship between the two lines forms the basis of the Tension Waves module.
Balance Line answers the question:
How does current momentum relate to the slower, underlying market momentum?
Flow Pressure
Flow Pressure analyses directional market pressure using available volume or candle structure when real volume is not available.
The result is summed over a defined period and then smoothed. The visual Flow Pressure wave additionally changes intensity at extreme values.
Flow Pressure answers the question:
Does current market pressure support buyers or sellers?
Structure / Trend
Structure / Trend defines the broader market direction and provides context for short-term momentum changes.
The module uses an EMA-based basis and an ATR-dependent band. A trend direction change occurs only when price breaks the corresponding side of the band.
Structure / Trend answers the question:
What is the current broader market direction?
KNN Bias
KNN Bias uses analysis of historical market condition similarity. It compares the current state (Momentum Core, Flow Pressure, Structure / Trend) with previously stored observations and, based on the subsequent price behaviour, creates a weighted directional vote.
KNN Bias answers the question:
What happened in the past when market conditions looked similar to the present ones?
Tension Waves
Tension Waves visually represent the difference between Momentum Core and Balance Line. The greater the distance, the deeper the histogram. Deepening of the wave in the same direction is particularly important and is used by both the Composite Score and the Signal Confluence Barometer.
Tension Waves answer the question:
Is the difference between current and baseline momentum increasing?
Composite Score
Composite Score is the central element of the entire indicator. It combines five independent components: Momentum Core, Flow Pressure, Structure / Trend, KNN Bias and Tension Waves.
Each component has its own weight. Points are awarded only when the direction of a given component agrees with the colour of the current candle and additional conditions are met (for example Core continuing further in its direction, or the Tension Wave deepening).
The result is presented as a percentage of the maximum possible points. BUY/SELL signals appear only after the defined threshold is exceeded.
Composite Score answers the question:
Do the individual analysis elements jointly confirm the direction of the current candle?
Signal Confluence Barometer
Shows how many of the five components currently confirm the dominant direction (without using weights).
Signal Confluence Barometer answers the question:
How many independent elements of the indicator currently confirm the same direction?
Contrarian Signals
Appear when Momentum Core returns from an extreme Oversold or Overbought level.
They serve to identify potential direction changes after an extreme has been reached.
Divergences
Compare price behaviour with Momentum Core. A bullish divergence forms when price makes a lower low while Core makes a higher low; a bearish divergence forms when price makes a higher high while Core makes a lower high.
They serve a warning and contextual function.
Overbought / Oversold Zones
Provide reference levels for Momentum Core. They feature dynamic transparency that depends on the distance of Core from the given level.
█ FEATURES
Momentum Core
• Source – price series used for Momentum Core and Balance Line calculations.
• Length – number of bars used to measure price change relative to ATR.
• Smoothing – smoothing period applied to Momentum Core.
• MA Method – averaging method (EMA / SMA / RMA) used across all modules.
• Scaling Sensitivity – the higher the value, the faster Core reaches the 0/100 extremes at the same volatility.
Balance Line
• Length – calculation period of the Balance Line.
• Smoothing – smoothing of the Balance Line (typically higher than Core to increase distance during trends).
Flow Pressure
• Length – number of bars summed when calculating Flow Pressure.
• Smoothing – smoothing of the Flow Pressure line.
• Force candle mode instead of volume – forces calculation from candle range even when the instrument has real volume data.
• Flow Wave Height Scale – controls the height of the Flow Pressure wave above the OB line or below the OS line.
• Flow Extreme Threshold – threshold above which the Flow Pressure wave switches to a darker shade (extreme pressure).
KNN Bias
• Number of Neighbors (K) – number of nearest historical observations considered in the KNN vote.
• Memory (bars) – maximum number of stored historical observations used by the classifier.
Structure / Trend
• Trend Base Length – period of the EMA and ATR used to define the structure band.
• Band Multiplier (ATR) – ATR multiplier defining the width of the structure band.
• Color bars by structure trend – colours price chart candles according to the direction of the Structure / Trend module.
Composite Score
• Show Score Signals – enables display of BUY/SELL signals derived from the Composite Score.
• Momentum Weight / Flow Weight / Structure Weight / KNN Weight / Tension Waves Weight – individual weights of the respective components.
• Signal Threshold (% of max score) – minimum percentage of the maximum possible score required to generate a signal.
• One signal per momentum wave – limits signals to one per Momentum Core wave (resets when Core crosses the 50 level).
Tension Waves
• Show Tension Waves – displays the histogram of tension between Momentum Core and Balance Line.
• Tension Wave Transparency – base transparency of the Tension Wave histogram (deepening waves render slightly more opaque).
OB/OS Zones
• Overbought / Oversold – levels considered extreme for Momentum Core.
• Dynamic OB/OS Lines – line transparency depends on the distance of Core from the level.
• OB/OS Transparency — Near Level / Far From Level – transparency settings based on distance.
• OB/OS Line Width – thickness of the Overbought and Oversold lines.
Contrarian Signals
• Show Contrarian Signals – enables signals when Momentum Core returns from an OS/OB extreme.
Divergences
• Show Divergences on Momentum Core – enables detection of divergences between price and Momentum Core.
• Pivot Lookback (left/right) – number of bars required on each side to confirm pivots.
Colors & Transparency
• Bullish Color / Bearish Color / Neutral Color – main colours used across all modules.
• Zero Line Color (50) – colour of the horizontal centre line.
• Text Color (labels) – colour of table header text and divergence label text.
• Flow Wave Transparency – transparency of the Flow Pressure wave fill.
• Transparency: Core→Center Gradient / Core↔Balance Gradient / Divergence Line Transparency – controls fill and line transparency.
Panel
• Show Table – enables the summary table display.
• Position – position of the table on the chart.
• Text Size – text size inside the table.
Alerts
• Score — Buy / Score — Sell
• KNN Direction Change
• Contrarian — Long / Contrarian — Short
• Divergence — Bullish / Divergence — Bearish
• Barometer — Direction Change
█ APPLICATIONS
Assessing the quality and strength of market moves
The primary use of the indicator is to evaluate whether the current price move is confirmed by several independent layers of momentum, flow pressure and structure analysis.
Filtering weak impulses
Composite Score and the Barometer help distinguish moves supported by agreement of most components from moves that have only local, short-lived support.
Detecting strengthening or weakening momentum
Tension Waves show whether the difference between short-term and baseline momentum is increasing. A deepening wave in the direction of the trend can confirm strength, while lack of deepening or a reversal may signal exhaustion.
Confirming trend direction
Simultaneous analysis of Structure / Trend, Momentum Core, Flow Pressure and KNN Bias makes it possible to assess whether the broader market direction is consistent with short-term momentum and historical similarity of conditions.
Identifying potential turning points
Contrarian signals (return from OS/OB) and divergences between price and Momentum Core provide warnings about possible weakening of directional pressure.
Building a custom momentum assessment model
Thanks to the ability to individually weight the five components, the user can create their own assessment model. One trader may place greater emphasis on Momentum Core and Flow Pressure, while another may consider Structure and KNN Bias more important.
█ NOTES
• The divergence module and contrarian signals serve a warning and contextual function. They do not enter the Composite Score directly.
• Composite Score signals are best used as a confirming element of market analysis together with structure, price action, support and resistance zones, and risk management.
• All component weights are fully configurable, allowing the user to adapt the assessment model to their own trading style while retaining the same multi-layered analysis logic. インジケーター

Universal Trend Continuation ProbabilityTradingView publication description
Universal Trend Continuation Probability
This open-source indicator estimates whether the chart's **current structural
direction state** is likely to remain active after a completed bar. It is a
trend-survival model, not a price-target or profit-probability model.
The dashboard provides two coherent forecasts:
- **Next 1 bar (P1):** probability that the active UP or DOWN state remains
active on the next completed bar.
- **Next 2 bars (P2):** probability that the same state remains active on both
next completed bars.
P2 is calculated with the probability chain rule:
`P2 = P1 × P(second bar survives | first bar survives)`
Therefore `0 ≤ P2 ≤ P1 ≤ 1` by construction. The dashboard's main score is
`+100 × P2` for UP, `−100 × P2` for DOWN, and `0` when the direction engine is
neutral.
How the model works
The direction engine combines normalized HMA20 slope, DMI balance, and
regression slope. A fixed regularized logistic ensemble then evaluates 33
completed-bar, direction-relative features covering direction strength,
momentum change, MACD histogram, RSI state, regression quality, price pressure,
ATR regime, range expansion, pullback clustering, and episode age.
The model does not use the symbol name, absolute price, clock, session,
timezone, or chart timeframe as an input. It uses no future bar, future label,
or `request.security` look-ahead. On an unfinished real-time bar, the displayed
values stay frozen at the previous completed bar and update only at bar close.
Interface
- English is the default language.
- Choose `Türkçe` under `Language / Dil` for the Turkish dashboard.
- Blue/orange/gray colors are chosen for color-blind accessibility.
- Only a centered dashboard is drawn on the main price chart. The indicator
creates no separate pane, plotted score line, horizontal levels, or chart
shading.
- The limitation warning is displayed in a readable row below the dashboard.
- The dashboard shows direction, P1, P2, the `CONTINUES / DOES NOT CONTINUE`
decision, and the signed main score.
- The fixed decision threshold is 50%.
- Optional alerts fire on completed-bar decision-state changes.
Reference historical cross-market evaluation
The frozen V5 selection and calibration process used chronological XU030
development blocks. A historical cross-market evaluation contained 112,590
completed directional events across these standard time-based OHLC series:
| Series | Timeframe | Data range (UTC dates) |
|---|---:|---:|
| FDXM | 1D | 2015-10-26 to 2026-08-10 |
| ES | 1D | 2013-11-27 to 2026-08-10 |
| RTY | 1D | 2017-07-10 to 2026-08-10 |
| FESX | 1D | 2014-03-25 to 2026-08-10 |
| NK225M | 1D | 2013-01-16 to 2026-08-10 |
| NQ | 15m | 2024-10-31 to 2026-07-31 |
| RTY | 15m | 2024-10-31 to 2026-08-10 |
| RTY | 3m | 2026-04-05 to 2026-08-10 |
| ES | 3m | 2026-04-05 to 2026-08-10 |
| Horizon | Correct / total | Accuracy | Error rate |
|---|---:|---:|---:|
| 1 bar | 106,458 / 112,590 | 94.55% | 5.45% |
| 2 bars | 99,752 / 112,590 | 88.60% | 11.40% |
“Correct” means that the model's 50% `CONTINUES / DOES NOT CONTINUE` decision
matched whether the existing direction engine remained active over the stated
horizon. It does **not** mean that price moved favorably or that a trade was
profitable.
In a separate NQ 15-minute diagnostic with 25,808 forecasts, most errors were
neutralization-timing errors rather than direct reversals. Of 1,396 one-bar
errors, 934 (66.9%) were `CONTINUES → NEUTRAL`, 456 (32.7%) were early
`DOES NOT CONTINUE` warnings followed by continuation, and only 6 (0.4%) were
direct reversals of the direction engine.
These figures are historical Python research results, not current-chart
performance. They do not guarantee future performance or exact results on
another symbol, timeframe, session, or data feed. Some foreign instruments had
been reviewed in earlier V1–V4 research; the results are therefore presented as
a historical cross-market evaluation relative to the frozen V5 selection
process, not as a permanently untouched blind universe.
Important limitations
- The foreign-market price-only AUC was approximately 0.49. A high survival
score is not evidence of positive return, favorable MFE, or a safe new entry.
- `DOES NOT CONTINUE` means the current state may neutralize or reverse; it does
not specifically predict the opposite direction.
- A low probability is better treated as structural end-risk information. It
has not been validated as an automatic exit rule.
- V6's analogue catalogue could rank neutralization risk, but its direct
probability override reduced correct forecasts in locked/blind tests and is
intentionally excluded from this Pine decision engine.
- Data differences in continuous futures adjustment, sessions, or bar
construction can change results.
- Use standard time-based OHLC candles. Heikin Ashi, Renko, Kagi, Point &
Figure, and Range chart results have not been validated.
Before public publication, the source should be compiled as a private
TradingView draft and checked against the included NQ reference using a
TradingView CSV export. This hosted-runtime parity step is separate from the
completed Python/formula validation.
Research indicator only. Not an execution strategy or investment advice.
Historical results do not guarantee future performance.
---
Universal Trend Continuation Probability
Bu açık kaynak indikatör, kapanmış bir bardan sonra grafikteki **mevcut yapısal
yön durumunun** aktif kalıp kalmayacağını tahmin eder. Fiyat hedefi veya kâr
olasılığı modeli değil, trend/yön devam modelidir.
Tablo birbiriyle tutarlı iki tahmin gösterir:
- **Sonraki 1 bar (P1):** aktif YUKARI veya AŞAĞI durumunun sonraki kapanmış
barda devam etme olasılığı.
- **Sonraki 2 bar (P2):** aynı durumun sonraki iki kapanmış barın ikisinde de
devam etme olasılığı.
P2, olasılık zinciriyle hesaplanır:
`P2 = P1 × P(ilk bar sürdüyse ikinci barın da sürmesi)`
Bu nedenle yapı gereği `0 ≤ P2 ≤ P1 ≤ 1` olur. Tablodaki ana skor YUKARI
durumda `+100 × P2`, AŞAĞI durumda `−100 × P2`, yön motoru nötrken `0`dır.
Modelin çalışma biçimi
Yön motoru normalize HMA20 eğimi, DMI dengesi ve regresyon eğimini birleştirir.
Sabitlenmiş düzenlileştirilmiş lojistik topluluk modeli daha sonra yalnız
kapanmış barlardan üretilen 33 yön-göreli özelliği değerlendirir. Bu özellikler
yön gücü, momentum değişimi, MACD histogramı, RSI durumu, regresyon kalitesi,
fiyat baskısı, ATR rejimi, range genişlemesi, geri çekilme kümelenmesi ve yön
yaşını kapsar.
Model; sembol adı, mutlak fiyat, saat, seans, saat dilimi veya grafik zaman
dilimini girdi olarak kullanmaz. Gelecek bar, gelecek hedef etiketi veya
`request.security` look-ahead kullanılmaz. Açık gerçek zamanlı barda görünen
değerler önceki kapanmış barda sabit kalır ve yalnız bar kapanınca güncellenir.
Arayüz
- Varsayılan dil İngilizcedir.
- Türkçe tablo için `Language / Dil` ayarından `Türkçe` seçilir.
- Mavi/turuncu/gri renkler renk körlüğüne uygun seçilmiştir.
- Ana fiyat grafiğinin ortasında yalnız bilgi tablosu çizilir. Gösterge ayrı alt
panel, skor çizgisi, yatay seviye veya grafik gölgelemesi oluşturmaz.
- Sınırlama uyarısı tablonun altında okunaklı bir satırda gösterilir.
- Tablo; yönü, P1 ve P2 olasılıklarını, `SÜRER / SÜRMEZ` tahminini ve ana
işaretli skoru gösterir.
- Karar eşiği %50 olarak sabittir.
- İsteğe bağlı alarmlar yalnız kapanmış barlarda karar durumu değiştiğinde
çalışır.
Referans tarihsel çapraz-piyasa değerlendirmesi
Sabitlenmiş V5 seçim ve kalibrasyon sürecinde kronolojik XU030 geliştirme
blokları kullanılmıştır. Tarihsel çapraz-piyasa değerlendirmesi, aşağıdaki
standart zaman bazlı OHLC serilerinde 112.590 kapanmış yönlü olay içerir:
| Seri | Zaman dilimi | Veri aralığı (UTC tarihleri) |
|---|---:|---:|
| FDXM | 1G | 2015-10-26 – 2026-08-10 |
| ES | 1G | 2013-11-27 – 2026-08-10 |
| RTY | 1G | 2017-07-10 – 2026-08-10 |
| FESX | 1G | 2014-03-25 – 2026-08-10 |
| NK225M | 1G | 2013-01-16 – 2026-08-10 |
| NQ | 15 dk | 2024-10-31 – 2026-07-31 |
| RTY | 15 dk | 2024-10-31 – 2026-08-10 |
| RTY | 3 dk | 2026-04-05 – 2026-08-10 |
| ES | 3 dk | 2026-04-05 – 2026-08-10 |
| Ufuk | Doğru / toplam | Doğruluk | Hata oranı |
|---|---:|---:|---:|
| 1 bar | 106.458 / 112.590 | %94,55 | %5,45 |
| 2 bar | 99.752 / 112.590 | %88,60 | %11,40 |
“Doğru”; modelin %50 eşiğindeki `SÜRER / SÜRMEZ` kararının mevcut yön motorunun
belirtilen ufukta aktif kalıp kalmamasıyla eşleşmesi demektir. Fiyatın olumlu
yönde hareket ettiği veya işlemin kârlı olduğu anlamına gelmez.
25.808 tahmin içeren ayrı NQ 15 dakika tanı testinde hataların çoğu doğrudan
ters dönüş değil, nötrleşme zamanlaması hatasıdır. 1.396 bir barlık hatanın
934'ü (%66,9) `SÜRER → NÖTR`, 456'sı (%32,7) erken `SÜRMEZ` uyarısından sonra
devam, yalnız 6'sı (%0,4) yön motorunun doğrudan ters yöne dönmesidir.
Bu rakamlar tarihsel Python araştırma sonuçlarıdır; mevcut grafiğin performansı
değildir. Gelecekteki performansı veya başka sembol, zaman dilimi, seans ya da
veri akışında aynı sonucu garanti etmez. Bazı yabancı araçlar V1–V4
araştırmasında daha önce incelenmiştir; bu nedenle rakamlar tamamen
dokunulmamış kör evren değil, sabit V5 seçim sürecine göre tarihsel
çapraz-piyasa değerlendirmesi olarak sunulmaktadır.
Önemli sınırlamalar
- Yabancı piyasalarda fiyat-only AUC yaklaşık 0,49'dur. Yüksek devam skoru;
pozitif getiri, olumlu MFE veya güvenli yeni giriş kanıtı değildir.
- `SÜRMEZ`, mevcut durumun nötrleşebileceği veya tersine dönebileceği anlamına
gelir; özellikle karşı yönü tahmin etmez.
- Düşük olasılık yapısal bitiş riski bilgisi olarak ele alınmalıdır. Otomatik
çıkış kuralı olarak doğrulanmamıştır.
- V6 analog kataloğu nötrleşme riskini sıralayabilmiştir; fakat doğrudan
olasılık düzeltmesi kilitli/kör testlerde doğru tahmin sayısını düşürdüğü için
Pine karar motoruna bilerek eklenmemiştir.
- Sürekli vade düzeltmesi, seans veya bar üretimindeki veri farkları sonucu
değiştirebilir.
- Standart zaman bazlı OHLC mumları kullanılmalıdır. Heikin Ashi, Renko, Kagi,
Point & Figure ve Range grafik sonuçları doğrulanmamıştır.
Public yayından önce kaynak private TradingView taslağında derlenmeli ve
TradingView CSV ihracıyla paketteki NQ referansına karşı kontrol edilmelidir.
Bu gerçek platform paritesi adımı, tamamlanmış Python/formül doğrulamasından
ayrıdır.
Yalnız araştırma indikatörüdür. İşlem stratejisi veya yatırım tavsiyesi
değildir. Geçmiş sonuçlar gelecekteki performansı garanti etmez.
インジケーター

S/R & S/D Zone ProS/R & S/D Zone Pro
SD Zone Pro is an advanced concept indicator that identifies Supply and Demand zones using pivot points, clustering, and volume weighting. It is designed to reduce chart clutter, dynamically track zones, and visualize the interaction of historical zones with current price action.
🎯 Use as Support and Resistance
Demand Zones → Support Levels: The green/red demand boxes formed on the chart represent potential Support areas where buyers are concentrated and price drops may halt or bounce upward. When price retraces to these zones, potential reversal signals or buying opportunities can be monitored.
Supply Zones → Resistance Levels: The supply boxes formed around peak areas represent potential Resistance areas where sellers gain control and upward price movement may be capped. When price approaches these levels, profit-taking or downward reaction signals can be watched.
Zone Breakouts and Role Reversals (Flip Zones): If a supply (resistance) zone is broken upward with strong volume, it can act as support when price retraces back to it in the future. Similarly, when a demand (support) zone is broken downward, it may serve as resistance going forward.
Tolerance and Volume Confirmation: Unlike single-line support/resistance levels, this indicator presents price levels as ranges/boxes and displays pivot volume, providing a more reliable wide-band support and resistance framework.
📏 Box Width (Zone Height / Thickness), Volume Impact, and Usage
Dynamic ATR Structure: The vertical width (height) of the boxes is automatically calculated using the ATR (Average True Range) metric in line with market volatility.
Meaning of Zone Thickness:
Wide/Thick Boxes: Formed during periods of high volatility or across wider pivot clusters. Indicates a broader buffer zone where price may fluctuate inside the area.
Narrow/Thin Boxes: Formed during low volatility or when price reacts to very precise levels. These areas highlight cleaner and sharper support/resistance zones.
Volume Impact on Zones:
Accumulation and Validity Confirmation: Independent of box width, the total volume (K, M, B) accumulated over a zone directly defines its strength. High volume inside a narrow box indicates a major institutional battle (accumulation/distribution) took place within that tight band, making it a very strong barrier.
Zone Merging and Volume Compounding: When adjacent boxes merge (either same-side or cross-side supply/demand overlaps), the height and coverage of the new combined zone expand while the accumulated volumes of all merged zones are summed up on the label. This confirms that the widened box has evolved into a high-volume Major Zone.
Usage in Trading and Risk Management:
Stop-Loss Placement: Ideal stop-loss levels should be placed slightly beyond the outer boundary of the box rather than right at the top/bottom edge, accounting for box width (thickness) to avoid false breakouts (fakeouts).
Entry and Confirmation Levels: Since the box width represents a price range, entries closer to the middle or opposite boundary of the box offer a more favorable Risk/Reward ratio. Reactions from high-volume zones increase trade probability.
📐 Box Extension Logic
1. Extension of Active (Unclosed) Boxes
The latest supply and demand boxes that are still forming and have not yet been absorbed by a merge are automatically extended from their right edge to the current bar as new bars develop.
The volume labels attached to these boxes also follow this alignment, updating their position to the right on every new bar.
2. Extension of Closed (Historical) Boxes
Whether historical zones extend to the current bar depends on the selected mode:
Continuous Extension Mode (Unrestricted):
When proximity filtering is turned off, the right edge of all historical supply and demand boxes continues to extend to the end of the chart on every new bar.
Price Proximity Extension Mode:
When enabled, box extension relies on three specific rules:
Direct Touch or Proximity: When price enters a box's price range or comes within the configured percentage proximity tolerance, the right edge of that box extends to the current bar. If price moves away, the box remains fixed at the last bar it touched.
Tracking Nearest Zones to Price: Even if price does not directly touch the boxes, the 2 nearest boxes strictly above and the 2 nearest boxes strictly below the current close price are continuously identified. As price moves, these nearest levels are re-evaluated, and these 4 boxes dynamically extend to the current bar regardless of touch criteria.
Exemption for Recent Zones: The newest closed boxes within the defined box limit are exempt from the touch condition and always remain extended to the current bar.
3. Price Range Filter and Visibility Logic
Boxes outside the specified minimum/maximum price limits continue running their extension logic in the background; however, their background and border opacities are set to 100% transparent to hide them from the chart. The price range filter does not stop boxes from extending; it only controls their visual display on screen.
📌 How to Use
Zone Formation: The indicator monitors swing lows (Pivot Low) and swing highs (Pivot High) on the chart. Once your specified grouping numbers are met, it automatically constructs Demand (Green/Red boxes) or Supply zones.
Volume Insights: The right side of each zone displays the total volume (formatted in K, M, B) of the pivot bars forming that cluster.
Live Tracking and Extension: From the moment zones form, their right edges extend toward the current bar.
Touch and Proximity Tracking: When price approaches or touches a historical zone again, that zone reactivates and extends toward the current bar.
Multi-Timeframe (MTF): You can project supply and demand zones from higher timeframes (e.g., 4-Hour, Daily) directly onto your lower timeframe charts.
⚙️ Settings and Definitions
1. Grouped Pivot Volume & SD Zones (Main Calculation & Clustering)
Show Demand / Supply Labels?: Toggles volume labels on or off in the Demand and Supply zones.
ATR Multiplier (Box Merge Tolerance): Defines the merge tolerance for closely formed boxes. The ATR value is multiplied by this factor; boxes separated by less than this distance are merged into a single zone.
Merge Supply & Demand Overlaps?: When enabled, overlapping Supply and Demand zones (within price tolerance) merge into a single zone.
Enable Merged Zone Color & Merged Zone Color: Highlights zones formed by a cross-merge between Supply and Demand with a distinct custom color (default: Orange).
Display Mode: Select whether to display Demand Only, Supply Only, or Both zone types on the chart.
Show Last (Non-Merged) Box?: The master switch controlling the visibility of the most recent active box that hasn't been merged yet.
Extend Boxes Only on Price Proximity?:
OFF: All historical boxes extend continuously to the latest bar.
ON: Boxes extend to the latest bar only when price approaches/touches them or when they are among the nearest zones to price.
Proximity Tolerance (%): Specifies how close (in percentage) price must get to a box level to trigger an extension.
2. Price Range Filter
Enable Price Range Filter?: Hides boxes that fall outside the specified lower and upper price limits.
Min Price / Max Price: The minimum and maximum price boundaries within which boxes remain visible.
3. Multi-Timeframe (MTF)
Enable MTF?: Enables pulling data from a different timeframe.
MTF Timeframe: The timeframe used for pivot detection (e.g., 1D, 4H, 1H). If left blank, the chart's current timeframe is used.
⚠️ IMPORTANT NOTES & DISCLAIMERS
💡 Regarding Repainting:
Pivot-based indicators inherently require confirmation bars defined by Pivot Length. Once a pivot is confirmed, the box is plotted back in history. This is not a bug or error; it is the fundamental technical mechanism of pivot calculations.
💡 MTF Usage:
When using Multi-Timeframe (MTF) mode, it is highly recommended to select a higher timeframe than your chart's current timeframe (e.g., 1-Hour or 4-Hour MTF while viewing a 15-minute chart). Selecting lower timeframes may cause data misalignment or missing bar mappings.
💡 Performance and Engine Limits:
Due to Pine Script engine limits, a maximum of 500 boxes and labels can be rendered simultaneously on a chart. The indicator features automatic capacity management to prevent memory overflow errors. インジケーター

Statistical Reversal ZonesStatistical Reversal Zones
Statistical Reversal Zones is an intraday support and resistance indicator designed to identify potential price reaction and reversal areas based on statistical distance from the Daily Open.
Instead of plotting traditional single support and resistance lines, the indicator creates configurable reversal zones above and below the day's opening price. Resistance zones are displayed as R1–R4, while support zones are displayed as S1–S4.
When price enters a zone and subsequently rejects it, the indicator tracks each confirmed reaction. Repeated reactions from the same zone are numbered 1, 2, 3, 4..., helping traders visually identify zones that price has respected multiple times during the session.
The built-in dashboard provides the current price range and status of every zone:
WAITING: Price has not interacted with the zone
IN/TOUCHED: Price has reached the zone
REJECTED: Price entered the zone and subsequently closed back through its inner boundary
BROKEN: Price closed beyond the outer boundary of the zone
Once a zone is broken, its BROKEN status remains active for the rest of that trading day.
The indicator also provides customizable zone widths, optional center lines, Daily Open display, zone-entry alerts, rejection indications, and individual controls for displaying each R/S zone.
Important: These zones represent statistical price-reaction areas and should not be interpreted as guaranteed reversal points or standalone Buy/Sell signals. They are best used alongside price action, trend, volume, VWAP, or other confirmation methods.
Recommended use: Intraday trading and identifying potential support, resistance, rejection, breakout, and reversal areas. インジケーター

Multi-Oscillator Divergence ConfluenceMost divergence tools track a single oscillator, which leaves you with a long list of candidates and no way to tell the strong ones from the marginal ones. This indicator checks three oscillators at the same price pivot — RSI, MACD histogram and MFI — and reports a setup only when a chosen number of them agree. The label shows the agreement count, so a 3/3 divergence is immediately distinguishable from a 1/3.
How it works
Confirmed price pivots are stored together with a snapshot of every oscillator at that pivot. When a new pivot forms, it is compared against the immediately preceding pivot — the standard definition of divergence — provided the two lie within your configured distance range. For a bullish setup, price must make a lower low while the enabled oscillators make higher lows; bearish is mirrored. The number of oscillators that agree is counted in that single pass, and the setup is drawn only if the count reaches your minimum.
The three oscillators are deliberately chosen to measure different things — momentum, trend momentum and money flow. A cumulative volume line was avoided on purpose: it tends to agree with the price trend by construction, which would make the agreement count meaningless.
Settings
Oscillators required to agree (default: all three). Lowering it surfaces more setups; on BTCUSD daily over roughly two years, the same data produced about 20 setups at 3/3 and about 45 at 1/3.
Each oscillator can be disabled individually, with its own length input. The label denominator and the threshold follow the number you leave enabled.
Pivot lookback (left/right) and the minimum/maximum distance between the two pivots.
Optional "Any pivot in range" mode scans every stored pivot instead of only the previous one. This finds more setups but produces considerably more signals.
Lines and labels can be turned off independently.
Alerts
Two alert conditions for any qualifying bullish or bearish divergence, plus two more for the case where every enabled oscillator agrees.
Notes and limitations
Pivot confirmation requires the configured number of right-side bars, so setups are always reported with that delay. This is inherent to pivot-based detection and is the honest trade-off for not repainting: once a setup is drawn, it stays where it was drawn.
Only regular divergences are detected — hidden divergences are not included. MFI uses volume data, which is tick-based in forex; disable it there if you prefer to work with price-only oscillators.
Agreement across oscillators describes a stronger disagreement between price and momentum. It does not make a reversal more likely to succeed, and many divergences resolve as continuation. This is an analysis tool, not a trading system: it does not size positions, manage risk or predict outcomes. インジケーター

OR Box + 15m EMA Reversal Signals (5m)A confluence-based reversal indicator built for 5-minute charts on SPY, QQQ, IWM, and SMH. It combines the opening range, a 15-minute EMA, and a two-step confirmation process to flag potential trend-continuation entries off intraday pullbacks.
How it works
Opening Range Box — Captures the high/low of the first 15 minutes of the regular session (9:30–9:45 AM ET by default, fully configurable) using true 1-minute data for accuracy regardless of your chart's timeframe. Each day gets its own box, drawn and color-coded, that stays fixed at its own historical price levels going forward.
15-Minute EMA — Plotted directly on the 5-minute chart via a multi-timeframe pull, colored green when the setup is bullish-armed, red when bearish-armed, and gray when neutral.
Armed state — The setup arms when the 15m EMA closes outside the opening range box (above for bullish, below for bearish). It disarms if price closes back inside the box or if the EMA itself drifts back into/through the box.
Touch + confirmation — While armed, a pullback candle touching the EMA on the 5-minute chart arms a pending signal. That signal only becomes a real, plotted arrow once the 15-minute candle containing that touch shows the same reversal pattern — a wick crossing the EMA with the close settling back on the trend side. This two-step check is designed to filter out weaker, single-timeframe pullbacks.
Trade validation — Every confirmed signal is tracked forward automatically: a green checkmark if price hits your configured target (dollar or percentage) before closing back through the EMA, or a red circle-slash if it doesn't (including a timeout after a configurable number of bars). A built-in success-rate table shows Bull/Bear/Overall win rates, filterable to a rolling lookback window or all-time.
Fully customizable: opening range window and session times, box/midline appearance, EMA length and colors, signal arrow colors, target type and size, label spacing, and table position/size.
⚠️ This indicator is for educational and informational purposes only. It does not constitute financial advice. Past signal performance shown in the success-rate table does not guarantee future results. Always do your own research and manage risk appropriately. インジケーター

Fibonacci Confluence Suite [AxeAlgo]Fibonacci Confluence Suite
OVERVIEW
Fibonacci Confluence Suite is an automatic Fibonacci retracement and extension toolkit. Instead of requiring you to manually draw a Fibonacci tool on every swing, it detects swing highs and lows on its own using fractal price structure, draws the retracement/extension grid between them, and keeps that grid updated in real time as new swings form.
On top of the standard retracement levels, this script adds several layers of context that are normally separate, manually-maintained tools: a Golden Pocket highlight, a confluence check against prior swings, a per-level "touch count" strength score, an optional volatility-adaptive lookback, Fibonacci time zones, and a compact on-chart status table. The goal is to let you see not just where a Fibonacci level sits, but how significant that level appears to be.
This is a technical analysis / charting tool. It does not predict price, does not place trades, and is not a signal generator promising entries or exits.
HOW IT WORKS
1. Swing detection: the script scans for fractal highs and lows (a bar whose high/low is more extreme than the two bars on either side of it) within a user-defined lookback Period.
2. Anchors: the most extreme fractal high and fractal low found inside that window become the 0% and 100% anchors.
3. Direction: the detected swing is treated as an up-move or down-move depending on which side price broke out of most recently; you can flip this with the Reverse input if you prefer levels measured from the opposite end.
4. Grid: every retracement/extension ratio you enable is calculated from those two anchors and drawn as a labeled horizontal line, with the current price and touch count shown directly on the label.
5. Confluence: each time the swing flips, the prior swing's high/low is stored. Newly drawn levels are checked against the Fibonacci levels of those earlier swings, and any level that lines up within your tolerance is marked and drawn wider so overlapping structure stands out.
KEY FEATURES
- Automatic fractal-based swing detection, no manual drawing required.
- Base lines (0.000 / 1.000) plus up to nine independently configurable extension ratios, each with its own show/hide toggle and value.
- Adjustable line style, width, color, and extension direction (none / left / right / both) for base and extension lines separately.
- Golden Pocket highlight (0.618-0.65) with adjustable fill color, useful as a classic confluence/reaction zone.
- Multi-swing confluence detection: compares the current Fibonacci grid against up to five prior swings and flags levels that overlap, with an adjustable tolerance (as a percentage of the swing range) and a visual marker on confluent levels.
- Level strength via touch counts: each level tracks how many times price has traded through it since that specific swing grid was drawn, shown directly in the line label.
- Optional volatility-adaptive sensitivity: scales the effective lookback window using current ATR relative to its own baseline, so the swing detection can loosen or tighten automatically across changing volatility regimes instead of relying on one fixed Period. Disabled by default; when disabled the script behaves exactly like a fixed-Period fractal Fibonacci tool.
- Fibonacci time zones: optional vertical lines placed at Fibonacci bar-count offsets from the start of the current swing, for traders who also watch time-based confluence.
- Status table showing current trend direction, swing high/low, nearest level to price, the strongest (most-touched) level, and the lookback period actually in use.
- Built-in alerts: a per-level alert whenever price trades through any visible base or extension line, a dedicated Golden Pocket alert, and grouped "any base line" / "any extension line" alert conditions for the classic Alert dialog.
HOW TO USE IT
- Period / Delay: Period sets how many bars back the script searches for the swing high/low. Delay sets how many bars of confirmation a fractal needs before it can be used; it must be smaller than Period. Larger Delay values produce more reliable fractals at the cost of a slower reaction to new swings.
- Line Extension: controls whether the drawn levels extend left, right, both directions, or not at all.
- Reverse: flips which anchor (swing high or swing low) is treated as the 0% origin, letting you view the same swing from the opposite bias.
- Base Lines / Extension Lines groups: toggle, color, style, and set the ratio of each level independently.
- Golden Pocket: toggle and recolor the 0.618-0.65 zone highlight.
- Level Strength: toggle whether touch counts are appended to each label.
- Multi-Swing Confluence: toggle, choose how many prior swings to compare against, set the matching tolerance, and set how much extra line width and which marker confluent levels get.
- Adaptive Sensitivity: enable to let ATR-based volatility scale the effective lookback automatically; adjust the ATR length and baseline length used for that comparison.
- Time Zones: enable vertical Fibonacci time markers, choose how many zones to draw, and toggle multi-color cycling versus a single accent color.
- Status Table: toggle visibility and choose its screen position.
Set alerts using "Any alert() function call" on this indicator to receive all per-level, Golden Pocket, and roll-up alerts, or use the named alert conditions in the Alert dialog if you only want a subset.
IMPORTANT NOTES AND LIMITATIONS
- Repainting: this script can repaint on the most recent, unconfirmed swing. Because a fractal only confirms after the Delay setting's worth of bars closes, the swing high/low anchors — and therefore every level drawn from them — can still shift on the last few bars until the current fractal fully confirms. Once a swing has confirmed and the trend has flipped, that swing's levels are fixed and will not repaint further. Increasing Delay reduces how often this happens, at the cost of reacting more slowly to fresh swings. Please account for this when reading the most recent levels on the chart, and avoid relying on unconfirmed levels for time-sensitive decisions.
- This tool identifies swing structure and Fibonacci confluence; it does not forecast direction, does not manage risk, and does not constitute a complete trading system on its own. It is intended to be used as one input alongside your own analysis, risk management, and market context.
- Touch counts and the confluence marker describe historical interaction with a level on this chart; they are not a probability estimate and do not guarantee how price will react at that level going forward.
- As with any lookback-based tool, results and appearance will vary by symbol, timeframe, and the Period/Delay settings chosen. Please test on your own instruments and timeframes before relying on it.
DISCLAIMER
This script is provided for educational and informational purposes only and does not constitute financial advice. Trading involves substantial risk of loss and is not suitable for every investor. Past behavior of any indicator, including this one, is not indicative of future results. Always do your own research and consider your own risk tolerance before making any trading decisions. インジケーター

Alpha S/R Channel StrategyAlpha S/R Channel Strategy (ASRC)
Mean-reversion strategy trading pullbacks to a dynamic Higher Timeframe EMA channel. Confirms exhaustion via Engulfing & Pin Bar patterns, with Pin+Engulf combo overriding trend filters to capture institutional liquidity grabs. Features optional RSI, BB width, and inverted Squeeze Momentum filters. Includes adaptive position sizing, partial TP, breakeven stops, session trade limits, no-trade windows, day/weekend close, and Friday trading control.
📌 Strategy Overview
Alpha S/R Channel Strategy is a dual‑timeframe mean‑reversion strategy that identifies high‑probability reversal setups by combining a dynamic channel derived from a Higher Timeframe EMA with high‑conviction candlestick patterns (Engulfing and Pin Bar).
The strategy waits for price to retrace to a dynamic value area (the channel) and confirms exhaustion through candlestick patterns before entering—capturing pullbacks within the prevailing trend while avoiding counter‑trend trades.
🧠 Unique Edge – Why This Mashup Works
Most trend‑following strategies chase breakouts and get caught in false moves. Most engulfing strategies ignore the bigger picture and enter too early. This strategy solves both problems by combining these components in a specific sequence:
1. Dynamic EMA Channel (The Value Area)
Instead of using static support/resistance, the strategy constructs a dynamic channel around a Higher Timeframe EMA. The channel width adapts to volatility using three modes:
- Percentage – width as % of current price.(price * (channelWidthPct / 100) )
- ATR Multiplier – width based on ATR from the Higher Timeframe.
- Fixed – static price distance.
Why this matters: The HTF EMA represents the "fair value" or equilibrium price. When price pulls back to this zone, it's statistically more likely to resume the trend rather than reverse.
-------------------------------------------------------------------
2. Channel Break + Candlestick Confirmation (The Trigger)
The strategy enters only when price returns to the channel AND shows exhaustion:
- Bullish Engulfing – Current green candle engulfs previous red/small green candle
- Bearish Engulfing – Current red candle engulfs previous green/small red candle
- Pin Bar + Engulfing Combo – Pin bar sweeps recent high/low and is followed by an engulfing pattern
Why this matters: The channel provides the context (where price should reverse). The candlestick patterns provide the confirmation (that reversal is actually happening). Using both drastically reduces false signals.
-------------------------------------------------------------------
3. Optional Multi‑Layer Filters (The Quality Control)
The strategy includes configurable filters that can be enabled/disabled:
1- EMA Lower TF – Ensures micro‑trend alignment (longs above EMA, shorts below)
However, there is a critical override:
🔄 Pin Bar + Engulfing Combo OVERRIDES the EMA Confirmation
When a Pin Bar sweeps the N‑bar high/low (proving a breakout attempt failed) and is immediately followed by an Engulfing pattern on the next candle, this combo represents a "double confirmation" of exhaustion that bypasses the EMA filter.
Why this is a breakthrough:
Strong institutional reversals (liquidity grabs) often happen against the short‑term EMA trend. A pure trend‑following strategy with a strict EMA filter would miss these reversals because price is moving against the EMA.
2- Higher Timeframe EMA – Ensures long‑term trend alignment
This acts as a "trend filter on top of the trend filter" – preventing entries that go against the even larger market structure. Users can select a separate timeframe (e.g., 1H) with its own EMA length for additional confirmation.
3- RSI – Prevents buying above 70 and selling below 30
4- Bollinger Bands – Blocks entries during low volatility (sideways markets)
5- Squeeze Momentum – This strategy uses an inverted Squeeze Momentum logic:
"val < 0 → Longs allowed, Shorts blocked"
"val > 0 → Shorts allowed, Longs blocked"
"val == 0 → Both allowed"
This inversion is intentional. The strategy is mean‑reversion based—it waits for momentum to become overextended and then trades against that momentum
These filters are optional because different assets and market conditions require different levels of confirmation. The user has full control.
-------------------------------------------------------------------
4. Comprehensive Risk Management
The strategy includes:
- Position Sizing – Fixed percentage of equity per trade (separate for first and second entry)
- Pyramiding – Allows up to 2 positions in the same direction (second trade uses lower risk)
- Multiple SL Options – Low-High, Swing high/low, Channel, Fixed distance
- Trade Counter Reset – Resets at session starts for scalping timeframes, daily for swing
- No‑Trade Windows – Blocks entries during end‑of‑day volatility (active only for TF ≤ 15m)
- Day/Week End Closing – Closes positions before gaps (configurable by timeframe)
- Partial Take Profit – Closes a configurable percentage (default: 50%) at a specified R:R ratio (default: 1:2), allowing the remainder to run to the full target (default: 1:3)
- Breakeven Stop – Optionally moves the stop loss to breakeven when the first TP level is reached, protecting the remaining position from turning into a loss
Why this matters: The risk controls ensure survivability across different market conditions. Also Breakeven protection reduces the risk of winning trades turning into losers.
-------------------------------------------------------------------
📊 How It Works
1. Dynamic Channel Calculation
The strategy constructs a channel around an Exponential Moving Average (EMA) from a selected Higher Timeframe:
- EMA – Calculated on the Higher Timeframe
- Channel Width – Adaptive based on volatility (Percentage, ATR, or Fixed)
- Upper Band = EMA + (Width / 2)
- Lower Band = EMA - (Width / 2)
Channel Width Modes:
- Percentage – Width = Price × (User‑defined %)
- ATR Multiplier – Width = ATR(14) × Multiplier
- Fixed – Width = Static distance
-------------------------------------------------------------------
2. Entry Signal Detection
Trades are executed on the Lower Timeframe (default: 5m) when all conditions are met:
Pattern Requirements (One of the following):
- Bullish Engulfing: Current green candle completely engulfs previous bearish or small green candle
- Bearish Engulfing: Current red candle completely engulfs previous bullish or small red candle
- Pin Bar + Engulfing Combo: Pin bar sweeps recent high/low AND is followed by engulfing pattern (Overrides LTF EMA)
# Engulfing Filters:
Body Only – Only bodies must engulf (not full range)
Min/Max Range – Configurable via Percentage, ATR, or Fixed
Gap Allowance – Controls how much gap is allowed in the wrong direction
Previous Range % – Limits the size of the prior candle when it's in the same color
# Pin Bar Detection:
- Wick/Body Ratio (default: 3.0) – Wick must be 3× larger than body
- Max Body/Range (default: 0.20) – Body must be ≤20% of total range
- Min Wick/Range (default: 0.70) – Wick must be ≥70% of total range
- Sweep Lookback (default: 10 bars) – Pin bar must sweep a recent high/low
Min Pin Bar Range % – Pin bar must meet a minimum size threshold
# Channel Proximity:
Price must be within the channel boundaries (open inside)
-------------------------------------------------------------------
3. Confirmation Filters (All Optional)
- Lower Timeframe EMA : Longs require price > EMA; Shorts require price < EMA (overridden by Pin+Engulf combo)
- Higher Timeframe EMA : Ensures long‑term trend alignment (longs above HTF EMA, shorts below)
- RSI : Prevents longs above 70; Prevents shorts below 30
- Bollinger Bands : Blocks entries when BB width < threshold (low volatility)
- Squeeze Momentum : Ensures momentum matches trade direction (inverted logic)
-------------------------------------------------------------------
4. Risk & Position Management
# Position Sizing:
- First Trade – Fixed % of equity (default: 2%)
- Second Trade – Separate % of equity (default: 1%)
- Position size = (Account Risk) / (Entry – SL Distance)
# Friday Trading:
- Allow Friday Trading (default: Disabled) – When disabled, no new trades will be opened on Fridays. Existing positions are not affected. This helps avoid weekend gap risk as markets close for the week.
# Stop‑Loss Options:
1- Low-High : Entry bar low/high ± buffer
2- Swing high/low : N-bar low/high ± buffer
3- Channel : Channel band ± buffer
4- Fixed distance : Fixed price distance from entry
# Take Profit:
- Main R:R ratio (default: 1:3)
- Separate R:R for second trade (default: 1:3)
# Trade Counter Reset:
TF ≤ 15m – Resets at Asia (20:00 NY), London (03:30 NY), New York (09:30 NY)
TF > 15m – Resets once per day at session start
# No‑Trade Window:
- Active only for TF ≤ 15m (16:45–19:05 NY time)
- Protects against end‑of‑day volatility spikes
# Close All Positions:
- TF ≤ 15m – Can close at day end and/or week end (configurable)
- 15m < TF ≤ 240m – Week end only
- TF > 240m – Feature disabled
# Entry Spacing:
- Minimum Bars Between Entries (default: 4) – Prevents multiple entries on the same bar or too close together, reducing the impact of whipsaw on tightly clustered signals
⚙️ Default Settings – Optimized for XAUUSD (Gold)
All default values have been specifically calibrated for Gold's typical volatility and intraday structure.
Setting \ Default \ Why This Works for Gold
-----------------------------------------------------------------------------------
Higher Timeframe \ 15m \ Gold's intraday rhythm operates on 15‑minute cycles. This timeframe captures the balance between institutional order flow and retail noise.
-----------------------------------------------------------------------------------
EMA Length \ 36 \ approximately one full trading session. This captures the dominant intraday trend without excessive lag.
-----------------------------------------------------------------------------------
Channel Width Mode \ Percentage \ Gold's price levels change over time. Percentage mode ensures the channel scales with price, maintaining consistent relative width regardless of Gold's price level.
-----------------------------------------------------------------------------------
Channel Width \ 0.35% \ Gold's daily range averages $30–$100. At current prices, 0.35% = approximately $113–$16. This width captures ~70% of Gold's daily volatility, creating a meaningful "value zone" that filters noise while remaining relevant.
-----------------------------------------------------------------------------------
Lower Timeframe \ 5m \ Fast enough to capture entry signals within the same session, slow enough to filter out micro‑noise. 5m is Gold's "sweet spot" for intraday entries.
-----------------------------------------------------------------------------------
Engulfing Mode \ Percentage \ Adapts to Gold's volatility. As Gold's price moves, the required engulfing range scales proportionally—ensuring consistent pattern quality.
-----------------------------------------------------------------------------------
Engulfing Min Range \ 0.098% \ At Gold's current price3000-5000, this ≈ $3.0–$5.0. Anything smaller is just market noise, not a meaningful reversal signal.
-----------------------------------------------------------------------------------
Engulfing Max Range \ 0.550% \ At Gold's current price, this ≈ $20–$25. Larger candles are often blow‑off spikes driven by news —they tend to reverse violently, making them poor entry points.
-----------------------------------------------------------------------------------
Previous Range % \ 0.60 \ Allows the prior candle to be up to 60% of the engulfing candle's range. This is Gold's "consolidation before reversal" pattern—a small same‑color candle before a large reversal candle.
-----------------------------------------------------------------------------------
Gap Allowance \ 250 ticks \ Gold's typical spread and gap behavior. (250 ticks = $0.250 However, tick values vary between brokers), which accommodates normal gaps without allowing extreme invalid gaps.
-----------------------------------------------------------------------------------
Pin Bar Sweep \ 10 bars \ On a 5m chart, 10 bars = 50 minutes. Gold's liquidity grabs often occur within a 30–60 minute window. 10 bars captures these recent liquidity zones without looking too far back.
-----------------------------------------------------------------------------------
Pin Bar Range % \ 0.70 \ Requires the pin bar(high-low) to be at least 70% of the minimum engulfing range. This ensures the pin bar has enough size to be meaningful—rejecting tiny pin bars that lack conviction.
-----------------------------------------------------------------------------------
Risk per Trade (1st) \ 2% \ Gold experiences 3–5 trade losing streaks regularly. 2% risk ensures that a typical losing streak results in only 6–10% drawdown—recoverable with a few winning trades.
-----------------------------------------------------------------------------------
Risk per Trade (2nd) \ 1% \ When pyramiding, total exposure increases. 1% on the second trade limits worst‑case loss to -3% total (2% + 1%), protecting the account during false reversals.
-----------------------------------------------------------------------------------
Risk:Reward \ 1:3 \ Gold routinely moves 1.5–2× its ATR in a single directional push. A 1:3 target (e.g., $15 on a $5 stop) is well within Gold's typical daily range—achievable without being overly ambitious.
-----------------------------------------------------------------------------------
Stop‑Loss Reference \ Channel \ Aligns the stop with the value area. If price breaks beyond the channel, the mean‑reversion thesis is invalidated. This is the most logical stop placement for this strategy.
-----------------------------------------------------------------------------------
Stop‑Loss Buffer \ 500 ticks \ 500 ticks = ($0.50 ) on Gold. However, tick values vary between brokers so The table on chart will display and show the calculated dollar value. This provides a safety buffer against spread, slippage, and normal wicks—preventing premature stops while keeping the stop within the value area.
-----------------------------------------------------------------------------------
Partial TP & Breakeven \ Disabled (50%, 1:2) \ Optional features that allow locking in partial profits and protecting positions once they move in your favor. Recommended to enable after forward testing.
-----------------------------------------------------------------------------------
No‑Trade Window \ Enabled \ 16:45–19:05 NY time captures the end‑of‑day volatility spike. Gold often experiences erratic moves during this period as institutional traders close positions.
-----------------------------------------------------------------------------------
Day End Close \ Enabled \ Gold gaps frequently at the daily open (5:00 PM NY). Closing before day end avoids these gaps, which can easily stop out tight positions.
-----------------------------------------------------------------------------------
Week End Close \ Enabled \ Gold is highly sensitive to weekend news (geopolitics, central banks). Gaps of $20–$50+ are common at Sunday open. Closing before Friday close is essential.
-----------------------------------------------------------------------------------
EMA Lower TF \ Enabled \ Ensures entries align with the 5m micro‑trend. However, the Pin+Engulf combo overrides this filter to capture institutional reversals against the trend.
-----------------------------------------------------------------------------------
Higher TF EMA \ Enabled (1H, 55) \ Provides an additional layer of trend confirmation at the macro level. The 1H 55‑EMA acts as a reliable gauge of the broader intraday trend, preventing entries against strong momentum.
-----------------------------------------------------------------------------------
RSI \ Enabled length(14) \ Prevents buying when Gold is overbought (RSI > 70) and selling when oversold (RSI < 30). Gold's sharp spikes often create extreme RSI readings—this filter avoids chasing exhausted moves.
-----------------------------------------------------------------------------------
Bollinger Bands \ Enabled \ locks entries during low volatility (BB width < 0.002). Gold sometimes enters tight consolidation ranges (BB width < 0.002) where engulfing patterns fail. This filter avoids trading in these conditions.
-----------------------------------------------------------------------------------
Squeeze Momentum \ Enabled \ This is inverted from standard SQZMOM. Gold's momentum often overshoots before reversing. By fading the extreme (longs when val < 0, shorts when val > 0), the strategy captures the reversal rather than chasing the continuation.
-----------------------------------------------------------------------------------
# Important Notes on Backtest Realism
- Commission – Most ECN/raw-spread brokers charge $3.00–$3.50 per side (round-turn commission of $6.00- $7.00) for 1 standard lot (100 oz) of XAUUSD. Standard accounts usually build the fee into a wider spread instead of charging a separate cash. This strategy deducts $3.50 per entry and $3.50 per exit ($0.035 × 100 oz)round-turn commission of $7.00. Adjust this to match your broker's exact fees.
- 4 ticks Slippage – For XAUUSD on OANDA, 1 tick = $0.001** per ounce (3 decimal places). 4 ticks = **$0.004 per ounce. Adjust this value if your broker quotes XAUUSD with different decimal precision (e.g., 2 decimal = $0.01 per tick).
Always adjust the commission value to your broker's exact fee structure before relying on the results.
"A backtest without realistic commission and slippage is a fantasy. A backtest with realistic commission and slippage is a truthful reflection of what you can expect when trading live."
-------------------------------------------------------------------
📊 Chart Display
Channel – Upper/Lower bands with a semi‑transparent fill (red zone), representing the value area
EMA Lower TF – Green EMA on the lower timeframe for confirmation
HTF EMA Filter – Red EMA line showing the additional trend filter (plotted on all timeframes ≤ its TF)
Info Table – Shows Market Status, EMA confirmations, Channel Width, Engulfing ranges, SL settings,
Filters, No‑Trade Window status, Session Close status
Signal Arrows – Green arrow pointing up (below bar) for Long entries, Red arrow pointing down (above bar) for Short entries
Historical Trades – Configurable number of past trades to display on the chart (default: 111, max: 125). Adjust this to optimize chart performance while keeping sufficient trade history for visual analysis.
Reset Signal – Arrow marker (grey) indicating when the trade counter resets at session starts (Asia, London, New York for TF ≤ 15m, or daily for larger TFs)
Background Colors – red for No‑Trade Window, Gray/White for Session Close
UI Note
# When you adjust any setting in the Inputs tab (Channel Width, Engulfing Min/Max, Previous Range, SL Buffer, etc.), the values displayed in the info table update automatically in real‑time.
This allows you to:
- See the impact of your changes immediately
- Verify the actual dollar values of your settings at current price levels
- Fine‑tune parameters without switching between tabs
Example: If you change the Channel Width from 0.35% to 0.50%, the info table will instantly show the new width in dollars (e.g., $8.50 → $12.00).
# Inputs are hidden from the status line to keep the chart clean. All settings (zones, EMAs, risk, patterns) remain fully adjustable in Settings → Inputs tab.
-------------------------------------------------------------------
📌 In Summary:
This is not a random collection of indicators.
- The HTF EMA Channel provides the structural context – a dynamic value area that adapts to volatility.
- The Engulfing/Pin Bar patterns provide the high‑conviction trigger – exhaustion confirmation.
- The EMA Override provides the institutional edge – capturing liquidity grabs that standard EMA‑based strategies miss.
- The Optional Filters provide the quality control – reducing false signals.
- The Risk Management provides the survivability – realistic position sizing and stops.
Each component exists specifically to compensate for a flaw in the others. This interdependency is what makes the strategy original, robust,
Author: Awab_Hassan
ストラテジー

Global Liquidity Indicators VS Bitcoin | TR🎯 Overview
Global Liquidity Indicators VS Bitcoin | TR is a macro‑economic divergence and consensus oscillator that compares Bitcoin's momentum against a composite Global Liquidity index. Instead of relying on a single metric, it aggregates up to five technical analysis tools (ROC, CCI, RSI, MFI, CMO) into a weighted voting system. The indicator applies user‑defined lags to both series, allowing traders to test leading/lagging relationships between liquidity conditions and Bitcoin price action. The final output is a normalised consensus score (‑100 to +100), displayed via dynamic background colouring, raw TA line overlays, and a prominent trend table for immediate directional bias.
⚙️ Core Calculations
Data Sourcing
The indicator requests closing prices from two custom tickers:
Bitcoin (BTC): INDEX:BTCUSD
Global Liquidity (LIQ): A composite basket defined as
TVC:CN10Y/TVC:DXY/FRED:BAMLH0A0HYM2*(ECONOMICS:USCBBS+FRED:JPNASSETS/FX:USDJPY+ECONOMICS:CNCBBS/FX_IDC:USDCNY+FRED:ECBASSETSW/FX_IDC:USDEUR)
This combines yield curves, FX rates, central bank balance sheets, and credit spreads into a single synthetic price series.
Technical Analysis Engine
For both BTC and LIQ, the indicator computes up to five separate momentum/oscillator values over user‑defined lengths:
ROC (Rate of Change) – default 90 for BTC, 63 for LIQ
CCI (Commodity Channel Index)
RSI (Relative Strength Index)
MFI (Money Flow Index)
CMO (Chande Momentum Oscillator)
Each TA variant is calculated independently, giving a multi‑faceted view of each asset’s internal momentum.
Lag Application
Every computed TA value is shifted by a user‑defined lag:
BTC_Lag (default 0) – shifts Bitcoin’s data forward/backward.
LIQ_Lag (default 101) – shifts Liquidity’s data.
This is the core differentiator: by applying a lag to Liquidity, the indicator can test whether past liquidity changes predict current Bitcoin moves (positive lag) or vice‑versa.
Binary Scoring & Consensus
For each enabled TA tool (enableROC, enableCCI, etc.), the indicator compares the lagged BTC value against the lagged LIQ value:
BTC > LIQ → score = +1 (bullish for BTC)
BTC < LIQ → score = -1 (bearish for BTC)
The total score is summed across all enabled indicators, then divided by the number of active tools (active) to produce an average:
text
percentual_btc = (sum_of_scores / active) * 100
The result ranges from ‑100 (all indicators favour Liquidity) to +100 (all indicators favour Bitcoin).
Primary TA Line (for visual plotting)
The user can select one TA type (TA input) to plot as the raw line overlay for both assets. This line is also shifted by its respective lag, allowing visual comparison of the chosen metric directly on the chart.
📈 Signal System
Trend Bias (Consensus)
Bullish Regime (Bull_BTC): percentual_btc > 0 → more than 50% of enabled indicators favour Bitcoin over Liquidity.
Bearish Regime (Bear_BTC): percentual_btc < 0 → more than 50% of enabled indicators favour Liquidity over Bitcoin.
Neutral: exactly 0 (rare, but possible when active is even and scores cancel out).
Crossing Zero
While not explicitly plotted as a crossover line, a shift from positive to negative (or vice‑versa) signals a change in the macro consensus – i.e., Liquidity is gaining/losing relative strength against Bitcoin.
Background Zone
The entire chart background is tinted:
Green (bullish) when consensus favours Bitcoin.
Red (bearish) when consensus favours Liquidity.
Transparency is fixed at 95%, keeping price action fully readable.
🎨 Visual Features
Primary TA Overlays
Two plotted lines (BTC in orange, LIQ in blue) display the user‑selected technical indicator (ROC, CCI, RSI, MFI, or CMO). Both respect their respective lag offsets, letting you visually assess divergences and crossovers.
9 Colour Themes
Choose from Classic, Modern, Heat, Robust, Accented, Monochrome, Moderate, Aqua, or Cosmic. These define the specific shades used for the bullish (UpC) and bearish (DnC) background fills and the trend table text.
Trend Table
A persistent, large‑font table positioned at the middle‑right of the chart displays:
⬆️ BULLISH (green)
⬇️ BEARISH (red)
➖ NEUTRAL (grey)
This gives an instantaneous, screen‑wide readout of the current macro bias.
Active Indicator Toggles
Each of the five TA tools can be individually enabled/disabled. Disabling a tool removes its vote from the consensus, allowing you to back‑test which combination of indicators produces the most reliable signals.
📖 Interpretation Guide
Positive values (> 0) indicate that Bitcoin’s momentum (as measured by the selected TA tools) is stronger than Global Liquidity’s momentum. This implies that risk‑on appetite is prevailing, and Bitcoin is likely to outperform – a bullish signal for BTC.
Negative values (< 0) indicate that Global Liquidity is gaining momentum faster than Bitcoin. This often suggests tightening financial conditions or risk‑off sentiment, which tends to weigh on speculative assets – a bearish signal for BTC.
Magnitude matters: a score of +80 or ‑80 means nearly all indicators agree, signalling a strong consensus and potentially a sustained trend. Values near zero suggest indecision or mixed signals – caution is advised.
The Lag Effect:
If LIQ_Lag is set high (e.g., 101 bars), the indicator effectively asks: “Did liquidity conditions 101 bars ago predict where Bitcoin is today?”
A consistently positive consensus under this setup suggests liquidity leads Bitcoin, making the indicator a leading macro predictor.
Conversely, if BTC_Lag is positive, you are testing whether Bitcoin leads liquidity – a less common but insightful alternative.
Background colour provides a quick visual summary; green zones are favourable for long positions, red zones for shorts or hedges.
🚨 Alert Summary
Two straightforward alert conditions are built in for automation:
LONG – triggered when percentual_btc > 0 (consensus turns bullish).
SHORT – triggered when percentual_btc < 0 (consensus turns bearish).
Both alerts are available in the TradingView alerts panel. They are ideal for macro‑based entry signals, portfolio allocation shifts, or as a filter to confirm directional bias before taking a trade on BTC or related crypto assets. インジケーター

STRAT Trap & VWAP Engine [WillyAlgoTrader]📊 STRAT Trap & VWAP Engine is an overlay toolkit that reads every candle through the lens of The STRAT methodology, detects failed-breakout "trap" candles, and turns them into fully managed trade plans — entry, structural stop, three R-multiple targets, break-even automation and webhook alerts — filtered by a volatility regime engine and accompanied by a pivot-anchored VWAP trail.
The core insight: the most information-dense candle on any chart is the one that breaks a prior extreme and then closes against its own break. The market went hunting for liquidity, found it, and failed to follow through. This indicator classifies every bar the STRAT way, catches exactly those divergence candles, and manages the resulting trade for you — while a regime filter keeps you out of chop and an anchored VWAP shows where the volume-weighted crowd is positioned inside the current trend leg.
Works on all markets (crypto, forex, stocks, indices, futures) and all timeframes.
📚 THE STRAT IN 60 SECONDS (for beginners)
The STRAT is a price-action methodology popularized by veteran floor trader Rob Smith. Its power is its simplicity: every candle on every chart is one of only three types, defined purely by its relationship to the previous candle's range:
— 1 (Inside bar) : the candle's entire range fits inside the previous candle (high <= prior high AND low >= prior low). The market is in equilibrium — nobody won.
— 2 (Directional bar) : the candle breaks ONE side of the previous candle. 2U breaks the prior high only; 2D breaks the prior low only. One side won.
— 3 (Outside bar) : the candle breaks BOTH sides (high > prior high AND low < prior low). Maximum disagreement — both sides were swept.
Sequences of these numbers form repeatable patterns. A 2D-2U is a reversal (sellers pushed down, buyers answered). A 2-1-2 is a pause-and-go. A 3-1-2 is compression after chaos resolving into direction. Because the classification is purely mechanical, there is zero subjectivity — two traders looking at the same chart will always count the same sequence.
The second pillar of The STRAT is Full Timeframe Continuity (FTC) : checking whether the higher timeframes (hourly, daily, weekly, monthly) are all trading in the same direction as your entry. When the 15-minute, hourly and daily candles are all green, a long is swimming with the current, not against it.
This indicator automates all of it — and then adds the twist that gives it its name.
🧩 WHY THESE COMPONENTS WORK TOGETHER
A STRAT pattern tells you a structure formed — but not whether the breakout that follows is genuine. A trap detector spots failed breakouts — but without structural context it fires in the middle of chop. A regime filter knows trend from range — but generates no entries by itself. A VWAP shows positioning — but a session VWAP resets at midnight regardless of what the trend is doing. None of these alone produces a complete, managed trade.
Bar classification → pattern matrix → trigger FSM → trap detection → regime + volume + FTC filters → trade engine (SL/TP1-3/BE) → anchored VWAP context
The classifier turns raw candles into STRAT numbers. The pattern matrix scans the sequence for tradeable combinations and arms a setup with exact trigger and stop levels. The trigger FSM waits for a confirmed break — or the Trap engine fires instead when a candle breaks an extreme and closes against it. Every prospective entry then passes through three independent gates (PVTE regime, volume confirmation, FTC alignment) before the trade engine takes over: structural stop, three R-multiple targets, automatic break-even, and a webhook alert at every stage. The anchored VWAP restarts at each confirmed structural pivot inside the regime, showing the volume-weighted average of the current leg — the reference institutional participants care about.
Remove any link and the chain breaks: patterns without triggers are just decoration; traps without a regime filter fade every wiggle; a trade engine without structural stops places arbitrary lines; a VWAP without pivot anchoring measures the wrong leg.
🔍 WHAT MAKES IT ORIGINAL
1️⃣ Mechanical STRAT classifier with a data-driven pattern matrix.
Every bar is classified exhaustively:
— Inside (1): high <= high and low >= low
— Outside (3): high > high and low < low
— 2U: high > high and low >= low
— 2D: low < low and high <= high
Patterns are not hardcoded if-chains — they live in a priority-ordered matrix scanned longest-first, so a 2-2-2 continuation (Extended mode) outranks the 2-2 it contains, and overlapping patterns resolve deterministically. Core set: 2-2 Rev/Cont, 3-2, 3-2-2, 2-1-2 Rev/Cont, 3-1-2, 1-2-2 RevStrat. Extended (opt-in): 2-2-2, 2-2-2-2 "Randy Jackson", 1-bar 3 RevStrat (outside bar closing beyond the prior bar's range).
2️⃣ Three-stage trigger FSM: SETUP → PENDING → TRIGGERED.
When a pattern completes on a confirmed close, the engine arms: trigger = the final pattern bar's high (bull) or low (bear), stop = the opposite side. A wick break of the trigger level on a later confirmed bar fires TRIGGERED. An adverse CLOSE beyond the stop side invalidates. No break within Setup Expiry bars (default 3) expires the setup. On an outside bar that pierces both sides, the adverse close wins — the conservative read, because the intrabar touch order is unknowable.
3️⃣ Trap Bar entry engine — the headline feature (default mode).
A trap bar is a candle whose body color contradicts its STRAT direction:
— Red 2U : broke the prior high, closed below its open → buyers were trapped above the break → SHORT
— Green 2D : swept the prior low, closed above its open → sellers were trapped below → LONG
Entry = trap bar close; stop = beyond the sweep extreme (the trap bar's own high/low) + 0.25×ATR buffer, with a 0.5×ATR minimum distance always enforced. Dojis (close == open) never qualify. Three Entry Modes: Trap Bar (default), STRAT Trigger (classic breakout entries), Both — where a trap candle on a trigger bar overrides the trigger's direction, because the failed breakout IS the trade.
4️⃣ Structural stop anchoring, four modes.
For trigger entries the SL Anchor input chooses: Trigger Level (default — just beyond the broken high/low; price trading back through the broken level means the breakout failed), Setup Bar (opposite side of the setup bar — wider, fully structural), Wick-Anchored (beyond the entry bar's own wick), or ATR (close ± SL Multiplier × ATR). All structural modes use:
stop_long = min(anchor − 0.25×ATR, close − 0.5×ATR)
which simultaneously applies the buffer and guarantees the minimum distance. A Max Risk cap (default 3×ATR, 0 = off) skips entries whose structural risk is too wide — outside-bar setups are the usual offenders.
5️⃣ Full trade management with honest intrabar accounting.
TP1/TP2/TP3 are R-multiples of the actual entry→stop distance (Risk Presets: Conservative 1R/2R/4R with 2.5×ATR stop, Balanced 1R/2R/3R, Aggressive, Scalping, or Custom). After TP1 is touched the stop moves to entry ( break-even ) — and a BE moved on a bar cannot stop that same bar out (the SL check uses the bar-start stop). When SL and a first TP1/TP3 touch land on the same bar, the TP registers and blocks the SL — an optimistic intrabar model, disclosed openly : the true touch order inside one bar is unknowable without tick data. A trade closes only at TP3, SL, or a BE stop-out. Win = TP1 was touched.
6️⃣ PVTE Regime Filter — two-threshold hysteresis, ON by default.
A 3-state regime engine (BULL / BEAR / NEUTRAL) built on a selectable basis kernel (EMA default, DEMA, HMA, KAMA; length 21) and ATR bands (length 100):
outer band = basis ± ATR × 3.0
inner band = basis ± ATR × (3.0 − 1)
Regime is entered on a confirmed close through an outer band and exits to NEUTRAL only on a close through the OPPOSITE inner band — the two-threshold gap kills flip-flopping in chop. Longs pass only in BULL, shorts only in BEAR; NEUTRAL blocks both by default (Allow mode available). Every entry — trap or trigger — must pass this gate, which converts the naturally counter-trend trap fade into a trend-continuation tool: only sweeps AGAINST the regime get faded, in the regime's direction.
7️⃣ Pivot-anchored VWAP trail.
Inside an active regime, the VWAP anchors at each confirmed structural pivot (Pivot Length 13 bars each side) in the regime direction, backfills from the pivot bar in one pass, then accumulates incrementally:
aVWAP = Σ(price × volume) / Σ(volume), from the anchor bar
It re-anchors on every new in-regime pivot and hard-resets on regime change — so the dotted trail always represents the current leg's volume-weighted average, not a stale session artifact. Pivot confirmation is honest lag: the swing is only KNOWN Pivot Length bars after it forms; the trail is drawn from the confirmed pivot forward. Delayed confirmation, not repainting.
8️⃣ FTC strip and FTC Alignment filter.
A top-center strip shows every timeframe above your chart (15m → Quarter): green/red for the current higher-TF candle direction, with ·I / ·O flags when that candle is inside/outside its predecessor. The optional Min FTC Aligned filter (default 0 = off) requires N visible higher timeframes to agree with your entry direction. Honesty note, stated in the tooltip as well: continuity is a live-state concept, so the strip and this filter read the FORMING higher-TF candles — the only reload-unstable element in the indicator; everything else is confirmed-close based.
9️⃣ Volume confirmation gate.
Optional filter requiring entry-bar volume > SMA20 × threshold (default 1.2), automatically bypassed on instruments without volume data. Applies to both entry sources.
🔟 Bot-grade alert architecture.
Every event emits a structured JSON webhook (or human-readable text): setup_bull/bear, trigger_bull/bear, trap_long/short, be, tp1_hit, tp2_hit, tp3_close, sl_hit. Entry payloads carry pattern, price, entry, sl, tp1-3, the PVTE regime (−1/0/1) and a compact FTC string like "1H+4H+D-W+". Closure payloads carry the result (win/loss) and a be_stop flag — built from pre-reset snapshots so same-bar event collisions can never produce NaN fields. Alerts follow a fixed intrabar chronology (management → closures → entries → setups) and five category toggles let a bot mute any stream it doesn't act on. Nine static alertcondition entries cover the TV alert dialog.
⚙️ HOW IT WORKS — CALCULATION FLOW
Step 1 — Classify: On every bar the STRAT type (1 / 2U / 2D / 3) is computed and, on confirmed close, appended to the sequence.
Step 2 — Match: The pattern matrix scans the sequence newest-first, longest patterns first; the first match arms a setup with trigger/stop at the final pattern bar's extremes.
Step 3 — Resolve: A pending setup is checked each confirmed bar: adverse close → invalidated; wick break of the trigger → TRIGGERED; expiry (default 3 bars) → expired. Setup lines freeze and dim on any resolution.
Step 4 — Detect traps: Independently, every confirmed bar is tested for the trap condition (2U closing red / 2D closing green).
Step 5 — Filter: The prospective entry (trap first in Both mode) must pass PVTE regime, volume and FTC gates, then the Max Risk cap.
Step 6 — Open & manage: Entry at close; SL/TP1-3 computed; each later confirmed bar checks TP touches (TP priority), moves BE after TP1, and closes on TP3/SL/BE stop-out. Lines project forward, extend while active, persist after close as a record, and recolor teal on TP hits.
Step 7 — Track context: The PVTE regime FSM updates on closes; the anchored VWAP accumulates, re-anchors on new pivots, resets on regime change.
Step 8 — Report: Dashboard sections refresh (sequence, setup state, trade, session stats), and the alert engine emits events in fixed chronological order.
📖 HOW TO USE
🎯 Quick start:
1. Add the indicator to a clean chart. Defaults are ready to observe: Trap Bar entries, PVTE filter ON, regime bands and anchored VWAP visible.
2. Watch the numbers under the candles: 1 = pause, 2 = direction, 3 = sweep of both sides. This alone teaches you The STRAT faster than any book.
3. Wait for a LONG · Trap 2D or SHORT · Trap 2U label — the indicator found a failed break aligned with the regime and opened a managed plan.
4. Follow the plan on the chart: dotted entry line, solid red stop, dashed green targets. Watch TP1 turn teal and the entry label switch to "→ SL (BE)".
5. Once comfortable, create ONE TradingView alert with condition "Any alert() function call" and paste your webhook URL — every event now reaches your phone or bot in JSON.
👁️ Reading the chart:
— Numbers 1/2/3 under bars = STRAT types (amber, green/red, magenta)
— 🟢 LONG · / 🔴 SHORT · labels = trade entries with the source pattern; the tooltip shows entry, SL, TP1-3 and risk
— ▲ / ▼ labels = STRAT triggers that did NOT open a trade (engine busy or filtered) — still valid signals for manual traders
— Solid/dotted horizontal pairs after a pattern = pending trigger (colored) and stop (muted); they dim if invalidated or expired
— Small triangles = hammer (below) / shooter (above), wick-dominant candles by the Actionable Wick fraction (default 0.75)
— Colored bands = PVTE regime envelope; dotted trail = anchored VWAP of the current leg
— Dashed horizontal levels = previous Day/Week/Month high/low with price tags (lookahead-safe)
— Top-center strip = Full Timeframe Continuity at a glance
📊 Dashboard fields:
— Seq: the last four confirmed STRAT types, oldest left
— Setup: pending pattern, direction and bars-waited/expiry — or "idle"
— Levels: the pending trigger (T) and stop (S) prices
— Candle: Hammer / Shooter / Inside on the current bar (informational)
— PVTE: current regime — BULL / BEAR / NEUTRAL / Off
— Trade section: entry, stop (with "BE @" after break-even), TP1-3 with ✓ marks, R:R at TP1, stop distance in %
— Stats section: trades, wins, losses, win rate with gauge, and the ▰▱ form strip of the last 10 — for the selected period (24H / 30D / All-Time)
🔧 Tuning guide:
— Too few trades: switch In NEUTRAL Regime to Allow, or set Entry Mode to Both, or raise Max Risk
— Too many shallow trades in chop: keep NEUTRAL = Block, raise the PVTE ATR Multiplier (wider regime bands), or add Min FTC Aligned = 2
— Stops feel too tight: change SL Anchor to Setup Bar (structural, wider) — targets scale with the wider risk automatically
— Stopped out by noise at breakeven: that is the cost of the BE rule; disable Break-Even After TP1 if you prefer to let trades breathe
— Chart too busy: Setup Labels, Trigger Labels and bar coloring are already off by default; Regime Bands and the VWAP trail have their own toggles
— Learning mode: turn Setup Labels and Trigger Labels ON and Trade Engine OFF — the chart becomes a pure STRAT trainer
⚙️ KEY SETTINGS
🎨 Appearance: Theme (Auto/Dark/Light — the palette adapts, signals stay readable on white and black), watermark, bar coloring (off), bar numbers (on), Signal Label Size.
📐 Pattern Engine: Extended Patterns (off), Setup Labels (off), Max Pattern Drawings (60, FIFO).
🎯 Trigger Engine: Setup Expiry (3 bars), Trigger/Stop Lines (on), Trigger Labels (off).
🛡️ Risk Management: Trade Engine (on), Entry Mode (Trap Bar), Risk Preset (Balanced), SL Anchor (Trigger Level), SL Buffer (0.25×ATR), ATR Length (14), TP1/2/3 multipliers (Custom preset), Max Risk (3×ATR), Break-Even After TP1 (on), line styles, label toggles, % distance on labels.
🔍 Filters: Volume Confirmation (off, ×1.2 SMA20), Min FTC Aligned (0 = off).
🌊 PVTE Regime Filter: filter toggle (on), Basis Kernel (EMA), Basis Length (21), ATR Length (100), ATR Multiplier (3.0), NEUTRAL behavior (Block), Regime Bands (on), Anchored VWAP (on), VWAP Pivot Length (13), VWAP Source (Close).
🕯️ Actionable Candles: hammer/shooter marks (on), Min Wick Fraction (0.75).
📊 Dashboard: position, size (Small-Huge), Market/Trade/Stats section toggles, Win Rate Period.
🔔 Alerts: master Enable, JSON/Text format, five category toggles (Entries, TP/BE, SL, Filtered Triggers, Setups).
🔔 ALERTS
— 🟢 trigger_bull / trap_long — entry with pattern, price, entry, sl, tp1-3, regime, ftc
— 🔴 trigger_bear / trap_short — mirrored short payload
— 🎯 tp1_hit / tp2_hit — target touches with level and entry
— 🛡️ be — stop moved to break-even
— 🏆 tp3_close — final target, result "win"
— 🛑 sl_hit — stop-out with be_stop flag and win/loss result
— 📐 setup_bull / setup_bear — a pattern armed with its trigger/stop levels
— Plain trigger alerts for signals that did not open a trade (filters/engine busy)
All fire on confirmed bar close. One alert covers everything: condition "Any alert() function call". Nine static alertcondition entries are also available in the TV dialog.
⚠️ IMPORTANT NOTES
— 🚫 No repainting of signals. Classification is fixed on bar close; all setups, triggers, traps, entries and closures are evaluated on barstate.isconfirmed only; pivots for the VWAP anchor use equal left/right lookback (delayed confirmation, drawn forward from the confirmed bar). One disclosed exception by design: the FTC strip and the optional FTC Alignment filter read the FORMING higher-timeframe candles, because timeframe continuity is a live-state concept — an entry allowed live can look filtered after a reload. That filter is OFF by default.
— 📐 Optimistic intrabar model. When SL and a first TP touch share one bar, the TP is credited (TP priority). Session statistics use this model and the "win = TP1 touched" definition; they reset on chart reload and are NOT a backtest — no commissions, slippage or position sizing.
— ⚖️ Trap entries are regime-gated fades. With the PVTE filter off, the trap engine will fade every divergence candle, including mid-range noise. The default configuration (NEUTRAL = Block) is intentional.
— 🛠️ This is an analysis tool, not an automated bot. It provides classification, signals, trade plans and alerts — trade decisions remain yours.
— 🌐 Works on all markets and timeframes. Instruments without volume data: the VWAP falls back to the price source and the volume filter bypasses automatically.
— 📚 The STRAT is a public price-action methodology popularized by Rob Smith. This is an original clean-room implementation: no third-party code is reused, and the pattern engine, trap logic, trade management and regime integration are built from scratch as described above. インジケーター

Support and Resistance Zones, Key Levels & Hold Rate [LunqFX]Support and resistance indicators all draw the same picture: a set of key levels and SR zones detected from swing pivots, every one of them looking as important as the next. Five price levels on the chart and no way to tell which one the market actually respects — so you place the order at whichever support or resistance price bounced off last, and call it analysis.
This support and resistance indicator keeps score. Each auto-detected SR zone carries the number of times it has been tested and how many of those tests it held, printed on the level itself:
1.15370 · 71% · 5 of 7 1.14344 · 50% · 1 of 2 1.13763 · 67% · 2 of 3
A key level that has held five of seven tests and one that has held one of six are not the same object, and until that number is on the chart you are trading them as if they were.
Included: automatic support and resistance zone detection from confirmed pivots, a hold-rate record on every level, strength-weighted drawing, a dashboard showing the nearest support and resistance either side of price, and optional buy and sell signals with a trend filter and alerts.
❶ HOW THE SUPPORT AND RESISTANCE ZONES ARE BUILT
Swing points come from confirmed pivots, so a level only exists once the bars on both sides of it have closed — nothing appears and then vanishes. Pivots that land close to each other are merged into a single zone rather than stacked as near-duplicate lines, with the merge distance measured in ATR so it adapts to the instrument.
A zone widens as new pivots join it, but only up to a ceiling. Past that it re-centres on the pivot that just touched it. Without that rule a level slowly swallows everything around it and turns into a band, and the count then measures touches of a band instead of touches of a price.
❷ THE HOLD RATE — what no other support and resistance tool shows
A test opens when price trades into the zone. It resolves on a CLOSED bar, one of two ways:
▸ HELD — price closed back out the side it came from, clear of the zone by a fraction of ATR. The margin matters: without it, a close one tick beyond the edge counts as a rejection, which is how level indicators manufacture events out of noise. ▸ BROKEN — price closed through to the other side.
Nothing is counted while a test is still open. And a fresh test cannot begin until the previous one has had room to breathe, because price chopping inside a zone for a week is one consolidation, not twenty separate tests of the level.
Samples of fewer than four tests are marked with a tilde. Two tests producing "100%" is noise, and the chart says so rather than letting the number stand.
❸ LEVEL STRENGTH YOU CAN SEE
Fill density, border thickness and the halo behind each zone all scale with how often the level has been tested, and levels holding above 60% are drawn in a brighter shade. The chart ranks its own levels — the strongest one is the one that looks strongest, with no arithmetic required from you.
❹ THE DASHBOARD — nearest support and resistance
The nearest level above and the nearest level below, each with its price and its record. When there is no tracked level on one side the panel says exactly that, rather than printing a dash that reads like a fault.
❺ BUY AND SELL SIGNALS — built in, switched off
The indicator includes buy and sell signals: a buy label when a support test holds, a sell label when resistance holds. Turn them on in the Signals section — the switch is the first setting in the group, and every alert works from them.
They ship switched OFF, and the reason is worth stating plainly. A rejection at a support or resistance level is a fact. What price does afterwards is not. A level also tends to weaken with each test as the orders behind it are consumed, so "this level held four times" is not evidence that it will hold a fifth — if anything the reverse. Any indicator that hands you an arrow on every bounce is selling you that assumption without saying so.
When switched on, a signal has to clear six filters before it prints: the level must have been tested enough times to have a record, it must hold more often than it breaks, the rejection must close clear of the zone by a fraction of ATR, price must still be near the level, the trend must agree with the direction, and both the chart as a whole and that particular level must have been quiet since the last one. Set that way they are rare. Treat them as a prompt to look, not as a call to act.
HOW TO USE IT
1 — Choose where to place a resting order. Between two levels the same distance away, the one with the better record is the better limit.
2 — Choose where to expect a break. A level holding one test in six is telling you something too: price is likely to go through it, which makes it a poor place to fade and a reasonable place to trade a breakout.
3 — Place stops behind proven levels. A stop tucked behind a level that has held five of seven has a structural reason to be there.
4 — Read the whole set at once. This is the reading most traders never get. If every level on the chart is showing 30–40%, the market is not respecting levels at all right now — it is trending or reacting to news, and level trading is the wrong approach for the session. When most levels sit at 70%+, the market is rotating and levels are worth trading. That judgement usually takes weeks of screen time; here it is on the chart.
HOW IT WORKS
Pivots of your chosen length define candidate levels. Each new pivot either joins the nearest existing zone within the merge distance or opens a new one; zones are capped in width and the oldest is dropped once the limit is reached. Every zone tracks four numbers: tests, holds, the bar its last test resolved on, and the bar it last signalled on. Tests resolve on closed bars only, with a rejection margin in ATR and a minimum gap between tests. The hold rate is simply holds divided by tests, and the drawing weight is derived from the test count.
Works on any symbol and timeframe. On daily charts and above, leave the minimum test count at one — a level there rarely gets a second test before it matters. On fast intraday charts raise it, since levels are tested often.
SETTINGS
▸ Levels — pivot length, how many levels are kept, how far back they draw, merge distance, zone thickness, maximum width, minimum tests to draw, and the gap between tests. ▸ Signals — off by default; prior holds required, minimum tests before a level may speak, minimum hold rate, cooldowns, distance from price and rejection strength. ▸ Trend Filter — direction requires both price position and the slope of the average, so a range satisfies neither side. ▸ Visuals — extension, labels, candle colouring, dashboard position.
ALERTS — buy signal, sell signal, and any signal. All fire on closed bars only.
NON-REPAINTING — levels are built from confirmed pivots and every test resolves on a closed bar. A record that has printed never changes retroactively, and a level that has appeared never disappears from history.
WHY THESE PARTS ARE ONE SCRIPT
The levels, the record and the visual weight describe one object. Detection alone gives you lines with no way to rank them. The record alone has nothing to attach itself to. The weighting exists only so the record can be read at a glance instead of counted. Take any one away and the other two stop being useful, which is why they ship together rather than as three indicators.
This indicator is an educational market-analysis tool, not financial advice. The hold rate describes what has already happened at a level on the loaded chart; it does not predict what will happen next. Always confirm with your own analysis and manage your risk. インジケーター

Structure Weaver [JOAT]Weaves raw price into readable market structure — swing labels, structure breaks, and a premium/discount dealing range.
◆ WHAT IT IS
Structure Weaver reads price the way a discretionary trader maps it: it classifies each confirmed swing, marks where structure genuinely breaks, and frames the active range into zones of relative value. It is a pure context tool for understanding trend and location — it does not print buy/sell signals.
This is 100% original code, written from scratch. It does not copy any other market-structure script.
◆ HOW IT WORKS
1. Swing classification. Confirmed swing points (using your chosen strength) are labelled live as:
• HH higher high, HL higher low — bullish rhythm
• LH lower high, LL lower low — bearish rhythm
Reading these in sequence is the foundation of trend structure.
2. Structure breaks — BOS and CHoCH. When price breaks the last confirmed swing, the tool stitches a labelled thread and distinguishes two cases:
• BOS (Break of Structure) — a break in the direction of the existing trend: continuation
• CHoCH (Change of Character) — the first break against the trend: a potential shift in control
You choose whether breaks confirm on a close or a wick .
3. The dealing range. The span between the last confirmed swing low and high is shaded into:
• Premium — the upper zone (expensive relative to the range)
• Equilibrium — a central band around the 50% level
• Discount — the lower zone (cheap relative to the range)
This gives every pullback objective context — are you buying in discount or chasing in premium.
◆ WHAT YOU SEE
• Live HH / HL / LH / LL swing labels
• BOS (solid) and CHoCH (dashed) structure threads, oldest recycled to keep the chart clean
• A shaded Premium / Equilibrium / Discount dealing range with an equilibrium line
• A resizable dashboard showing the current structure bias, the last event and its age, a BOS/CHoCH tally, the active swing high/low with holding-or-taken status, and where price sits in the range with a position gauge
◆ HOW TO USE IT
• Read the swing sequence and structure color for trend bias; a CHoCH is your earliest warning that control may be changing hands.
• Favor entries from discount in an uptrend and from premium in a downtrend , using equilibrium as the pivot.
• A BOS in trend direction is continuation confirmation.
• Works on all symbols and timeframes. Increase swing strength to weave only major structure; lower it for finer detail.
◆ NOTES & LIMITATIONS
Because swings are only confirmed once the required bars have printed on both sides, labels and breaks appear after that confirmation — this is by design and avoids repainting on already-closed structure. It is a context tool, not financial advice, and does not predict direction on its own. Combine it with your own method and risk management.
— made with passion by officialjackofalltrade
インジケーター

WB Market Alignment V3.1 OptimisedWB Market Alignment V3.1
Multi-Factor Trend, Pullback & Momentum Confirmation System
WB Market Alignment V3.1 is a trend-following pullback indicator designed to identify high-probability continuation setups by combining multiple layers of market confirmation into a single signal.
The indicator scores market conditions using trend, momentum, volatility, volume, session timing and pullback structure before generating a LONG or SHORT trade signal. Instead of relying on a single indicator, WB Market Alignment uses an 8-point alignment model to help traders focus on quality setups and avoid low-conviction entries.
The goal is simple:
Trade with the dominant trend, enter on pullbacks, and only participate when multiple market factors are aligned.
Core Features
Trend Alignment
The indicator confirms trend direction using:
Fast Pullback EMA (default: 21 EMA)
Major Trend EMA (default: 200 EMA)
Higher-Timeframe EMA confirmation
This creates a multi-timeframe trend filter to help keep traders trading in the direction of the broader market.
VWAP Confirmation
Optional VWAP filtering ensures long setups occur above VWAP and short setups occur below VWAP.
This helps avoid trades that are fighting session order flow.
RSI Momentum Filter
Momentum is measured using RSI.
Default requirements:
RSI ≥ 55 for long setups
RSI ≤ 45 for short setups
This reduces entries during weak or indecisive conditions.
ATR Volatility Filter
The indicator compares current ATR against its historical baseline.
Signals can be blocked when:
Volatility is too low
Volatility is excessively high
This helps avoid dead markets and extreme conditions.
Relative Volume Confirmation
Volume is compared to average volume.
Higher relative volume generally indicates stronger participation and improves setup quality.
EMA Pullback Logic
The system waits for price to revisit the fast EMA before signalling.
For a long setup:
Price pulls back into the EMA zone
Price closes back above the EMA
Optional bullish candle confirmation
For a short setup:
Price pulls back into the EMA zone
Price closes back below the EMA
Optional bearish candle confirmation
This helps traders avoid chasing extended moves.
Setup Scoring System
Eight market conditions are evaluated:
Chart trend
Higher-timeframe trend
VWAP position
RSI momentum
EMA pullback confirmation
EMA slope
ATR conditions
Relative volume
Signals only trigger when the minimum score requirement is met.
Default score:
7 out of 8
This keeps the system highly selective.
ATR-Based Risk Projection
When a signal appears, the indicator automatically plots:
Suggested entry level
ATR-based stop loss
Target 1
Target 2
These levels are calculated using risk multiples and ATR volatility.
Professional Dashboard
The dashboard provides a real-time overview of:
Trend direction
Higher-timeframe confirmation
VWAP status
RSI strength
Relative volume
ATR conditions
Session status
News filter status
Long setup score
Short setup score
Current trade readiness
How To Use
Long Setup
Look for:
✅ Bullish chart trend
✅ Higher-timeframe trend bullish
✅ Price above VWAP
✅ RSI above bullish threshold
✅ Pullback into the EMA zone
✅ Bullish reclaim candle
✅ Minimum score achieved
When all required conditions align, a LONG signal will appear.
Short Setup
Look for:
✅ Bearish chart trend
✅ Higher-timeframe trend bearish
✅ Price below VWAP
✅ RSI below bearish threshold
✅ Pullback into the EMA zone
✅ Bearish rejection candle
✅ Minimum score achieved
When all required conditions align, a SHORT signal will appear.
Suggested Timeframes
The indicator can be used on most liquid markets, including:
Indices
Forex
Stocks
Futures
ETFs
Cryptocurrencies
Suggested combinations:
Entry Chart Higher Timeframe5 Minute 1 Hour
15 Minute 1 Hour
15 Minute 4 Hour
1 Hour Daily
4 Hour Daily
Risk Management
This indicator does not predict future price movements.
Always:
Use appropriate position sizing
Respect stop losses
Consider market news and events
Wait for candle close confirmation
Trade within your own risk tolerance
The built-in ATR projections are intended as a planning tool and should not be considered financial advice.
Best Results
WB Market Alignment V3.1 performs best in:
Strong trending markets
Pullback continuation environments
High-liquidity instruments
Active trading sessions
It is intentionally selective and may produce fewer signals than conventional crossover-based systems.
The focus is on quality over quantity. インジケーター

Triple Supertrend Confluence [MarkitTick]💡 A triple-layer Supertrend confluence system that fuses adaptive volatility bands, multi-timeframe bias, momentum strength, volume conviction, and a cooldown throttle into a single, high-confidence trend signal — then automates the entire trade plan around it with ATR-scaled stop-loss and three staged take-profit levels.
✨ Originality and Utility
Most Supertrend implementations on the platform are single-instance: one ATR period, one multiplier, one line. This script restructures the classic Supertrend into a voting system. Three independently parameterized Supertrend instances (a primary "core" trend and two auxiliary "fast" and "slow" trackers) are calculated in parallel from the same underlying price source, and a signal is only treated as valid when a configurable number of these instances agree on direction. This confluence layer is what separates the tool from a standard Supertrend plot — it is designed to filter out the single biggest weakness of trend-following overlays: getting whipsawed by a solitary indicator flipping on marginal price action.
On top of the consensus layer, the script lets traders stack up to four independent, optional confirmation filters (trend strength via ADX/DMI, higher-timeframe directional bias, relative volume, and a bar-count cooldown) before a signal is considered "confirmed." Each filter can be toggled independently, so the tool scales from a bare-bones single Supertrend up to a fully gated, multi-condition trend-following system. A real-time dashboard keeps every filter's pass/fail state visible at a glance, and an automated trade-planning layer converts each confirmed flip into a structured entry/stop/three-tier-target plan, plotted directly on the chart and exposed through webhook-ready JSON alert payloads.
🔬 Methodology and Concepts
• Core Supertrend Engine
The underlying trend engine follows the standard Supertrend construction: an ATR-derived envelope is built around a price source, with an upper band (source plus a multiple of ATR) and a lower band (source minus a multiple of ATR). These bands are "ratcheted" bar to bar — the lower band can only rise or reset if price closes below the prior lower band, and the upper band can only fall or reset if price closes above the prior upper band. The active trend line switches between the lower band (uptrend) and upper band (downtrend) whenever price closes through the opposite band, producing the familiar stepped Supertrend line. This engine is reused three times with different parameters to build the confluence system described below.
• Adaptive Source Smoothing
Rather than feeding raw HL2 price directly into the Supertrend engine, the script offers eight optional smoothing methods to pre-condition the source: Simple, Exponential, and Wilder's Moving Averages; a Double-Pass Weighted Moving Average; a Triple-Pass Volume-Weighted Moving Average; a Hull Moving Average; a custom slope-adjusted average (LLAMA) that blends a simple mean with a linear slope projection over the lookback window; and a single-state Kalman Filter that recursively updates an estimate and its error covariance bar by bar to produce a noise-adaptive average. Smoothing the source before it reaches the Supertrend calculation reduces false flips caused by single-bar noise spikes, at the cost of some responsiveness.
• Adaptive Volatility Factor
Instead of using a fixed ATR multiplier for the core Supertrend band width, the script can compute a percentile rank of current ATR against its own recent history (a lookback window of your choosing). This rank is then mapped linearly onto a user-defined minimum/maximum multiplier range. In practice, this means the band automatically widens during historically high-volatility regimes (reducing whipsaw) and tightens during historically low-volatility regimes (increasing sensitivity), rather than using one static multiplier across all conditions.
• Triple Consensus Voting
Two additional Supertrend instances — a faster-reacting pair (shorter ATR length, smaller multiplier) and a slower-reacting pair (longer ATR length, larger multiplier) — run alongside the core engine on the same smoothed source. When consensus mode is enabled, a signal is only marked confirmed if at least two of the three instances (including the core) agree on direction. This is a simple majority-vote filter designed to suppress signals that are specific to one particular band setting rather than representative of the broader trend structure.
• ADX / DMI Trend Strength Filter
An optional Average Directional Index filter, calculated using Wilder's Directional Movement methodology, requires ADX to be at or above a user-defined threshold before a flip is confirmed. This is a standard technique for distinguishing genuine directional moves from choppy, non-trending price action, since Supertrend-style systems are known to underperform in low-ADX ranging conditions.
• Higher-Timeframe Bias Filter
An optional filter pulls the trend direction of the same Supertrend engine calculated on a higher, user-selected timeframe, and only confirms a signal if it aligns with that higher-timeframe bias. The higher-timeframe value is read from the prior, fully closed bar on that timeframe to avoid any intra-bar recalculation, ensuring the filter reflects only confirmed historical structure rather than an in-progress bar.
• Volume Confirmation Filter
An optional filter compares current bar volume against its own moving average, requiring volume to exceed the average by a user-defined multiple before a signal is confirmed. This is a simple conviction check: trend changes accompanied by above-average participation are treated as more reliable than those occurring on thin volume.
• Cooldown Guard
An optional bar-count throttle prevents a new confirmed signal in the same direction as a recent prior signal if too few bars have elapsed since that prior signal within the same directional segment, reducing rapid re-signaling during choppy transition periods.
• Confirmation Lag Notice
All confirmation logic (consensus vote, ADX filter, HTF bias, volume filter, cooldown guard) and the resulting BULL/BEAR labels, alerts, and trade-level plotting are evaluated strictly on confirmed, closed bars using barstate.isconfirmed. This means every signal displayed or alerted is final and will not repaint once printed. However, users should be aware that a signal is only confirmed one bar after the actual Supertrend flip occurs, since the confirmation checks (particularly the higher-timeframe bias filter) require a fully closed bar to evaluate safely. This introduces a small, deliberate one-bar lag between the raw trend flip and the confirmed signal in exchange for eliminating repainting.
• Automated Trade Level Engine
On every confirmed flip, the script calculates a full trade plan from the entry price (the confirmed close), an ATR-scaled stop-loss (a user-defined multiple of ATR away from entry), and three take-profit levels defined as user-configurable risk:reward multiples of the initial stop distance. These levels are drawn as extending lines and labels, with shaded risk and reward zones between them, and refresh automatically on each new confirmed signal unless the signal is manually locked.
🎨 Visual Guide
Stepped trend line (color reflects the Up/Down Color inputs): traces the active Supertrend band. It plots along the lower band while price is in an uptrend and the upper band while price is in a downtrend.
Muted/gray trend line: when a filter is active but not yet satisfied, the trend line temporarily switches to the Unconfirmed Color to signal that the raw trend has flipped but confirmation is still pending.
Soft background fill (Up Fill / Down Fill colors): a translucent shaded region behind price reinforcing the current trend direction.
Heatmap candles: when enabled, candle bodies and wicks are recolored using the Heatmap Up/Down colors to match the current trend direction, offering an at-a-glance visual of trend state independent of the line itself.
"BULL" / "BEAR" labels: printed below or above the bar respectively, only on confirmed flips that pass every active filter.
Gray cooldown background: a shaded band that appears across the chart while the Cooldown Guard is actively suppressing new signals.
Trade level lines: a solid red Stop-Loss line, a dashed blue Entry line, and three dashed teal Take-Profit lines (TP1 lightest, TP3 most opaque), each extending to the right of the current bar with a price label attached, shown only when Show Trade Levels is enabled.
Shaded risk/reward zones: a light red fill between Stop-Loss and Entry (the risk zone) and a light teal fill between Entry and TP3 (the reward zone).
On-chart dashboard table: displays symbol/timeframe, Lock status, current Trend direction, Confirmed state, ADX value with a color-coded strength percentage, active Adaptive Filter type, Consensus vote count, HTF Bias direction and pass/fail, Volume filter pass/fail, and remaining Cooldown bars — all updating on the most recent bar.
📖 How to Use
Use the stepped trend line and background fill as the primary trend read: price above the line with an up-colored fill suggests an uptrend context; price below with a down-colored fill suggests a downtrend context.
Treat a "BULL" or "BEAR" label as the actionable signal rather than the raw line flip — labels only appear once every enabled filter has passed, meaning the signal has already been screened for trend strength, higher-timeframe alignment, volume conviction, and cooldown status.
If the trend line is showing the Unconfirmed Color, the underlying trend has technically flipped but is still waiting on one or more active filters — treat this as a "watch" state rather than a trade trigger.
Check the dashboard on each new bar to see exactly which filter(s) are passing or failing before a signal can confirm; this is useful for understanding why an expected signal did not appear.
When Show Trade Levels is enabled, use the plotted Stop-Loss, Entry, and TP1/TP2/TP3 lines as a starting reference for structuring a trade around a confirmed signal — adjust position sizing and targets to your own risk tolerance.
Enable Lock Signal to freeze the current trade-level plot in place (useful for screenshots or reviewing a specific setup) without it being overwritten by a new signal.
The JSON alert payloads are formatted for direct use in webhook-based automation, carrying action, ticker, timeframe, direction, and price fields for long entries, short entries, and their corresponding close-position triggers.
⚙️ Inputs and Settings
ATR Len / Factor: the ATR lookback and multiplier for the core Supertrend engine; higher Factor values produce a looser band and fewer, larger-magnitude signals.
Adaptive Factor (and Min/Max/Rank Len): when enabled, replaces the fixed Factor with a volatility-percentile-driven multiplier that ranges between Factor Min and Factor Max based on where current ATR sits within its own recent history.
Use ADX Filter / ADX Threshold / ADX Length: gates signal confirmation on trend strength; raise the threshold to demand stronger directional conviction before confirming.
Adaptive Filter / Adaptive Filter Len: selects the source-smoothing method applied before the Supertrend calculation, and its lookback length.
Use HTF Confluence / HTF: requires the selected higher timeframe's own Supertrend direction to agree before confirming a signal.
Use Volume Filter / Volume Avg Len / Volume Mult: requires current volume to exceed its moving average by the given multiple before confirming.
Use Cooldown Guard / Cooldown Bars: suppresses new same-direction signals for a set number of bars following a recent prior signal in the same directional segment.
Use Triple Consensus / Fast Factor / Fast ATR Len / Slow Factor / Slow ATR Len: enables the majority-vote filter and configures the auxiliary fast and slow Supertrend instances used to build consensus.
Lock Signal: freezes the currently plotted trade levels, preventing them from updating on a new signal.
Show Trade Levels: toggles the automated Entry/SL/TP1-3 line and label plotting.
SL ATR Mult: the ATR multiple used to place the stop-loss distance from entry.
TP1/TP2/TP3 R:R: the risk:reward multiples used to place each take-profit level relative to the stop distance.
Heatmap Candles / BULL-BEAR Labels / Show Dashboard / Position: visual display toggles and dashboard placement.
Long/Short/Close Long/Close Short Action: customizable string values embedded in the JSON alert payload's "action" field, for mapping to specific webhook automation commands.
🔍 Deconstruction of the Underlying Scientific and Academic Framework
• Volatility-Based Trend Following (Supertrend / ATR Envelopes)
The core engine descends from the broader family of volatility-adjusted trend-following bands, which use Average True Range (a measure of typical price movement magnitude popularized by J. Welles Wilder) to scale a trailing stop-and-reverse line to prevailing market volatility rather than a fixed price distance. The ratcheting band logic ensures the line never moves against the prevailing trend, which is the defining mechanical property of a trailing-stop-style trend system as opposed to a simple moving average crossover.
• Percentile Ranking for Regime Adaptation
The adaptive factor mechanism applies percentile rank normalization — expressing current ATR as its standing relative to a distribution of its own recent historical values — as a way of contextualizing volatility without relying on a fixed absolute threshold, which allows the same logic to be meaningfully applied across instruments and timeframes with very different baseline volatility levels.
• Ensemble / Majority-Vote Filtering
The Triple Consensus mechanism is a straightforward application of ensemble logic: combining multiple independent estimators (in this case, differently parameterized instances of the same underlying model) and requiring agreement among a majority before acting. This is a well-established technique for variance reduction in signal processing and forecasting contexts, on the premise that independent estimators are less likely to agree by chance during noise-driven, non-trending conditions than during genuine directional moves.
• Wilder's Directional Movement / ADX
The ADX filter is drawn directly from J. Welles Wilder's Directional Movement System, which decomposes price movement into positive and negative directional components and derives a smoothed index (ADX) representing trend strength independent of direction. ADX below common threshold levels is widely associated with range-bound, non-trending conditions in technical analysis literature.
• Recursive State Estimation (Kalman Filtering)
The optional Kalman Filter smoothing method applies a simplified single-state form of the Kalman recursive estimation framework from control theory and signal processing, in which a running estimate is continuously updated by weighting new observations against the estimate's own error covariance, producing a smoothing average that adapts its responsiveness based on recent prediction error rather than using a fixed lookback window.
• Slope-Adjusted Trend Extrapolation (LLAMA)
The LLAMA smoothing option combines a simple arithmetic mean with a linear slope term derived from the change in price over the lookback window, projecting the average forward along the recent trend direction — a lightweight application of linear extrapolation principles used to reduce the inherent lag of simple averaging methods.
• Volume as a Conviction Proxy
The volume filter reflects the broader technical-analysis principle that price movements accompanied by above-average participation carry more informational weight than those on thin volume, a concept with roots in classical volume-price analysis dating back to early technical analysis literature (e.g., Dow Theory's treatment of volume as a confirming factor).
⚠️ Disclaimer
All provided scripts and indicators are strictly for educational exploration and must not be interpreted as financial advice or a recommendation to execute trades. We expressly disclaim all liability for any financial losses or damages that may result, directly or indirectly, from the reliance on or application of these tools. Market participation carries inherent risk where past performance never guarantees future returns, leaving all investment decisions and due diligence solely at your own discretion. インジケーター

ES/SPY Conversion Ratio (by Yulien)The CME_MINI:ES1! ES/ AMEX:SPY SPY Conversion Ratio compares E-mini S&P 500 futures (ES) with the SPDR S&P 500 ETF (SPY). It establishes a daily reference ratio from the confirmed close of the first regular-session minute (9:30-9:31 AM, America/New_York), avoiding reliance on the noisier opening-auction print.
It also calculates a live ratio on every update, displays the percentage drift from the first-minute reference, and converts a user-selected SPY price level into its corresponding ES price rounded to the configured ES tick size.
The indicator includes a configurable on-chart table, an interactive SPY reference level, and a customizable horizontal marker. It does not generate trading alerts or directional signals. This tool is intended for relative price conversion and execution reference only.
IMPORTANT DATA REQUIREMENT
Accurate operation requires real-time market data for both CME ES futures and SPY. Delayed, unavailable, or differently timestamped feeds can produce stale prices, an unavailable first-minute reference, or an inaccurate live ratio. インジケーター

インジケーター


