

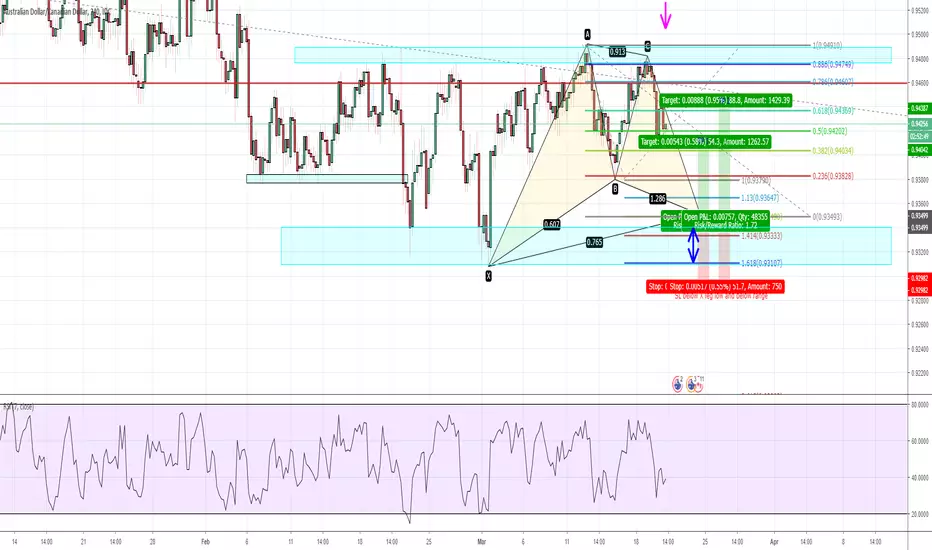
Another nice advanced pattern formation forming on the AUDCAD on the 4HR chart. The D completion is targeted to complete just above the range support structure. This may create some buffer for the price to continue to move down and test structure. Therefore, must ensure stops can cater for the possible move down. Stops are below the range. Must ensure orders are within a 1:1 ratio or greater for trade to be valid.

면책사항
해당 정보와 게시물은 금융, 투자, 트레이딩 또는 기타 유형의 조언이나 권장 사항으로 간주되지 않으며, 트레이딩뷰에서 제공하거나 보증하는 것이 아닙니다. 자세한 내용은 이용 약관을 참조하세요.
면책사항
해당 정보와 게시물은 금융, 투자, 트레이딩 또는 기타 유형의 조언이나 권장 사항으로 간주되지 않으며, 트레이딩뷰에서 제공하거나 보증하는 것이 아닙니다. 자세한 내용은 이용 약관을 참조하세요.