

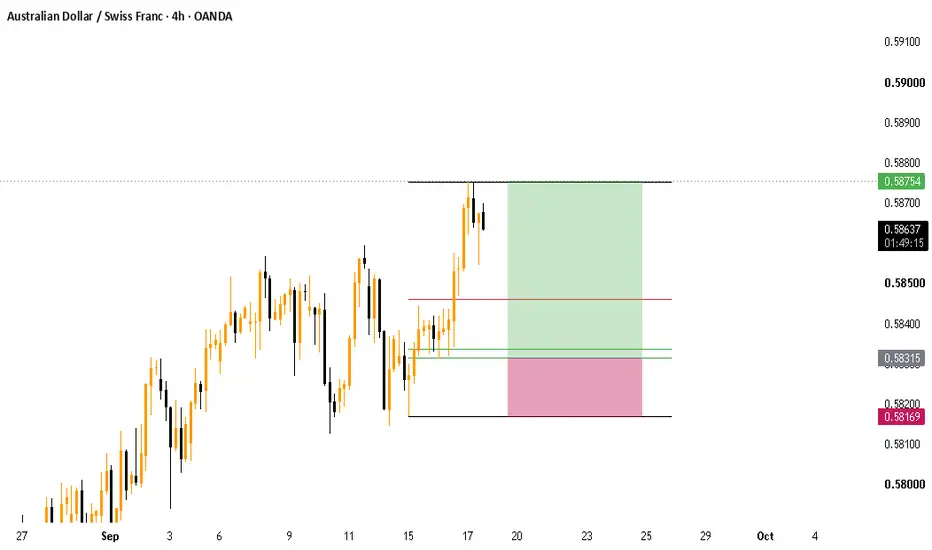
Bias: Bullish (Buy Limit Setup)
Market Structure: Strong bullish trend with higher highs and higher lows on the 4H timeframe.
Entry Zone: 4H Bullish Order Block / 71% Fibonacci OTE level at 0.58315.
Stop Loss (SL): Fixed at the 0% Fibonacci level (swing low invalidation) at 0.58169.
Take Profit (TP): Target 100% Fibonacci level / Buy-Side Liquidity at 0.58754.
Plan: Waiting for price to complete its retracement into the demand zone to trigger the long order. Strictly rules-based setup with an optimized Risk-to-Reward ratio.
Market Structure: Strong bullish trend with higher highs and higher lows on the 4H timeframe.
Entry Zone: 4H Bullish Order Block / 71% Fibonacci OTE level at 0.58315.
Stop Loss (SL): Fixed at the 0% Fibonacci level (swing low invalidation) at 0.58169.
Take Profit (TP): Target 100% Fibonacci level / Buy-Side Liquidity at 0.58754.
Plan: Waiting for price to complete its retracement into the demand zone to trigger the long order. Strictly rules-based setup with an optimized Risk-to-Reward ratio.

면책사항
해당 정보와 게시물은 금융, 투자, 트레이딩 또는 기타 유형의 조언이나 권장 사항으로 간주되지 않으며, 트레이딩뷰에서 제공하거나 보증하는 것이 아닙니다. 자세한 내용은 이용 약관을 참조하세요.
면책사항
해당 정보와 게시물은 금융, 투자, 트레이딩 또는 기타 유형의 조언이나 권장 사항으로 간주되지 않으며, 트레이딩뷰에서 제공하거나 보증하는 것이 아닙니다. 자세한 내용은 이용 약관을 참조하세요.