
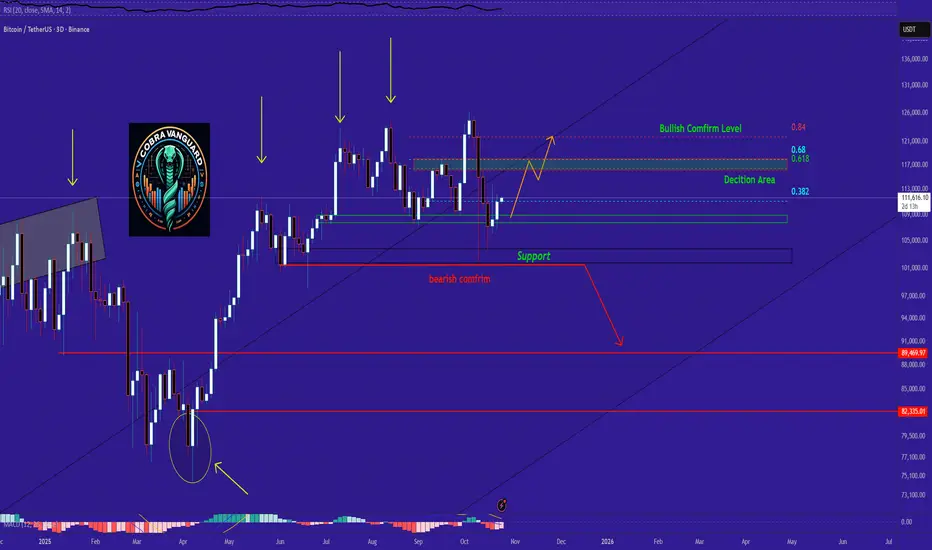
📉 Stage 1 – Bearish Reversal Zone
The red zone and areas below it signal a potential return to the downtrend.
Stage 2 – Launch Zone
The desicion zone between 111,300 to 111,500 could trigger a sharp breakout move.
📈 Stage 3 – Bullish Extension
If price breaks through the 115,000 to 117,000 range, there’s a high probability of reaching 121,000 to 122,000.
The red zone and areas below it signal a potential return to the downtrend.
Stage 2 – Launch Zone
The desicion zone between 111,300 to 111,500 could trigger a sharp breakout move.
📈 Stage 3 – Bullish Extension
If price breaks through the 115,000 to 117,000 range, there’s a high probability of reaching 121,000 to 122,000.

관련 발행물
면책사항
해당 정보와 게시물은 금융, 투자, 트레이딩 또는 기타 유형의 조언이나 권장 사항으로 간주되지 않으며, 트레이딩뷰에서 제공하거나 보증하는 것이 아닙니다. 자세한 내용은 이용 약관을 참조하세요.
면책사항
해당 정보와 게시물은 금융, 투자, 트레이딩 또는 기타 유형의 조언이나 권장 사항으로 간주되지 않으며, 트레이딩뷰에서 제공하거나 보증하는 것이 아닙니다. 자세한 내용은 이용 약관을 참조하세요.