
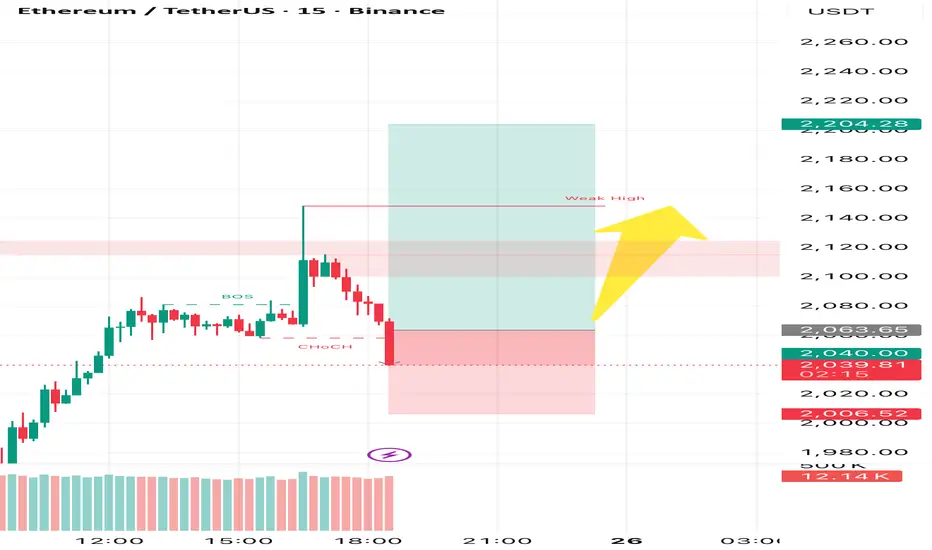
Alright guys, let me explain this step by step so you understand the logic behind the setup.
Ethereum is maintaining a bullish market structure on the higher timeframe — higher lows are forming and buyers are defending key demand zones. Liquidity is resting above current price, which makes upside continuation highly probable.
Now here’s the smart approach 👇
Before the expansion move, we can still see a controlled pullback toward the 2025–2055 zone. This is a discount area where smart money could step in before pushing price higher.
So instead of chasing candles, we wait for price to come to us.
Patience creates precision.
📥 Optimal Entry Zone
2025 – 2055
🛑 Invalidation Level
1935 (If this breaks, bullish structure becomes
🎯 Targets
• TP1: 2098
• TP2: 2149
• TP3: 2167
• TP4: 2190
• Extended target: 2200+
📌 Important Lesson:
The simpler you keep your chart, the clearer things will become.

면책사항
해당 정보와 게시물은 금융, 투자, 트레이딩 또는 기타 유형의 조언이나 권장 사항으로 간주되지 않으며, 트레이딩뷰에서 제공하거나 보증하는 것이 아닙니다. 자세한 내용은 이용 약관을 참조하세요.
면책사항
해당 정보와 게시물은 금융, 투자, 트레이딩 또는 기타 유형의 조언이나 권장 사항으로 간주되지 않으며, 트레이딩뷰에서 제공하거나 보증하는 것이 아닙니다. 자세한 내용은 이용 약관을 참조하세요.