

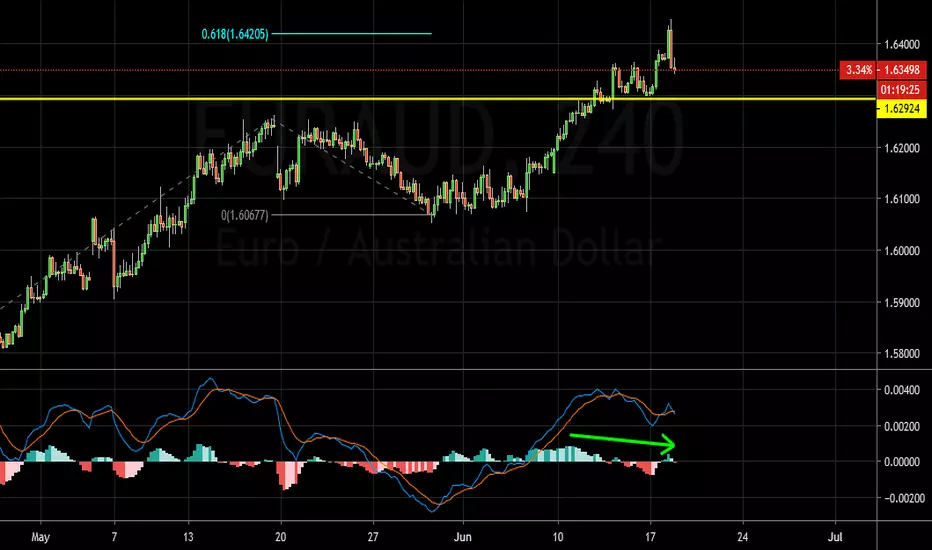
D1 - Price reached a critical zone, potential bearish divergence forming.
Until this critical zone holds and the possible divergence is not invalidated, we can look for sell setups.
H4 - Bearish divergence completed already along with nice bearish Engulfing pattern. That’s the first aggressive trigger.
If you want to be more conservative then wait for the price to break below the low shown in the chart. you may then look for more evidences of bearish pressure in order to start looking for the sells.
It would be interesting to see how the 1.6360 level will be handled. False break at the end of the day or the price will remain above it? Reminder that this is a critical level from the D1/W1 charts.

면책사항
해당 정보와 게시물은 금융, 투자, 트레이딩 또는 기타 유형의 조언이나 권장 사항으로 간주되지 않으며, 트레이딩뷰에서 제공하거나 보증하는 것이 아닙니다. 자세한 내용은 이용 약관을 참조하세요.
면책사항
해당 정보와 게시물은 금융, 투자, 트레이딩 또는 기타 유형의 조언이나 권장 사항으로 간주되지 않으며, 트레이딩뷰에서 제공하거나 보증하는 것이 아닙니다. 자세한 내용은 이용 약관을 참조하세요.