
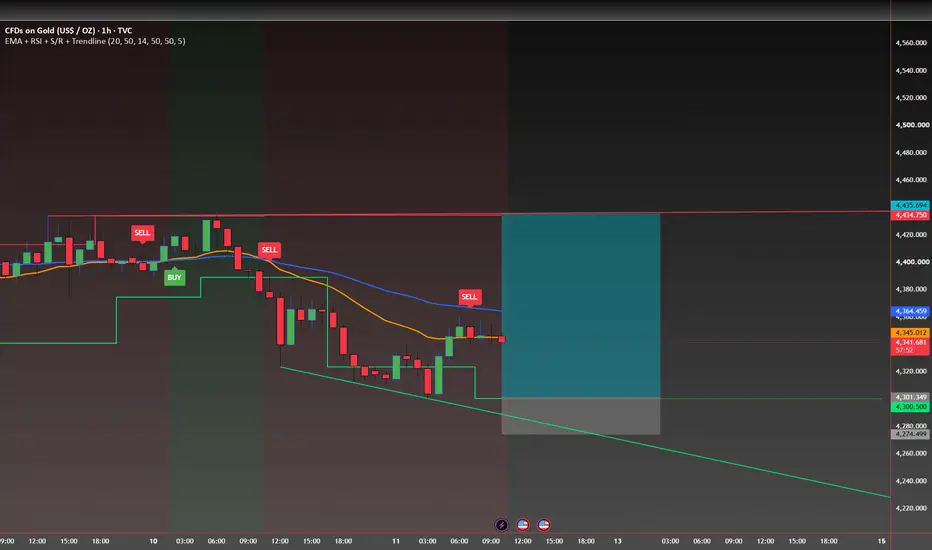
This indicator is designed as a multi-confirmation market analysis tool. Instead of relying on one signal, it combines trend direction, momentum, market structure, support/resistance, and trendlines into one clean chart.
The idea behind combining these tools is strong: EMA can provide trend context, RSI measures momentum, while support/resistance and trendlines provide price-structure information. Similar multi-confirmation approaches are commonly used in TradingView indicators.
T
TradingView
+1
🚀 What Makes This Indicator Different?
4 confirmations → 1 decision
📈 EMA — Trend Direction
⚡ RSI — Momentum
🧱 Support & Resistance — Key Price Levels
📐 Trendlines — Market Structure
🟢 BUY — Bullish confirmation
🔴 SELL — Bearish confirmation
The goal is not to predict every candle. The goal is to wait until several pieces of technical information point in the same direction.

면책사항
해당 정보와 게시물은 금융, 투자, 트레이딩 또는 기타 유형의 조언이나 권장 사항으로 간주되지 않으며, 트레이딩뷰에서 제공하거나 보증하는 것이 아닙니다. 자세한 내용은 이용 약관을 참조하세요.
면책사항
해당 정보와 게시물은 금융, 투자, 트레이딩 또는 기타 유형의 조언이나 권장 사항으로 간주되지 않으며, 트레이딩뷰에서 제공하거나 보증하는 것이 아닙니다. 자세한 내용은 이용 약관을 참조하세요.