
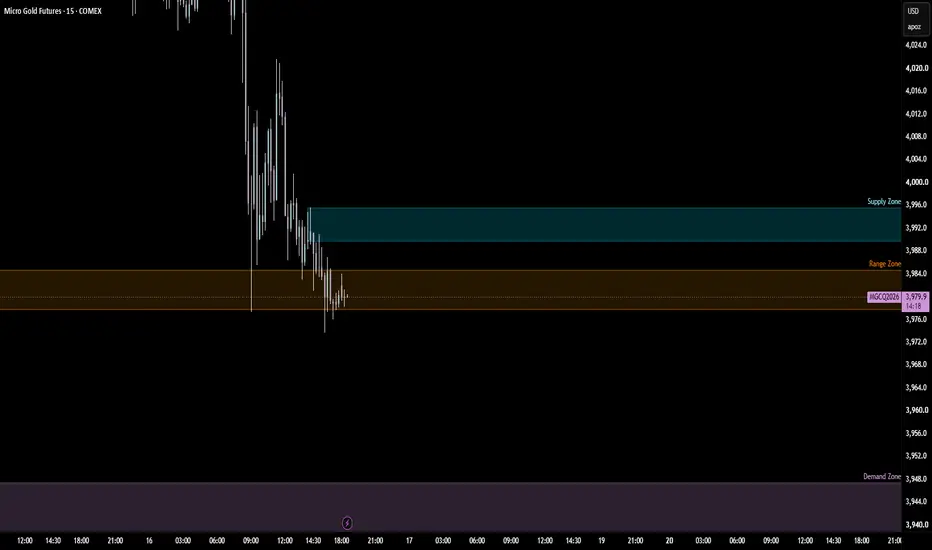
Key Levels:
The identified range is bounded by Demand and Supply zones, defended respectively by buyers and sellers.
Strategy:
We are looking for a decisive breakout of the range with a tight stop-loss.
Trade Management:
Breakout to the upside → Long, targeting the Supply zone as TP.
Breakout to the downside → Short, targeting the Demand zone as TP.
Thanks to gold's volatility, a trade never lasts more than one day.
Drop a Boost if you like the idea and follow for daily setups 🚀
The identified range is bounded by Demand and Supply zones, defended respectively by buyers and sellers.
Strategy:
We are looking for a decisive breakout of the range with a tight stop-loss.
Trade Management:
Breakout to the upside → Long, targeting the Supply zone as TP.
Breakout to the downside → Short, targeting the Demand zone as TP.
Thanks to gold's volatility, a trade never lasts more than one day.
Drop a Boost if you like the idea and follow for daily setups 🚀
거래청산: 타겟 닿음
Long TP HIT 🎯TP 1 💥

면책사항
해당 정보와 게시물은 금융, 투자, 트레이딩 또는 기타 유형의 조언이나 권장 사항으로 간주되지 않으며, 트레이딩뷰에서 제공하거나 보증하는 것이 아닙니다. 자세한 내용은 이용 약관을 참조하세요.
면책사항
해당 정보와 게시물은 금융, 투자, 트레이딩 또는 기타 유형의 조언이나 권장 사항으로 간주되지 않으며, 트레이딩뷰에서 제공하거나 보증하는 것이 아닙니다. 자세한 내용은 이용 약관을 참조하세요.