
The Big picture hasn't spoken yet.
Short term fear and noise cannot overshadow the upward trend in the long term.
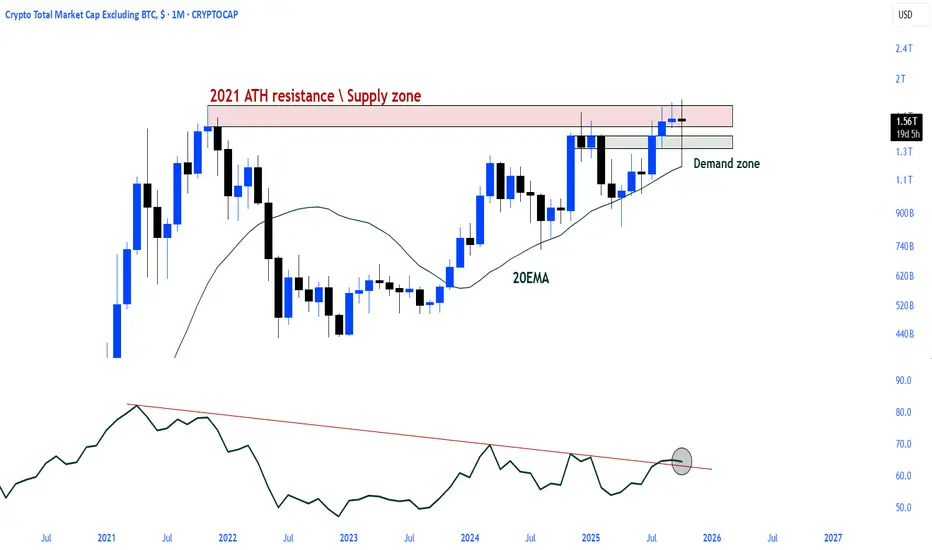
The 1M chart still shows a bullish trend.
The 2021 ATH resistance and major supply zone were tested in November 2024 but rejected. Following this rejection, the market entered a broad correction phase.
The subsequent recovery saw the price retest the 2021 ATH level but was rejected once again.
Nevertheless, the retest of the demand zone formed after November 2024 and the EMA20 region indicates that the structure remains strong.
Short term fear and noise cannot overshadow the upward trend in the long term.
The 1M chart still shows a bullish trend.
The 2021 ATH resistance and major supply zone were tested in November 2024 but rejected. Following this rejection, the market entered a broad correction phase.
The subsequent recovery saw the price retest the 2021 ATH level but was rejected once again.
Nevertheless, the retest of the demand zone formed after November 2024 and the EMA20 region indicates that the structure remains strong.

면책사항
해당 정보와 게시물은 금융, 투자, 트레이딩 또는 기타 유형의 조언이나 권장 사항으로 간주되지 않으며, 트레이딩뷰에서 제공하거나 보증하는 것이 아닙니다. 자세한 내용은 이용 약관을 참조하세요.
면책사항
해당 정보와 게시물은 금융, 투자, 트레이딩 또는 기타 유형의 조언이나 권장 사항으로 간주되지 않으며, 트레이딩뷰에서 제공하거나 보증하는 것이 아닙니다. 자세한 내용은 이용 약관을 참조하세요.