OPEN-SOURCE SCRIPT
Bucket 3 Momentum
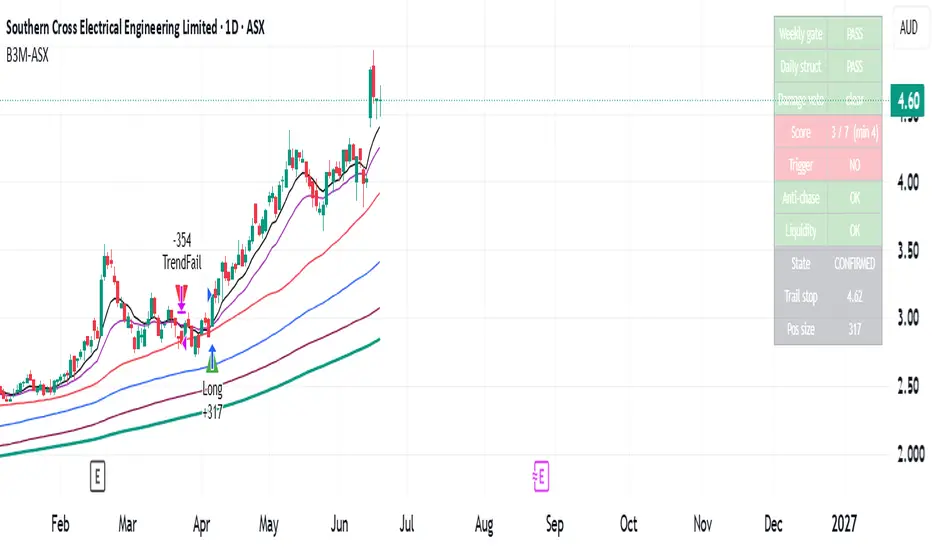
Bucket 3 Momentum
A backtestable daily-chart momentum strategy for ASX equities, built on a four-layer confirmation model: a trade fires only when the weekly trend grants permission, daily structure is intact, a price trigger confirms demand, and risk/extension checks pass.
The weekly layer is the gatekeeper — price above a rising 30-week SMA with healthy weekly RSI — so it won't buy dips in stocks that have quietly left a Stage-2 uptrend. The daily layer confirms the structure (price above the 50/150 DMAs, 50DMA flat-to-rising) with a damage veto for collapsing RSI, fresh 20-day lows, or bearish DMI. Entry triggers on a 5-day breakout with a strong close, but only once a tunable setup score is met (RSI curl + signal cross, fast-MACD turn, DMI recovery, improving RS vs XJO). An anti-chase filter blocks entries stretched too far above the 20EMA.
Positions are sized by defined risk (default 1.5% per trade), with the initial stop below the pullback swing low, floored at 1 ATR. Three exits execute: initial hard stop, a 1.5×ATR trailing stop that ratchets up only, and a structural trend-failure exit.
Built to be backtest-honest — weekly data uses the completed-bar pattern to avoid repaint/lookahead bias, structural decisions act on bar close, protective stops fill intrabar. An on-chart table shows each layer's status, live score, and current state. Tunable throughout; benchmarked against the XJO, so other universes need the benchmark and liquidity floor adjusted.
For education only — not financial advice. Past backtested performance does not guarantee future results.
A backtestable daily-chart momentum strategy for ASX equities, built on a four-layer confirmation model: a trade fires only when the weekly trend grants permission, daily structure is intact, a price trigger confirms demand, and risk/extension checks pass.
The weekly layer is the gatekeeper — price above a rising 30-week SMA with healthy weekly RSI — so it won't buy dips in stocks that have quietly left a Stage-2 uptrend. The daily layer confirms the structure (price above the 50/150 DMAs, 50DMA flat-to-rising) with a damage veto for collapsing RSI, fresh 20-day lows, or bearish DMI. Entry triggers on a 5-day breakout with a strong close, but only once a tunable setup score is met (RSI curl + signal cross, fast-MACD turn, DMI recovery, improving RS vs XJO). An anti-chase filter blocks entries stretched too far above the 20EMA.
Positions are sized by defined risk (default 1.5% per trade), with the initial stop below the pullback swing low, floored at 1 ATR. Three exits execute: initial hard stop, a 1.5×ATR trailing stop that ratchets up only, and a structural trend-failure exit.
Built to be backtest-honest — weekly data uses the completed-bar pattern to avoid repaint/lookahead bias, structural decisions act on bar close, protective stops fill intrabar. An on-chart table shows each layer's status, live score, and current state. Tunable throughout; benchmarked against the XJO, so other universes need the benchmark and liquidity floor adjusted.
For education only — not financial advice. Past backtested performance does not guarantee future results.
오픈 소스 스크립트
트레이딩뷰의 진정한 정신에 따라, 이 스크립트의 작성자는 이를 오픈소스로 공개하여 트레이더들이 기능을 검토하고 검증할 수 있도록 했습니다. 작성자에게 찬사를 보냅니다! 이 코드는 무료로 사용할 수 있지만, 코드를 재게시하는 경우 하우스 룰이 적용된다는 점을 기억하세요.

면책사항
해당 정보와 게시물은 금융, 투자, 트레이딩 또는 기타 유형의 조언이나 권장 사항으로 간주되지 않으며, 트레이딩뷰에서 제공하거나 보증하는 것이 아닙니다. 자세한 내용은 이용 약관을 참조하세요.
오픈 소스 스크립트
트레이딩뷰의 진정한 정신에 따라, 이 스크립트의 작성자는 이를 오픈소스로 공개하여 트레이더들이 기능을 검토하고 검증할 수 있도록 했습니다. 작성자에게 찬사를 보냅니다! 이 코드는 무료로 사용할 수 있지만, 코드를 재게시하는 경우 하우스 룰이 적용된다는 점을 기억하세요.
면책사항
해당 정보와 게시물은 금융, 투자, 트레이딩 또는 기타 유형의 조언이나 권장 사항으로 간주되지 않으며, 트레이딩뷰에서 제공하거나 보증하는 것이 아닙니다. 자세한 내용은 이용 약관을 참조하세요.