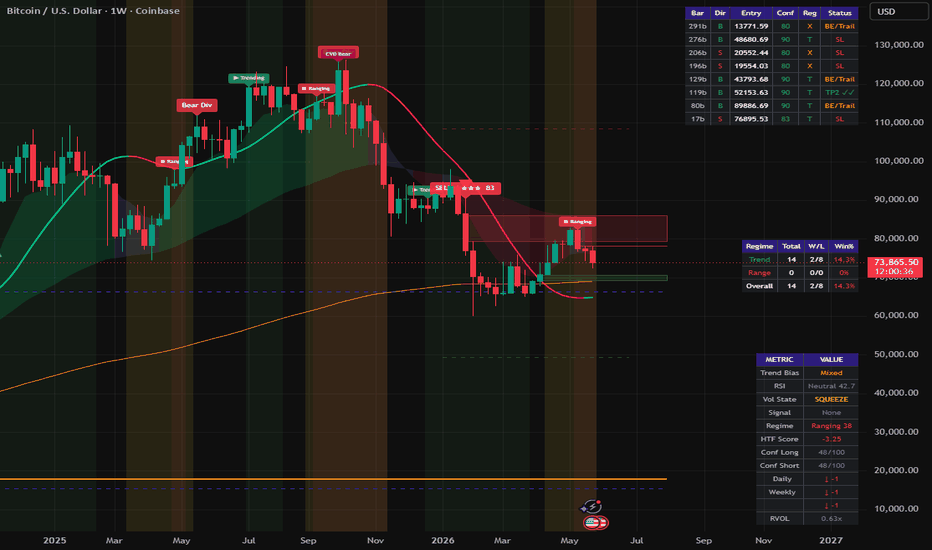
Crypto Ultimate Indicator v2═══════════════════════════════════════════════
CRYPTO ULTIMATE INDICATOR (CUI)
═══════════════════════════════════════════════
A multi-layer confluence system for crypto traders. Stacks 12+ independent technical layers — trend, momentum, volume, regime, multi-timeframe bias, and Smart Money Concepts — and fires Buy/Sell signals only when enough of them agree. Every signal comes with a confidence score, three take-profit levels, position size recommendation, and live outcome tracking.
Built for 4H and Daily crypto charts. No proprietary "secret sauce" — every component is documented and every input is exposed.
━━━━━━━ WHY THIS EXISTS ━━━━━━━
Most multi-indicator scripts stack correlated trend filters (more EMAs, more oscillators) and call it "confluence." That just adds the illusion of agreement without adding independent information.
CUI's filter stack is built from genuinely different signal sources, so when they align, that alignment carries real weight:
• Trend regime — HMA + Supertrend + EMA Ribbon
• Momentum — RSI with proper pivot-to-pivot divergence
• Volume flow — body-weighted Volume Delta + CVD divergence
• Volatility state — Bollinger squeeze + squeeze-release timing
• Market structure — composite of ADX, Choppiness Index, BB-width percentile
• Multi-timeframe — weighted Daily / Weekly / Custom HTF (all offset, no repaint)
• Liquidity & gaps — Fair Value Gaps + Liquidity Sweep detection
• External context — optional BTC trend filter for alt trading
A Buy or Sell only fires when the relevant subset of these align. A built-in "Why-Not" diagnostic table shows you exactly which filter is blocking a near-signal at any moment — turning the indicator into a tunable system rather than a black box.
━━━━━━━ CORE FEATURES ━━━━━━━
TREND & MOMENTUM
▸ Hull Moving Average (configurable length)
▸ Supertrend with ATR factor
▸ 5-EMA Ribbon (8/13/21/34/55) with stacking score
▸ RSI with consecutive-pivot divergence detection
▸ MACD and Stochastic RSI (data window)
VOLUME
▸ Body-weighted Volume Delta (not naive close-position)
▸ Cumulative Volume Delta (CVD)
▸ CVD divergence at confirmed pivots
VOLATILITY & REGIME
▸ Bollinger Bands with squeeze detection and release timing
▸ Composite regime classifier (ADX × CHOP × BB-width)
▸ Background tint for trending vs ranging states
▸ Regime transition labels
SMART MONEY CONCEPTS
▸ Fair Value Gap zones (bullish and bearish)
▸ Liquidity Sweep detection
MULTI-TIMEFRAME
▸ Daily / Weekly / User-defined custom HTF
▸ Weighted confluence score (D 1.0x + W 1.5x + Custom 0.75x)
▸ Optional HTF pivot-based S/R lines
BTC CONTEXT (for alt traders)
▸ Optional BTC trend filter
▸ Relative strength vs BTC
SIGNAL ENGINE
▸ 0-100 confidence score
▸ Configurable minimum confidence threshold
▸ Auto-tune presets (Aggressive / Balanced / Conservative / Custom)
▸ Confirmation bar requirement
▸ Minimum spacing between signals
TRADE MANAGEMENT
▸ Three take-profit levels (TP1/TP2/TP3) with configurable ATR multipliers
▸ Custom % allocation per target
▸ Adaptive SL/TP — different distances in trending vs ranging conditions
▸ Break-even stop activation after TP1
▸ Chandelier ATR trailing stop on runner portion
▸ Position size calculator (account size × risk % × confidence multiplier)
LIVE TRACKING & DIAGNOSTICS
▸ Main dashboard with all current state
▸ Signal log table — last N trades with live TP/SL outcomes
▸ Why-Not diagnostic — which filter is currently blocking each direction
▸ Regime stats — win rate broken down by trending vs ranging
ALERTS
▸ 15+ classic alertcondition triggers
▸ Optional JSON webhook payload for bot integration
━━━━━━━ HOW A BUY SIGNAL FIRES ━━━━━━━
All of the following must be true on the signal bar:
1. HMA trending up
2. RSI above 50
3. Volume delta positive
4. EMA Ribbon score ≥ +3 (at least 4 of 5 aligned bullish)
5. Supertrend bullish
6. HTF confluence score ≥ +1.5
7. Confidence score ≥ user minimum
8. BTC trend bullish (if BTC filter enabled)
9. Price not inside opposing FVG zone (if FVG filter enabled)
10. Market not in strong ranging mode
11. Price more than 0.5 ATR from upper resistance zone
12. Candle body > 50% of range
13. Minimum bars elapsed since last signal
14. Confirmation bar (if enabled)
A Sell signal requires the inverse. On 4H BTC expect roughly 1-3 signals per week in normal conditions. If you see fewer, drop the confidence floor or switch to the Aggressive preset.
━━━━━━━ RECOMMENDED USE ━━━━━━━
▸ Primary: 4H on BTC/USDT, ETH/USDT, and majors
▸ Also works: Daily, 12H, 8H
▸ Use caution below 1H — noise increases, news spikes can trigger wicks
▸ Low-liquidity alts: bump ATR period to 21
WORKFLOW
1. Start on the Balanced preset
2. Watch the dashboard and Why-Not panel for a few sessions
3. Adjust the confidence floor based on signal frequency
4. Enable Regime Stats after chart history accumulates
5. For bots: enable JSON webhook alerts, route via "Any alert() function call"
━━━━━━━ REPAINT DISCLOSURE ━━━━━━━
Full transparency on what does and doesn't repaint:
▸ HMA, Supertrend, EMA Ribbon: repaint on the developing current bar (use bar-close confirmation for live trading)
▸ HTF confluence (D/W/Custom): all use offset — fetch last closed HTF bar only — NO intra-period repaint, NO lookahead
▸ RSI and CVD divergence labels: plotted at confirmed pivot bar (5 bars after the actual pivot). Do NOT appear and disappear.
▸ FVG zones: drawn on confirmation bar of the 3-bar gap pattern. Do not repaint once drawn.
▸ Liquidity sweeps: detected on bar close
▸ Trade outcomes (signal log): evaluated on each closing bar
▸ Regime transition labels: confirmed on bar close
━━━━━━━ HONEST LIMITATIONS ━━━━━━━
▸ This is a decision-support tool, not a complete trading system. Risk management, position discipline, and execution matter more than any indicator.
▸ Signal outcomes in the Regime Stats table are based on bar-close evaluation. Real-fill slippage is not modeled.
▸ Volume Delta is approximated from candle structure, not true tick-level bid/ask (TradingView doesn't expose that without premium feeds).
▸ FVG and liquidity sweep are simplified interpretations of those concepts — pure SMC purists may prefer dedicated tools.
▸ The regime classifier is a heuristic composite. It works well on liquid crypto pairs but can lag at sharp inflection points.
▸ Past performance does not predict future results.
━━━━━━━ SETTINGS OVERVIEW ━━━━━━━
The script has many inputs, grouped by function. For first-time users, the most important groups are:
▸ Preset & Theme → pick Balanced to start
▸ UI Sizing → table text and label sizes
▸ Signal Engine → set Minimum Confidence Score
▸ Tiered Exits → TP/SL multipliers and % allocation
▸ Position Sizing → account size and risk per trade
▸ Alerts & Webhooks → enable JSON for bot trading
Default state shows a clean chart: HMA, Supertrend, BB, regime tint, signal labels, plus three tables (dashboard, signal log, HTF panel). Everything else is one toggle away — EMA Ribbon, FVG boxes, ATR zones, HTF S/R lines, CVD divergence labels, sweep markers, Why-Not diagnostic, Regime Stats.
━━━━━━━ WHAT'S NOT INCLUDED ━━━━━━━
▸ Full strategy() backtest — this is an indicator(). A companion strategy script may be released separately.
▸ Funding rate / open interest overlays — require specific tickers not universally available
▸ Chart pattern recognition (H&S, wedges, etc.)
━━━━━━━ CREDITS ━━━━━━━
Built on Pine Script v6. Uses TradingView built-ins: ta.supertrend, ta.dmi, ta.bb, ta.macd, ta.rsi, ta.pivothigh, ta.pivotlow, ta.valuewhen. Choppiness Index, CVD, FVG detection, liquidity sweep logic, regime classifier, confidence scoring, trade tracking, and confluence weighting are custom implementations.
═══════════════════════════════════════════════
지표
Daily MA Bounce & Rejection 8 MAs UnifiedStrict bounce/rejection setups on 8 daily MAs (EMA 8/21/50/100/200 + SMA 50/100/200). One indicator, longs + shorts,position-relative.
A unified moving-average strategy indicator that fires only the highest-conviction setups: strict bounces off MA support (price above MA,
holds, closes back up) and strict rejections from MA resistance (price below MA, fails to break through, closes back down).
Covers the full institutional MA stack:
- 5 EMAs: 8 (short-term trend), 21 (intraday trend), 50 (intermediate), 100 (long-term), 200 (secular)
- 3 SMAs: 50, 100, 200 (the classical institutional levels watched alongside the EMAs)
The position-relative model treats any MA as support when price is above it, resistance when price is below it. Same logic across all 8 MAs
— no separate scripts for support vs resistance, no separate longs vs shorts.
Targets are the nearest MAs on the far side of entry (overhead MAs for longs, underfoot for shorts) — natural structural exits, not
arbitrary R-multiples. 지표

Entropic Liquidity Manifold [JOAT]Entropic Liquidity Manifold
Introduction
Entropic Liquidity Manifold builds an adaptive POC-style liquidity mean using volume density, auction entropy, displacement, and release scoring.
This open-source indicator is designed as a context tool, not a standalone trading system. It focuses on explaining the current market state with restrained visuals and confirmed-bar logic where signals are used.
Core Concepts
1. Adaptive Manifold
The equilibrium updates faster when density and entropy rise.
2. Volume Density
Volume divided by bar range estimates participation concentration.
3. Auction Entropy
Close location identifies whether the auction is balanced or directional.
4. Absorption vs Release
High density with balance supports absorption, while displacement with direction supports release.
manifold := manifold + adaptiveAlpha * (hlc3 - manifold)
Features
Adaptive liquidity mean
Upper and lower shelves
Entropy trace
Absorption node markers
L+ and L- release labels
Input Parameters
Density and entropy memory
Release and absorption gates
Cooldown
Manifold, candle, and HUD toggles
HUD position selector
How to Use This Script
Use the manifold as an adaptive auction reference. Absorption nodes mark balance; L+ and L- mark confirmed directional release.
Limitations
The script uses historical OHLCV data and cannot know future prices.
Signals and states can be late during fast reversals because confirmed-bar logic is used to reduce repainting.
Model outputs should be interpreted with market context, risk controls, and independent analysis.
No visual state should be treated as a certain trade outcome.
Originality Statement
ELM is original in combining adaptive equilibrium, density, entropy, displacement, and release scoring.
Disclaimer
This indicator is provided for educational and informational purposes only. It is not financial advice, investment advice, or a recommendation to buy or sell any financial instrument. All calculations are derived from historical market data and may produce inaccurate readings in some market conditions. No indicator can predict future market behavior. Use proper risk management and independent judgment.
-Made with passion by jackofalltrades
지표

지표

지표
지표
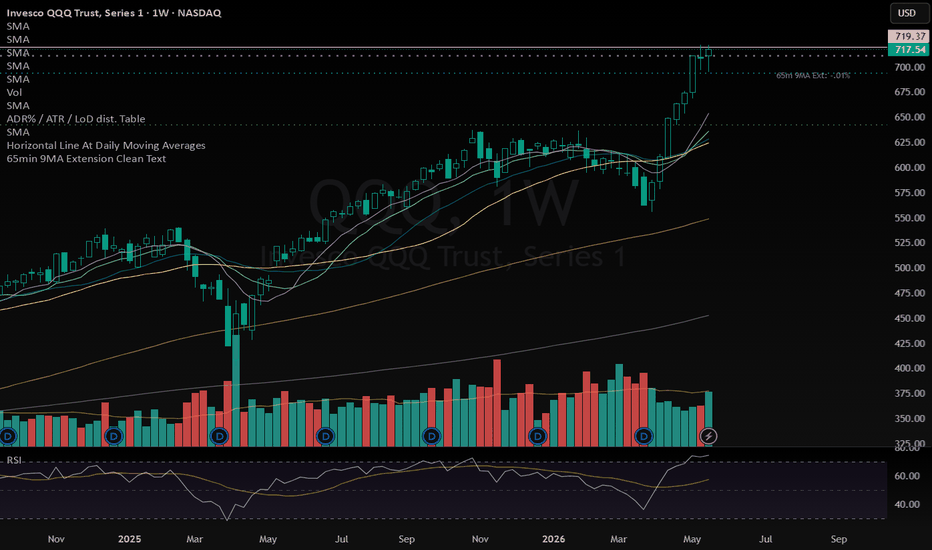
Multi MA (Daily/Weekly Source TF)# Multi MA (Daily/Weekly Source TF)
Multi MA (Daily/Weekly Source TF) is a flexible multi-timeframe moving average indicator built for traders who want one MA system for daily and non-weekly charts, and a different MA system for weekly charts, without constantly changing settings by hand. Each line can be configured independently for type, length, source, source timeframe, visibility, color, and width, making it possible to track daily-based structure on higher timeframes while keeping a separate weekly trend framework inside the same script.
This script is a multi-moving-average indicator designed for traders who want different moving average configurations on daily charts and weekly charts, while still being able to display daily-based moving averages on higher timeframes such as monthly or yearly charts.
Traditional moving average indicators are usually limited to a single chart timeframe context. That creates a common workflow problem: the moving average set that makes sense on a daily chart is often not the same set you want on a weekly chart. As a result, traders end up manually changing inputs every time they switch timeframes.
This script solves that problem by allowing each moving average line to have independent settings for:
- Daily / non-weekly charts
- Weekly charts
In addition, each line can use its own source, moving average type, length, source timeframe, visibility settings, color, and width.
## What This Script Does
The indicator supports up to 10 moving average lines. For each line, you can configure:
- Daily type: `SMA` or `EMA`
- Daily length
- Daily price source
- Daily source timeframe
- Whether to show the line on daily / other non-weekly charts
And separately:
- Weekly type: `SMA` or `EMA`
- Weekly length
- Weekly price source
- Weekly source timeframe
- Whether to show the line on weekly charts
This means the same line can behave differently depending on whether the current chart is weekly or not.
## Core Idea
The script uses two logic layers:
1. Display logic based on the current chart timeframe
2. Calculation logic based on the selected source timeframe
When the current chart is weekly, the script uses the weekly configuration for that line.
When the current chart is anything other than weekly, the script uses the daily configuration for that line.
Because the moving averages are calculated using the selected source timeframe instead of the current chart timeframe alone, you can do things like:
- View a 5-day EMA on a monthly chart
- View a 200-day SMA on a yearly chart
- Use a different weekly structure without changing the daily structure
This is especially useful for traders who anchor their analysis on daily trend structure but still want to inspect that same structure from higher-level chart views.
## Example Use Case
A common setup might look like this:
On daily and other non-weekly charts:
- Line 1 = EMA 5-day
- Line 2 = EMA 9-day
- Line 3 = EMA 21-day
- Line 4 = SMA 50-day
- Line 5 = SMA 150-day
- Line 6 = SMA 200-day
On weekly charts:
- Line 4 = SMA 10-week
- Line 5 = SMA 30-week
- Line 6 = SMA 40-week
In this workflow:
- Daily charts show the shorter-term and long-term daily trend structure
- Weekly charts automatically switch to a cleaner higher-timeframe structure
- Monthly and yearly charts can still display daily-based moving averages if desired
## Why This Script Is Useful
This script is built to address several practical issues that appear in real trading workflows:
- Switching between daily and weekly charts often requires different MA systems
- Standard MA indicators usually force one configuration across all timeframes
- Higher timeframe charts often hide the daily structure traders still want to track
- Multiple indicators or repeated manual adjustments create clutter and inefficiency
By separating daily and weekly configurations per line, this script keeps your charting workflow more consistent and more efficient.
## Key Features
- Up to 10 moving average lines
- Per-line `SMA` / `EMA` selection
- Per-line daily and weekly lengths
- Per-line daily and weekly source price selection
- Per-line daily and weekly source timeframe selection
- Per-line daily and weekly visibility control
- Works on any chart timeframe
- Can display daily-based moving averages on higher timeframe charts
- Useful for multi-timeframe trend analysis
## How To Use
1. Set `Number of lines` to define how many moving average lines you want active.
2. For each active line, configure the daily / non-weekly settings:
- Daily Type
- Daily Length
- Daily Source Timeframe
- Daily Source
- Show On Daily/Other Charts
3. Configure the weekly settings for the same line:
- Weekly Type
- Weekly Length
- Weekly Source Timeframe
- Weekly Source
- Show On Weekly Charts
4. Adjust line color and width as needed.
## Intended Use
This indicator is best suited for:
- Multi-timeframe traders
- Trend-following systems
- Swing trading workflows
- Market structure analysis
- Traders who want daily and weekly moving average systems inside a single script
## Notes
- Weekly settings are only used when the current chart timeframe is weekly.
- All non-weekly charts use the daily configuration.
- Because the script can request data from a specific source timeframe, a moving average such as `EMA 5D` can still be displayed on monthly or yearly charts.
지표

지표

Aura Volume Delta Matrix [Pineify]Aura Volume Delta Matrix
This indicator measures the net demand pressure behind each bar by separating candle volume into buying and selling components, smoothing the difference, and plotting it as a gradient histogram against a signal line. Rather than treating volume as a single unsigned number, it asks: how much of this bar's volume was buying versus selling? The answer — volume delta — reveals whether the crowd was net accumulating or distributing, even when price barely moved.
Key Features
Candle-polarity volume split: full bar volume attributed to buyers when close > open, sellers when close < open, and split 50/50 on doji candles
Dual EMA smoothing pipeline — one pass to extract the trend from noisy raw delta, a second pass to generate a crossover signal line
Normalized gradient histogram: bar intensity scales to the 100-bar rolling maximum, so weak readings appear faint and strong readings appear saturated, giving an immediate visual sense of magnitude relative to recent history
Crossover signals that only fire when delta is already on the correct side of zero — filtering out shallow, mean-reverting crosses that would otherwise generate noise
How It Works
The calculation pipeline has three stages.
Volume attribution: Each bar's total volume is assigned to buyers or sellers based on candle polarity. A bullish close (close > open) attributes 100% to buyers; a bearish close (close < open) attributes 100% to sellers; equal open and close splits it evenly. This is a bar-level proxy for order flow — not tick-level CVD, but a reasonable approximation available on any timeframe without premium data.
Delta smoothing: Raw delta (bullVol − bearVol) is noisy on its own. A configurable EMA (default 14) removes single-bar spikes and reveals the directional bias over recent bars. This smoothed delta is what plots as the histogram.
Signal line: A second EMA (default 9) is applied to the smoothed delta. This behaves like the MACD signal line — when the histogram crosses above it while already positive, demand is re-accelerating from a bullish baseline; crossing below while negative signals the opposite.
The gradient coloring normalizes the histogram against its own 100-bar peak, so you can immediately tell whether current delta intensity is historically significant or just routine churn.
How the Components Work Together
The two-pass EMA structure is intentional. A single EMA of raw delta would react quickly but produce too many false crosses. By smoothing first and then deriving a signal from the smoothed output, the crossover logic only fires when momentum has already built enough to survive the first layer of filtering. The zero-side gate on signals adds a second filter: a bullish crossover below zero means demand is recovering within a still-bearish context, which is a weaker setup than a crossover that occurs while net buying is already dominant. Together these two conditions — crossover confirmed by zero-side context — push the signal rate down and focus it on higher-conviction shifts.
Trading Ideas and Insights
Use bullish crossovers (delta crosses above signal while delta > 0) as a candidate entry trigger on trending assets. Consider waiting for price to also be above a longer-period moving average before acting on the signal.
Divergence between price making a new high and delta making a lower high may indicate absorption — sellers stepping in at resistance without moving price yet. This is worth watching rather than acting on automatically.
On ranging markets, delta will oscillate around zero and the smoothing will compress toward the baseline. Low histogram intensity (faint gradient bars) visually signals low-conviction conditions where crossover signals are less reliable.
The signal line alert conditions can be used to push notifications when the crossover setup occurs, removing the need to watch the chart continuously. Still, confirm with price structure before entering.
As with any volume-based indicator, results vary by asset liquidity and data provider. Crypto and futures markets with transparent volume data tend to produce cleaner delta readings than instruments where reported volume is an estimate.
Unique Aspects
The gradient normalization against a rolling 100-bar peak is a visual improvement over fixed-scale histograms: it adapts to each instrument's typical volume range without manual scaling, making the chart readable across different assets.
The zero-side signal filter avoids a common problem in oscillator crossover systems — signals that fire during shallow pullbacks within a larger counter-trend, where the histogram is technically crossing but the broader context is unfavorable.
The doji split (50/50 at open = close) is a minor but honest edge case handling that most simplified volume delta scripts skip.
How to Use
Add the indicator to any chart. It works on all timeframes, though intraday timeframes tend to show more granular delta shifts.
Watch histogram color and intensity. Solid, saturated green bars suggest strong net buying relative to recent history; faint bars suggest low-conviction buying or a quiet session.
Look for crossovers of the orange signal line. Bullish: histogram rises through the signal line while above zero. Bearish: histogram falls below the signal while below zero. Half-crossovers (histogram crosses signal but is on the wrong side of zero) are filtered from alerts.
Set alerts via the indicator's alert conditions if you want to monitor for crossover setups without watching the chart.
Customization
Delta Smoothing Length (default: 14) — Controls how much the raw volume delta is smoothed before plotting. Higher values produce a slower, more stable histogram but introduce more lag. Lower values react faster and may show more noise.
Signal Line Length (default: 9) — The EMA length applied to the smoothed delta to create the crossover trigger. Shorter values generate more frequent signals; longer values are more selective.
Bullish / Bearish / Signal Colors — Fully customizable to match your chart theme or personal preference.
Conclusion
Aura Volume Delta Matrix translates raw bar volume into a directional demand measure, smooths it through a dual-EMA pipeline, and presents the result as a gradient histogram with a signal-line crossover system. It's most useful for traders who want a volume-based confirmation layer that isn't just "volume went up" but instead reflects which side of the trade had more participation. Pair it with price structure or trend context for best results — no volume indicator tells the full story on its own.
지표

RSI Divergence Momentum EngineRSI Divergence Momentum Engine
RSI Divergence Momentum Engine is a momentum and divergence analysis tool based on the Relative Strength Index. It is designed to help users study RSI trend tone, overbought / oversold behavior, RSI signal-line interaction, regular divergence, hidden divergence, and price-structure confirmation.
The script combines RSI with a signal moving average, pivot-based divergence detection, ADX trend-strength filtering, RSI trend-lock logic, gap protection, and a price-structure score. The goal is to reduce weak divergence interpretation and provide a more structured view of momentum reversal and continuation conditions.
It does not provide buy or sell recommendations. The purpose of this script is to help users analyze RSI momentum behavior, divergence quality, trend context, and structure alignment.
────────────────────
Core Concept
────────────────────
RSI is a momentum oscillator that measures the speed and magnitude of recent price changes.
A high RSI reading can show strong upside momentum or overbought pressure.
A low RSI reading can show strong downside momentum or oversold pressure.
Divergence occurs when price and RSI move in different structural directions.
A bullish regular divergence occurs when price makes a lower low while RSI forms a higher low.
A bearish regular divergence occurs when price makes a higher high while RSI forms a lower high.
Hidden divergence can be used to study potential continuation behavior inside an existing trend.
This script focuses on four main ideas:
• RSI momentum tone
• RSI signal-line interaction
• regular and hidden divergence
• divergence quality filtering through structure, ADX, and trend context
────────────────────
What This Script Shows
────────────────────
The script can display:
• RSI line
• RSI signal moving average
• RSI / signal fill
• overbought and oversold zones
• RSI middle level
• momentum tone ribbon
• bullish divergence labels
• bearish divergence labels
• hidden divergence labels
• divergence lines
• optional divergence zones
• RSI 50 recovery / loss markers
• RSI signal moving average crossover markers
• overbought / oversold event markers
• confidence percentage
• strength grade markers
These elements are intended to help users review whether RSI momentum is confirming, weakening, diverging, or aligning with price structure.
────────────────────
How It Works
────────────────────
1. The script calculates RSI from the selected source and length.
2. A configurable signal moving average is applied to the RSI.
3. RSI tone is classified by comparing RSI with the middle level and its signal line.
4. Overbought, oversold, and middle reference levels are plotted.
5. Pivot lows and pivot highs are detected on the RSI.
6. Price pivots and RSI pivots are compared to detect regular divergence.
7. Optional hidden divergence can also be detected.
8. Divergence distance and RSI gap filters help reduce very small or crowded signals.
9. ADX filtering checks whether the market has enough trend strength for the divergence context.
10. Trend-lock logic can block counter-trend divergence when RSI remains in a strong trend state.
11. Gap protection can reduce counter-direction signals immediately after strong gap movement.
12. A price-structure score checks EMA, VWAP, swing, and reversal-candle alignment.
13. A confidence score is calculated from ADX, structure score, RSI extreme location, divergence gap, and gap-protection context.
14. The script assigns weak, normal, or strong divergence grades based on the selected thresholds.
This structure is intended to make RSI divergence interpretation more selective than a simple pivot-to-pivot comparison.
────────────────────
Inputs And Customization
────────────────────
Users can adjust:
• RSI source
• RSI length
• RSI signal moving average length
• RSI signal moving average type
• overbought level
• oversold level
• middle level
• signal mode
• RSI 50 cross confirmation window
• RSI / signal gap requirement
• divergence pivot length
• minimum and maximum pivot distance
• minimum RSI divergence gap
• divergence line visibility
• hidden divergence visibility
• divergence cooldown
• strength grading thresholds
• confidence percentage visibility
• ADX filter settings
• trend-lock settings
• gap-protection settings
• price-structure score settings
• trend EMA filter
• volume filter
• RSI extreme filter
• RSI background zones
• RSI signal fill
• momentum tone ribbon
• guide labels
The default settings are designed to focus on clearer RSI divergence structures while reducing weak signals from noisy pivots, trend conflicts, and poor structure alignment.
────────────────────
Visual Elements
────────────────────
The script includes:
• RSI line
• RSI Signal MA
• RSI Signal Fill
• Overbought Zone
• Oversold Zone
• Middle Line
• Momentum Tone Ribbon
• Bull divergence label
• Bear divergence label
• Hidden Bull label
• Hidden Bear label
• Divergence line
• Optional divergence zone
• RSI+ marker
• RSI- marker
• MA cross marker
• OB / OS marker
The RSI line changes color according to bullish, bearish, or neutral momentum tone.
The fill between RSI and the signal moving average helps show short-term RSI pressure.
The momentum tone ribbon gives a compact view of whether RSI is above or below its signal and middle level.
The divergence labels show the detected direction, strength grade, and optional confidence percentage.
────────────────────
Reference Markers
────────────────────
Bull:
Shows a regular bullish RSI divergence.
Bear:
Shows a regular bearish RSI divergence.
H-Bull:
Shows a hidden bullish divergence.
H-Bear:
Shows a hidden bearish divergence.
RSI+:
Shows a stronger RSI recovery above the middle level.
RSI-:
Shows a stronger RSI loss below the middle level.
MA↑:
Shows RSI crossing above its signal moving average.
MA↓:
Shows RSI crossing below its signal moving average.
OB:
Shows RSI crossing into the overbought zone.
OS:
Shows RSI crossing into the oversold zone.
These markers are not trading signals. They are visual references for studying RSI momentum, divergence quality, and trend context.
────────────────────
How To Use
────────────────────
Use this script as an RSI momentum and divergence analysis tool.
General interpretation examples:
• A bullish divergence can help users review whether downside price movement is losing RSI momentum.
• A bearish divergence can help users review whether upside price movement is losing RSI momentum.
• A stronger divergence grade can indicate that the event satisfied more ADX, structure, RSI extreme, and divergence-gap conditions.
• RSI+ can help users review when RSI recovers above the middle level with strength.
• RSI- can help users review when RSI loses the middle level with weakness.
• Hidden divergence can be used to study potential continuation behavior, especially when aligned with trend context.
• The RSI signal moving average can help users review short-term momentum shifts.
• The momentum tone ribbon can help users quickly read bullish, bearish, or neutral RSI pressure.
This script is best reviewed together with price action, support and resistance, volatility, trend structure, and higher-timeframe context.
────────────────────
Confirmation And Repainting Notes
────────────────────
This script uses RSI pivot highs and pivot lows.
Pivot-based divergence requires bars on both sides of the RSI turning point before the pivot is confirmed.
Because of this, divergence labels and divergence lines appear only after the relevant pivot is confirmed.
If realtime mode is used, some signal conditions may change before candle close.
For more conservative use, users can select bar-close confirmation and evaluate signals after candle close.
The script does not use future price data to predict market direction. However, pivot-based structures naturally require confirmation bars, so divergence markers are confirmed after the pivot has formed.
────────────────────
Limitations
────────────────────
This script does not predict future price movement.
It does not provide buy or sell recommendations.
RSI divergence does not guarantee reversal.
Hidden divergence does not guarantee continuation.
RSI can remain overbought or oversold during strong trends.
Divergence signals can be less reliable in low-volatility ranges, fast news-driven moves, or unstable market conditions.
The confidence score is a structural reference, not a probability of profit.
This script should not be used as a standalone trading system.
────────────────────
Disclaimer
────────────────────
This publication is for educational and informational chart analysis only.
It does not constitute financial advice, investment advice, or a recommendation to buy or sell any financial instrument.
All trading and investment decisions are the responsibility of the user.
━━━━━━━━━━━━━━━━━━━━
RSI Divergence Momentum Engine
RSI Divergence Momentum Engine은 Relative Strength Index를 기반으로 한 모멘텀 및 다이버전스 분석 보조지표입니다. RSI 추세 톤, 과매수 / 과매도 행동, RSI 시그널선 상호작용, 일반 다이버전스, 히든 다이버전스, 가격 구조 확인을 함께 분석할 수 있도록 설계되었습니다.
이 스크립트는 RSI와 시그널 이동평균, 피벗 기반 다이버전스 감지, ADX 추세 강도 필터, RSI 트렌드 락 로직, 갭 보호, 가격 구조 점수를 결합합니다. 목적은 약한 다이버전스 해석을 줄이고, 모멘텀 반전과 지속 조건을 더 구조적으로 확인하는 것입니다.
이 지표는 매수 또는 매도 추천을 제공하지 않습니다. 목적은 RSI 모멘텀 행동, 다이버전스 품질, 추세 컨텍스트, 구조 정렬을 분석하는 것입니다.
────────────────────
핵심 개념
────────────────────
RSI는 최근 가격 변화의 속도와 크기를 측정하는 모멘텀 오실레이터입니다.
높은 RSI 값은 강한 상승 모멘텀 또는 과매수 압력을 보여줄 수 있습니다.
낮은 RSI 값은 강한 하락 모멘텀 또는 과매도 압력을 보여줄 수 있습니다.
다이버전스는 가격과 RSI가 서로 다른 구조적 방향으로 움직일 때 발생합니다.
상승 일반 다이버전스는 가격이 더 낮은 저점을 만들지만 RSI는 더 높은 저점을 만들 때 발생합니다.
하락 일반 다이버전스는 가격이 더 높은 고점을 만들지만 RSI는 더 낮은 고점을 만들 때 발생합니다.
히든 다이버전스는 기존 추세 안에서 잠재적인 지속 행동을 관찰하는 데 사용할 수 있습니다.
이 스크립트는 네 가지 핵심 개념에 초점을 둡니다.
• RSI 모멘텀 톤
• RSI 시그널선 상호작용
• 일반 및 히든 다이버전스
• 구조, ADX, 추세 컨텍스트를 통한 다이버전스 품질 필터링
────────────────────
이 스크립트가 보여주는 것
────────────────────
이 스크립트는 다음 요소를 표시할 수 있습니다.
• RSI 라인
• RSI 시그널 이동평균
• RSI / 시그널 fill
• 과매수 및 과매도 구간
• RSI 중앙선
• 모멘텀 톤 리본
• 상승 다이버전스 라벨
• 하락 다이버전스 라벨
• 히든 다이버전스 라벨
• 다이버전스 라인
• 선택 가능한 다이버전스 존
• RSI 50선 회복 / 이탈 마커
• RSI 시그널 이동평균 교차 마커
• 과매수 / 과매도 이벤트 마커
• 신뢰도 퍼센트
• 강도 등급 마커
이 요소들은 RSI 모멘텀이 가격을 확인하는지, 약해지는지, 다이버전스를 형성하는지, 또는 가격 구조와 정렬되는지를 복기할 수 있도록 돕습니다.
────────────────────
작동 방식
────────────────────
1. 선택한 소스와 길이를 기준으로 RSI를 계산합니다.
2. 설정 가능한 시그널 이동평균을 RSI에 적용합니다.
3. RSI를 중앙선 및 시그널선과 비교해 모멘텀 톤을 분류합니다.
4. 과매수, 과매도, 중앙 기준선을 표시합니다.
5. RSI의 피벗 저점과 피벗 고점을 감지합니다.
6. 가격 피벗과 RSI 피벗을 비교해 일반 다이버전스를 감지합니다.
7. 선택적으로 히든 다이버전스도 감지할 수 있습니다.
8. 피벗 거리와 RSI gap 필터를 사용해 너무 작거나 밀집된 신호를 줄입니다.
9. ADX 필터는 다이버전스 컨텍스트에 충분한 추세 강도가 있는지 확인합니다.
10. 트렌드 락 로직은 RSI가 강한 추세 상태를 유지할 때 역추세 다이버전스를 차단할 수 있습니다.
11. 갭 보호 로직은 강한 갭 움직임 직후 반대 방향 신호를 줄일 수 있습니다.
12. 가격 구조 점수는 EMA, VWAP, 스윙, 반전 캔들 정렬을 확인합니다.
13. ADX, 구조 점수, RSI 극단 위치, 다이버전스 gap, 갭 보호 컨텍스트를 기반으로 신뢰도 점수를 계산합니다.
14. 선택한 기준에 따라 약함, 보통, 강함 등급을 부여합니다.
이 구조는 단순한 피벗 비교보다 더 선별적인 RSI 다이버전스 해석을 목표로 합니다.
────────────────────
입력값 및 설정
────────────────────
사용자는 다음 항목을 조정할 수 있습니다.
• RSI source
• RSI length
• RSI signal moving average length
• RSI signal moving average type
• overbought level
• oversold level
• middle level
• signal mode
• RSI 50 cross confirmation window
• RSI / signal gap requirement
• divergence pivot length
• minimum and maximum pivot distance
• minimum RSI divergence gap
• divergence line visibility
• hidden divergence visibility
• divergence cooldown
• strength grading thresholds
• confidence percentage visibility
• ADX filter settings
• trend-lock settings
• gap-protection settings
• price-structure score settings
• trend EMA filter
• volume filter
• RSI extreme filter
• RSI background zones
• RSI signal fill
• momentum tone ribbon
• guide labels
기본 설정은 노이즈성 피벗, 추세 충돌, 구조 정렬이 부족한 약한 신호를 줄이면서 더 명확한 RSI 다이버전스 구조에 집중하도록 설계되어 있습니다.
────────────────────
시각 요소
────────────────────
이 스크립트는 다음 시각 요소를 포함합니다.
• RSI line
• RSI Signal MA
• RSI Signal Fill
• Overbought Zone
• Oversold Zone
• Middle Line
• Momentum Tone Ribbon
• Bull divergence label
• Bear divergence label
• Hidden Bull label
• Hidden Bear label
• Divergence line
• Optional divergence zone
• RSI+ marker
• RSI- marker
• MA cross marker
• OB / OS marker
RSI 라인은 상승, 하락, 중립 모멘텀 톤에 따라 색상이 바뀝니다.
RSI와 시그널 이동평균 사이의 fill은 단기 RSI 압력을 보여줍니다.
모멘텀 톤 리본은 RSI가 시그널선과 중앙선 위 또는 아래에 있는지 빠르게 확인하는 데 도움을 줍니다.
다이버전스 라벨은 감지된 방향, 강도 등급, 선택 가능한 신뢰도 퍼센트를 표시합니다.
────────────────────
참고 마커
────────────────────
Bull:
일반 상승 RSI 다이버전스를 표시합니다.
Bear:
일반 하락 RSI 다이버전스를 표시합니다.
H-Bull:
히든 상승 다이버전스를 표시합니다.
H-Bear:
히든 하락 다이버전스를 표시합니다.
RSI+:
RSI가 중앙선 위로 강하게 회복되는 구간을 표시합니다.
RSI-:
RSI가 중앙선 아래로 약하게 이탈하는 구간을 표시합니다.
MA↑:
RSI가 시그널 이동평균을 상향 돌파하는 구간을 표시합니다.
MA↓:
RSI가 시그널 이동평균을 하향 이탈하는 구간을 표시합니다.
OB:
RSI가 과매수 구간으로 진입하는 구간을 표시합니다.
OS:
RSI가 과매도 구간으로 진입하는 구간을 표시합니다.
이 마커들은 매매 신호가 아닙니다. RSI 모멘텀, 다이버전스 품질, 추세 컨텍스트를 관찰하기 위한 시각적 참고 지점입니다.
────────────────────
사용 방법
────────────────────
이 스크립트는 RSI 모멘텀 및 다이버전스 분석 도구로 사용하는 것이 적절합니다.
일반적인 해석 예시는 다음과 같습니다.
• 상승 다이버전스는 가격 하락 움직임에서 RSI 모멘텀이 약해지고 있는지 확인하는 데 사용할 수 있습니다.
• 하락 다이버전스는 가격 상승 움직임에서 RSI 모멘텀이 약해지고 있는지 확인하는 데 사용할 수 있습니다.
• 더 강한 다이버전스 등급은 ADX, 구조, RSI 극단 위치, divergence gap 조건을 더 많이 충족했다는 의미일 수 있습니다.
• RSI+는 RSI가 중앙선을 강하게 회복하는 구간을 복기하는 데 사용할 수 있습니다.
• RSI-는 RSI가 중앙선을 약하게 이탈하는 구간을 복기하는 데 사용할 수 있습니다.
• 히든 다이버전스는 특히 추세 컨텍스트와 정렬될 때 잠재적인 지속 행동을 분석하는 데 사용할 수 있습니다.
• RSI 시그널 이동평균은 단기 모멘텀 전환을 확인하는 데 사용할 수 있습니다.
• 모멘텀 톤 리본은 상승, 하락, 중립 RSI 압력을 빠르게 읽는 데 도움을 줄 수 있습니다.
이 스크립트는 가격 행동, 지지와 저항, 변동성, 추세 구조, 상위 시간대 컨텍스트와 함께 검토하는 것이 좋습니다.
────────────────────
확인봉 및 리페인트 안내
────────────────────
이 스크립트는 RSI 피벗 고점과 피벗 저점을 사용합니다.
피벗 기반 다이버전스는 RSI 전환점의 양쪽에 일정 수의 봉이 형성되어야 확정됩니다.
따라서 다이버전스 라벨과 라인은 관련 피벗이 확정된 이후에만 표시됩니다.
Realtime 모드를 사용할 경우 일부 신호 조건은 봉 마감 전까지 변경될 수 있습니다.
보다 보수적인 사용을 원한다면 Bar Close Confirmed 모드를 선택하고 봉 마감 이후 신호를 확인하는 것이 적절합니다.
이 스크립트는 미래 가격 데이터를 사용해 시장 방향을 예측하지 않습니다. 다만 피벗 기반 구조는 확인봉이 필요하므로 다이버전스 마커는 피벗이 형성된 뒤 확정됩니다.
────────────────────
한계
────────────────────
이 스크립트는 미래 가격 움직임을 예측하지 않습니다.
매수 또는 매도 추천을 제공하지 않습니다.
RSI 다이버전스는 반전을 보장하지 않습니다.
히든 다이버전스는 추세 지속을 보장하지 않습니다.
강한 추세에서는 RSI가 장시간 과매수 또는 과매도 상태에 머무를 수 있습니다.
저변동성 횡보, 뉴스성 급변, 불안정한 시장 환경에서는 다이버전스 신호의 신뢰도가 낮아질 수 있습니다.
신뢰도 점수는 구조적 참고값이지 수익 확률이 아닙니다.
이 스크립트를 단독 매매 시스템으로 사용해서는 안 됩니다.
────────────────────
중요 고지
────────────────────
본 게시물은 교육 및 정보 제공 목적의 차트 분석 자료입니다.
투자 자문, 매수·매도 추천, 특정 금융상품 거래 권유를 의미하지 않습니다.
모든 투자 판단과 그 결과에 대한 책임은 이용자 본인에게 있습니다. 지표

지표
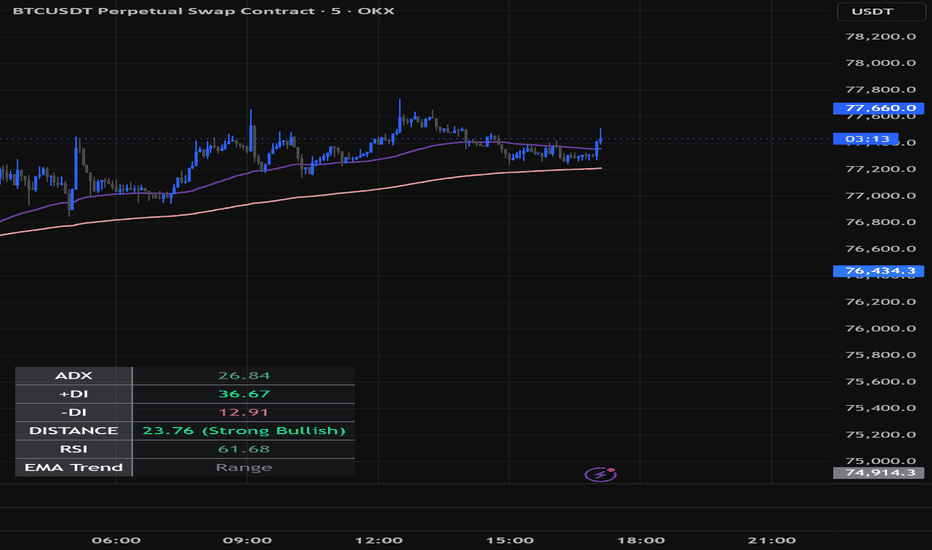
EMA's [Ordinary Trader]EMAs by Plots two parallel stacks of three EMAs — one anchored to a Higher Timeframe of your choice, one following the chart's current timeframe. Built around the Ordinary Trader methodology, where the 15-minute 50 / 100 / 300 EMA stack acts as a higher-timeframe directional filter while trading on lower timeframes.
**WHAT YOU SEE ON THE CHART**
Six EMAs total, split into two groups:
- **HTF EMAs** — three EMAs locked to a higher timeframe of your choice (default 15-minute). They stay anchored to 15-minute data even when you drop the chart to 1m, 3m, or 5m. Drawn as **thick** lines.
- **LTF EMAs** — three EMAs that follow the chart's current timeframe (or any specific lower timeframe you pin them to). Drawn as **thin** lines.
Same colour for the same EMA length across both groups: 50 = sage green, 100 = terracotta orange, 300 = purple-grey. Thickness tells you which timeframe you're looking at; colour tells you which EMA length.
**HOW TO USE IT**
The default setup is the Ordinary Trader 15-minute filter: HTF set to 15-minute, LTF following the chart. Pull up a 1m, 3m, or 5m chart and you'll see both groups at once — the thick lines are your 15-minute anchor, the thin lines are your chart-timeframe stack for entries.
By default the 50 and 100 EMAs are on in both groups; the 300 EMA is off but available. Flip it on in the Settings panel if you want the full stack.
**AUTO-HIDE FOR THE LTF GROUP**
When your chart timeframe is equal to or higher than the HTF timeframe, the LTF group hides automatically. So on a 15-minute chart (with HTF still at 15-minute) only the HTF group shows — no point drawing the LTF stack on top of an identical HTF stack. Same on the 1-hour, daily, or higher.
**VISUAL SMOOTHING**
When a higher-timeframe EMA is plotted on a lower-timeframe chart, it naturally looks stepped — each new HTF bar updates the EMA in one chunk, so the line moves in jumps rather than smoothly. The Visual Smoothing option (on by default) applies a light smoothing pass so the line reads cleanly on lower-timeframe charts. It trades a tiny amount of lag for a cleaner look — turn it off if you'd rather see the raw, stepped HTF values.
**SETTINGS**
- **General** — LTF Timeframe, HTF Timeframe, Plot Style (Line / Stepline), Visual Smoothing on/off + length
- **HTF EMAs** — toggle, length, and price source for each of the three HTF EMAs
- **LTF EMAs** — toggle, length, and price source for each of the three LTF EMAs
**NOTES**
- Pairs naturally with the other Ordinary Trader-family indicators (STRATEGY, ZONES, KEY LEVELS, FVGs). 지표

3 Supertrend NON-REPAINT3 Supertrend NON-REPAINT PRO — Institutional Market Filter System
The 3 Supertrend NON-REPAINT PRO is a next-generation evolution of the classic multi-Supertrend concept, redesigned for modern intraday and swing trading environments. Instead of relying on simple trend alignment, this system builds a multi-layer market intelligence engine that filters noise, confirms structure, and focuses only on high-quality trading conditions.
Most Supertrend strategies fail in real markets because they:
Overtrade in choppy conditions
Ignore volume context
Lack session awareness
Repaint or behave inconsistently in backtests
This version solves those issues by combining trend, volatility, liquidity, and time filters into one unified framework.
The core of the strategy is built on three independent Supertrend layers (fast, mid, slow):
Trades are only considered when Supertrends agree in direction
This ensures true trend consensus across multiple volatility regimes
Eliminates weak or early-stage signals
This creates a robust directional backbone for the entire system.
A built-in ATR-normalized trend strength engine classifies market conditions into:
🔵 TREND → optimal trading environment
🟡 MIX → reduced reliability
⚫ CHOP → filtered out
This prevents Supertrend signals from firing during low-quality consolidation phases.
Every signal is validated against real participation using relative volume:
LOW / NORMAL / HIGH / SPIKE classification
Trades are prioritized only when volume confirms momentum
Filters out weak breakouts and liquidity traps
The strategy adapts to global market behavior by identifying:
Asia session
London session
New York session
US pre-market
Trading is focused on high-liquidity sessions, where trend continuation is statistically stronger and slippage risk is lower.
This system is engineered for real execution reliability:
All signals require bar confirmation
No intrabar repainting behavior
Backtest results remain stable and trustworthy
This makes it suitable for both discretionary and automated trading workflows.
The strategy includes Fair Value Gap detection, allowing traders to:
Identify institutional imbalance zones
Track price inefficiencies in real time
Combine trend signals with structural liquidity zones
This adds a powerful contextual layer beyond pure trend following.
To improve directional bias, the system includes:
Fast EMA (short-term momentum)
Slow EMA (macro trend direction)
These act as a secondary confirmation layer, aligning Supertrend signals with broader market structure.
This is not just a “3 Supertrend indicator”.
It is a multi-factor trading framework that only triggers when all conditions align:
✔ Trend consensus (3 Supertrends)
✔ Market regime validation
✔ Volume confirmation
✔ Session liquidity filter
✔ Structural imbalance awareness (FVG)
✔ Non-repaint confirmation
Instead of reacting to every trend flip, this system focuses only on:
High-probability, high-liquidity, structurally confirmed market moves.
It transforms the classic Supertrend idea into a professional-grade confluence engine designed for disciplined trading and algorithmic consistency. 지표
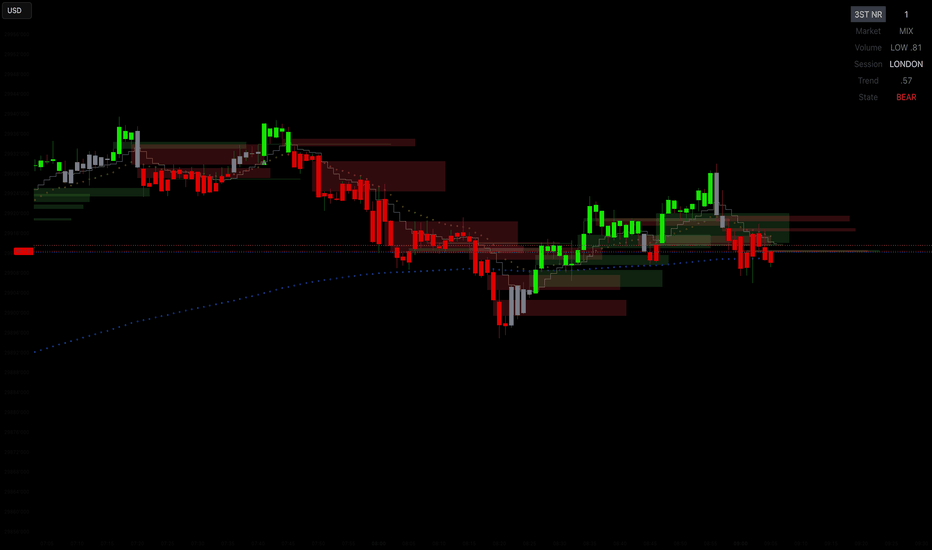
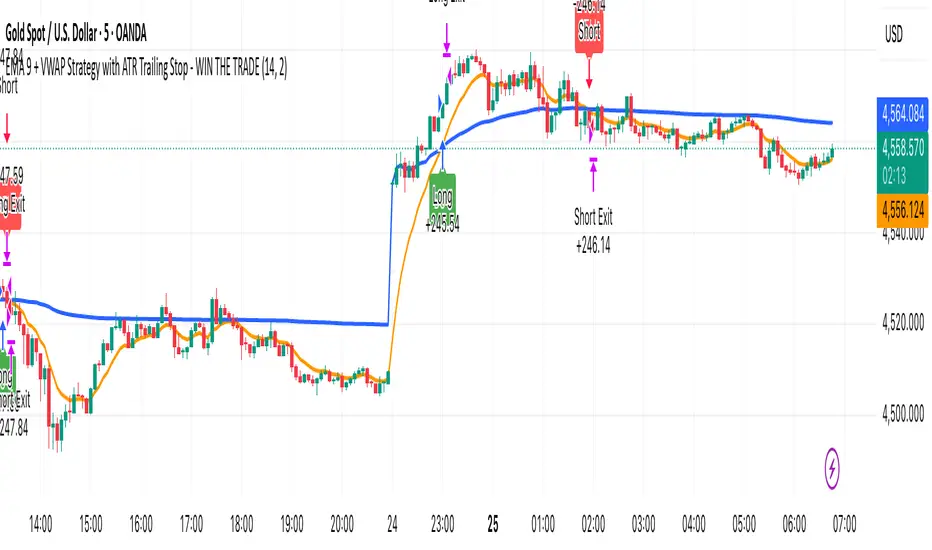
EMA 9 + VWAP Strategy with ATR Trailing Stop - WIN THE TRADEEMA 9 + VWAP Strategy with ATR Trailing Stop
A simple trend-following strategy that combines the power of the 9 EMA , VWAP , and an ATR-based trailing stop for cleaner entries and dynamic trade management.
This strategy is designed for traders who want a straightforward system with minimal discretion and clear buy/sell conditions.
Strategy Logic
Buy Conditions
A long position is opened when the 9 EMA crosses above VWAP.
Sell Conditions
A short position is opened when the 9 EMA crosses below VWAP.
Trade Management
Uses an ATR trailing stop to automatically lock in profits and manage risk. The trailing stop dynamically adjusts based on market volatility.
Features
EMA + VWAP crossover entries
ATR-based trailing stop exits
Visual BUY/SELL labels
Dynamic trailing stop lines plotted on chart
Built-in alerts
Works well for scalping, intraday trading, and trend continuation setups
Best Markets
This strategy can be used on Forex, Gold (XAUUSD), Indices, Crypto, and Stocks.
Recommended Timeframes
Popular timeframes include 1 Minute, 5 Minute, 15 Minute, and 1 Hour.
Lower timeframes generally produce more signals, while higher timeframes can provide cleaner trends.
Inputs
ATR Length controls the ATR calculation period.
ATR Multiplier adjusts the trailing stop distance.
Increasing the ATR multiplier gives trades more room to breathe, while lowering it creates tighter exits.
Alerts
The script includes ready-to-use JSON webhook alerts for automation and bot integrations.
You can connect it to trading bots, Discord alerts, Telegram alerts, trade execution systems, and prop firm automation tools.
Disclaimer
This strategy is for educational purposes only and should not be considered financial advice. Always test and optimize settings before using on a live account.
전략

Simple MA TPO
Simple MA TPO
■Description
■Concept & Purpose
This indicator was developed with a single core concept: to discover the "true power" and foster a deeper understanding of the Time Price Opportunity (TPO) profile—often considered a super-tool in market analysis. By combining traditional TPO mechanics with market gravity (Moving Averages), this script aims to provide traders with a clearer, more visual representation of value and price deviation over time.
■Originality & How It Works
While traditional TPO profiles use letters (A, B, C...) to denote time periods and static colors for volume/time areas, this script introduces two highly original mechanics to add value to the community:
Sequential Numbering: Instead of letters, each TPO block is numbered sequentially (1, 2, 3...) based on its formation order. This drastically simplifies reading the flow of time within a session.
MA Deviation Gradient Coloring: The most unique feature is its coloring logic. TPO blocks are not colored randomly. Instead, their color is determined by their deviation from a baseline Moving Average (acting as the market's center of gravity).
■Calculations & Output
To ensure complete transparency in how the visual data is generated, here is the specific calculation used for the block colors:
Formula: Deviation % = ((Price / MA) - 1.0) * 100.0
Why this calculation? This calculates the exact percentage distance between the TPO block's price level and the baseline Moving Average at the time that specific block was formed. It visualizes how "overextended" the market was when time was spent at that price.
Actual Output: The output is a percentage float value (e.g., if the MA is $100 and the block price is $102, the output is 2.0 or 2%). This value is then clamped by the user-defined Max Deviation % input (default 2.0%).
Color Mapping: The clamped percentage is fed into a gradient. Negative deviations (undervalued relative to MA) shift towards Cyan, while positive deviations (overvalued) shift towards Magenta.
■How to Use
Identify Value Areas: Look for the "POC" (Point of Control) line, which indicates the price level where the most time (highest number of blocks) was spent.
Assess Reversion Risk: Blocks that are bright Magenta or bright Cyan indicate that time was spent far away from the Moving Average. Traders can use this to visually gauge if a breakout is sustainable or if a mean-reversion is likely.
Customize Your View: You can adjust the TPO timeframes (Daily/Weekly/Monthly), the block interval (e.g., 30 minutes), and choose your preferred MA type (SMA, EMA, WMA, HMA).
Disclaimer: This indicator is designed for educational and analytical purposes. TPO is a tool for understanding market structure and time spent at price levels, not a standalone trading signal generator. Past performance of price around value areas does not guarantee future results.
説明文
コンセプトと開発目的
このインジケーターは「相場分析におけるスーパーツールであるTPO(マーケットプロファイル)の真の力を見出し、深い理解を得る」というコアコンセプトのもとに開発されました。伝統的なTPOの仕組みと相場の重心(移動平均線)を融合させることで、時間の経過に伴う価値の推移と価格の乖離を、より視覚的かつ明確にトレーダーに提供します。
オリジナリティと機能
従来のTPOプロファイルは時間枠をアルファベット(A、B、C...)で表し、静的な色を使用しますが、このスクリプトはコミュニティに新たな付加価値を提供するために2つの独自機能を備えています。
連番表示: アルファベットの代わりに、各TPOブロックは形成された順番に沿って(1、2、3...)と連番で表示されます。これにより、セッション内での時間の流れを直感的に読み取ることが劇的に容易になります。
MA乖離率によるグラデーション着色: 最大の特徴はその着色ロジックです。TPOブロックは、相場の重心として機能する基準移動平均線(MA)からの「乖離率」に基づいて色が決定されます。
計算式と出力値の根拠
視覚データがどのように生成されているかを完全に透明化するため、ブロックの着色に使用されている具体的な計算式を明記します:
計算式: 乖離率(%) = ((価格 / MA) - 1.0) * 100.0
なぜこの計算なのか? この式は、特定のTPOブロックが形成された瞬間において、その価格水準が基準となる移動平均線からパーセンテージでどの程度離れているか(価格がどれほど伸びきっているか)を正確に測定するために使用されます。
実際の出力値: 出力はパーセンテージの浮動小数点数になります(例:MAが100ドルで、ブロックの価格が102ドルの場合、出力は 2.0 つまり2%になります)。この値は、ユーザーが設定した「最大の限界乖離率」(デフォルト2.0%)によって制限されます。
カラーマッピング: 制限されたパーセンテージはグラデーション関数に渡されます。マイナスの乖離(MAに対して割安)はシアン(水色)に近づき、プラスの乖離(割高)はマゼンタ(赤紫)に近づくように色が変化します。
使用方法
バリューエリアの特定: 最も多くの時間(ブロック数)が費やされた価格帯を示す「POC(Point of Control)」ラインを探し、相場の中心的価値を把握します。
平均回帰リスクの評価: 鮮やかなマゼンタやシアンのブロックは、移動平均線から遠く離れた場所で時間が費やされたことを示します。トレーダーはこれを視覚的な基準として、ブレイクアウトが持続可能か、あるいは平均回帰(MAへの戻り)が起こりやすいかを判断できます。
柔軟なカスタマイズ: TPOの期間(日/週/月)、ブロックの区切り(例:30分)、そして好みのMAタイプ(SMA、EMA、WMA、HMA)を自由に変更できます。
免責事項:このインジケーターは教育および分析目的で設計されています。TPOは市場構造と価格帯での滞在時間を理解するためのツールであり、単独の売買シグナルではありません。バリューエリア周辺での過去の価格動向は、将来の結果を保証するものではありません。
지표

지표

ID0009 Rebound Exit Planner [ReconHK]━━━━━━━━━━━━━━━━━━━━━━━━━━━━━━
OVERVIEW
━━━━━━━━━━━━━━━━━━━━━━━━━━━━━━
ID 0009 — Rebound Exit Planner is an advanced trading concept designed mainly for 15-minute, 1-hour, and 4-hour timeframes . It is built for day trading and swing trading , where timing, capital efficiency, and realistic exits matter.
This indicator does not try to predict the whole future of the ticker. It focuses on one professional question:
Inside this defined box, what is the realistic rebound potential of this ticker based on its historical behavior?
━━━━━━━━━━━━━━━━━━━━━━━━━━━━━━
1. CORE MINDSET — WHAT MATTERS IS INSIDE THE BOX
━━━━━━━━━━━━━━━━━━━━━━━━━━━━━━
ID 0009 is for traders who want high-quality, controlled rebound trades . The main idea is not to predict everything that happens after the move. The main idea is:
Can this ticker reach a realistic historical target inside the box?
What happens outside the box is not the main focus. Price may continue higher after the box, drop again, or move sideways. For this indicator, the important question is:
Did the trade do what we wanted inside the box?
The box gives the trader a defined area to test whether the target is realistic, whether the timing is realistic, whether price reached the target before the box ended, whether the ticker showed enough rebound strength, whether the sample quality was acceptable, and whether the capital was used efficiently.
Key point: ID 0009 does not make trading risk-free. Position size must always follow risk management. The advantage is that it connects target, timing, historical samples, and exit discipline inside one box.
Short version: What happens inside the box matters most. If the ticker can repeatedly reach realistic targets inside the box, the trader can close faster, manage capital better, and avoid holding trades with no clear exit plan.
━━━━━━━━━━━━━━━━━━━━━━━━━━━━━━
2. CORE CONCEPT — WHAT THIS INDICATOR REALLY DOES
━━━━━━━━━━━━━━━━━━━━━━━━━━━━━━
ID 0009 is mainly an exit-planning indicator , not a simple buy-signal tool. Its purpose is to help traders build a higher-quality rebound trade by defining where price could realistically rebound, how much time the move may need, and where the trader should close or reduce the position .
The box shows the ticker’s historical rebound potential within a specific active-market time window. The bands inside the box are not random targets; they are based on how far similar rebounds reached in the past.
Correct use: Enter with your own strategy or the optional LONG helper, then use ID 0009 to manage the exit professionally.
The focus is not only “Can price go up?” The better question is:
Can this ticker reach a realistic target inside the box before the time window becomes unattractive?
━━━━━━━━━━━━━━━━━━━━━━━━━━━━━━
3. WHAT THE BOX MEANS
━━━━━━━━━━━━━━━━━━━━━━━━━━━━━━
The box is your trade management area . It tells you:
From this point, price has this amount of time to reach a realistic rebound target.
Use it like this: find a possible long entry using your own strategy or the optional LONG triangle, look at the box and choose a realistic exit band, use P68 more carefully in weak markets, use P50 / P40 only when the trend is strong, freeze the box if you want to test that exact moment, and watch only what happens inside the box .
If price reaches your selected band, close or reduce. If price moves too slowly and the box is almost finished, stop waiting or reduce risk.
Practical rule: Target reached inside the box = take profit. Box ending without target = do not keep capital blocked.
The box is not about predicting the full future. It is about making the trade more controlled, faster, and easier to manage.
━━━━━━━━━━━━━━━━━━━━━━━━━━━━━━
4. HOW TO READ THE LABEL CORRECTLY
━━━━━━━━━━━━━━━━━━━━━━━━━━━━━━
Each band has a label on the right side of the box.
Example: P68 +4.00% | 104.00 | N 64
Read it like this: P68 is the band type, +4.00% is the expected rebound target from the projection base price, 104.00 is the target price level, and N 64 means 64 historical samples were used for this projection.
This label does not mean there is a 68% chance price will go up.
Correct meaning: This is the historical rebound target zone, the target price, and the number of samples used.
Practical rule: Use the label to identify the target price and sample count quickly. Do not read it as a guaranteed probability of price increase.
Screenshot example:
━━━━━━━━━━━━━━━━━━━━━━━━━━━━━━
5. HOW TO USE IT CORRECTLY IN AN UPTREND
━━━━━━━━━━━━━━━━━━━━━━━━━━━━━━
In an uptrend, the main market direction supports the rebound, so price may have a better chance to reach higher bands.
Confirm the ticker is really in an uptrend, enter using your own strategy or the optional LONG triangle, and use the box to plan the exit before the trade becomes emotional. Take partial profit at safer bands like P80 or P68 . If momentum stays strong, you can allow part of the position to aim for P50 or P40 . If price reaches a band and starts rejecting, reduce or close instead of waiting blindly. If price does not move well inside the box, do not keep capital blocked.
Practical rule: In an uptrend, P50 or P40 can be possible, but protect profit step by step.
Goal: Do not hold forever. Use trend strength to reach a better exit inside the box.
━━━━━━━━━━━━━━━━━━━━━━━━━━━━━━
6. HOW TO USE IT CORRECTLY IN A DOWNTREND
━━━━━━━━━━━━━━━━━━━━━━━━━━━━━━
A downtrend is one of the best ways to test the real power of ID 0009. Downtrends are difficult because rebounds are usually weaker, faster, and less reliable. If the indicator can help identify where to exit in a downtrend, it shows how useful the box really is.
Downtrend goal: Catch a controlled rebound, close faster, and avoid staying in the trade before price drops again.
Find a ticker that is clearly in a downtrend. Use your own entry logic or the optional LONG triangle only as a helper. Open the indicator box and check the realistic rebound zones. Be more defensive with the target. Focus mainly on safer zones like P68 , not aggressive zones like P40 . Use Freeze Projection from the GUI where a long entry would make sense, then use TradingView Replay Mode to watch how price behaves inside the frozen box. Repeat this many times on different downtrend examples.
The important question in a downtrend is not “Will this become a new uptrend?” The better question is:
How much can this ticker realistically rebound before weakness returns?
Practical rule: In a downtrend, use ID 0009 carefully. Enter only with confirmation, target safer zones like P68, close faster, and do not wait too long for P40 unless the structure clearly improves.
Screenshot example:
Recommended test: Use Freeze Projection + Replay Mode in downtrends to check again and again whether the indicator can guide controlled exits before price drops again.
━━━━━━━━━━━━━━━━━━━━━━━━━━━━━━
7. THE 3 SETTINGS USERS SHOULD UNDERSTAND
━━━━━━━━━━━━━━━━━━━━━━━━━━━━━━
Most settings are already explained in the GUI. For normal use, focus only on these three:
Rebound Window — controls how much active market time the ticker has to reach the target. Shorter window = faster trade. Longer window = more time for the rebound.
Freeze Projection — locks the box at one exact moment. Use it with Replay Mode to test if price reaches the target inside the box.
Optional LONG Triangles — only an entry helper, not the main indicator. Use it if helpful, or disable it if you have your own entry method.
Important: The main value is still the exit box, not the entry triangle.
━━━━━━━━━━━━━━━━━━━━━━━━━━━━━━
8. THE TABLE — CHECK QUALITY BEFORE TRUSTING THE BOX
━━━━━━━━━━━━━━━━━━━━━━━━━━━━━━
The table tells you if the projection is strong enough to use. Focus on three things: Samples , Status / Fit , and Window .
Samples show how many historical cases were used. More samples usually means more reliable context. Status / Fit shows whether the setup has enough historical support or should be treated carefully. Window shows how much active market time the ticker has to reach the target.
Practical rule: If samples are low or status is weak, do not trust the box too much. Use smaller risk or skip the trade.
━━━━━━━━━━━━━━━━━━━━━━━━━━━━━━
9. GOOD MINDSET VS BAD MINDSET
━━━━━━━━━━━━━━━━━━━━━━━━━━━━━━
Good mindset means using ID 0009 as an exit-plan tool: enter with your own strategy, use the box to plan the exit, close or reduce when price reaches the selected label target, use P68 more carefully in downtrends, use P50 or P40 only when the trend is strong, stop waiting if the box is ending and price is still weak, check the sample table before trusting the box, and care most about what happens inside the box.
Bad mindset means treating the indicator like a guaranteed signal: buying only because the LONG triangle appears, thinking the label means price must go up, waiting for P40 in a weak downtrend, ignoring low samples, holding after the box ends with no plan, thinking the indicator removes risk, or caring more about what might happen after the box than what happens inside it.
Practical rule: Use ID 0009 to exit with discipline, not to hope longer.
━━━━━━━━━━━━━━━━━━━━━━━━━━━━━━
FINAL SHORT EXPLANATION
━━━━━━━━━━━━━━━━━━━━━━━━━━━━━━
ID0009 is a historical rebound exit-plan indicator . It helps traders understand what a ticker can realistically achieve inside a specific active-market time window based on historical samples.
The indicator is not mainly for entry. It is mainly for planning where and when to close or reduce a long position before the rebound becomes weak or capital stays blocked too long.
Very short version: Enter with your own strategy. Use ID0009 to plan the exit. The box shows the ticker’s realistic rebound potential, the labels show target zones, and the table shows whether the projection has enough historical support.
Please subscribe and follow the next releases so you do not miss upcoming indicators and improvements. I am also working on other promising ideas, including tools related to Dollar Cost Average, liquidity, and other advanced trading concepts . 지표

지표
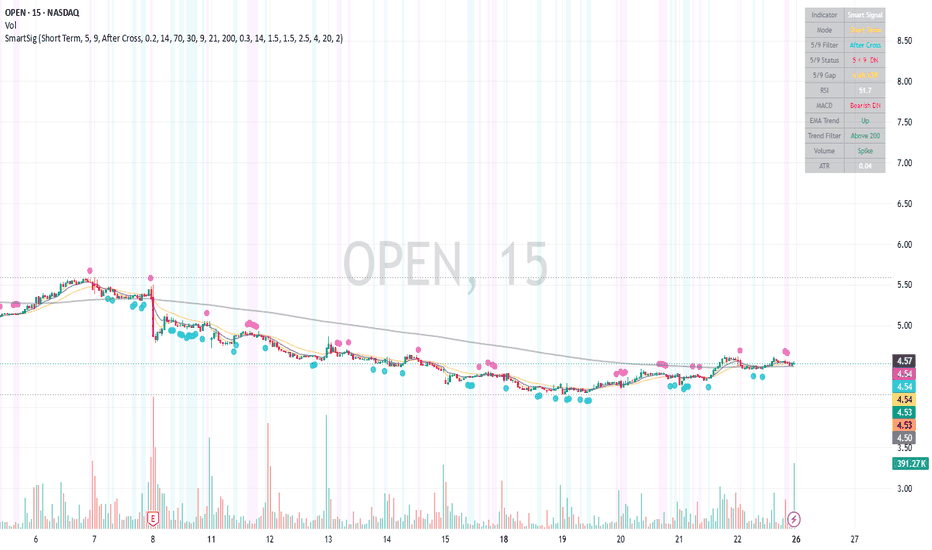
[ A L P H A X ] VOIDAlphaX VOID — Fair Value Gap Confluence System: FVG Detection, 5-Layer Retest Entries, CE Rejection Filter & ATR Trailing Exit Engine
AlphaX VOID is a professional-grade smart money confluence system built around the single most powerful concept in institutional price action: the Fair Value Gap. Where price moves so aggressively that it leaves an unmitigated imbalance in the order book — a void — institutions return to fill orders at those levels. VOID detects every qualifying gap in real time, tracks its state, and waits. When price returns to retest that void, a 5-layer confluence engine evaluates the quality of that retest across EMA structure, squeeze momentum, volume delta pressure, VWAP bias, and ADX directional strength. Only when enough layers agree does a signal fire — not on the gap formation, not on the first touch, but on a confirmed, high-quality institutional retest with the trend and momentum behind it. Designed for active traders on crypto, forex, gold, and indices across the 1-minute to 15-minute timeframes.
━━━━━━━━━━━━━━━━━━━━━━━━━━━━━━━━━━━━━━━━
🕳 What Is a Fair Value Gap?
A Fair Value Gap (FVG) is a three-candle price structure where the middle candle moves with such force that it creates a gap between the wick of the first candle and the wick of the third candle — a zone where no two-sided trading occurred. Price moved through that area too fast for the market to establish fair value.
Bull FVG: The low of candle 3 is above the high of candle 1. Price left a gap to the upside — an unmitigated bullish imbalance. When price returns to this zone, institutions are likely resting buy orders there.
Bear FVG: The high of candle 3 is below the low of candle 1. Price left a gap to the downside — an unmitigated bearish imbalance. When price returns to this zone, institutions are likely resting sell orders there.
Why FVGs matter to institutional traders: Market makers and large institutions cannot fill their full order size in a single fast move. When price revisits the FVG zone, they use the retest to complete their position. This is why FVG retests so frequently produce high-velocity continuation moves — they are not random support/resistance, they are unfilled institutional order clusters.
AlphaX VOID does not simply draw FVG boxes. It tracks the lifecycle of every gap — from formation through active, retest, and filled — and only presents entry signals when the retest coincides with genuine multi-layer confluence.
━━━━━━━━━━━━━━━━━━━━━━━━━━━━━━━━━━━━━━━━
🔬 FVG Detection Engine — Quality Filters
Not every gap is worth trading. Gaps formed during weak, choppy price action are noise. VOID applies two mandatory quality filters to every detected gap before registering it as valid.
Displacement Filter:
The middle candle of the three-candle structure must show genuine displacement — its body must exceed the average body size over the last 14 bars by a configurable multiplier (default: 1.15×). This ensures the gap was formed by a real impulsive move, not a slow grind that happened to leave a small gap. A gap without displacement is a weak gap.
Minimum Gap Size Filter:
The physical size of the gap (the distance between the relevant wicks of candle 1 and candle 3) must meet a minimum threshold expressed as a multiple of ATR (default: 0.15×). This eliminates micro-gaps that are too small to be meaningful — gaps so narrow that spread and noise would immediately invalidate any retest entry.
Only gaps passing both filters are registered, stored, and tracked.
FVG Lifecycle Tracking:
Every registered FVG is stored in memory arrays with its top, bottom, direction, formation bar, and fill state. On every bar, VOID updates the state of all active gaps:
Active — gap is unmitigated. Box and CE line extend forward in real time
Filled — price has fully closed through the gap boundary. Box color shifts to neutral gray, CE line fades. Optionally hidden entirely via the Hide Filled FVGs setting
Age cutoff — gaps older than the configured Max FVG Age (default: 120 bars) are excluded from retest scanning. Old gaps lose institutional relevance as market structure evolves
━━━━━━━━━━━━━━━━━━━━━━━━━━━━━━━━━━━━━━━━
📐 The FVG Visual System
Every active FVG is rendered directly on the price chart as a structured visual zone with three components.
FVG Box:
A shaded rectangle spanning the full gap from top to bottom. Bull gaps are shaded in semi-transparent yellow-green; bear gaps in semi-transparent red. The box extends forward by the configured number of bars (default: 30) and updates in real time as price evolves. When a gap fills, the box shifts to neutral gray — or is removed entirely if Hide Filled FVGs is enabled.
CE Line (Consequent Encroachment — 50% Level):
A dashed line at the exact midpoint of the FVG zone. This is the Consequent Encroachment level — the 50% retracement into the gap. This level is critical for entries: the most reliable FVG retests are those where price dips into the gap but closes back above (bull) or below (bear) the CE line, demonstrating that the institutional zone held and rejected price cleanly. The CE Rejection filter is on by default and can be toggled in settings.
FVG Formation Dots:
Small squares appear below (bull FVG) or above (bear FVG) the bar at the moment a new qualifying gap is formed, providing instant chart-level notification of every new gap without requiring dashboard attention.
━━━━━━━━━━━━━━━━━━━━━━━━━━━━━━━━━━━━━━━━
🧠 The Retest Detection Engine
Detecting a gap is the easy part. Detecting a high-quality retest of that gap is the core intellectual challenge VOID is built to solve.
On every bar, VOID scans all active, unfilled FVGs of the appropriate direction for a valid retest condition. A retest requires all of the following to be true simultaneously:
1. Price overlap: The current bar's low must be at or below the FVG top, and the current bar's high must be at or above the FVG bottom. Price is physically inside or touching the zone.
2. Candle rejection: The bar must close in the correct direction — a bullish close (close above open) for a bull FVG retest, a bearish close for a bear FVG retest. Price entered the gap but the candle closed back out, demonstrating rejection.
3. CE rejection (when enabled): For bull retests, the close must be at or above the CE midline — not just any bullish close, but one that reclaims the institutional midpoint. For bear retests, the close must be at or below the CE midline. This is the single most important retest quality filter in the system. A retest that fails to reclaim the 50% level is a weak, indecisive retest.
4. Age validation: The gap must be no older than the configured maximum age. Gaps older than this threshold are excluded even if all other conditions are met.
5. Most recent qualifying gap priority: When multiple gaps qualify simultaneously, VOID selects the most recently formed gap — the freshest institutional imbalance takes precedence.
━━━━━━━━━━━━━━━━━━━━━━━━━━━━━━━━━━━━━━━━
📊 The 5-Layer Confluence Engine
A valid FVG retest alone is not sufficient for a signal. VOID requires that the retest occur within a high-quality confluence environment across five independent layers. Each layer casts a directional vote on every bar. Signals only fire when a configurable minimum number of votes align (default: 3 of 5).
━━━━━━━━━━━━━━━━━━━━━━━━━━━━━━━━━━━━━━━━
Layer 1 — EMA Ribbon (Trend Structure)
A triple EMA ribbon using Fast (default: 8), Slow (default: 21), and Signal (default: 50) EMAs. All three must stack in directional order and price must be on the correct side for a full ribbon vote.
Bull: Fast above Slow above Signal, close above Fast EMA.
Bear: Fast below Slow below Signal, close below Fast EMA.
A separate EMA Trend Alignment setting (default: on) enforces that bull FVG retest signals only fire when the fast EMA is above the slow EMA — the minimum trend structure condition — even if the full ribbon stack is not met. This prevents counter-trend FVG entries that carry the lowest success rate.
The ribbon is plotted on the chart as a gradient fill between the Fast and Slow EMA lines — yellow-green fill during bull structure, red during bear, gray during flat.
━━━━━━━━━━━━━━━━━━━━━━━━━━━━━━━━━━━━━━━━
Layer 2 — Squeeze Momentum (Energy Detection)
The TTM Squeeze momentum engine measures whether energy is building or releasing and in which direction.
Squeeze state: When Bollinger Bands compress inside Keltner Channels, volatility is contracting and a directional breakout is loading. This state is displayed as an orange background tint and flagged on the dashboard as ⚡ SQZ. An FVG retest that coincides with a squeeze release is one of the highest-quality setups the system can detect — the gap provides the structural level, the squeeze provides the breakout energy.
Momentum direction: Calculated via linear regression of price relative to the midpoint of the recent high-low range. Positive and rising = bull momentum. Negative and falling = bear momentum.
━━━━━━━━━━━━━━━━━━━━━━━━━━━━━━━━━━━━━━━━
Layer 3 — Volume Delta (Institutional Pressure)
A proprietary volume pressure model that splits each candle's volume into estimated bullish and bearish components based on the close position within the high-low range, smoothed by EMA. A secondary OBV slope confirms the dominant pressure direction over the configured lookback.
Bull vote: Bull volume EMA exceeds bear, delta EMA is positive, and OBV slope is rising — three independent volume signals all confirming buying pressure.
Bear vote: The full inverse.
An FVG retest with genuine volume delta confirmation means real capital is flowing into the gap zone, not just price drifting back. This is the distinction between a high-probability institutional retest and a low-energy drift that is likely to fail.
━━━━━━━━━━━━━━━━━━━━━━━━━━━━━━━━━━━━━━━━
Layer 4 — VWAP Bias (Institutional Session Reference)
The Volume Weighted Average Price anchored to the session provides the clearest single reference for institutional directional bias. Price above VWAP means institutions are net buyers for the session. Price below means net sellers.
Bull vote: Close above VWAP.
Bear vote: Close below VWAP.
A bull FVG retest that occurs while price is above VWAP is a with-institution trade. A bull FVG retest while price is below VWAP is counter-institutional — the gap exists, the retest is clean, but the session-level bias is working against the entry. This distinction is worth one full confluence point and often determines whether a retest succeeds or fails.
The VWAP filter can be toggled off, and the VWAP line itself can be shown or hidden independently.
━━━━━━━━━━━━━━━━━━━━━━━━━━━━━━━━━━━━━━━━
Layer 5 — ADX Directional Strength (+DI / -DI)
The ADX filter in VOID operates at two levels. First, the ADX value must meet the minimum threshold (default: 18) confirming the market is trending rather than ranging. Second, the directional component is used — +DI versus -DI — to confirm that the ADX strength is aligned with the signal direction.
Bull vote: ADX above threshold and +DI exceeding -DI — the trend strength is directionally bullish.
Bear vote: ADX above threshold and -DI exceeding +DI — the trend strength is directionally bearish.
This is fundamentally different from a simple ADX on/off gate. An ADX reading of 25 with +DI above -DI in a bull FVG setup is confirming. An ADX reading of 25 with -DI above +DI in a bull FVG setup means the trend strength is bearish — directionally opposed to the signal — and this layer will not vote for it.
━━━━━━━━━━━━━━━━━━━━━━━━━━━━━━━━━━━━━━━━
🏷 Signal Firing Logic
A VOID signal fires when all of the following are simultaneously true:
A valid FVG retest is detected (overlap + candle rejection + CE rejection if enabled + age check)
The confluence score meets or exceeds the configured minimum (default: 3 of 5 layers)
ADX confirms a trending market (value above minimum threshold)
Session filter confirms active hours
Signal cooldown has elapsed since the last signal (default: 8 bars) — prevents repeated signals during extended retest zones
EMA trend alignment condition is met if the Require EMA Trend Alignment setting is enabled
Edge triggering: The signal fires only on the bar where all conditions first become true simultaneously — not on every bar they remain true. Each triangle on the chart represents a distinct, fresh confluence event.
Score label: Every signal prints a label (e.g., 4/5 FVG ) showing the live confluence score at signal time. The FVG suffix confirms this is an institutional gap retest entry, not a generic momentum entry.
━━━━━━━━━━━━━━━━━━━━━━━━━━━━━━━━━━━━━━━━
🎯 FVG-Anchored Stop Loss Placement
VOID includes a purpose-built stop loss mode unique to FVG trading: Place SL Beyond FVG Edge (default: on).
When enabled, the stop loss for a bull retest entry is placed at the bottom of the retested FVG minus an ATR buffer — not below the current bar's low. For a bear retest, the stop is placed at the top of the retested FVG plus an ATR buffer.
Why this matters: The FVG boundary is the institutional invalidation level. If price closes beyond the far edge of the gap, the imbalance has been fully absorbed — the institutional thesis for the retest is gone and the trade is structurally invalid. Using the FVG edge as the stop base produces stops that are:
Structurally meaningful — anchored to the actual invalidation level, not an arbitrary ATR distance from entry
Tighter when gaps are narrow — better risk-reward on high-quality, precise gaps
Wider when gaps are large — providing the trade room to breathe within the full institutional zone
When this setting is off, the stop reverts to a standard ATR-based distance from the bar's low or high — consistent with the Pulse Scalper behavior.
━━━━━━━━━━━━━━━━━━━━━━━━━━━━━━━━━━━━━━━━
🛡 Dynamic ATR Exit System
All three exit mechanisms from the VOID exit engine work together on every open trade:
Stop Loss: Placed at the FVG far edge (when enabled) or bar low/high, minus/plus an ATR buffer (default: 1.2×). Your maximum risk boundary. Does not move.
TP1 — Partial Target (50%): 1.8× ATR from entry. Scale out half the position here and move the remainder to breakeven. A small circle marker appears at the TP1 bar.
TP2 — Full Target: 3.5× ATR from entry. Full position exits and the system resets. A labeled TP marker confirms the exit on the chart.
ATR Trailing Stop: A dynamic stop that advances with price every bar — always positioned 1.5× ATR behind the current bar's low (bull) or high (bear). Plotted as a live orange line. In strong institutional continuation moves, the trail captures significantly more than the fixed TP2 target. In weak retests that stall early, the trail cuts the loss before the fixed SL is reached — providing a tighter actual exit than the structural stop.
All exit levels are plotted as live lines on the chart for the duration of the trade and cleared automatically on exit.
━━━━━━━━━━━━━━━━━━━━━━━━━━━━━━━━━━━━━━━━
📊 Live Dashboard
The real-time dashboard displays the complete internal state of the indicator across four sections, updated on every bar.
FVG STATE
Bull FVGs — count of currently active, unfilled bull FVGs being tracked
Bear FVGs — count of currently active, unfilled bear FVGs being tracked
Retest — live retest detection status: ▲ BULL RETEST or ▼ BEAR RETEST when a valid gap touch is occurring, — NONE otherwise. This updates in real time so you can see a retest developing before the full signal fires
MARKET
Session — ✓ ACTIVE or ✗ OFF-HOURS. Confirms whether the session filter gate is open
ADX — live ADX value with ✓ or ✗ pass/fail. Confirms whether market structure is trending strongly enough to support FVG retest entries
CONFLUENCE
L1 EMA — current ribbon state: ▲ BULL, ▼ BEAR, or — FLAT
L2 Momentum — current momentum state: ⚡ SQZ (squeeze building), ▲ BULL, ▼ BEAR, or — FLAT. The squeeze state is the highest pre-signal alert condition
L3 Vol Delta — current volume pressure: ▲ BULL, ▼ BEAR, or — NEUTRAL
L4 VWAP — current VWAP position: ▲ ABOVE (institutional bull bias) or ▼ BELOW (institutional bear bias)
L5 ADX Dir — ADX directional vote: ▲ BULL (+DI dominant), ▼ BEAR (-DI dominant), or — FLAT
Bull Score — live 0–5 score. Background highlights yellow-green when the minimum threshold is met
Bear Score — live 0–5 score. Background highlights red when the minimum threshold is met
POSITION
Position — current tracked position: ▲ LONG, ▼ SHORT, or — FLAT with background color highlight
Stop Loss — the active SL level (FVG-anchored or ATR-based depending on settings), color-coded by direction
TP1 / TP2 — the active first take-profit level; TP2 is tracked internally and triggers the full exit marker
Bars in Trade — bars elapsed since entry, tracking trade duration
━━━━━━━━━━━━━━━━━━━━━━━━━━━━━━━━━━━━━━━━
📈 Chart Visual System
FVG Boxes (yellow-green / red) — active imbalance zones extending forward in real time. Color shifts to gray on fill
CE Dashed Lines — the 50% midpoint of every active FVG. The key level for CE rejection filtering
Formation Dots — small squares marking the exact bar a new qualifying FVG was detected
▲ Triangle (below bar) — bull retest entry signal. All conditions met
▼ Triangle (above bar) — bear retest entry signal. All conditions met
Score Label (e.g. 4/5 FVG) — confluence score at signal time, printed on every entry triangle
EMA Ribbon Fill — yellow-green fill during bull EMA structure, red during bear, gray during flat
VWAP Line (purple) — optional, toggleable session VWAP reference
Orange Squeeze Background — active during Bollinger/Keltner squeeze conditions
Yellow-green background tint — active during open long trades
Red background tint — active during open short trades
SL Line — fixed stop loss level, active while trade is open
TP1 Line — first partial take-profit target
TP2 Line (bright) — full exit target
Trail Line (orange) — dynamic trailing stop, advances with price every bar
TP marker — confirms TP2 hit and full exit
SL marker — confirms stop loss or trail triggered
━━━━━━━━━━━━━━━━━━━━━━━━━━━━━━━━━━━━━━━━
🚀 How to Trade with AlphaX VOID — Step by Step
Step 1 — Read the FVG State
Check the dashboard: how many active bull and bear FVGs are on the chart?
Multiple active FVGs in one direction indicate a well-defined institutional order cluster — a zone with stacked imbalances that price is likely to respect strongly on retest
Zero active FVGs in a direction means no institutional retest opportunity exists yet — wait for a new gap to form
Step 2 — Watch for Retest Alert on the Dashboard
The RETEST row updates in real time. ▲ BULL RETEST or ▼ BEAR RETEST appearing means price is currently inside a valid FVG zone with a rejection candle forming
This is your cue to check the confluence score rows. Watch the bull or bear score building in real time on the current bar — if it is approaching or has crossed the threshold, a signal may be seconds away
Step 3 — Enter on the Signal Triangle
A ▲ triangle below the bar is a confirmed bull FVG retest entry. All conditions — FVG retest quality, confluence score, ADX, session, cooldown, trend alignment — are met simultaneously
A ▼ triangle above the bar is a confirmed bear FVG retest entry
Read the score label. A 5/5 signal is the maximum confluence available — all five layers and the gap retest aligned simultaneously. These are the highest-conviction setups VOID produces
Enter on the close of the signal bar or the open of the next bar
Step 4 — Manage the Trade with Live Exit Lines
The SL line is your structural invalidation. If you used the FVG-anchored SL, price closing beyond this level means the institutional gap has been fully absorbed — the thesis is invalid
Watch the orange Trail Stop advancing with price as the trade moves in your favor
At TP1, scale out 50% of the position. Move your stop to breakeven on the remainder
Let the trailing stop manage the rest — it captures whatever continuation the institutional imbalance produces
Step 5 — Exit and Reset
A TP marker confirms TP2 hit. Full exit and system reset
An SL marker confirms stop or trail triggered. Accept the loss and wait — the FVG that was retested is now filled or invalidated, and a new setup will develop from the next qualifying gap
Never re-enter immediately after a stopped trade. Wait for the confluence score to rebuild and a new qualifying gap to form or a fresh retest of a different active gap
━━━━━━━━━━━━━━━━━━━━━━━━━━━━━━━━━━━━━━━━
⚠ Identifying Low-Quality Conditions — When Not to Trade
Stand aside when:
ADX ✗ on the dashboard — the market is not trending. FVG retests in ranging markets are frequently absorbed rather than rejected, producing whipsaw exits
RETEST shows ▲ or ▼ but no triangle appears — a retest is occurring but the confluence score or other filters are blocking the signal. This is the system explicitly telling you the quality threshold is not met — do not override it manually
Session ✗ OFF-HOURS — thin liquidity environments produce unreliable FVG reactions. The institutional actors who created the gap are not active
Multiple gap fills in quick succession — if several FVGs are filling rapidly without producing entries, the market is in a trending impulse phase eating through old imbalances rather than respecting them. Wait for the new gaps being created by this impulse to age and become valid retest candidates
Score stuck at 1 or 2 of 5 — the confluence environment is fragmented. Too few layers agree for a reliable institutional retest
Orange squeeze background present but score below threshold — energy is coiling but the directional confluence is not established. Wait for the squeeze to release in a clear direction with score confirmation before acting
What to do:
Monitor the dashboard for the RETEST row and confluence scores building simultaneously — the ideal setup shows both developing on the same bar
Prioritize gaps with the CE Rejection filter active — CE-rejected retests are the cleanest institutional entries available
Wait for ADX to confirm — a trending ADX above threshold combined with a directional +DI/-DI alignment is the ideal background for FVG retest entries
The highest-quality VOID setup: active squeeze on the dashboard, price retesting a fresh FVG at the CE level, 5/5 confluence score, ADX ✓, session ✓. These conditions together rarely occur — when they do, they produce the strongest continuation moves the system identifies
━━━━━━━━━━━━━━━━━━━━━━━━━━━━━━━━━━━━━━━━
⚡ Key Features
🕳 Real-time FVG detection engine — identifies all qualifying bull and bear Fair Value Gaps with displacement and minimum gap size filters
📦 Full FVG lifecycle tracking — every gap stored in memory arrays with top, bottom, direction, age, and fill state updated on every bar
📐 CE (Consequent Encroachment) filter — requires price to reclaim the 50% midpoint of the gap on retest, eliminating weak, indecisive touches
🧠 5-layer confluence gate — EMA Ribbon, Squeeze Momentum, Volume Delta, VWAP Bias, and ADX Directional Strength must agree before a retest signal fires
📊 Live confluence scoring — bull and bear scores updated every bar, displayed on the dashboard before the signal appears
🎯 FVG-anchored stop loss — places the SL at the structural invalidation level (the far FVG edge) rather than a generic ATR distance, producing structurally meaningful risk levels
⚡ Squeeze momentum integration — TTM-style Bollinger/Keltner squeeze detection flags pre-breakout energy buildup with orange background tint and dashboard state
📡 VWAP session bias — confirms whether a retest is with or against institutional session direction
🔬 ADX directional filter — uses both the ADX value and +DI/-DI directionality, not just a simple trend/no-trend gate
🛡 Dynamic ATR trailing stop — orange line advances with price every bar, capturing extended institutional continuation moves beyond the fixed TP2 level
📈 EMA ribbon with trend alignment enforcement — prevents counter-trend FVG entries that carry the lowest success rate
🕐 Session filter — restricts entries to active market hours, eliminating thin-liquidity false retest reactions
⏱ Signal cooldown — prevents repeated signals during extended retest zones, ensuring each entry represents a distinct high-quality event
📊 21-row live dashboard — FVG State, Market, Confluence, and Position sections updated in real time
🔔 10 alert conditions — new FVG formation, retest entry, TP1/TP2 hits, stop hits for both bull and bear
🎨 Fully cohesive dual-tone color system — yellow-green for all bullish elements, red for all bearish elements, orange for squeeze and trail, gray for filled gaps and neutral states
⚙ Fully configurable — FVG parameters, confluence layers, EMA periods, squeeze settings, VWAP filter, ADX threshold, exit multipliers, session window, and all colors are independently adjustable
━━━━━━━━━━━━━━━━━━━━━━━━━━━━━━━━━━━━━━━━
⚙ Settings Reference
Fair Value Gaps
Show FVG Zones — toggle FVG boxes on or off
Show CE (50%) Lines — toggle the consequent encroachment midpoint lines
Max Active FVGs — maximum number of FVGs stored in memory simultaneously (default: 40)
Zone Extend (bars) — how many bars forward the FVG box and CE line project (default: 30)
Max FVG Age for Entries — gaps older than this bar count are excluded from retest scanning (default: 120)
Min Gap Size (ATR x) — minimum gap width as a multiple of ATR required for gap registration (default: 0.15)
Min Displacement (body x) — middle candle body must exceed average body by this multiplier (default: 1.15)
Require CE Rejection — close must reclaim the 50% gap midpoint on retest (default: on — strongly recommended)
Hide Filled FVGs — removes boxes and CE lines for gaps that have been fully mitigated (default: off)
EMA Ribbon
Fast EMA — fastest ribbon line (default: 8)
Slow EMA — intermediate ribbon line (default: 21)
Signal EMA — macro trend anchor (default: 50)
Show EMA Ribbon — toggle ribbon fill and lines
Squeeze Momentum
BB Length / BB Mult — Bollinger Band parameters for squeeze detection (defaults: 20 / 2.0)
KC Length / KC Mult — Keltner Channel parameters (defaults: 20 / 1.5)
Momentum Length — linear regression period for momentum direction (default: 12)
Volume Delta
Volume MA Length — EMA smoothing for bull and bear volume estimates (default: 14)
OBV Slope Length — lookback for OBV slope directionality (default: 10)
VWAP
Use VWAP Filter — when on, Layer 4 requires close to be on the correct side of VWAP (default: on)
Show VWAP Line — toggle the VWAP line on the chart (default: off)
Confluence Gate
Min Layers Required — minimum confluence votes needed for a signal (default: 3 of 5)
Session Filter — toggle active hours restriction
Active Session — configurable session window (default: 0700-2000)
Signal Cooldown — minimum bars between consecutive signals (default: 8)
Require EMA Trend Alignment — enforces minimum EMA directional alignment even when full ribbon is not stacked (default: on)
ADX Filter
Use ADX Filter — toggle the trend quality and directional gate
ADX Length — calculation lookback (default: 14)
ADX Minimum — threshold below which all signals are suppressed (default: 18)
Exit Settings
ATR Length — lookback for all ATR exit calculations (default: 10)
SL ATR Mult — stop loss ATR buffer beyond FVG edge or bar low/high (default: 1.2)
TP1 ATR Mult — first take-profit target (default: 1.8)
TP2 ATR Mult — full exit target (default: 3.5)
Use ATR Trailing Stop — toggle dynamic trailing stop
Trail ATR Mult — trailing distance from current bar's extreme (default: 1.5)
Show Exit Levels — toggle SL, TP1, TP2, and trail lines on the chart
Place SL Beyond FVG Edge — anchors stop to the structural gap invalidation level (default: on)
Display
Show Confluence Score Label — prints live score on every signal triangle
Show Dashboard — toggle the full dashboard panel
Dashboard Position — Top Left / Top Right / Bottom Left / Bottom Right
Colors
Bull / Bull Bright — yellow-green family for all bullish signals, fills, ribbons, and labels
Bear / Bear Bright — red family for all bearish signals, fills, ribbons, and labels
Squeeze — orange for squeeze tint and trailing stop line
Bull FVG / Bear FVG — gap box fill and border colors
Filled FVG — neutral gray for mitigated gaps
EMA Fast / Slow / Signal — individual EMA line colors
Ribbon Fill Bull / Bear / Flat — ribbon fill colors for each trend state
VWAP Line — VWAP plot color (default: purple)
SL / TP / TP2 / Trail Lines — individual exit level line colors
Long Zone BG / Short Zone BG — active trade background tints
Bull Label Text / Bear Label Text — text color for score labels on bull and bear signals
Dash Text / Dash BG / Dash Header / Dash Section / Dash Frame — full dashboard color control
━━━━━━━━━━━━━━━━━━━━━━━━━━━━━━━━━━━━━━━━
🔔 Alert Conditions (10 total)
FVG Formation Alerts
New Bull FVG Formed — a qualifying bullish Fair Value Gap has been detected. Watch for retest entry
New Bear FVG Formed — a qualifying bearish Fair Value Gap has been detected. Watch for retest entry
Entry Alerts
Bull FVG Retest Entry — all conditions met: bull FVG retest, CE rejection, confluence score, ADX, session
Bear FVG Retest Entry — all conditions met for a short institutional retest entry
Exit Alerts
Bull TP1 Hit — price reaches the first bull take-profit. Scale out 50%
Bull TP2 Hit — price reaches the full bull exit target. Position closed
Bull Stop Hit — stop loss or trailing stop triggered on a long position
Bear TP1 Hit — price reaches the first bear take-profit. Scale out 50%
Bear TP2 Hit — price reaches the full bear exit target. Position closed
Bear Stop Hit — stop loss or trailing stop triggered on a short position
All alert messages are formatted as const strings for clean webhook and notification platform integration.
━━━━━━━━━━━━━━━━━━━━━━━━━━━━━━━━━━━━━━━━
🎯 Recommended Settings by Instrument & Timeframe
The default configuration is optimized for XAUUSD, major forex pairs, and crypto on M1–M5 :
Min Layers at 3/5 — strong confluence without requiring perfection on every bar
CE Rejection on — the single most important FVG quality filter. Leave this enabled in all configurations
ADX minimum at 18 — slightly more permissive than the Pulse Scalper default, accounting for the structural quality already provided by the FVG retest condition
FVG-anchored SL on — structurally superior stop placement for all FVG-specific entries
Max FVG Age at 120 bars — covers approximately 2 hours on M1, 10 hours on M5. Sufficient for intraday imbalances without trading excessively old gaps
For other instruments or timeframes, adjust:
Higher timeframes (M15, H1, H4) — increase Max FVG Age to 200–300, increase Retest Cooldown to 15–25, increase TP2 to 4.5–5.5× ATR, raise Min Confidence to 4/5
Crypto (BTC, ETH) — increase Min Gap Size to 0.25–0.35× ATR to filter micro-gaps in volatile crypto price action, increase KC Mult to 2.0 for the squeeze layer
Indices (NAS100, US30) — use defaults with session tightened to 09:30–16:00. Increase displacement multiplier to 1.3 for cleaner gap quality on index moves
More signals — lower Min Layers to 2, disable CE Rejection, increase Max FVG Age, reduce Cooldown
Fewer, higher-quality signals — raise Min Layers to 4 or 5, keep CE Rejection on, raise ADX minimum to 22–25, reduce Max FVG Age to 60–80 bars
━━━━━━━━━━━━━━━━━━━━━━━━━━━━━━━━━━━━━━━━
👥 Who This Is For
🏦 Smart money and institutional price action traders — VOID is built on the core concept that institutional order flow creates imbalances and returns to fill them. This is the foundational logic of ICT methodology applied with quantitative confluence filters
🥇 Gold (XAUUSD) and forex scalpers — FVGs are particularly reliable on gold and major forex pairs where institutional order flow is most dominant
📊 Crypto and index traders — the displacement and gap size filters adapt the system to higher-volatility instruments without producing noise
🎯 Precision entry traders — the CE rejection filter and FVG-anchored stop produce tighter, more structurally defined entries than generic momentum systems
🧠 Systematic traders — the 5-layer confluence score provides a quantitative quality metric for every retest event, not just a visual signal
📉 Traders who want to stop chasing breakouts — VOID forces you to wait for price to return to the institutional level, eliminating the discipline failure of entering on extended, overheated moves
⚠ Traders who struggle with stop placement — the FVG-anchored SL system provides structurally meaningful stop levels determined by the market's own imbalance boundaries, not arbitrary ATR multiples
━━━━━━━━━━━━━━━━━━━━━━━━━━━━━━━━━━━━━━━━
📝 Notes
All signals are confirmed on bar close — the indicator is non-repainting by design. FVG boxes and CE lines may extend or update visually on the current bar, but no signal is generated until bar close confirmation
The CE Rejection filter is strongly recommended. Disabling it allows signals on any touch of the FVG box, including weak wicks that are unlikely to produce clean continuation moves
Maximum 500 labels, 500 lines, and 500 boxes are rendered. On very low timeframes with extended chart history, the oldest FVG boxes, CE lines, and signal markers may be automatically removed by TradingView's rendering limits. Reduce Max Active FVGs if this becomes an issue
FVG fill state is based on bar close — a wick through the gap boundary that closes inside or above the zone does not mark the gap as filled. Only a close beyond the boundary constitutes a fill
The VWAP calculation resets at the start of each session. On 24-hour crypto instruments, the VWAP anchors to the chart's visible history. For best VWAP behavior on crypto, consider disabling the VWAP filter (Layer 4) and relying on the remaining four layers
Gap age counting begins from the formation bar. A gap formed 5 bars ago on M5 is 25 minutes old — very fresh. The same gap age on H1 is 5 hours old — potentially stale. Adjust Max FVG Age to your timeframe context
The Trade Status section tracks position direction from signal to exit within a single chart session — it does not connect to your broker or brokerage account
━━━━━━━━━━━━━━━━━━━━━━━━━━━━━━━━━━━━━━━━
⚠ Disclaimer
This indicator is a technical analysis and visualization tool intended for educational and informational purposes only. It does not constitute financial advice or a recommendation to buy or sell any financial instrument. All signals are generated from historical and real-time price data using mathematical calculations — their accuracy or profitability is not guaranteed. Past performance of any signal type does not guarantee future results. Always conduct your own analysis, use proper risk management, and consult a licensed financial advisor before making any trading decisions. The author accepts no responsibility for any losses incurred from the use of this indicator.
━━━━━━━━━━━━━━━━━━━━━━━━━━━━━━━━━━━━━━━━
Built for traders who understand that price always returns to where it left unfinished business — and who want a system precise enough to be there when it does. 지표

전략

지표

전략

지표