

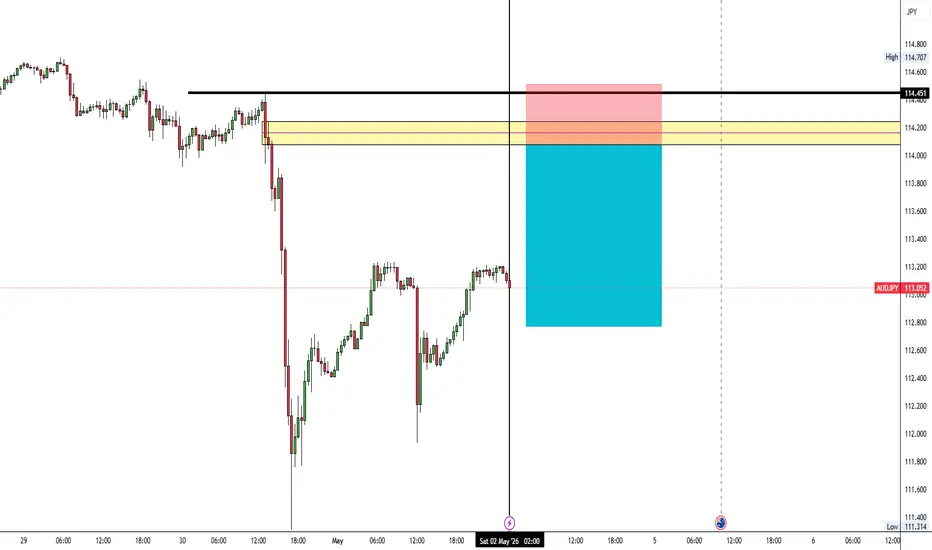
🚨 AUDJPY SELL SETUP 🚨
📍 Supply Zone Rejection
⚡ Clean Institutional Level
🐻 Sellers Waiting at Premium Price
💡 Trade Plan:
➡️ Price taps supply zone
➡️ Rejection confirmation candle
➡️ Execute SELL with discipline
🎯 Target:
📉 Previous Demand / Liquidity Sweep
🛑 Stop Loss:
🔺 Above Supply Invalidity Level
⚖️ Risk Management:
✅ 1–2% Risk Only
✅ Patience Before Entry
❌ No FOMO Trades
🧠 “The market rewards patience, not prediction.”
📊 Strategy:
Zone + Confirmation + Execution
📍 Supply Zone Rejection
⚡ Clean Institutional Level
🐻 Sellers Waiting at Premium Price
💡 Trade Plan:
➡️ Price taps supply zone
➡️ Rejection confirmation candle
➡️ Execute SELL with discipline
🎯 Target:
📉 Previous Demand / Liquidity Sweep
🛑 Stop Loss:
🔺 Above Supply Invalidity Level
⚖️ Risk Management:
✅ 1–2% Risk Only
✅ Patience Before Entry
❌ No FOMO Trades
🧠 “The market rewards patience, not prediction.”
📊 Strategy:
Zone + Confirmation + Execution

Penafian
Maklumat dan penerbitan adalah tidak bertujuan, dan tidak membentuk, nasihat atau cadangan kewangan, pelaburan, dagangan atau jenis lain yang diberikan atau disahkan oleh TradingView. Baca lebih dalam Terma Penggunaan.
Penafian
Maklumat dan penerbitan adalah tidak bertujuan, dan tidak membentuk, nasihat atau cadangan kewangan, pelaburan, dagangan atau jenis lain yang diberikan atau disahkan oleh TradingView. Baca lebih dalam Terma Penggunaan.