
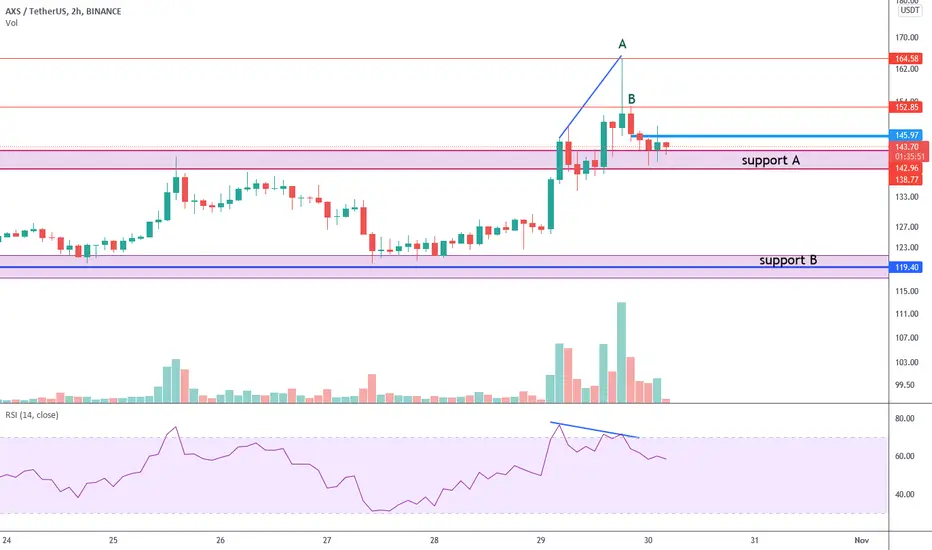
On the 1-hour timeframe, we see the bearish divergence formation.
On the 2-hour timeframe, we see a confirmed reversal pattern represented by a shooting star candle "A" with a bearish engulfing candle "B" confirmation.
4-hour timeframe, also represented by shooting star.
We can expect a downward movement with a take-profit target near the "B" support area of $120, but we still need to break through the "A" support area near $140.
On the 2-hour timeframe, we see a confirmed reversal pattern represented by a shooting star candle "A" with a bearish engulfing candle "B" confirmation.
4-hour timeframe, also represented by shooting star.
We can expect a downward movement with a take-profit target near the "B" support area of $120, but we still need to break through the "A" support area near $140.

Wyłączenie odpowiedzialności
Informacje i publikacje nie stanowią i nie powinny być traktowane jako porady finansowe, inwestycyjne, tradingowe ani jakiekolwiek inne rekomendacje dostarczane lub zatwierdzone przez TradingView. Więcej informacji znajduje się w Warunkach użytkowania.
Wyłączenie odpowiedzialności
Informacje i publikacje nie stanowią i nie powinny być traktowane jako porady finansowe, inwestycyjne, tradingowe ani jakiekolwiek inne rekomendacje dostarczane lub zatwierdzone przez TradingView. Więcej informacji znajduje się w Warunkach użytkowania.