

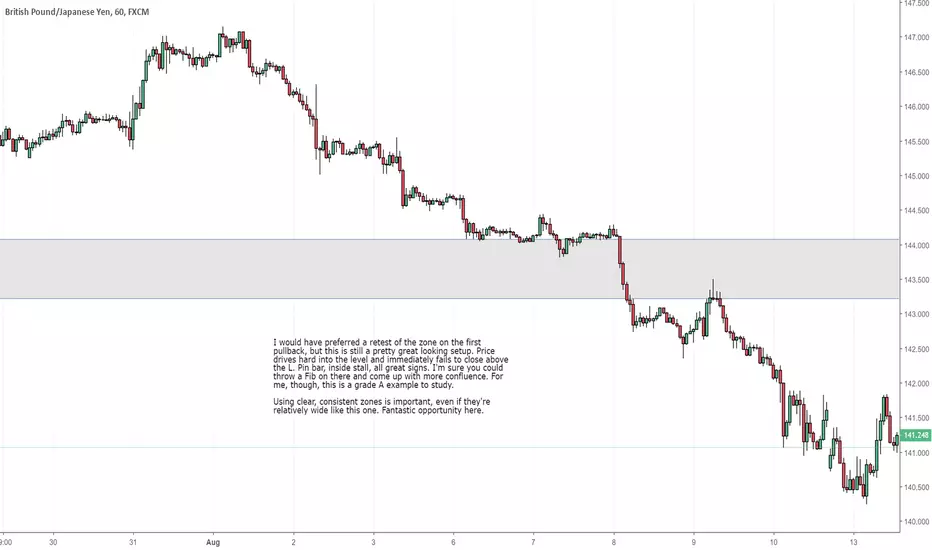
Here's the setup on the H1.
Apply this to any time frame. If you're using important levels and trading at the right times, most healthy breakouts involve some version of this shape. Strong, confirmed breakout with a clear close past the level, a weak but steady pullback to the level, and then an immediate fail at support-turned-resistance.
Apply this to any time frame. If you're using important levels and trading at the right times, most healthy breakouts involve some version of this shape. Strong, confirmed breakout with a clear close past the level, a weak but steady pullback to the level, and then an immediate fail at support-turned-resistance.

Powiązane publikacje
Wyłączenie odpowiedzialności
Informacje i publikacje nie stanowią i nie powinny być traktowane jako porady finansowe, inwestycyjne, tradingowe ani jakiekolwiek inne rekomendacje dostarczane lub zatwierdzone przez TradingView. Więcej informacji znajduje się w Warunkach użytkowania.
Powiązane publikacje
Wyłączenie odpowiedzialności
Informacje i publikacje nie stanowią i nie powinny być traktowane jako porady finansowe, inwestycyjne, tradingowe ani jakiekolwiek inne rekomendacje dostarczane lub zatwierdzone przez TradingView. Więcej informacji znajduje się w Warunkach użytkowania.