อินดิเคเตอร์

อินดิเคเตอร์

CPR MTF StatusMulti-timeframe CPR (Central Pivot Range) dashboard that shows the trend bias across 6 standard timeframe pairs all from a single chart.
── TIMEFRAME PAIRS ──
Each row pairs a chart timeframe with its natural CPR anchor:
5m → 1H CPR
15m → 4H CPR
1H → Daily CPR
4H → Weekly CPR
D → Monthly CPR
W → Yearly CPR
── HOW STATUS IS DETERMINED ──
For each pair, the indicator computes the previous-period CPR and the current developing CPR, then compares their position:
▲▲ Strong Bull — developing CPR entirely above previous CPR (no overlap)
▲ Light Bull — bands overlap, but developing pivot is above previous pivot
— Neutral — pivots are equal
▼ Light Bear — bands overlap, but developing pivot is below previous pivot
▼▼ Strong Bear — developing CPR entirely below previous CPR (no overlap)
The previous CPR uses non-repainting data (prior completed period). The developing CPR repaints to reflect the current state — this is intentional for a live dashboard.
── TIMEFRAME VALIDITY ──
CPR calculations require the anchor timeframe to be strictly higher than the chart timeframe. When you're on a higher TF chart (e.g. Daily), lower anchor pairs (1H, 4H) cannot compute correctly because request.security can't aggregate full-period HLC from a lower timeframe.
The indicator automatically detects this and either hides invalid rows (default) or dims them with "n/a". A hint row appears when rows have been hidden, suggesting you switch to a lower chart timeframe to see all pairs.
── DISPLAY MODES ──
Full Mode (default):
Vertical table with Chart TF, CPR TF, and color-coded Status columns. Optionally shows previous and developing pivot values. The row matching your current chart timeframe is highlighted.
Compact Mode:
Single horizontal row of coloured cells — just the CPR label and a status arrow (e.g. "D▲▲"). Hover any cell for full detail. An optional summary cell at the end shows the net score.
── FEATURES ──
• Toggle individual timeframe rows on/off
• Customizable 5-level color scheme (strong/light bull/bear + neutral)
• Optional pivot value columns (prev + developing)
• Summary row with bull/neutral/bear count and tinted background
• Current chart TF row auto-highlighting
• Status line showing bull/bear TF counts
• Alerts: all 6 bullish, all 6 bearish, 5+ bullish, 5+ bearish
• Table position and text size settings
• Works on any symbol
── USAGE TIPS ──
• Best used on lower timeframe charts (5m or 15m) to see the most rows
• Pairs well with the Vector CPR Bands indicator for full CPR + band analysis
• When all or most timeframes align in one direction, it signals strong multi-timeframe confluence
อินดิเคเตอร์

Reverse ZigZagReverse ZigZag
A reimagined ZigZag indicator that processes price data from the most recent bar backwards, solving the biggest frustration with traditional ZigZag implementations: the inaccurate last leg.
━━━━━━━━━━━━━━━━━━━━━━━━
THE PROBLEM
Standard ZigZag indicators process bars left-to-right. This means the last leg is always "tentative" — it often anchors to the current bar instead of the actual swing extreme. If the true low was 3 bars ago but price has since bounced, the traditional ZigZag either misses it entirely or draws to the wrong bar. This makes the indicator unreliable precisely where it matters most: at the current price action.
THE SOLUTION
This indicator flips the logic. Instead of walking forward through history, it starts at the most recent bar and walks backwards. The result:
→ The last leg is always accurate — it finds the true extreme first, then works outward
→ No tentative or "pending" pivots — every swing point is drawn to the correct bar
→ No repainting — pivots don't shift around as new bars form
→ Clean, consistent results that match what your eyes see on the chart
━━━━━━━━━━━━━━━━━━━━━━━━
HOW IT WORKS
Phase 1 — Initialization
Starting from the current bar, the indicator walks left until it finds a price range that exceeds the deviation threshold. The more recent extreme becomes the first confirmed pivot.
Phase 2 — Backward Walk
From that first pivot, the algorithm continues left, tracking running highs and lows. When price reverses by more than the deviation %, a pivot is confirmed and the direction flips. This continues across the full lookback window.
Phase 3 — Drawing
Lines and labels are drawn between all confirmed pivots. Labels show the price and the magnitude of each swing move.
━━━━━━━━━━━━━━━━━━━━━━━━
SETTINGS
• Deviation % — Minimum reversal required to confirm a new pivot (default: 5%). Lower values capture smaller swings, higher values show only major structure.
• Lookback Bars — How far back to calculate (default: 500). Increase for longer history.
• Show Price Labels — Toggle pivot labels showing price and swing magnitude.
• Line Color / Width — Customize appearance.
• High/Low Pivot Colors — Separate colors for swing highs and lows.
━━━━━━━━━━━━━━━━━━━━━━━━
USE CASES
• Swing traders identifying reversal points and market structure
• Harmonic pattern recognition where accurate pivot placement is critical
• Elliott Wave analysis requiring precise swing labeling
• Support/resistance identification from confirmed swing levels
• Measuring swing magnitude to gauge momentum shifts
━━━━━━━━━━━━━━━━━━━━━━━━
NOTES
• The indicator recalculates on the last bar, so all drawing happens once per bar update — this is efficient and avoids the overhead of managing state across bars.
• Works on any timeframe and any instrument.
━━━━━━━━━━━━━━━━━━━━━━━━
อินดิเคเตอร์

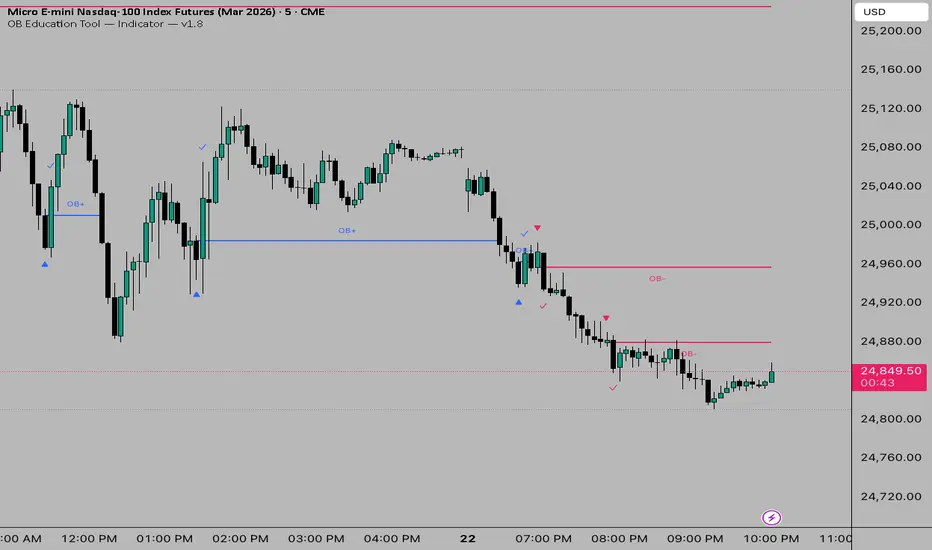
Smart Money: Auto Order Blocks [identityKa]Overview
The Smart Money: Auto Order Blocks is a professional-grade volume and structural mapping tool designed for SMC (Smart Money Concepts) traders. Order Blocks represent areas where large financial institutions have accumulated significant buy or sell positions. Unlike basic pivot indicators that leave cluttered lines on the chart indefinitely, this script introduces a Smart Mitigation Engine that automatically tracks the validity of these institutional zones in real-time.
Core Mechanics & Detection
The algorithm uses pivot sensitivity to locate origin points of major market imbalances:
Bearish Order Blocks (Supply): Detected at the absolute high of a structural swing before a major downward move. The box is drawn from the wick's high to the highest candle body in that cluster, encapsulating the entire institutional sell zone.
Bullish Order Blocks (Demand): Detected at the absolute low of a structural swing before a major upward move. The box encapsulates the wick's low up to the lowest candle body.
The Smart Mitigation Engine
A fundamental rule of SMC is that once an Order Block is fully pierced and the price closes beyond it, the institutional orders within that zone are considered filled or "Mitigated."
This script constantly monitors the closing price. If a candle strictly closes above a Bearish OB, or strictly below a Bullish OB, the algorithm mathematically invalidates the zone.
Upon mitigation, the box is instantly deleted from the chart, ensuring that only "Fresh" and highly reactive unmitigated zones are visible to the trader. This keeps the workspace incredibly clean.
HUD Dashboard & AI Logic
The on-chart intelligence panel evaluates the proximity of the live price to the active Order Blocks:
Dangerous: Displayed actively whenever the current live price is trading inside the coordinates of an unmitigated Order Block. This serves as a warning that the price is in an institutional high-friction area where sharp rejections and high volatility are imminent.
LONG / SHORT: The engine tracks the macro bias based on the last mitigation event. If a Bearish OB was broken upwards (invalidated resistance), the macro bias shifts to LONG. If a Bullish OB was broken downwards, the bias shifts to SHORT.
How to Use It
This tool provides exceptional context for trade entries. When the AI Suggestion reads "LONG," traders should patiently wait for the price to pull back into a green Bullish OB zone. Once the price enters the zone (triggering the "Dangerous" state), traders can drop to a lower timeframe (e.g., 5-minute) to spot a micro-reversal pattern before executing a trade aligned with the macro trend. อินดิเคเตอร์

Dynamic Trendlines & Breakouts [identityKa]Overview
The Dynamic Trendlines & Breakouts is an automated structural analysis tool designed to remove human subjectivity from drawing trendlines. By utilizing mathematical pivot extremes, the script identifies the dominant market geometry in real-time. More importantly, it incorporates a Smart Volume Filter to distinguish between genuine structural breakouts and low-volume retail traps (fakeouts).
Core Engine Mechanics
The indicator operates on two primary algorithmic pillars:
Dynamic Coordinate Mapping: The script calculates the most recent pivot highs and pivot lows based on a user-defined lookback sensitivity. It then draws precision-extended dashed lines connecting these coordinates, forming dynamic Resistance (Upper Line) and Support (Lower Line) boundaries.
Volume-Confirmed Breakouts: The script continuously monitors the closing price relative to these extended lines. However, a crossover is not enough. If the "Volume Confirmation" feature is active, the engine checks a 20-period Simple Moving Average of the volume. A Bullish "B" (Buy) or Bearish "S" (Sell) label is only printed if the breakout candle is accompanied by above-average institutional volume, significantly increasing the probability of trend continuation.
HUD Dashboard & AI Proximity Logic
The integrated on-chart panel tracks the last confirmed breakout state and utilizes an ATR-based proximity sensor to generate the AI Suggestion:
Dangerous: Displayed actively whenever the current price is within a 0.5 Average True Range (ATR) distance of either the upper or lower trendline. This alerts the trader that the price is actively testing a major structural boundary, making new entries highly risky until a clear bounce or volume-confirmed breakout occurs.
LONG / SHORT: Triggered when the last structural breakout was Bullish (LONG) or Bearish (SHORT), provided the price is safely trending away from the immediate resistance/support lines.
How to Use It
This tool is ideal for momentum and breakout traders. When the price approaches a trendline (AI Suggestion reads "Dangerous"), prepare for a setup. Do not front-run the breakout. Wait for the engine to print the "B" or "S" label, confirming that both the structural level has been breached and the volume supports the move. Once confirmed, trade in the direction of the new momentum. อินดิเคเตอร์

Liquidity Magnet Zones [identityKa]Overview
The Liquidity Magnet Zones is an advanced Smart Money Concepts (SMC) indicator that identifies and manages unmitigated pools of liquidity. Institutional algorithms gravitate toward liquidity to fill large orders. This script mathematically plots these high-probability areas—Buy Side Liquidity (BSL) and Sell Side Liquidity (SSL)—and actively manages them, deleting zones the moment they are "swept" to keep the chart clean and relevant.
Core Mechanics: BSL & SSL Detection
The engine uses pivot point analysis to map market extremes:
Buy Side Liquidity (BSL): Formed at major structural highs. Retail traders typically place stop-losses (buy-to-cover orders) above these highs. The script identifies these unmitigated peaks and draws a dashed line projecting into the future.
Sell Side Liquidity (SSL): Formed at major structural lows. Retail traders place sell-stop orders below these lows. The script tracks these valleys as magnetic targets for price action.
Smart Mitigation (The Sweep Engine)
Unlike static drawing tools, this indicator constantly evaluates the live price against the drawn liquidity zones.
If a candlestick wick or body pierces a BSL or SSL line, the liquidity is considered "Swept" (mitigated).
The script instantly removes the line from the chart, triggering a real-time alert that institutional orders have likely been absorbed, opening the door for a structural reversal.
HUD Dashboard & Post-Sweep AI Logic
The integrated on-chart panel evaluates the structural bias based on the most recent liquidity event:
Dangerous: Displayed actively while the price is piercing and sweeping a liquidity line. This warns traders that extreme volatility is present as stop-losses trigger, making it highly risky to enter breakout trades.
SHORT: Triggered after BSL has been swept. SMC logic dictates that Smart Money forces price upward to trigger buy-stops, providing the necessary liquidity to execute large sell orders. Therefore, the post-sweep bias becomes Bearish (SHORT).
LONG: Triggered after SSL has been swept. Smart Money forces price downward to trigger sell-stops, allowing them to accumulate buy orders. The post-sweep bias becomes Bullish (LONG).
How to Use It
This tool is designed for reversal and mitigation trading, not breakout trading. Do not blindly place limit orders at BSL or SSL lines. Instead, wait for the price to hit the line (AI Suggestion reads "Dangerous"). Drop to a lower timeframe (e.g., 1m or 5m) and look for a Change of Character (CHoCH) confirming that Smart Money is indeed reversing the trend after engineering liquidity. อินดิเคเตอร์

Auto Dynamic S/R Zones Pro [identityKa]Overview
The Auto Dynamic S/R Zones Pro is a structural Price Action utility that automatically identifies, draws, and manages Supply (Resistance) and Demand (Support) liquidity zones. Unlike traditional pivot indicators that draw single horizontal lines, this script constructs volumetric "boxes" to represent areas of historical institutional interest. Furthermore, it incorporates a Smart Mitigation Engine that automatically cleans the chart by deleting zones once they have been functionally broken or fully mitigated by price action.
Core Zone Calculation Methodology
The script utilizes historical pivot detection (ta.pivothigh and ta.pivotlow) based on a user-defined lookback/lookforward sensitivity. Once a structural extreme is found, the engine calculates the boundaries of the zone to capture the entire rejection area rather than just the wick tip:
Resistance Zones (Supply): The top of the box is anchored to the absolute high of the pivot candle. The bottom of the box is calculated using the maximum value between the open and close of that same candle (capturing the wick-to-body spread).
Support Zones (Demand): The bottom of the box is anchored to the absolute low of the pivot candle. The top of the box is calculated using the minimum value between the open and close (capturing the lower wick-to-body spread).
The Smart Mitigation Engine (Chart Cleanup)
To prevent chart clutter and outdated data, the script utilizes dynamic arrays to manage the drawn boxes.
The script continuously monitors the closing price relative to all active zones.
If a candlestick closes strictly above the upper boundary of a Resistance box, or strictly below the lower boundary of a Support box, the zone is mathematically considered "Mitigated" (broken).
Upon mitigation, the script instantly deletes the box and its associated label from the chart history, firing a breakout alert and leaving only fresh, untested zones visible.
HUD Dashboard & AI Logic
The integrated on-chart panel evaluates the immediate relationship between the current price and the active S/R arrays:
Dangerous: Triggered whenever the current closing price is actively printing inside the coordinates of any active Support or Resistance box. This indicates price is in a high-friction decision zone where rejections are highly probable.
LONG / SHORT: The engine tracks the most recent structural breakout. If the last mitigated zone was a Resistance, it adopts a "LONG" bias indicating bullish structure. If the last mitigated zone was a Support, it adopts a "SHORT" bias indicating bearish structure, provided the price is not currently stuck inside another zone.
How to Use It
This indicator simplifies top-down analysis. Traders can use a higher timeframe (e.g., 1H or 4H) to let the script automatically map out major untested supply and demand zones. When the price enters an active zone (triggering the "Dangerous" AI state), traders can drop to a lower timeframe to look for reversal patterns. Alternatively, traders can trade the momentum of the breakouts by setting alerts for when a zone is officially broken/mitigated. อินดิเคเตอร์

Smart Pivot Reversals [identityKa]Overview
The Smart Pivot Reversals is a structural Price Action indicator designed to automatically detect and highlight market swing highs (Tops) and swing lows (Bottoms). Instead of relying on lagging moving averages to find reversals, this script uses raw bar-by-bar analysis to identify local structural extremes. To increase signal reliability, it includes optional, mathematically strict filters for macro-trend alignment and momentum exhaustion.
Underlying Concepts & Calculations
At its core, the indicator utilizes the standard ta.pivothigh and ta.pivotlow functions. The detection mechanism is entirely governed by two user-defined parameters:
Left Bars (Sensitivity): The number of preceding bars that must have a lower high (for a Top) or a higher low (for a Bottom). A smaller number detects micro-swings, while a larger number identifies major structural points.
Right Bars (Confirmation): The number of subsequent bars required to validate the pivot. Note on Visualization: The script uses a negative offset equal to the "Right Bars" value. This means the "TOP" or "BOTTOM" label is plotted exactly on the pivot candle historically, only after the confirmation bars have closed.
Smart Validation Filters (Optional Logic)
To filter out noise in ranging markets, traders can enable two concurrent mathematical filters:
Macro Trend Filter (EMA): When activated, the script calculates a standard Exponential Moving Average (default length 200). A pivot low (Bottom) is only validated if the closing price is strictly above the EMA (identifying pullbacks in an uptrend). A pivot high (Top) is only validated if the closing price is strictly below the EMA.
Momentum Strict Mode (RSI): When activated, the script checks the Relative Strength Index (default length 14) at the exact moment the pivot is confirmed. A Top is only valid if the RSI is in the Overbought zone (≥70). A Bottom is only valid if the RSI is in the Oversold zone (≤30).
HUD Dashboard & State Tracker
The script features a built-in, customizable on-chart panel that aggregates the last confirmed structural pivot and outputs an AI-style state suggestion:
LONG: Triggered and sustained when the last confirmed structure was a valid BOTTOM.
SHORT: Triggered and sustained when the last confirmed structure was a valid TOP.
Dangerous: Displayed during periods of transition or neutral states before a definitive structure is confirmed.
How to Use It
This tool is highly effective for traders utilizing Price Action methodologies, particularly on intraday charts (such as 15-minute or 1-hour timeframes). The printed Top/Bottom labels serve as excellent objective points for drawing support/resistance zones or trendlines. Traders can use the optional EMA and RSI filters to mechanically ignore counter-trend setups and only focus on high-probability reversal structures that align with the broader market context. อินดิเคเตอร์

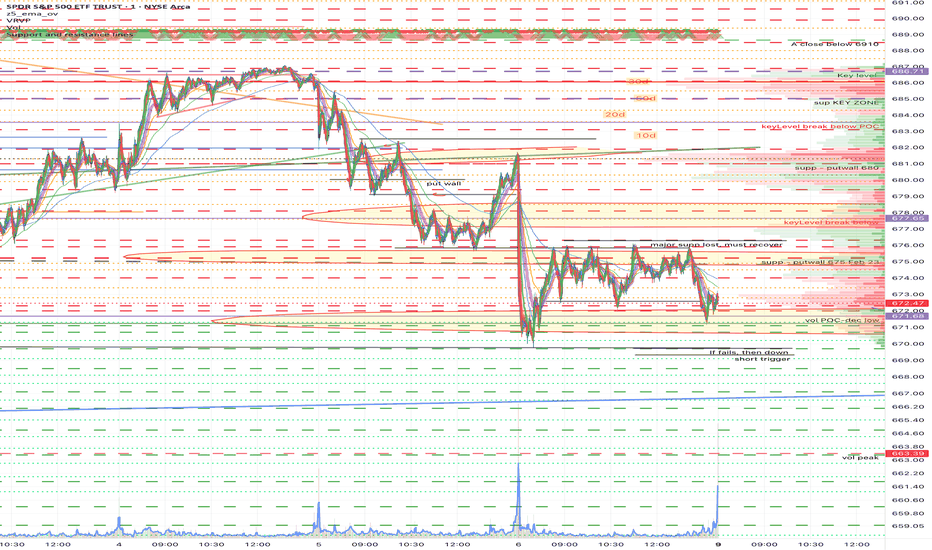
EdgeGate Premarket Breakout LevelsOverview
EdgeGate™ Premarket Breakout Levels is designed for traders who use a premarket breakout strategy and want a simple way to visualize the key levels that often drive early-session momentum.
The indicator automatically plots:
Premarket High
Premarket Low
Previous New York Session High
Previous New York Session Low
These levels help traders quickly identify potential breakout zones, liquidity areas, and key intraday structure without needing to manually mark sessions each day.
What the Indicator Shows
Premarket High / Low
During the premarket session (default 04:00–09:30 ET), the indicator continuously tracks the session range and plots:
Premarket High
Premarket Low
Once the premarket session closes, these levels become fixed and extend across the trading day.
These levels are commonly used by traders watching for premarket breakout setups after the opening bell.
Previous NY Session High / Low
The indicator also plots the previous regular New York session range (09:30–16:00 ET):
Prev NY High
Prev NY Low
These levels often act as important areas of:
support and resistance
liquidity sweeps
breakout continuation or rejection zones
How Traders Use These Levels
Traders using a premarket breakout strategy typically watch for:
Price consolidating below Premarket High before a breakout
Momentum moves through Premarket Low for downside continuation
Reactions at Previous NY Session High or Low
Liquidity sweeps before trend continuation
This indicator helps keep those reference levels clearly visible throughout the trading session.
Customization
Users can customize:
Premarket session times
Line colors
Line styles (solid, dashed, dotted)
Line thickness
This allows the levels to be styled to match individual chart layouts.
🟣 About EdgeGate™
EdgeGate™ builds tools around one principle:
Structure. Liquidity. Execution.
We focus on developing precision-based session and liquidity frameworks designed for intraday traders who care about context, not clutter.
This is Version 1.0.0 of the EdgeGate™ public toolkit — released free to the TradingView community.
More session tools and execution-focused models coming soon.
🟣 Version
EdgeGate™ Premarket Breakout Levels
Version: 1.0.0
Release Type: Initial Public Release
Status: Stable
Build Philosophy: Clean session structure only
Included in v1.0.0
Premarket High / Low tracking (ET)
Previous NY Session High / Low tracking (ET)
Live Premarket High / Low plotting during premarket
Locked Premarket levels after session close
Previous NY session High / Low displayed on current chart
Customizable line colors, widths, and styles
Session-based level framework designed for premarket breakout traders
🟣 Release Standard (EdgeGate™ Framework)
All EdgeGate™ public tools will follow a structured release format:
Version number
Release type (Major / Minor / Patch)
Documented feature set
Defined behavioral philosophy
Transparent future roadmap
🆓 Open Source
This script is released free and open-source for the community.
You’re welcome to modify, improve, and build upon it respectfully.
⚠️ Disclaimer
For educational purposes only.
Not financial advice. อินดิเคเตอร์

อินดิเคเตอร์
อินดิเคเตอร์

อินดิเคเตอร์

อินดิเคเตอร์

Luminous Pivot S&R Matrix [Pineify]Luminous Pivot S&R Matrix — Dynamic Support & Resistance Zones with ATR-Adaptive Width and Breakout Detection
The Luminous Pivot S&R Matrix is a dynamic support and resistance indicator that automatically identifies significant pivot highs and pivot lows, constructs ATR-adaptive zones around them, and monitors each zone in real time for breakout invalidation. Unlike static horizontal line tools that require manual placement, this indicator continuously scans price action for structurally significant turning points using a configurable lookback window, then wraps each pivot in a volatility-scaled zone whose width adapts to current market conditions via the Average True Range (ATR). When price closes beyond a zone's pivot level, the zone is automatically deactivated and visually dimmed, while a breakout signal is plotted — giving traders a fully automated, self-managing support and resistance framework that stays relevant as markets evolve.
Key Features
Automatic pivot detection using a configurable lookback length to identify both major and minor structural turning points in price
ATR-adaptive zone construction that dynamically scales the width of each support and resistance zone based on current market volatility
Real-time zone management with automatic extension of active zones to the current bar and visual invalidation when zones are broken
Breakout detection system that flags bullish breakouts (close above resistance) and bearish breakouts (close below support) with triangle markers and candle coloring
Memory management system that limits the number of displayed zones per side, automatically removing the oldest zones to keep charts clean and readable
Built-in alert conditions for both bullish and bearish breakouts, enabling automated notification workflows
How It Works
The indicator operates through a three-stage pipeline: pivot detection, zone construction, and dynamic zone management.
Stage 1: Pivot Detection
The indicator uses Pine Script's built-in ta.pivothigh() and ta.pivotlow() functions with a user-defined lookback length (default: 15 bars). A pivot high is confirmed when a bar's high is the highest value within the lookback window on both sides. Similarly, a pivot low is confirmed when a bar's low is the lowest value within that same window. Because confirmation requires bars to the right of the pivot, detected pivots are inherently lagged by the lookback length — this is by design, as it ensures only structurally validated turning points are plotted, filtering out noise and false signals.
Stage 2: ATR-Adaptive Zone Construction
Once a pivot is confirmed, the indicator constructs a zone around it. Rather than using a fixed-width band, the zone boundaries are calculated using the 14-period ATR value at the pivot bar, scaled by the user's ATR multiplier (default: 0.8). The zone extends from pivot price + (ATR × multiplier) / 2 to pivot price − (ATR × multiplier) / 2 . This means zones are naturally wider during volatile market conditions and narrower during calm periods, providing contextually appropriate support and resistance bands. A horizontal line is drawn at the exact pivot price, and a semi-transparent box fills the zone area.
Stage 3: Dynamic Zone Management & Breakout Detection
On every bar, the indicator iterates through all active zones. Active zones are extended rightward to the current bar, keeping them visually current. The indicator then checks whether price has closed beyond the zone's pivot level — above for resistance zones, below for support zones. When a breakout occurs, the zone is deactivated (marked inactive), its visual appearance is dimmed to gray with a dashed line style, and a breakout flag is raised. This flag triggers the plotted triangle signal and candle coloring for that bar.
Trading Ideas and Insights
Zone Bounce Entries — When price approaches an active support zone from above, look for bullish reversal candlestick patterns (hammer, engulfing) within the zone for potential long entries. The zone's ATR-based width provides a natural area for price to find buyers, and the wider the zone, the more volatility the market has been experiencing — suggesting a larger potential reaction.
Breakout Continuation Trades — When a bullish breakout signal fires (green triangle), it confirms that price has closed above a resistance pivot. Traders can use this as confirmation to enter long positions, especially when the breakout occurs on above-average volume. The invalidated zone often becomes new support on retests.
Zone Density Analysis — Areas where multiple support or resistance zones cluster together represent stronger structural levels. When several pivots form at similar price levels, the overlapping zones create a high-confluence area that is more likely to hold or produce significant breakouts when finally violated.
Failed Breakout Recognition — If price triggers a breakout signal but quickly reverses back into the zone on the next bar, this suggests a false breakout or stop hunt. Traders can watch for these failed breakouts as potential reversal signals in the opposite direction.
Trend Context — In a strong uptrend, you will observe support zones consistently holding while resistance zones are frequently broken (bullish breakout signals). In a downtrend, the opposite pattern emerges. Tracking the ratio of bullish to bearish breakouts provides a structural view of trend strength.
How Multiple Indicators Work Together
The Luminous Pivot S&R Matrix integrates three complementary analytical techniques into a unified support and resistance system:
Pivot point detection provides the structural price levels, ATR-based zone construction adds volatility context to those levels, and the real-time breakout detection system transforms static levels into dynamic, self-managing trading zones — together forming a complete support and resistance analysis framework.
The pivot detection engine serves as the foundation, identifying bars where price has demonstrably reversed direction. The configurable lookback length allows traders to tune the sensitivity — a shorter lookback (5-10) captures minor swing points suitable for intraday trading, while a longer lookback (15-30) identifies major structural levels appropriate for swing and position trading.
The ATR-adaptive zone construction addresses a fundamental limitation of traditional pivot-based indicators: a single price line rarely captures the full area where supply or demand exists. By expanding each pivot into a zone scaled by the ATR, the indicator acknowledges that support and resistance are areas , not exact prices. The ATR multiplier gives traders control over how much volatility context to incorporate — a lower multiplier (0.3-0.5) creates precision zones for tight stop placement, while a higher multiplier (1.0-1.5) creates wider zones that capture the full range of potential price reaction.
The breakout detection and zone lifecycle management system is what transforms this from a static level-drawing tool into a dynamic analytical framework. By automatically tracking whether each zone remains active or has been invalidated, the indicator eliminates the manual overhead of monitoring multiple levels. The visual differentiation between active zones (solid colored) and broken zones (gray dashed) provides instant context about which levels are still structurally relevant. The memory management system ensures that only the most recent zones remain on the chart, preventing visual clutter that accumulates with traditional pivot indicators.
Unique Aspects
Volatility-adaptive zone width — Unlike fixed-width pivot zones or percentage-based bands, the ATR scaling ensures zones automatically widen during volatile periods and narrow during calm periods, providing contextually appropriate support and resistance areas across all market conditions.
Self-managing zone lifecycle — Zones are not simply drawn and forgotten. Each zone is actively monitored, extended, and eventually invalidated when broken. The visual transition from active (colored, solid) to broken (gray, dashed) creates an intuitive map of which levels remain structurally significant.
Structural pivot validation — By requiring confirmation bars on both sides of a pivot, the indicator only plots levels where price has demonstrably reversed. This eliminates the noise of minor fluctuations and focuses attention on levels where genuine supply or demand has been observed.
Clean chart design with memory management — The configurable zone limit per side prevents the chart from becoming cluttered with historical levels. The oldest zones are automatically removed when new ones form, ensuring the chart always shows only the most relevant current levels.
Dual breakout signaling — Breakouts are communicated through three simultaneous channels: plotted triangle markers, candle color changes, and configurable alert conditions. This multi-channel approach ensures traders never miss a breakout event regardless of how they monitor their charts.
How to Use
Add the Luminous Pivot S&R Matrix to your chart. It overlays directly on the price chart, displaying colored zones at detected pivot levels.
Observe the colored zones — green zones represent support areas (pivot lows), and red zones represent resistance areas (pivot highs). Active zones have solid lines and colored fills; broken zones appear gray with dashed lines.
Watch for breakout signals — a green triangle below a bar indicates price has closed above a resistance zone (bullish breakout), while a red triangle above a bar indicates price has closed below a support zone (bearish breakout). Breakout candles are also colored accordingly.
Use active zones as potential entry areas — look for price reactions (bounces, rejections) when price approaches an active zone. Combine with candlestick patterns or other confirmation tools for higher-probability entries.
Monitor zone invalidation patterns — frequent resistance breakouts suggest bullish momentum, while frequent support breakdowns suggest bearish momentum. This provides a structural view of the prevailing trend.
Set up alerts using the built-in alert conditions ("Bullish Breakout" and "Bearish Breakout") to receive notifications when price breaks through an active zone, even when you are not watching the chart.
Combine with volume indicators, trend filters, or momentum oscillators for additional confirmation before executing trades based on zone reactions or breakout signals.
Customization
Pivot Lookback (default: 15) — Controls how many bars on each side are required to confirm a pivot. Increase for major structural levels suitable for higher timeframes (20-30); decrease for more frequent pivot detection on lower timeframes (5-10).
Zone ATR Multiplier (default: 0.8) — Scales the 14-period ATR to determine zone width. Increase for wider zones that capture more price reaction area (1.0-1.5); decrease for tighter, more precise zones (0.3-0.5).
Max Active Zones per side (default: 5) — Limits how many support and resistance zones are displayed simultaneously. Increase if you want to see more historical context (8-15); decrease for a cleaner chart with only the most recent levels (2-3).
Support / Resistance Colors — Customize the zone and signal colors to match your chart theme or personal preference.
Zone Transparency (default: 85) — Controls the opacity of zone box fills and borders. Lower values make zones more prominent; higher values keep them subtle and non-distracting.
Conclusion
The Luminous Pivot S&R Matrix provides a methodologically rigorous approach to automated support and resistance analysis by combining structural pivot detection with volatility-adaptive zone construction and real-time breakout monitoring. By treating support and resistance as dynamic zones rather than static lines, and by automatically managing the lifecycle of each zone from creation through invalidation, this indicator eliminates the manual overhead of traditional S/R analysis while providing richer contextual information. Whether you are a day trader looking for precise intraday bounce zones, a swing trader identifying key structural levels for position entries, or a position trader monitoring major support and resistance breaks for trend confirmation, the Luminous Pivot S&R Matrix delivers a clean, self-managing, and visually intuitive framework for understanding where the market's key structural boundaries lie — and when they are being broken. อินดิเคเตอร์

Nadaraya-Watson Dynamic Envelopes [identityKa]Welcome to another premium-grade, free-to-use trading tool developed by identityKa.
The Nadaraya-Watson Dynamic Envelopes is a highly advanced, visually smooth overlay indicator designed to capture dynamic support and resistance zones. Instead of relying on traditional, jagged moving averages, this indicator utilizes a Gaussian-inspired smoothing technique (via an optimized ALMA mathematical engine) to wrap the price action in a flowing, highly responsive channel.
Whether you are a day trader looking for mean-reversion setups or a swing trader identifying macro tops and bottoms, this indicator provides crystal-clear visual guidance without cluttering your chart.
🔥 Key Features:
Dynamic Smoothing Engine: Creates non-jagged, flowing upper (resistance) and lower (support) bands that adapt to market volatility.
Mean Reversion Signals: Prints distinct triangle shapes (Red for Bearish, Green for Bullish) when the price action sharply interacts with the outer envelopes, highlighting high-probability reversal zones.
Smart HUD Dashboard: Includes a clean, fully customizable on-chart dashboard that displays the current engine status, price position relative to the midline, and a real-time AI Suggestion (LONG, SHORT, or Dangerous) based on the algorithmic state.
100% Customizable: Every aspect of the indicator, from bandwidth smoothness and multipliers to theme colors (featuring the signature identityKa neon palette) and dashboard positioning, can be adjusted in the settings menu.
💡 How to Trade with It:
Mean Reversion: Look for bullish (green) triangle signals when the price touches or pierces the lower green envelope for potential long entries. Conversely, look for bearish (red) triangle signals at the upper red envelope for short entries.
Trend Continuation: In strong trending markets, the midline (white) often acts as dynamic support/resistance.
Pro Tip: This indicator works best when combined with a primary trend filter (such as our Alpha SuperTrend Signal). Avoid taking reversal signals against a very strong macroeconomic trend unless confirmed by other Price Action concepts.
⚙️ Settings & Alerts:
The script comes with built-in alert conditions for both Support Bounces (Bullish) and Resistance Rejections (Bearish), allowing you to automate your workflow. All settings are globally accessible in English.
Elevate your chart quality. Trade with precision. Trade with identityKa. อินดิเคเตอร์

Liquidity Sweep Rider Institutional HFT Grabber Liquidity Sweep Rider Strategy (Swing Pivot + Volume Filter)
Publication Description:
This is an open-source Pine Script v6 strategy that identifies potential liquidity sweep patterns around confirmed swing highs and lows.
It uses:
Pivot points (ta.pivothigh / ta.pivotlow) to mark historical swing levels where orders (such as stops or pending entries) often cluster.
A volume filter requiring above-average volume (SMA-based with multiplier) on the sweep candle to highlight stronger moves.
Classic sweep logic: price wicks beyond the level but closes back inside, suggesting a possible reversal after liquidity is taken.
Entry rules:
Long: after a downside sweep below a recent swing low (with volume condition).
Short: after an upside sweep above a recent swing high (with volume condition).
Features include:
Optional toggles to enable/disable long/short directions.
ATR-based stop-loss and take-profit (configurable multipliers and risk-reward ratio).
Visual plots for liquidity levels, entry signals, background highlights, and an info table.
Alert conditions for long/short triggers.
Important notes:
This is an educational/example script for backtesting and learning.
Past performance does not indicate future results. Trading involves significant risk of loss — use proper risk management and never risk more than you can afford to lose.
No guarantees of profitability are made. Always test thoroughly on demo accounts before live use.
Customize parameters (pivot lengths, volume multiplier, ATR settings) based on the instrument and timeframe you trade. Works on various markets/timeframes but performs differently depending on liquidity and volatility.
Feel free to fork/modify the code. Feedback and improvements are welcome!
(≈ 3–4 paragraphs, clear, educational, includes risk disclaimer, explains logic + usage without hype.) กลยุทธ์

อินดิเคเตอร์

อินดิเคเตอร์

อินดิเคเตอร์
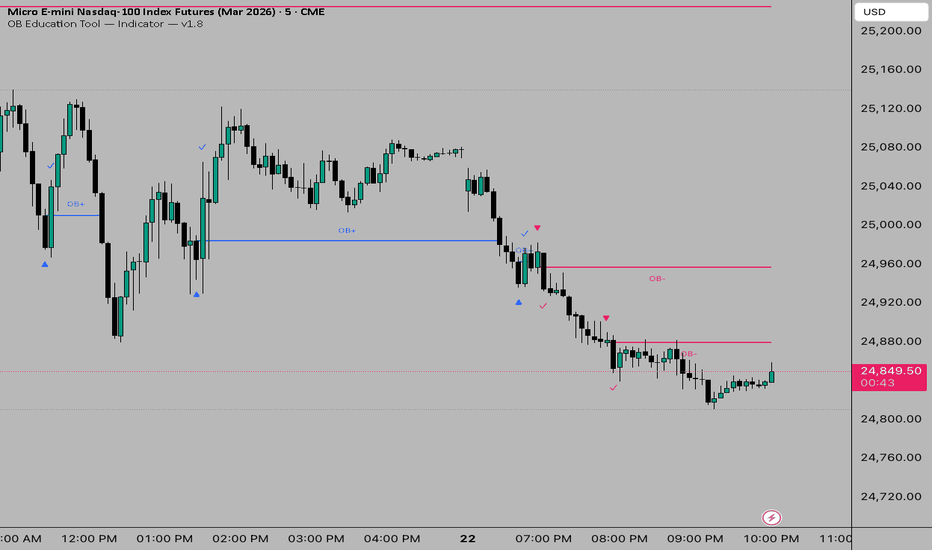
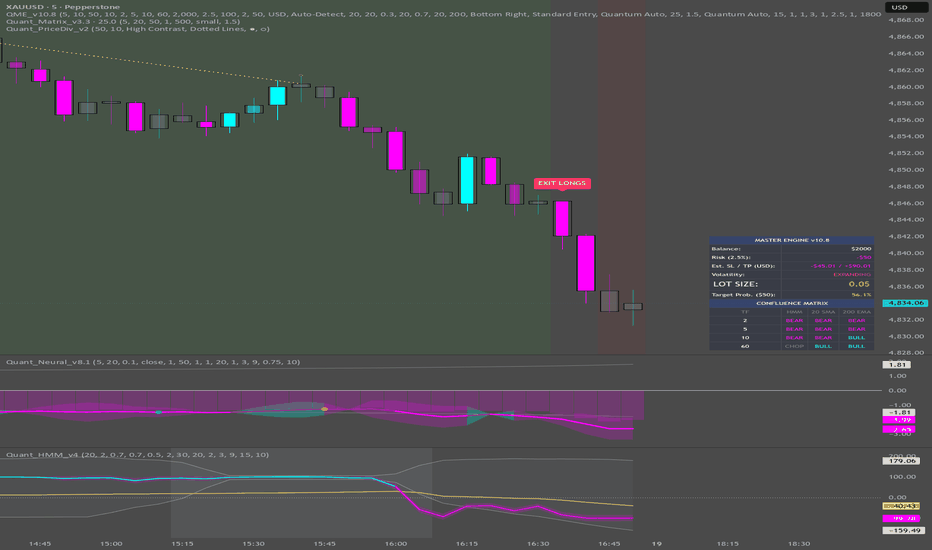
Quantum Main Chart Divergence v1Quantum Main Chart Divergence - The Confluence Scanner
Overview Looking back and forth between price action and multiple sub-chart oscillators can cause trader fatigue and delayed entries. The Quantum Main Chart Divergence acts as a heads-up display (HUD), bringing complex sub-chart analysis directly onto your candlesticks. This indicator runs a hidden, "under-the-hood" Adaptive Z-Score engine to scan for structural momentum shifts, printing clean, unobtrusive divergence labels exactly where the price pivots occur.
Key Highlights
• Invisible Adaptive Engine: It calculates an Efficiency Ratio-driven Adaptive Z-Score entirely in the background. You get the power of an advanced institutional oscillator without cluttering your screen with another pane.
• Instant Visual Confirmation: Prints crisp "R" (Regular) and "H" (Hidden) labels directly above or below the trigger candles the moment a structural pivot is confirmed.
• Plug-and-Play Themes: Features a built-in theme selector (Dark, Light, and High Contrast) so the divergence labels automatically match your chart's aesthetic without needing to manually tweak individual color hex codes.
• Failsafe Mathematics: Built with a mathematical safeguard to ensure the hidden oscillator remains stable and never throws division-by-zero errors during extremely low-volatility, flatline market conditions.
How to Trade It
1. Regular Divergence ("R"): Indicates exhaustion. If price makes a lower low but the hidden oscillator makes a higher low, a Bullish "R" label prints. Use this to anticipate major reversals, catch falling knives safely, or exit existing trend trades.
2. Hidden Divergence ("H"): Indicates trend continuation. If price makes a higher low but the oscillator dips to a lower low, a Bullish "H" label prints. This flags the exact moment a pullback has finished and the primary trend is ready to resume.
The Quantum Ecosystem Integration
This indicator serves as the ultimate "Trigger Confirmation" for the Quantum Trading System.
• Quantum Adaptive Session Profile (SVP): When price approaches your Adaptive POC, VAH, or VAL, wait for an "R" or "H" label to print. A divergence precisely at a structural level is a top-tier setup.
• Quantum Confluence : If you see a Bullish "R" on the main chart, look down at your Trendilo sub-chart. If Trendilo is glowing Neon Cyan and your BSP histogram is showing strong buying pressure, you have ultimate confluence. Execute the trade.
⚠️ DISCLAIMER: STRICTLY FOR EDUCATIONAL PURPOSES The information, scripts, and concepts provided in this publication are for educational and informational purposes only and do not constitute financial, investment, or trading advice. Trading in financial markets (including Forex, Crypto, Stocks, and Commodities) carries a high level of risk and may not be suitable for all investors. You could lose some or all of your initial investment. Past performance is not indicative of future results. Always conduct your own due diligence, backtest any strategy thoroughly, and consult with a certified financial advisor before making any trading decisions. By using this script, you acknowledge that you are solely responsible for your own trading actions and outcomes.
อินดิเคเตอร์
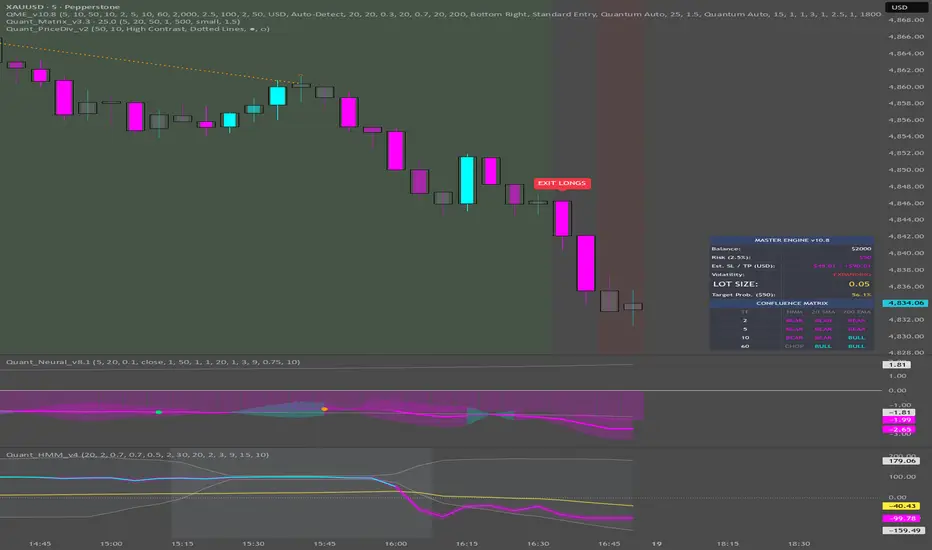
SMI Fractal Iron HMASMI FRACTAL IRON HMA
Professional Multi-Engine Trading Overlay
Version 7.0 • February 2026 • Pine Script™ v6 • Overlay Indicator
By NPR21
FIVE INTEGRATED ENGINES
Fractal Pivots │ SMI Filter │ HMA Forecast │ Risk Management │ Short Trend Dashboard
DESCRIPTION
SMI Fractal Iron HMA integrates five complementary analytical engines into a single overlay indicator, designed so that each component addresses a different dimension of trade analysis — structure, momentum, trend context, risk parameters, and real-time directional scoring — and the outputs of each engine reinforce or qualify the signals of the others.
▸ Fractal Pivot Detection
Identifies structural swing highs and lows using fractal pivot logic with a key innovation: the left-side structural lookback and the right-side confirmation delay are split into two independent inputs. This allows traders to maintain high structural selectivity (catching only significant swing points) while independently controlling how many bars of confirmation are required before a signal prints. Setting Right Bars to zero enables zero-delay mode where the label appears on the forming bar itself.
▸ Stochastic Momentum Index (SMI) Filter
A double-smoothed EMA of the price-to-midpoint relationship, scaled to a configurable range. When enabled as a filter, long signals only print when SMI is rising and short signals only print when SMI is falling. Signals opposing the current momentum direction are silently suppressed, reducing noise without adding visual clutter.
▸ HMA Trend Duration Forecast
Tracks the Hull Moving Average slope to determine trend state. Each completed trend’s duration is stored in a rolling sample. The historical average projects the probable length of the current trend. On the chart: a white arrow line shows the forecast window, a Trend ↑ Up Real or Trend ↓ Down Real label updates in real time with the current bar count, and a Prob: label shows the forecasted duration. HMA BUY and HMA SELL labels print at each trend change with optional price display.
▸ Risk Management System
Activates on each confirmed pivot signal and draws five horizontal levels: Entry, Stop Loss (configurable in points or percentage), and three Take Profit tiers calculated as Reward:Risk multiples. Features include:
•TP hit tracking — each level changes to dashed with a check-mark label when price reaches it.
•Trailing stop — moves to breakeven at a configurable threshold, then trails by a fixed offset.
•TP2+ reversal exit — after TP2 is hit, closes the trade if price reverses by a specified distance before TP3.
•P&L dashboard — real-time display of direction, entry, current P&L in the selected currency, R:R ratio, dollar risk/reward at each TP, bars in trade, HMA trend direction, and probable trend length.
•Auto-reset — clears all trade objects when a trade completes (SL, TP3, or TP2+ reversal), readying for the next signal.
▸ Short Trend Dashboard
A 5-component real-time scoring engine that votes on the current bar’s directional bias:
•Momentum (25 pts) — price change vs. ATR-scaled threshold.
•Candle Structure (25 pts) — body-to-range ratio and wick rejection analysis.
•Micro Trend (25 pts) — fast/slow EMA crossover with ATR-normalized gap scoring.
•Acceleration (25 pts) — bar-to-bar momentum change detecting speed gain or loss.
•Volume B/S (10 pts) — estimated buy vs. sell pressure from close position within bar range.
The composite score (0–100) produces a letter grade (A+, A, B, C) and a directional label (BULLISH, BEARISH, LEAN BULL/BEAR, or NEUTRAL). The TEMP Heat Gauge (0–100) blends seven sub-indicators (ROC, RSI, Stochastic, Volume Pressure, EMA Position, Candle, Acceleration) into a single temperature reading (HOT / WARM / NEUTRAL / COOL / COLD). Scalper Mode activates ultra-fast EMA and momentum presets optimized for 1–5 minute charts with Instant Flip detection for single-bar reversals.
▸ Why These Five Engines Together
Each engine answers a different question. The pivot engine identifies where structure turns. The SMI filter confirms whether momentum supports the signal. The HMA forecast provides how long the trend is likely to last. The risk management system defines how much is at stake. The Short Trend Dashboard gives a right now directional confidence score. Together they create a workflow: detect the turn, confirm direction, understand trend context, manage the trade, and monitor conviction — all from a single indicator.
HOW TO USE
▸ Getting Started
1.Add the indicator to your chart. Default settings (Left 5 / Right 1) provide a balanced starting point with strong structural selectivity and minimal delay.
2.BUY labels appear below swing lows. SELL labels appear above swing highs. In Confirmed + Preview mode, semi-transparent labels flicker during bar formation and lock solid at bar close.
3.Use the HMA colored line and trend forecast labels to understand the broader trend context. HMA BUY and HMA SELL labels mark each trend change.
4.Enable Risk Management to see SL/TP lines and the P&L dashboard on each confirmed signal.
5.Monitor the Short Trend Dashboard for real-time confirmation. CONSENSUS +4/5 or +5/5 indicates strong alignment across all components.
▸ Tuning the Pivot Detection
•Left 5 / Right 5: Maximum accuracy. Pivot must be highest/lowest of 11 bars. 5-bar confirmation delay. Best for identifying only major swing points.
•Left 5 / Right 1: Strong selectivity, minimal delay. Preview label flickers on the confirmation bar. Good balance for scalping and active trading.
•Left 5 / Right 0: Zero-delay mode. Label appears on the pivot bar during formation. Fastest possible signal. Useful for scalping when combined with the SMI filter.
•Left 8–10 / Right 0: Zero delay with larger left lookback to compensate for missing right-side confirmation.
▸ Configuring Risk Management
•Enable the Risk Management Overlay toggle. Set Stop Loss in points (e.g., MNQ: 3–5 pts) or as a percentage of entry price.
•Set TP1, TP2, TP3 as Reward:Risk multiples (defaults: 2:1, 3:1, 4:1). Adjust to your trading style.
•Set Point Value for your instrument: MNQ = 2, MES = 5, MYM = 0.5, MGC = 10, MCL = 10.
•The P&L dashboard updates every bar showing dollar P&L, R:R ratio, and TP hit status.
•Enable trailing stop for trades that run: set breakeven threshold, trail start, and trail offset distances.
▸ Reading the Short Trend Dashboard
•Direction + Score: BULLISH/BEARISH/LEAN with a score of 0–100. Grade A+ or A = high conviction.
•TEMP Heat Gauge: Above 70 = HOT (overbought). Below 30 = COLD (oversold). 45–55 = NEUTRAL.
•CONSENSUS: Total vote out of 5 components. +4/5 or +5/5 = strong directional alignment.
•Scalper Mode: Ultra-fast presets for 1–5 min charts. Instant Flip marks single-bar reversals with ** notation.
▸ Label Display Options
•Stack: Label sits directly on the high/low with offset ticks. Text stacks vertically with optional timestamp.
•Pointer: Label offset to the side with a pointer coming off the corner pointing at the exact high/low of the bar.
•Timestamp: Five formats: HH:mm, HH:mm:ss, h:mm a, MMM dd HH:mm, MMM dd. Uses the chart’s time zone.
▸ Suggested Starting Settings
•Scalping (1–5 min): Left 5, Right 1, HMA Length 9–14, Scalper Mode ON, SL 3–5 pts
•Day Trading (5–15 min): Left 5, Right 2–3, HMA Length 14–20, Scalper Mode OFF, SL 5–10 pts
•Swing Trading (1H–4H): Left 5, Right 5, HMA Length 20–50, Scalper Mode OFF, SL 10–25 pts
•Zero-Lag Mode: Left 7–10, Right 0, SMI Filter ON, HMA Length 14, Scalper Mode ON
DISCLAIMER
This indicator is a technical analysis tool designed to assist with identifying potential swing reversal points, trend direction, and trade risk parameters. It is not a standalone trading system and does not constitute financial advice. No indicator can predict future price movement. Past performance of any signal methodology does not guarantee future results. Always use proper risk management and consider multiple sources of analysis. The author assumes no responsibility for trading losses. Use at your own risk. อินดิเคเตอร์

อินดิเคเตอร์