Güncellendi
SMC Supply & Demand Zones - H4 / H1 / M10
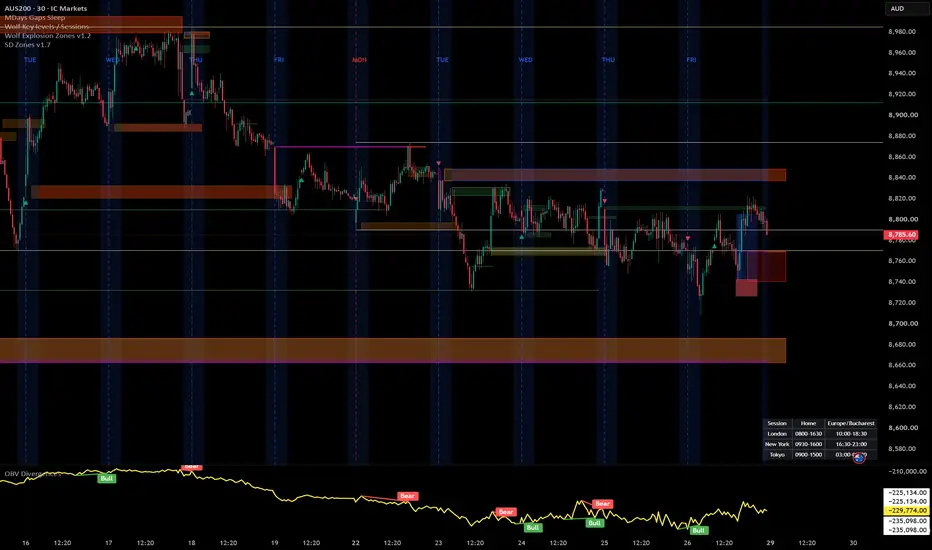
Automatically identifies and draws supply and demand zones across three timeframes (H4, H1, and M10) simultaneously on any chart, using a strict volume-confirmed impulse candle definition rooted in Smart Money Concepts (SMC).
How zones are built
A zone is created only when all three conditions are met on the same candle:
Body size ≥ 1.5 × ATR(14) — filters out indecision candles
Close breaks beyond the prior 5 candles' high (demand) or low (supply) — confirms impulsive intent
Volume ≥ 1.5 × SMA(volume, 20) — requires institutional-level participation
Zone boundaries follow the SMC base candle rule: demand zones span from the impulse candle's open down to its low; supply zones span from its high down to its open.
Visual design
Each timeframe uses a distinct colour family so you can read confluence at a glance — H4 in blue, H1 in orange, M10 in green. Lighter shades mark demand, darker shades mark supply. When price closes fully through a zone, it fades to grey and is tagged with [m] (mitigated) — it stays on the chart for context but is visually de-emphasised. Each zone carries a label (e.g. "H4 D", "H1 S") pinned to its right edge.
Settings
Toggle each timeframe on/off independently
Adjust the body multiplier, prior-bar lookback, and volume multiplier to match the instrument
Set separate caps for active and mitigated zones per timeframe (FIFO — oldest removed first)
Full colour control per timeframe and direction
Toggle labels and borders separately
Non-repainting
All three timeframe feeds use request.security() with lookahead = barmerge.lookahead_off and gaps = barmerge.gaps_off. Zones are created only on the bar where an impulse candle's close is first confirmed — no bar-0 data is used.
Recommended use
Load on your entry timeframe (M10 or M5) and use the H4/H1 zones as bias and confluence levels. Look for price to sweep into a higher-TF zone and react — that is your area of interest for entry confirmation on the lower timeframe.
How zones are built
A zone is created only when all three conditions are met on the same candle:
Body size ≥ 1.5 × ATR(14) — filters out indecision candles
Close breaks beyond the prior 5 candles' high (demand) or low (supply) — confirms impulsive intent
Volume ≥ 1.5 × SMA(volume, 20) — requires institutional-level participation
Zone boundaries follow the SMC base candle rule: demand zones span from the impulse candle's open down to its low; supply zones span from its high down to its open.
Visual design
Each timeframe uses a distinct colour family so you can read confluence at a glance — H4 in blue, H1 in orange, M10 in green. Lighter shades mark demand, darker shades mark supply. When price closes fully through a zone, it fades to grey and is tagged with [m] (mitigated) — it stays on the chart for context but is visually de-emphasised. Each zone carries a label (e.g. "H4 D", "H1 S") pinned to its right edge.
Settings
Toggle each timeframe on/off independently
Adjust the body multiplier, prior-bar lookback, and volume multiplier to match the instrument
Set separate caps for active and mitigated zones per timeframe (FIFO — oldest removed first)
Full colour control per timeframe and direction
Toggle labels and borders separately
Non-repainting
All three timeframe feeds use request.security() with lookahead = barmerge.lookahead_off and gaps = barmerge.gaps_off. Zones are created only on the bar where an impulse candle's close is first confirmed — no bar-0 data is used.
Recommended use
Load on your entry timeframe (M10 or M5) and use the H4/H1 zones as bias and confluence levels. Look for price to sweep into a higher-TF zone and react — that is your area of interest for entry confirmation on the lower timeframe.
Sürüm Notları
Added behaviour for mitigated zonesSürüm Notları
Changed default valuesAdded Custom value for SMA Volume (default 8 instead of 20)
Sürüm Notları
Added H2, M30 zones and alerts for touching the zonesSürüm Notları
I've made ATR as an input and changed some defaultsSürüm Notları
added M5 / M1 zonesSürüm Notları
Added custom Volume SMA length for M5 , M1 .Fixed Replay mode.
Sürüm Notları
Added custom SMA/WMA Volume Improved Zone Touched Alert
Sürüm Notları
Updates:1.Extended Supply/Demand zones to the right
2.Mitigated zones colored

Feragatname
Bilgiler ve yayınlar, TradingView tarafından sağlanan veya onaylanan finansal, yatırım, alım satım veya diğer türden tavsiye veya öneriler anlamına gelmez ve teşkil etmez. Kullanım Koşulları bölümünde daha fazlasını okuyun.
Feragatname
Bilgiler ve yayınlar, TradingView tarafından sağlanan veya onaylanan finansal, yatırım, alım satım veya diğer türden tavsiye veya öneriler anlamına gelmez ve teşkil etmez. Kullanım Koşulları bölümünde daha fazlasını okuyun.