

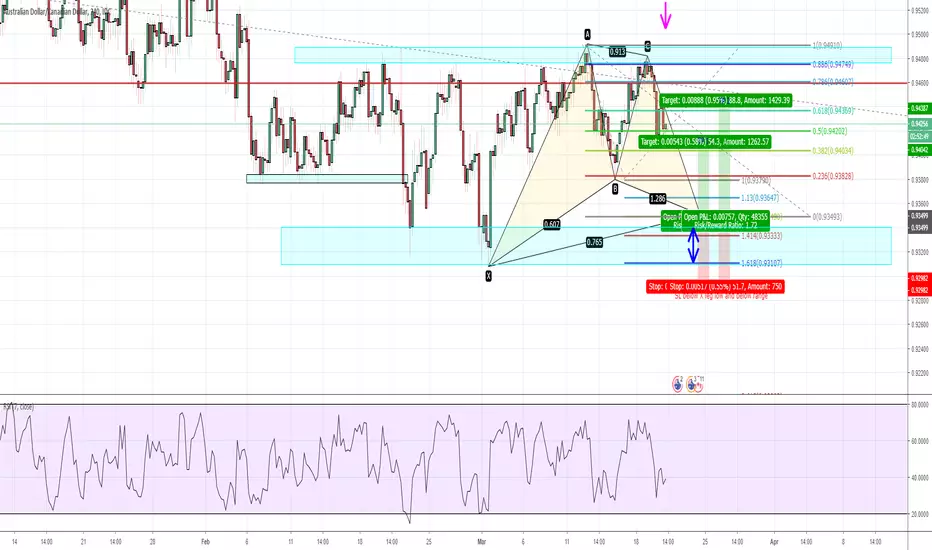
Another nice advanced pattern formation forming on the AUDCAD on the 4HR chart. The D completion is targeted to complete just above the range support structure. This may create some buffer for the price to continue to move down and test structure. Therefore, must ensure stops can cater for the possible move down. Stops are below the range. Must ensure orders are within a 1:1 ratio or greater for trade to be valid.

免責聲明
這些資訊和出版物並非旨在提供,也不構成TradingView提供或認可的任何形式的財務、投資、交易或其他類型的建議或推薦。請閱讀使用條款以了解更多資訊。