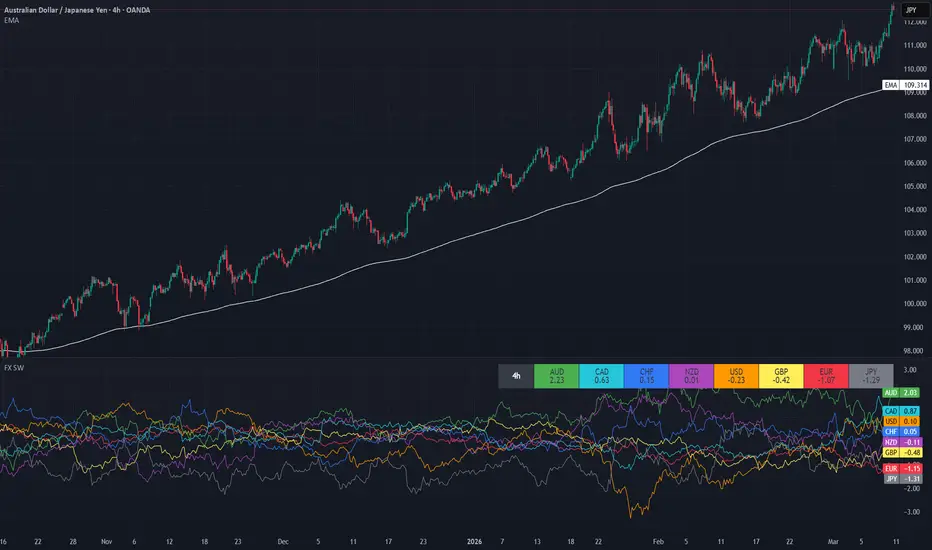
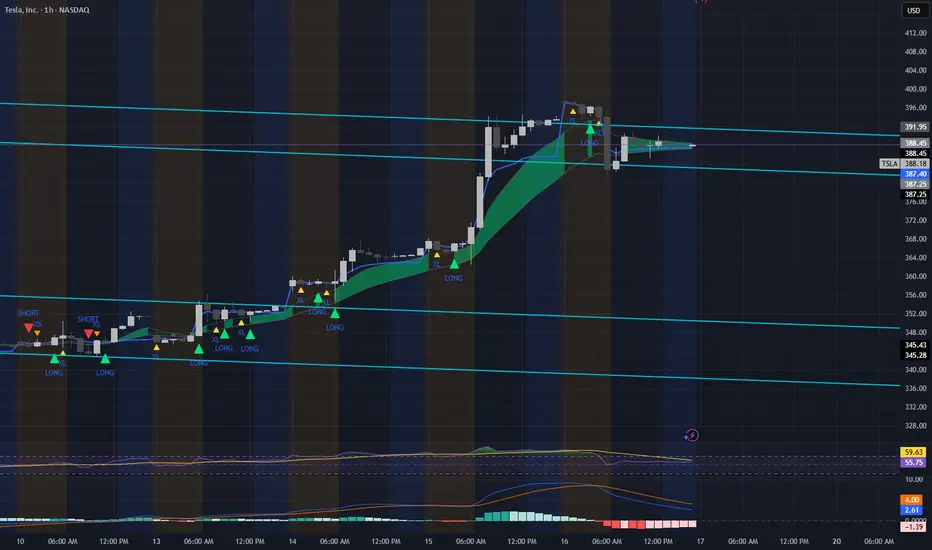
EMA Trend SSSThis is a 2 EMA (20/50) trend cloud script. Not much more to say but I have to give more details otherwise it won't be published, hopefully I've typed enough now to make the TV gods happy!Chỉ báocủa SingleSpeedSteve5
DDDDD: Liquidity Trap ReversalDDDDD: Liquidity Trap Reversal This indicator is designed to detect potential reversal zones that form after an apparent liquidity sweep at local extremes. The core idea is not to chase breakout candles blindly, but to identify situations where price extends into prior highs or lows, attracts participation, and then begins to show signs of exhaustion. Instead of treating every breakout as continuation, this script looks for a specific reversal environment built from trend context, range expansion, abnormal volume, and momentum slowdown. Core concept Markets often move into obvious swing highs or swing lows to trigger stops, breakout entries, or forced positioning. In some cases, that expansion is not the beginning of a clean trend leg, but the late phase of a move where liquidity is being taken before momentum weakens. This script attempts to highlight those areas by combining: a higher-level directional structure, an extreme test versus recent price range, a relative volume expansion filter, a trend-strength condition, and a momentum-fading condition. The goal is to mark bars where the move into the extreme may be overextended and vulnerable to reversal. Logic overview The script evaluates five main components: 1) Macro directional bias A Supertrend-derived direction is used as the main structural filter. This acts as the broader directional architecture around the trap event. 2) Extreme sweep detection Price must reach beyond a recent local extreme: for bearish trap logic, price pushes into the recent high range, for bullish trap logic, price sweeps into the recent low range. The lookback window for this sweep is controlled by the Extreme Lookback input. 3) Relative volume expansion The script compares current volume against a moving average of volume and flags bars where volume expands beyond a user-defined multiplier. This is used as a proxy for liquidation, stop-running, or abnormal participation. 4) Trend-strength filter ADX must remain above a minimum threshold. This helps avoid treating every small poke above or below a range as meaningful. The script is looking for sweeps that happen in a market with enough directional energy behind the move. 5) Momentum fade MACD histogram behavior is used to detect whether momentum is no longer accelerating with the same strength. This does not mean momentum has fully reversed already. It simply aims to capture early signs that the impulse may be losing efficiency. Signal interpretation A signal appears when the script finds a combination of: directional structure, sweep of a recent extreme, elevated relative volume, strong enough ADX, and fading momentum. A Bull Trap label marks a downside sweep that may be exhausting and becoming vulnerable to a reversal upward. A Bear Trap label marks an upside sweep that may be exhausting and becoming vulnerable to a reversal downward. These labels should be interpreted as context markers, not automatic trade commands. Timeframe and architecture The script supports a timeframe override, which allows the calculations to be performed on a selected timeframe instead of the chart timeframe. This can be useful when the user wants a more stable structural read while viewing a lower timeframe chart. The Macro EMA is included as an optional visual reference only. It is not the trigger by itself, but can help users read whether the signal is appearing in a stretched or conflicting area relative to the chosen trend framework. How to use This indicator is generally more useful when treated as a reversal context tool rather than a standalone entry system. Possible ways to use it: identify sweep-and-fade zones after price attacks obvious highs or lows, avoid late breakout chasing when a trap condition appears, combine with market structure confirmation on a lower timeframe, wait for reclaim / rejection / follow-through before acting, use it as a filter alongside your own execution model. Many users may find it more effective to wait for additional confirmation such as: rejection wicks, structure shift, reclaim of prior level, momentum turn on execution timeframe, or a clear invalidation level. Inputs Macro EMA Length Defines the EMA length for the optional macro trend reference line. Supertrend Factor / Period Controls the structural direction component. Timeframe Override Lets the user run calculations on a different timeframe than the current chart. Extreme Lookback Defines how far back the script looks to determine recent highs and lows. Liquidation Vol Threshold Sets the relative volume multiplier required to classify a bar as abnormal participation. Min ADX Minimum trend-strength threshold required before a trap can qualify. Notes and limitations This indicator does not predict every reversal, and it is not intended to label all stop-hunts perfectly. Volume behavior, momentum behavior, and extreme sweeps can look different across markets and symbols. Signals may behave differently depending on: asset class, session structure, exchange volume quality, and chosen timeframe. For that reason, this script is best used as a decision-support tool within a broader trading framework, not as a guaranteed standalone system. Practical reminder A trap label does not automatically mean price must reverse immediately. In strong trends, markets can continue to expand even after an apparent sweep. Users should always define their own confirmation logic, invalidation rules, and risk management process.Chỉ báocủa EdgeDecodeCập nhật 88 1.2 K
Ema Crossover-Parthit gives a cross over of 5 13 26 ema for a mood of trend its a mood indicator i have made it Chỉ báocủa parth355144
BTCUSDT ADX + EMA Trend System 1HEste script basado en una combinacion de rsi + adx en 1h tiene una generación avanzada de señales: Aprovecha una sofisticada combinación de análisis RSI, detección dinámica de niveles altos/bajos, filtros de tendencia de media móvil y evaluación de la fuerza del mercado basada en Adx para ofrecer entradas de operaciones precisas y oportunas.Chỉ báocủa btwhite339
Coinugget EMA TrendThe Simple Way We Trade Sometimes the simplest approach works best in trading. The goal is straightforward: read the overall trend, then find a support or resistance level to enter. Our team primarily uses 4 EMAs to read the big picture. EMA25, 50, 100, 200 — each level acts as a dynamic support or resistance. For short-term entries, we sometimes go against the move when price touches the BB Upper or Lower band. And to confirm trend strength? We watch whether price respects previous highs and lows. A trend stays valid as long as it doesn't break those key levels. And for momentum? RSI. The most widely used indicator for a reason. EMA + BB + Previous highs/lows + RSI. We believe that's all you really need. The indicator used here is Coinugget EMA Trend — now available publicly on TradingView. P.S. The background color gives you a quick visual cue: 🟢 Dark green = Strong bullish alignment (EMA7 > 25 > 50 > 100 > 200) 🟢 Light green = Bullish alignment (EMA25 > 50 > 100 > 200) 🔴 Dark red = Strong bearish alignment (EMA7 < 25 < 50 < 100 < 200) 🔴 Light red = Bearish alignment (EMA25 < 50 < 100 < 200) Chỉ báocủa COINUGGET20
5 EMA Multi-Timeframe Dashboard (Trend, Momentum & Entry Signals5 EMA Dashboard is a multi-timeframe trend and confirmation tool built for traders who want a quick visual read on market structure, trend direction, momentum, and possible entry signals. This script plots the 200, 55, 34, 21, and 8 EMAs directly on the chart and displays a dashboard table that tracks trend structure across multiple timeframes: 1D, 15M, 5M, 2M, and 10S. Trend logic is based on full EMA stacking with price included, so bullish structure is defined as Price > 8 > 21 > 55 > 200, while bearish structure is the reverse. The table highlights the active chart timeframe in yellow and shows whether each timeframe is bullish, bearish, or mixed. In addition, the script includes a confirmation section using a user-selected timeframe to evaluate whether the stock is “in play” based on trend alignment, momentum, and a TTM-style linear regression filter. It also flags possible entry conditions when price crosses above or below the 8 EMA or VWAP. This makes the script useful for traders who want: multi-timeframe trend alignment quick bullish vs bearish structure checks confirmation that a stock is actively trending simple visual cues for possible EMA 8 or VWAP entries You can also use this shorter version for the public library summary: Multi-timeframe EMA dashboard that shows bullish, bearish, or mixed structure across 1D, 15M, 5M, 2M, and 10S using price + EMA stacking. Includes trend confirmation, momentum/TTM-style filters, and possible EMA 8 or VWAP entry signals in a movable on-chart table. And if you want, here is a more polished “How it works” section too: How it works This script defines bullish structure as price above the 8 EMA, with the 8 above the 21, the 21 above the 55, and the 55 above the 200. Bearish structure is the exact opposite. If those conditions are not fully aligned, the script labels the timeframe as mixed. The dashboard then combines that structure with confirmation-timeframe momentum and entry logic to help traders quickly judge whether a stock is trending cleanly and whether a possible setup is forming. Short Description Multi-timeframe EMA dashboard showing bullish, bearish, or mixed structure using price + EMA stacking. Includes trend confirmation, momentum filters, and EMA 8 / VWAP entry signals in a movable table. Full Description Overview The 5 EMA Multi-Timeframe Dashboard is a structured trading tool designed to help you quickly identify trend direction, confirm momentum, and spot potential entry opportunities—all in one view. This script combines price action, EMA stacking, and momentum confirmation into a clean dashboard format, allowing traders to assess whether a stock is trending cleanly or in a choppy, non-tradeable state. Key Features 1. Multi-Timeframe Trend Dashboard Tracks structure across: 1 Day 15 Minute 5 Minute 2 Minute 10 Second (if supported) Automatically highlights your current chart timeframe in yellow Displays: Structure (EMA alignment) Trend (Bull / Bear / Mixed) 2. EMA Structure Logic (Core Edge) Trend is defined using full EMA stacking with price included: Bullish Structure: Price > 8 EMA > 21 EMA > 55 EMA > 200 EMA Bearish Structure: Price < 8 EMA < 21 EMA < 55 EMA < 200 EMA Mixed: Any misalignment → indicates chop or low-quality setup 3. “Stock In Play” Confirmation Uses a selectable confirmation timeframe (default: 2-minute) to determine if a stock is actively trending. A stock is considered “In Play” when: EMA structure is aligned (bullish or bearish) Momentum is moving in the same direction TTM-style linear regression filter supports the move This helps filter out low-quality trades and focus only on stocks with real momentum. 4. Momentum & TTM-Style Filter Momentum (10-period) confirms directional strength TTM-style linear regression acts as a trend acceleration filter Displays: POS (Positive) NEG (Negative) FLAT 5. Entry Signals (Simple & Actionable) Identifies potential entries on the confirmation timeframe: EMA 8 Cross Bullish: price crosses above EMA 8 Bearish: price crosses below EMA 8 VWAP Cross Bullish: price crosses above VWAP Bearish: price crosses below VWAP These are labeled clearly in the dashboard for quick decision-making. 6. Fully Customizable Dashboard Move the table anywhere on the chart: Top / Bottom / Left / Right / Center Adjustable font size for visibility Works across different trading styles (scalping → intraday → swing) 🧠 How to Use Step 1: Check Structure Look for alignment across multiple timeframes Best setups occur when 2M, 5M, and 15M agree Step 2: Confirm “In Play” Only trade when: Trend = Bull or Bear “In Play” = Confirmed Momentum + TTM align Step 3: Wait for Entry EMA 8 or VWAP cross signals provide timing Avoid chasing extended moves ⚠️ Important Notes Lower timeframes (especially 10-second) depend on your TradingView data plan Multi-timeframe values may slightly adjust in real-time due to how data is aggregated Best used with confirmed setups—not as a standalone signal generator 🚀 Best For Intraday traders Scalpers Momentum traders Anyone using EMA-based strategies ⚠️ Disclaimer This indicator is for educational and informational purposes only. It does not constitute financial advice. Always perform your own analysis and risk management.Chỉ báocủa Dipam_Ishwar15
AG Pro HTF Bias Dashboard [AGPro Series]AG Pro HTF Bias Dashboard Overview / What it does AG Pro HTF Bias Dashboard is a higher-timeframe context tool built for traders who want a fast, structured view of directional conditions across multiple larger timeframes without crowding the chart with extra signals, zones, or decision noise. The script summarizes higher-timeframe bias in a compact dashboard and presents each selected row as Bull, Bear, or Neutral, together with a mode-specific status readout. The goal is not to predict the next candle or replace a full trade plan. The goal is to make larger-timeframe context easier to read at a glance. This indicator is designed to answer a simple but important workflow question: "What is the broader directional environment across the higher timeframes I care about right now?" Instead of forcing the user to manually flip through multiple charts and compare structure or trend conditions one by one, the dashboard keeps that information visible in a single panel. The script supports multiple bias engines so the same dashboard can be adapted to different styles of chart reading. Users can evaluate higher-timeframe context through EMA Stack alignment, confirmed Swing Structure, SuperTrend direction, or MACD Momentum agreement. This makes the tool flexible enough for trend-following traders, structure-based traders, and users who prefer momentum-style confirmation. Unlike many overlays that try to combine entries, exits, alerts, pattern detection, and signal generation inside one study, this script stays focused on one task: higher-timeframe directional context. That single-purpose design is intentional. It keeps the output clean, readable, and easier to integrate into an existing process. Unique Edge The main strength of this script is not signal generation. Its edge is structured context compression. Instead of plotting a large number of higher-timeframe elements directly on the chart, AG Pro HTF Bias Dashboard converts higher-timeframe conditions into a compact visual matrix. This makes it possible to assess multi-timeframe agreement quickly while keeping the chart itself relatively clean. A second differentiator is the ability to switch the bias engine. The dashboard is not locked to one interpretation framework. Users can work with: - EMA Stack, for ribbon-style alignment - Swing Structure, for confirmed HH/HL and LH/LL progression - SuperTrend, for ATR-based directional trend state - MACD Momentum, for momentum agreement between line, signal, and histogram Another important detail is the higher-timeframe validity filter. Rows that are not actually higher than the current chart timeframe are marked as Lower/EQ instead of being treated as valid higher-timeframe context. This helps keep the dashboard aligned with its intended purpose. The script also includes confluence logic, so the user can see not only the state of each row, but also the dominant higher-timeframe bias and how many valid rows support that direction. In practice, this helps users distinguish between broad directional agreement and mixed conditions. Methodology The dashboard can display three to five higher-timeframe rows, depending on user settings. Each row evaluates one selected timeframe and classifies it into Bull, Bear, or Neutral. Bias Mode options: 1) EMA Stack This mode evaluates directional alignment using a three-EMA structure. A bullish state requires price and the EMA ribbon to be aligned in bullish order. A bearish state requires the opposite alignment. When the full sequence is not aligned, the row can remain neutral and display a partial status such as 2/3 or 1/3 rather than forcing a directional label. 2) Swing Structure This mode uses confirmed pivot logic to read higher-timeframe structure. It looks for confirmed higher highs / higher lows or lower highs / lower lows, and then evaluates position relative to the active swing range. Because this logic depends on confirmed pivots, structure changes are naturally more selective and may appear later than faster trend models. 3) SuperTrend This mode reads directional state using an ATR-based trend framework. It is intended for users who prefer a cleaner directional state model rather than ribbon alignment. 4) MACD Momentum This mode classifies bias through agreement between the MACD line, signal line, and histogram. It is useful for traders who prefer momentum confirmation over structure or moving-average ordering. The dashboard then calculates: - the number of valid bullish rows - the number of valid bearish rows - the dominant higher-timeframe state - the confluence count across valid rows Optional chart context features are also included. Depending on settings, the script can color candles according to the active chart bias, plot the active EMA ribbon or SuperTrend on the chart, apply a subtle background tint when confluence is strong enough, and show a compact mini context tag on the chart. States / Context Output This indicator is a context dashboard, not an alert engine. It does not generate buy or sell alerts, does not mark trade entries, and does not claim to identify optimal execution points. Its outputs are state-based and contextual: - Bull - Bear - Neutral - Confluence summary - Mode-specific status text The mini chart tag, when enabled, is only a compact summary of dominant higher-timeframe direction and current confluence. It should be read as context, not as a trade instruction. Key Inputs Higher Timeframes Users can select three to five rows and define the exact higher timeframes to monitor. Bias Mode Choose between EMA Stack, Swing Structure, SuperTrend, and MACD Momentum. Engine Parameters The script exposes relevant inputs for each engine, including EMA lengths, Swing Strength, SuperTrend ATR settings, and MACD settings. HUD Controls The panel position and panel scale can be customized so the dashboard can fit different layouts and chart styles. Style Controls Users can adjust theme and directional colors for bullish, bearish, and neutral states. Chart Context Controls Optional features include candle coloring, active indicator plotting for EMA / SuperTrend, strong-confluence background tinting, mini context tag visibility, tag anchor, tag offset, and tag font size. Limitations & Transparency This script is not a prediction model. It summarizes directional context from user-selected higher-timeframe logic. Higher-timeframe tools can update only when data from those larger intervals updates. Because of that, the dashboard should be understood as a context layer rather than a real-time trigger engine. Swing Structure mode uses confirmed pivots. That means structure changes may appear later than faster directional methods, because confirmation requires completed pivot information. Neutral states do not necessarily mean the market is untradeable. They simply indicate that the selected bias engine does not currently show clear directional alignment under the chosen rules. The confluence count is a summary statistic, not a quality score. A larger number of aligned rows does not automatically mean a better trade. It only means more selected higher-timeframe rows currently point in the same direction. Rows marked Lower/EQ are excluded from valid higher-timeframe confluence because they are not above the active chart timeframe. This script is intended to support discretionary analysis and chart organization. It should be combined with the user’s own execution framework, risk model, and market understanding. Risk Disclosure This indicator is provided for analysis and educational use. It does not provide financial advice, investment advice, or guaranteed outcomes. Market conditions can change quickly, and no single indicator or dashboard can remove uncertainty from trading or investing. Users should evaluate higher-timeframe context together with price action, liquidity, volatility, risk management, and their own decision process. Past behavior, historical alignment, or current confluence does not guarantee future performance. Chỉ báocủa AGProLabsCập nhật 4464
Tradytics Levels + AlertsTradytics Levels + Alerts gives you nightly Gamma and darkpool levels updated nightly for top 10 stocksChỉ báocủa Mstr_RobobotCập nhật 4442
Tradytics Levels + EMA Cloud - Aria EngineDarkpool and Gamma levels daily updated after close during ETH. Chỉ báocủa Mstr_RobobotCập nhật 25
Tradytics Levels With EMA Cloud - Aria Signal EngineThis script marks darkpool and Gamma levels daily. Levels are updated automatically nightly for the top 10 tech stocks. NVDA AAPL MSFT GOOGL AMZN META TSLA AVGO JPM PLTRChỉ báocủa Mstr_Robobot10
AG Pro Trend Continuation Quality [AGPro Series]AG Pro Trend Continuation Quality Overview / What it does AG Pro Trend Continuation Quality is an overlay built to evaluate whether a pullback is behaving like a healthy retracement inside an active trend, or whether the move is losing structural quality before continuation can develop. Instead of treating every dip in an uptrend or every pop in a downtrend as equally important, the script isolates pullback sequences and scores them through a continuation-quality framework. The goal is not to predict every next candle. The goal is to help traders judge whether the market is showing disciplined retracement behavior that often precedes trend continuation. The model combines trend alignment, pullback depth, pullback duration, relative volume behavior during the retracement, and the strength of the bounce candle that attempts to resume the trend. These conditions are translated into a compact quality score so the user can quickly separate cleaner continuation structures from weaker ones. On the chart, the script highlights pullback zones, tracks the retracement box, displays a continuation-quality label, and maintains an information panel that summarizes trend state, recent quality readings, best quality, average quality, and internal distribution data. The result is a workflow-oriented continuation map rather than a simple trend-following overlay. Unique Edge The distinctive part of this script is that it does not label trend continuation from trend direction alone. A bullish EMA stack or bearish EMA stack is not enough by itself. The script specifically evaluates the quality of the retracement before the continuation attempt is scored. That makes it meaningfully different from basic EMA trend tools, pullback highlighters, or single-condition continuation signals. Many tools can say that price is above or below an average. Fewer tools attempt to measure whether the internal anatomy of the pullback remains constructive for continuation. The scoring engine focuses on five practical questions: 1. Is the broader trend aligned? 2. Is the pullback still structurally controlled rather than excessively deep? 3. Did the retracement last a reasonable number of bars? 4. Did volume contract during the pullback instead of expanding aggressively against trend? 5. Did the bounce show enough intent to suggest renewed directional participation? This creates a cleaner framework for evaluating continuation setups in a way that is visual, systematic, and easier to compare across multiple pullbacks on the same chart. Methodology The script first determines directional context using EMA alignment and, when needed, swing-structure logic. This creates a working trend state that frames whether the script should be looking for bullish or bearish pullback behavior. Once a directional leg is active, the script begins tracking a pullback when price retraces against that trend. During the retracement, it measures: - how far the pullback travels relative to the prior trend leg, - how many bars the pullback lasts, - how pullback volume compares with the prior expansion leg, - and whether the bounce candle shows convincing re-engagement. These components are translated into a 0 to 10 quality score. Higher scores represent more orderly and structurally coherent pullbacks. Lower scores represent weaker or more suspect retracements. The visual output is designed to make those evaluations easier to read in real time: - pullback boxes frame the retracement zone, - optional fib-depth line shows the deepest retracement point tracked inside the pullback, - labels display score, quality grade, depth, duration, and relative volume, - panel metrics summarize the current continuation environment. Signals & Alerts The script is designed as a quality-mapping tool, not as an automatic trade system. Its event logic revolves around the completion of a pullback and the appearance of a bounce candle that attempts to resume the trend. When that bounce qualifies, the script calculates the final continuation-quality score and can display the setup if it meets the user-defined minimum score threshold. Available workflow signals include: - active bullish or bearish trend state, - pullback in progress, - completed pullback with scored continuation attempt, - high-quality continuation events when the score reaches stronger thresholds. Optional alerts can be used for: - high-quality continuation conditions, - or any scored pullback event, depending on user preference. Because alerts are tied to the script’s scoring and confirmation logic, they are intended to support chart review and decision-making rather than act as guaranteed execution instructions. Key Inputs EMA Fast Length / EMA Mid Length / EMA Slow Length These define the trend stack used to frame directional bias. Swing Pivot Length Controls the swing-structure sensitivity used in secondary trend detection. Max Pullback Depth (%) Defines how strict the script is when assessing whether a retracement remains healthy relative to the prior trend leg. Min Pullback Bars / Max Pullback Bars Controls the acceptable pullback duration window. Volume Decline Ratio Helps determine whether the retracement is occurring on lighter activity relative to the prior directional leg. Minimum Score to Display Filters weaker continuation events from the chart. Label Size / Label Offset / Reduce Label Overlap Lets the user adapt chart readability to their own zoom level and instrument volatility. Panel Position / Panel Font Size / Panel Theme Allows the continuation dashboard to be integrated into different chart layouts without dominating screen space. Limitations & Transparency This script does not know future market intent. It evaluates observable price and volume behavior after conditions form on the chart. A high score does not guarantee continuation. It only indicates that the completed pullback meets the script’s internal definition of stronger continuation quality relative to other pullbacks. The model is also sensitive to market regime. Trend continuation behavior tends to be clearer in directional markets and less reliable in highly compressed, erratic, or news-driven conditions. Volume behavior can vary across instruments and data feeds. On some assets, especially where volume data is synthetic, limited, or structurally uneven, the volume component should be interpreted with caution. Like other structure-based tools, this script can produce different practical usefulness depending on timeframe, instrument, volatility regime, and chart cleanliness. Users should calibrate inputs based on the market they are studying rather than treating defaults as universal settings. This script should not be viewed as: - a prediction engine, - a standalone trade system, - a replacement for risk management, - or a guarantee that a bounce will develop into a full continuation leg. Risk Disclosure This script is for chart analysis and educational use. It is designed to help users study pullback quality inside established trends, not to provide financial, investment, or trading advice. All trading and investing involve risk. Market conditions can change quickly, and even high-quality continuation structures can fail. Users should apply their own confirmation process, position sizing rules, and risk controls before acting on any market observation. Use the script as a structured continuation framework, not as certainty. Chỉ báocủa AGProLabsCập nhật 4438
Desire To Trade Mechanical Volatility BreakoutBreakout Strategy (Simple Version) 🔔 Signal - Stock is above 200 EMA - Price has been moving sideways (tight range ~20 bars) - Volume is above average - Market (SPY) is trending up 🚀 Entry - Buy when price closes above the range high 🛑 Exit Stop Loss: - Bottom of the range Take Profit: - Take partial profit at 1R - Let the rest run until: - trend weakens - or stop is hitChiến lượccủa EtienneCrete115
Carrier Volatility [Pumori]Carrier Volatility This is the foundational Pulse component of the ET Massif Framework research suite. Description Pumori is a high-resolution volatility and impulse response tool built around an ultra-short fractional length (0.1 EMA). It is a high-frequency carrier framework that exposes the formation of volatility through controlled instability rather than smoothing. Unlike traditional indicators that smooth or lag volatility, Pumori captures high-frequency energy, allowing volatility to be observed in near real-time as it forms. Construct At its core, Pumori uses: Dual 0.1-length EMA A sub-unit length (N < 1) is intentionally used to produce an anti-smoothing response, where the recursive term overreacts to incoming data and amplifies micro-movements. The EMA is applied twice recursively, producing a controlled oscillatory response. This interaction forms the carrier layer, where continuous oscillation exposes high-frequency volatility directly. Flexible source input (RSI, RSI SMA, close, custom) Three default source modes are available, allowing Pumori to operate across different domains. RSI is set as the default carrier as it represents normalized momentum in a bounded range, providing a stable domain for the transform. The chosen source defines how the carrier behaves and directly influences stability, noise profile, and interpretability. Volatility Envelope The recursive overshoot–correction cycle forces continuous oscillation around the source, forming a dynamic envelope that expands and contracts with volatility. Pumori does not measure volatility, it reveals volatility formation. Think of Pumori like an AM radio carrier wave. The point is not signal transmission — it is that the carrier must operate at a high enough frequency for changes to become visible immediately. Most traditional volatility measures operate over a fixed lookback window, which makes them inherently lagging. Pumori Instead, it allows volatility to express immediately. The 0.1 EMA acts as a high-frequency baseline upon which expansion and contraction are directly observed. Modes Default RSI is the default baseline configuration. because it provides a bounded and naturally oscillatory structure (0–100), allowing the carrier to behave in a stable and interpretable manner. Unlike price, which can expand unpredictably, RSI compresses extremes and standardizes movement, making volatility expansion and contraction easier to observe. The result is a clean carrier waveform that offers the best balance between responsiveness and readability. Diagnostic RSI (SMA) , the simple moving average of RSI is applied to the carrier transform. This reduces internal jitter while preserving underlying structure. It is used to assess movement quality, separating clean, controlled trends from noisy or chaotic trends. Price Applying it on price produces a highly reactive output where volatility expansion and contraction are expressed in a zig-zag band around price. The oscillations reflect immediate changes in movement and make volatility clustering visible within trend. How to Use Volatility Gauge Band expansion indicates an active volatility state. Band contraction indicates a suppressed environment No volatility = no opportunity. Market Progression A low-volatility environment facilitates smooth, steady price progression. In contrast, high-volatility states produce a chaotic path characterized by erratic movement and uneven progression, signaling potential structural instability and reduced directional efficiency. Future Development Fractional EMA on price is further planned to be used as input component for adaptive filtering systems (e.g., Kalman filter integration). Specifically, the high-frequency oscillations of the volatility band provides a direct proxy for noise measurement, allowing dynamic adjustment of model responsiveness without introducing lag. Default Settings EMA Lengths: 0.1, 0.1 Default Mode: RSI (stable carrier behavior) Diagnostic Mode: RSI SMA (reduced noise, structural clarity) Price Mode: Close (Volatility clustering & envelop) RSI Length: 14 RSI SMA Length: 14 日本語概要 (Japanese Summary) Pumoriは、0.1という極短期間のEMA(指数平滑移動平均)を用いた高解像度なボラティリティ指標です。従来のATR(アベレージ・トゥルー・レンジ)のような遅行性の高い「平均型」ではなく、相場における瞬間的なボラティリティの拡張と収縮をリアルタイムに捉えることを目的としています。 主な特徴: 高精度なバンド形成: 価格データまたはRSIをベースに、ジグザグ状のボラティリティバンドを形成します。 ボラティリティの「発生」を直感的に把握: 従来の指標では見逃されがちな、微細な価格変化の初動(ボラティリティの発生)を直接観測可能です。 市場の質を識別: 相場が「滑らかなトレンド」にあるのか、あるいは「ノイズの多い不安定な状態」にあるのか、その動きの質を瞬時に判別できます。 中文概要(Chinese Summary) Pumori 是一個基於 0.1 極短期 EMA 的高解析度波動率工具,旨在即時捕捉市場波動的擴張與收縮。不同於傳統 ATR 等滯後性的「平均型」指標,Pumori 能在第一時間反應波動的動態變化。 核心特點: 動態鋸齒型波動帶: 可靈活作用於價格、RSI 或平滑後的 RSI,形成緊隨走勢的動態帶狀區域。 捕捉「波動生成」: 直接觀測波動的初動與爆發,而非事後進行數值平均 高靈敏度動能偵測: 對市場動能變化極為敏感,能有效區分趨勢的平滑程度與市場雜訊(Noise)。 主要用途: 市場環境判斷: 辨識當前是否具備交易條件(穩定趨勢 vs. 混亂無序)。 波動品質分析: 評估市場走勢的品質,區分健康的波動與無效的雜訊。 進階算法基礎: 作為未來卡爾曼濾波器(Kalman Filter)進行波動調節的核心基礎。 Disclaimer: This script is a research tool for market structure analysis and educational purposes only. It does not constitute financial advice. Trading involves risk.Chỉ báocủa et20tradeviewCập nhật 44212
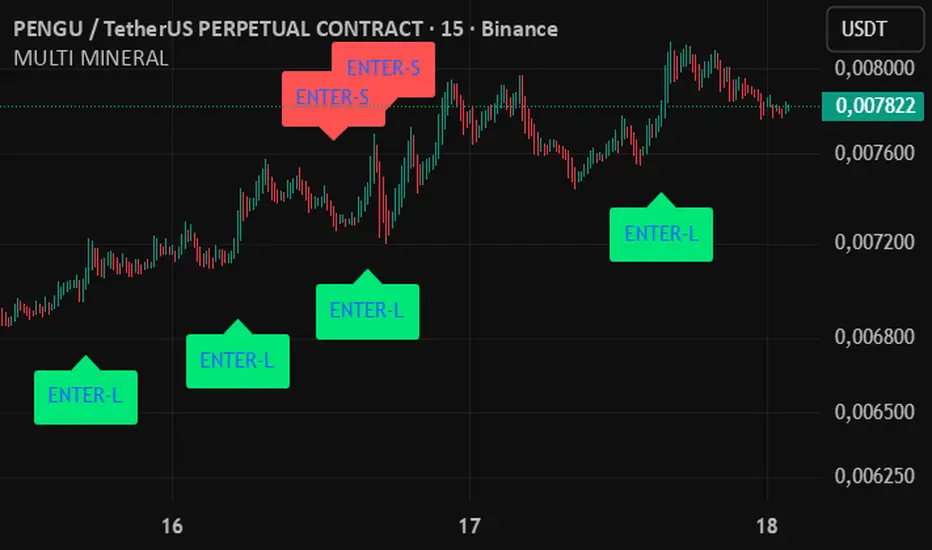
CIHAN_OZDEMIR_LISABYCO_V1.0Cihan Özdemir V1.0 - Gelişmiş Price Action & Dinamik Savunma Sistemi Bu indikatör, özellikle 5 ve 15 dakikalık grafiklerde Scalp ve Day Trade yapan yatırımcılar için geliştirilmiştir. Piyasadaki "gürültüyü" filtreleyerek sadece kurumsal bazlı fiyat hareketlerine (Price Action) odaklanır ve eşsiz bir "Gömülü Savunma Modülü" ile kasanızı korur. 🛡️ Öne Çıkan Özellikler 1. Hibrit Price Action Motoru Sistem, teknik analizin en güçlü 3 yapısını aynı anda tarar: Engulfing (E): Trend dönüşlerini ve güç değişimlerini yakalar. Order Block (B): Kurumsal hacmin masaya girdiği "balina" bölgelerini tespit eder. Fair Value Gap (F): Piyasadaki hızlı dengesizlikleri ve likidite boşluklarını hedefler. 2. Çok Katmanlı Teyit Mekanizması Hatalı sinyalleri (Fake-out) engellemek için 4 ayrı filtre opsiyonu sunar: 3dk Hull Teyidi: Küçük zaman dilimindeki trend yönünü ana grafiğe yansıtarak "trend tersi" işlemlerden korur. ADX Testere Filtresi: Piyasanın hacimsiz olduğu (yatay) dönemlerde botun "doğranmasını" engeller. EMA 200 & RSI Filtreleri: Büyük resmi ve aşırı alım/satım bölgelerini opsiyonel olarak denetler. 3. Gömülü Akıllı Savunma (V1.0 Özel) Bu indikatörün en büyük farkı, pozisyona girdiği an devreye giren "Otomatik Çıkış" mantığıdır: Doğal Stop (Natural SL): Sinyalin geldiği mumun en altı (Long) veya en üstü (Short) anlık stop seviyesi kabul edilir. "Sinyal mumu kırılırsa strateji bozulur" mantığıyla çalışır. Zaman Aşımı (6 Mum Kuralı): 5 dakikalık grafikte işleme girdikten sonra 30 dakika (6 mum) boyunca fiyat hedefe gitmiyorsa, piyasa yataya bağlamış demektir. Sistem otomatik "KAPAT" emri fırlatarak sermayenizi hantal pozisyonlardan kurtarır. 🚀 Kullanım Klavuzu Zaman Dilimi: En verimli sonuçlar 5dk ve 15dk grafiklerde alınır. Otomasyon (WunderTrading vb.): * V17_LONG / V17_SHORT alarmları giriş için. V17_EXIT alarmı ise hem Stop patladığında hem de 6 Mum süresi dolduğunda çalışacak olan "Market Close" emridir. Strateji Önerisi: * TP1: %0.60 (Portföyün %75'i) TP2: %2.00 (Kalan %25 - Runner)Chỉ báocủa lisabycoCập nhật 30
Pulse Heatmap [LB] Pulse Reaction Heatmap Overview The Pulse Reaction Heatmap is a high-precision contextual price-reading indicator. It fuses an adaptive liquidity pulse with a dynamic volume density heatmap . Its core goal: reveal the "Market Footprint" —visually pinpointing price levels of institutional activity, liquidity absorption, and trend re-accumulation. It delivers no mechanical signals; it spotlights zones primed for market reactions, defenses, or transitions . Core Mechanism: The Pulse Line Anchored by the Pulse , a hybrid trend-tracking line: Adaptive Logic: Blends a Fast EMA ( 18 ) and Anchor EMA ( 34 ) to capture market equilibrium. "Stickiness" Factor: ATR-based filter keeps it "glued" to price in consolidation, fluidly adapting during breakouts—eliminating the "lagging float" of standard MAs. Dynamic Window: Pulse-centered workspace via multi-ATR , keeping the heatmap volatility-relevant. Heatmap Construction & Scoring Weighted scoring algorithm per bar in the lookback: Conviction Weighting: Volume filtered by Body-to-Range ratio —large-body candles (low wicks) add max "conviction" density. Positional Distribution: Weights across Full Range , Close (Acceptance) , and Wick Extremes (Test Levels) . Temporal Decay: Older data fades mathematically (factor 0.978 ), prioritizing recent "hot" interest. Visual Interpretation (Color Logic) Gradient shows Market Interest Intensity : Cold Zones (Blues/Greys): "Thin" liquidity; price slices through fast. Intermediate Zones (Yellows/Oranges): Market Rotation —active order book equilibrium. Hot Zones (Bright Red/Orange): Peak density; highly probable "accepted" prices for reactions/defenses. Practical Trading Application Confluence for AMT: Dynamic high-volume nodes and value areas as trends evolve. Filtering Pullbacks: Target retraces into "Hot" zones for institutional defense confirmation. Breakout Validation: Break + heatmap "re-densification" above = New Price Acceptance . Important: The Pulse Reaction Heatmap is a Contextual Analysis Tool , not automated signals. Pair with Market Structure and Price Action to target true zones.Chỉ báocủa luis_barlier44434
Double Moving Average## 📊 Double Moving Average (DMA) **General Description:** An indicator composed of two completely independent Moving Averages (MAs), each configured with its own parameters. Unlike a standard MA, each MA #1 and MA #2 can use a different timeframe, even if the chart displays another timeframe. --- ### **MA #1 - Parameters** | Parameter | Default | Range | Description | |-----------|---------|-------|-------------| | **Enable MA #1** | ✓ | Yes/No | Activate/deactivate the first MA | | **Length** | 50 | 1-500 | Calculation period of the MA | | **Source** | Close | Open/High/Low/Close | Price source | | **Offset** | 0 | 0-100 | Shift the curve to the right | | **Type** | EMA | SMA/EMA/WMA | Type of moving average | ### **MA #2 - Parameters** Identical to MA #1 but with default **Length: 200** --- ### **Smoothing - Per MA** Each MA can have its own smoothing: | Parameter | Options | |-----------|---------| | **Enable Smoothing** | Yes/No | | **Type** | None / SMA / EMA / WMA | | **Length** | 1-100 | | **BB StdDev** | 0.1-10 (Bollinger Bands) | --- ### **Timeframe (Period) - Per MA** Each MA calculates on an independent timeframe: **Options:** 1min, 2min, 5min, 10min, 15min, 30min, 1hr, 2hr, 4hr, 1day **"Wait for Close":** Waits for the timeframe candle to close before confirmation --- ### **Main Functions** 1. **`f_convert_timeframe()`** - Converts timeframe formats for Pine Script 2. **`f_calculate_ma()`** - Calculates SMA, EMA, or WMA 3. **`f_apply_smoothing()`** - Applies smoothing if enabled --- ### **Use Cases** - Display short-term MA (5min) for scalping - Display long-term MA (1day) for overall trend - All on the same chart, independent of the displayed timeframe - Compare two different trend periods simultaneouslyChỉ báocủa julieware236915
Clean MA Signal - XAUUSD [5m] Clean MA Signal — XAUUSD A trend-following signal indicator built specifically for XAUUSD on the 5-minute chart. Combines EMA stack alignment, higher timeframe trend filtering, and multiple quality filters to surface only high-probability entries — and stay out of the noise gold is famous for. How it works Signals trigger when the fast EMA crosses or breaks through the slow EMA with momentum, while all three EMAs (9 / 21 / 50) are in full alignment. A 1-hour HTF filter ensures you're only trading in the direction of the larger trend. Filters applied to every signal EMA stack: all three EMAs must be fully stacked (bull or bear) 1H trend bias: fast and slow EMA must agree on the 1-hour chart ADX ≥ 20: only trades trending conditions — skips gold's choppy consolidation phases RSI range: avoids overbought/oversold extremes Body ratio ≥ 0.45: requires a decisive candle — filters out wick-heavy indecision bars Volatility spike filter: rejects candles more than 2.5× the average ATR — avoids news spike traps Exhaustion filter: skips entries after 3 consecutive same-direction closes Cooldown: minimum 8 bars between signals to prevent signal stacking Stop loss & take profit SL is placed below/above the 8-bar swing low/high plus an ATR buffer — respects actual price structure rather than a fixed distance. Three TP levels are projected using ATR multiples (1.2 / 2.5 / 4.5). TP and SL hit events are marked directly on the chart. Works on 5-minute chart (primary). Also functional on 3m and 15m with minor input adjustments. For educational purposes only. Past performance does not guarantee future resultsChỉ báocủa nadunyrn1f16
Clean 9/21 EMA CloudTrendSpider-style 9/21 EMA cloud with no visible EMA lines — just a clean bullish/bearish cloud for minimalist trend, pullback, and momentum analysis.Chỉ báocủa nasir_asadovCập nhật 11
Key Level SuiteKey Level Suite is a comprehensive label indicator that displays the most important price levels directly on your chart — always anchored to the right edge so they stay out of your price action and are easy to read at a glance. Instead of drawing horizontal lines across the entire chart, Key Levels renders clean, minimal text labels at each price level. When multiple levels converge within a configurable threshold, they are automatically merged into a single label showing all contributing names (e.g. wVWAP | mH | pdVAH), making confluences immediately visible without any manual work. 📌 Levels Included 🔹 VWAP & Value Area (VAH / VAL) Session VWAP with one standard-deviation bands for Daily, Weekly, Monthly, Quarterly, and Yearly periods. 🔹 Previous VWAP & Value Area The final VWAP, VAH, and VAL from the completed prior session — Daily through Yearly. 🔹 Rolling VWAP & Value Area Volume-weighted average price over rolling windows of 1, 7, 30, 90, and 365 days, each with its own VAH/VAL band. 🔹 Highs & Lows Current and previous session high/low for all five periods. 🔹 Opens Session open price for Daily, Weekly, Monthly, Quarterly, and Yearly. 🔹 EMA (10 slots) Up to 10 exponential moving averages with independently configurable length and timeframe per slot. Leave the timeframe blank to use the chart timeframe. ⚙️ Settings Style Choose label text size: Tiny, Small, Normal, or Large. Colors Individual color pickers for each timeframe group — Daily, Weekly, Monthly, Quarterly, Yearly — plus separate colors for High/Low, Open, and EMA labels. All current, previous, and rolling levels of the same timeframe share one color, making it immediately clear which timeframe a level belongs to. Merge Enable or disable automatic label merging and set the proximity threshold as a percentage. Levels within this distance of each other are combined into a single label listing all contributing names — no more overlapping text at confluence zones. VWAP / Previous VWAP / Rolling VWAP / Statics / EMA Every individual level and group can be toggled on or off independently, so you only see what is relevant to your trading style.Chỉ báocủa jxriedel1134
AG Pro Moving Average Ribbon Stress Meter [AGPro Series]AG Pro Moving Average Ribbon Stress Meter Overview / What It Does This indicator is designed to read the internal condition of a moving-average ribbon rather than treating the ribbon as a simple trend overlay. Instead of asking only whether the ribbon is bullish or bearish, it asks a different question: is the ribbon structurally calm, starting to load, becoming strained, or losing internal order. The script builds a six-line moving-average ribbon, measures how those averages interact with each other, and converts that interaction into a stress framework. The result is a visual map that helps show whether the ribbon is organized, stretched, unstable, or resetting after stress. In practical terms, the script is built to help users evaluate ribbon quality, internal synchronization, and the degree of structural pressure inside the moving-average stack. It is not intended to forecast future prices, call tops or bottoms, or replace broader market analysis. Its purpose is to organize what the ribbon is doing now and how stable or unstable that structure appears to be. The chart output combines multiple layers: the ribbon itself, a central stress spine, edge bands, optional stress aura, event labels, and a compact status panel. Together, these elements aim to make the ribbon easier to interpret without requiring the user to manually inspect every moving average line on every bar. Unique Edge Many ribbon-style tools focus on directional bias, crossovers, or broad expansion and contraction. This script focuses on internal ribbon stress. Its main distinction is that it does not treat all ribbon trends as equal. A ribbon can be rising while still carrying internal disagreement. A ribbon can also look compressed or visually clean while underlying alignment, slope behavior, width dynamics, or price stretch are beginning to deteriorate. This script is built to surface those conditions. The goal is not to reduce the market to a single signal. The goal is to provide a structured visual read on whether the moving-average stack is operating in a calm state, a loaded state, a strained state, or a more unstable condition. That makes it more useful as a workflow tool than as a simple trend-colour overlay. Another point of differentiation is presentation. The script uses a ribbon-focused visual design so that the user can read internal condition directly from the chart. Focus modes, theme presets, stress spine layering, and a compact panel are included to keep the display informative without turning the chart into a dense dashboard. Methodology The script evaluates ribbon condition through five stress components. 1) Order Stress This measures whether the moving averages are stacked cleanly or whether their order is becoming mixed. Lower stress suggests cleaner structural order. Higher stress suggests more internal disorder. 2) Slope Dispersion Stress This evaluates how consistently the moving averages are sloping together. When the ribbon lines are moving with similar directional agreement, synchronization is stronger. When their slopes diverge, internal stress rises. 3) Width Instability Stress This tracks whether the ribbon width is behaving in a stable or unstable way. A ribbon can widen in an orderly way or in a more erratic way. This component attempts to distinguish between those conditions. 4) Curvature Stress This evaluates bending in the ribbon core. Strong changes in ribbon curvature may indicate increasing internal pressure or transition. 5) Price Stretch Stress This measures how far price is moving from the ribbon core relative to ribbon width and ATR-based normalization. This is not a directional claim. It is a structure-based distance measure. These components are weighted and blended into a smoothed Stress Score. That score then feeds the state engine. Primary states include Calm, Loaded, Strained, Critical, Fractured, and Recovery. The panel and visual styling use those states to summarize the ribbon condition at the current bar. Signals & Alerts This script is built around state transitions and structural events rather than buy/sell promises. Depending on settings, users may see event labels and alerts such as: Stress Build Shows that stress has crossed into an early loading phase. Strained Shows that the ribbon has moved into a more stressed internal state. Critical Load Highlights a higher-pressure condition where instability has become more meaningful. Ribbon Fracture Marks a stronger structural failure condition when stress and ribbon order deterioration align. Stress Reset Shows that a previously elevated stress condition has cooled enough to register recovery. Order Restored Highlights improvement in ribbon order after disorder had been present. These events are not trade instructions. They are context markers intended to help users track shifts in ribbon condition. Alerts should be interpreted together with market structure, timeframe context, volatility, and personal risk management. Key Inputs Source and MA Type The ribbon can be built from different moving-average types and data sources. Ribbon Lengths Users can define the six ribbon lengths to fit their preferred structure and timeframe. Stress Engine Inputs ATR length, slope lookback, width lookback, curvature lookback, smoothing, and component references allow users to calibrate how sensitive the stress model should be. Weights The script includes separate weights for order stress, slope dispersion, width instability, curvature stress, and price stretch stress. Thresholds Loaded, Strained, Critical, and Fracture thresholds can be adjusted for tighter or looser state transitions. Theme Presets and Focus Mode Theme presets and focus modes allow the ribbon to be displayed in different visual styles while preserving the same logic. Events and Panel Users can control label density, label spacing, marker visibility, and panel position. Limitations & Transparency This script is an interpretation framework built around moving-average relationships. It does not know future price movement, and it does not claim certainty. Like any model built on smoothed market data, it will react more slowly in some environments and may produce fewer useful transitions in others. Different assets and timeframes can produce different ribbon personalities. A threshold or weight set that feels balanced on one market may feel too sensitive or too quiet on another. Users should expect to adapt settings if they move between instruments with very different volatility or trend behavior. The stress model is also deliberately selective. It does not try to label every fluctuation or classify every candle. Its purpose is to organize ribbon condition, not to describe every possible market state. This indicator should also not be confused with a complete trading plan. It does not define entries, exits, position sizing, or account risk. It is best used as a structural context tool inside a broader workflow. Risk Disclosure This script is for chart analysis and educational use. It is not financial advice, investment advice, or a promise of outcome. No indicator can guarantee performance, remove risk, or eliminate false readings. Market conditions change, correlations shift, and trend behavior can weaken or reverse without warning. Any decision taken from this script should be made within a broader framework that includes price structure, liquidity, volatility, timeframe alignment, and risk control. Users are responsible for testing settings, understanding the limitations of moving-average tools, and deciding whether the information produced by the script fits their own process. Chỉ báocủa AGProLabsCập nhật 2240
Trinity FlowOverview This strategy is based on the trading method I used when I first entered the world of investing at age 20. While the original entry conditions and exit rules were quite rough, I've revived this approach with a sense of nostalgia, refining it into a modern form after years of experience. Strategy Features Trend Filter: Trend determination using three EMAs (8, 14, 50) EMA alignment 8 > 14 > 50: Long condition (EMA line: White) EMA alignment 50 > 14 > 8: Short condition (EMA line: Red) Other alignments: Range/neutral (EMA line: Gray) Entry Timing: Stochastic RSI (3, 3, 14, 14) crossover Long entry on the bar following a confirmed golden cross Short entry on the bar following a confirmed death cross Risk Management: ATR (14) based fixed ratios Stop Loss: ATR × 3 Take Profit: ATR × 2 Visual Design White EMA line: Long opportunity zone Red EMA line: Short opportunity zone Gray EMA line: No clear trading opportunity Light white box: Profit zone Light red box: Loss zone Parameters All parameters (EMA periods, Stoch RSI settings, ATR period, SL/TP multipliers) are fully adjustable in the settings. Disclaimer Frequent false signals may occur in ranging markets Works best in strong trending markets Past performance does not guarantee future results 概要 このストラテジーは、私が20歳の頃、初めて投資の世界に入った時に使っていた手法を基にしています。当時は粗削りなエントリー条件と決済ルールでしたが、長年の経験を経て、懐かしさを感じながら現代的な形に復活させました。 手法の特徴 トレンドフィルター:3本のEMA(8, 14, 50)の並び順でトレンドを判定 EMAが8 > 14 > 50の順:ロング条件(EMAライン:白) EMAが50 > 14 > 8の順:ショート条件(EMAライン:赤) それ以外:レンジ状態(EMAライン:灰色) エントリータイミング:Stochastic RSI(3, 3, 14, 14)のクロス ゴールデンクロス確定後の次足でロングエントリー デッドクロス確定後の次足でショートエントリー リスク管理:ATR(14)ベースの固定比率 損切:ATR × 3倍 利確:ATR × 2倍 ビジュアルデザイン 白いEMAライン:ロング狙える状態 赤いEMAライン:ショート狙える状態 灰色のEMAライン:エントリーチャンスなし 薄い白ボックス:利益ゾーン 薄い赤ボックス:損失ゾーン パラメータ すべてのパラメータ(EMA期間、Stoch RSI設定、ATR期間、損切・利確倍率)は設定から調整可能です。 注意事項 レンジ相場では頻繁にダマシが発生する可能性があります 強いトレンド相場で最も効果を発揮します バックテストの結果は過去のパフォーマンスであり、将来の結果を保証するものではありませんChiến lượccủa mm_mitsuya38
HTF EMA Pullback Strategy (Long & Short, FX-agnostic) cmHTF EMA Pullback Strategy (Long & Short, FX-agnostic)Chiến lượccủa coin_a_phrase20
SMC EMA CROSS ZIG ZAG# Mega Trend Suite – SMC + EMA (Lightweight Edition) **A professional Smart Money Concepts (SMC) toolkit combined with classic EMA crossovers and VWAP.** No Heikin Ashi, no MA Cross EMA – just clean price action, order flow, and trend confirmation. --- ## 🔍 Overview This indicator bundles the most essential tools for **institutional-style analysis**: - ✅ **SMC Structure** (internal & swing BOS/CHoCH) - ✅ **Order Blocks** (bullish/bearish, with box or candle highlight) - ✅ **Fair Value Gaps (FVG)** with auto threshold & multi‑timeframe support - ✅ **Premium / Discount Zones** + Equilibrium line - ✅ **Multi‑Timeframe High/Low levels** (Daily / Weekly / Monthly) - ✅ **ZigZag** (main & internal) with HH/HL/LH/LL labels - ✅ **VWAP** – anchored to the session - ✅ **Two EMA sets** (9/21 & 20/50) with cross signals - ✅ **Compact Dashboard** (SMC bias & current timeframe) - ✅ **Full alert system** for all SMC events and EMA crosses --- ## 🧠 Key Features Explained ### 1. Smart Money Concepts (SMC) | Component | What it does | |-----------|---------------| | **Swing Structure** | Detects Break of Structure (BOS) and Change of Character (CHoCH) on a higher‑length pivot (default 50). Shows labels “BOS” or “CHoCH” when price crosses a swing high/low. | | **Internal Structure** | Same as swing, but uses a shorter length (default 10) to catch micro‑structure changes. Optional confluence filter (body vs. wick). | | **Order Blocks (OB)** | Stores the extreme bar (parsed by volatility filter) after a valid BOS/CHoCH. Displays as zone boxes or candle highlights. Mitigation detection (close / high/low). | | **Fair Value Gaps (FVG)** | Detects 3‑bar imbalances on a chosen timeframe (or current). Uses auto‑threshold based on historical bar delta. Extendable boxes. | | **Premium / Discount Zones** | Calculates the range between the highest swing high and lowest swing low. Shades the upper 50% (premium) and lower 50% (discount) with an equilibrium line in the middle. | | **MTF High/Low Levels** | Plots previous period’s high/low for Daily, Weekly, Monthly. Line style (solid/dashed/dotted) and color customizable. | | **ZigZag** | Classic pivot‑based ZigZag with HH/HL/LH/LL labels. Separate internal ZigZag available for finer swings. | ### 2. VWAP - Standard Volume Weighted Average Price. - Useful for intraday bias – price above VWAP = bullish tilt. ### 3. EMA Sets Two independent EMA pairs: - **Set 1:** 9 & 21 (fast) - **Set 2:** 20 & 50 (slower) Each set plots its own lines and generates up/down triangles on crossover / crossunder. Colours, widths, and signal colours are fully adjustable. --- ## ⚙️ Input Parameters (Grouped) ### 🔧 Master Controls - `Enable SMC Module` – turn all SMC features on/off. ### 📊 SMC – General - `Mode` – Historical (keeps all drawings) / Present (refreshes each bar). - `Style` – Colored / Monochrome. ### 📊 SMC – Structure & Order Blocks - Internal / Swing lengths, label sizes, BOS/CHoCH filter (All / BOS only / CHoCH only). - OB display mode (Both / Zone Box / Candle Highlight). - OB mitigation source (Close / High/Low). - OB filter (ATR / Cumulative Mean Range). ### 📊 SMC – Fair Value Gaps - Auto threshold on/off, custom timeframe, extend bars. ### 📊 SMC – MTF High/Low Levels - Show Daily / Weekly / Monthly – each with independent line style & colour. ### 📊 SMC – Premium / Discount Zones - Toggle zones, custom colours for premium, equilibrium, discount. ### 📊 ZigZag Swing Lines - Main ZigZag depth/deviation/backstep, colours, width, style, labels. - Optional internal ZigZag with separate settings. ### 📈 VWAP & EMA Sets - VWAP on/off, colour, width. - Two EMA sets: each with fast/slow lengths, colours, line width, cross signal colours. ### 📊 Dashboard - Position (Top‑Left/Right, Bottom‑Left/Right), font size. ### 🎨 Colors - Global bull / bear / neutral colours (used in dashboard). --- ## 🖥️ Dashboard A small table shows at a glance: - **SMC Bias** – Bullish / Bearish / Neutral (based on swing trend). - **Current Timeframe** – e.g., “60” for 1h, “D” for daily. The dashboard adapts to dark/light chart background. --- ## 🚨 Alerts (30+ conditions) All alerts are available from the TradingView alert dialog: | Category | Alerts | |----------|--------| | **Internal Structure** | Bull/Bear BOS, Bull/Bear CHoCH | | **Swing Structure** | Bull/Bear BOS, Bull/Bear CHoCH | | **Order Blocks** | Bull/Bear Internal OB mitigated, Bull/Bear Swing OB mitigated | | **Fair Value Gaps** | Bull FVG formed, Bear FVG formed | | **EMA Crosses** | EMA Set 1/2 Bull Cross, Bear Cross | --- ## 🧩 How to Use 1. **Add the indicator** to any chart (any symbol, any timeframe). 2. **Keep default settings** for a clean SMC + EMA experience. 3. **For scalping / intraday:** - Enable Internal Structure (length 5–10). - Use VWAP as bias filter. - Watch for FVGs on 1m–15m. 4. **For swing trading:** - Focus on Swing Structure (length 50+). - Use Premium/Discount zones for entries (buy in discount, sell in premium). - Confirm with EMA Set 2 (20/50) cross. 5. **Order Blocks:** - When price returns to a bullish OB zone, look for buying opportunities. - When a bearish OB gets mitigated, expect continuation down. --- ## 💡 Tips - **Monochrome style** is perfect for grayscale / minimalistic setups. - **Present mode** keeps drawings only on the current visible bars – useful for low‑resource usage. - **FVG auto‑threshold** works best on higher timeframes (1h+). For lower timeframes, you may turn it off and use manual threshold via the `barDelta` calculation (already built‑in). - The **ZigZag** does not repaint – it uses confirmed pivots. --- ## 📜 Credits & Version - **Original concept:** Mega Trend Suite (SMC + HAMA + MA Cross EMA) - **This edition:** Removed HAMA, MA Cross EMA, and Heikin Ashi Smoothed – keeping only SMC, VWAP, and EMA sets. - **Version:** 1.0 (Pine Script v6) --- ## ❗ Notes - This indicator is **not a financial advice** – always use proper risk management. - Maximum drawings (labels, lines, boxes) are set to 500 each – enough for several months of data. - Multi‑timeframe levels (Daily/Weekly/Monthly) work correctly only if the chart has enough historical data. --- **Happy trading!** *Mega Trend Suite – SMC + EMA* Chỉ báocủa Syed_Hussain_K108