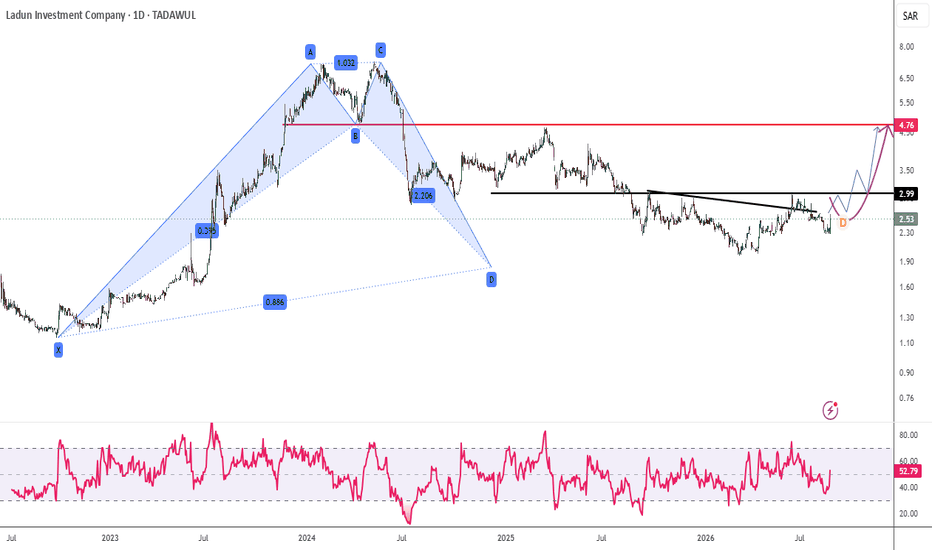
Long
Long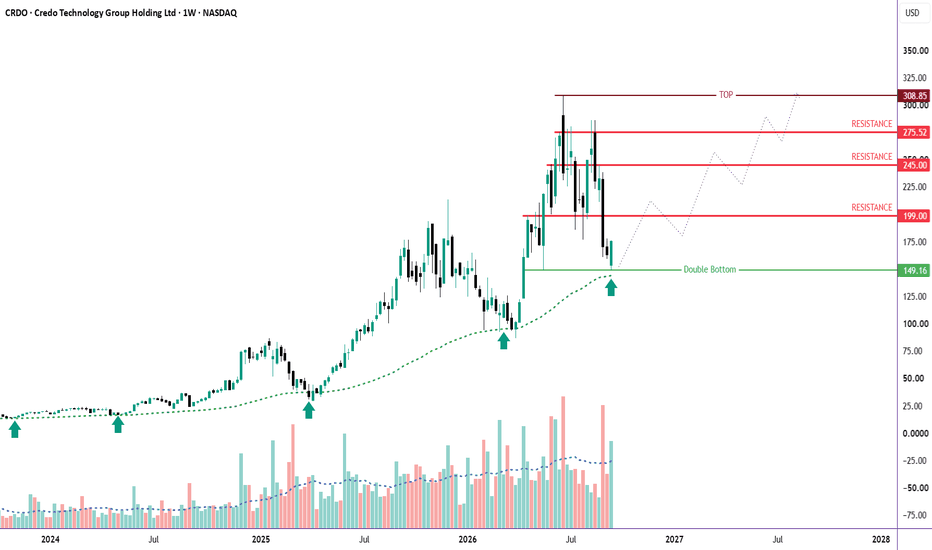
 Long
Long
Options Blueprint [Int]: Balancing Upside With Nearby ResistanceDirection Is Only Half of the Decision
A bullish chart does not automatically imply that the most distant bullish target should determine the trade.
This distinction becomes particularly important when price is showing evidence of upside momentum while approaching a technically meaningful resistance area. In that situation, there are really two questions: Where could price move, and what could happen before it gets there?
That distinction between direction and location is the central lesson in this case study.
The current daily chart of E-mini Nasdaq-100 futures, NQ, provides a useful example. The technical structure contains several bullish elements, but it also places a significant obstacle relatively close above current price. Rather than ignoring that obstacle and simply targeting the highest chart projection, an options trader can potentially structure the position around the area where price may first encounter difficulty.
The Bullish Evidence
At the time of the chart, NQ was trading around the 29,550–29,570 area.
Recent price action shows two potentially constructive patterns. The first is a possible double bottom within the recent consolidation. The second is a falling wedge whose upper boundary was pierced during the latest trading session.
A falling wedge can represent declining selling pressure when successive downward swings become progressively compressed. A break through its upper boundary does not guarantee continuation, but it can signal that the balance between buyers and sellers is changing.
There is another piece of evidence on the chart. A 20-period Bollinger Band places its moving average through the recent consolidation, and price has begun challenging and trading around that average after piercing the falling wedge.
Taken together, the wedge break, potential double bottom and interaction with the Bollinger moving average create a reasonable technical basis for studying a bullish scenario.
But bullish evidence does not exist in isolation.
The Obstacle Above Price
The upper Bollinger Band is located around 30,170, and a separate resistance area is clustered around approximately 30,170–30,200.
That creates an interesting conflict.
Traditional pattern analysis could justify a considerably higher objective, with the chart showing a potential target near 31,000. However, price would first need to travel through an area where two different analytical references identify resistance.
This is where a useful trading distinction appears: a chart target is not the same thing as a condition that must occur.
The bullish patterns may suggest that 31,000 is technically possible. They do not tell us that price must move directly there, nor do they tell us how price will behave around 30,200 first.
That nearby obstacle changes how the bullish thesis can be expressed.
Turning Resistance Into Part of the Structure
One way of approaching this scenario is with a call calendar spread rather than simply purchasing a call and relying on a large directional move.
The illustrative structure shown on the chart uses the same 30,200 strike with two different expiration dates:
A September 18 30,200 call is purchased for approximately 83 index points, while a September 11 30,200 call is sold for approximately 8.50 points.
The resulting net debit is approximately 74.50 index points.
Because options on E-mini Nasdaq-100 futures use a $20 multiplier, that corresponds to approximately $1,490 for one calendar spread before commissions, fees and execution differences.
The selection of 30,200 is not arbitrary. It places the calendar strike almost directly at the technical area where the upper Bollinger Band and resistance zone converge.
That changes the question being asked by the position.
Instead of requiring NQ to move all the way toward 31,000, the calendar initially asks whether price could migrate toward approximately 30,200 while the shorter-dated option loses time value faster than the longer-dated option.
Why Calendars Behave Differently
A calendar spread is not simply a cheaper version of a long call.
Its value depends on several variables interacting simultaneously: price, time and implied volatility.
If NQ rises gradually toward 30,200 as the September 11 expiration approaches, the structure may develop favorably because the short call is approaching expiration while the September 18 call still retains additional time.
But there are other possibilities.
If NQ remains substantially below 30,200, both options may lose value and the longer-dated call can still deteriorate.
If NQ rises too quickly and moves significantly beyond 30,200, the short call can gain value rapidly and the calendar may behave very differently from a simple directional long-call position.
Changes in implied volatility can also alter the result. A decline in longer-dated implied volatility can reduce the value of the September 18 option even when price moves in the expected direction.
For those reasons, a calendar does not have the same fixed expiration payoff geometry as a vertical spread.
The TradingView modeling shown for this illustration estimated an initial maximum debit of 74.50 points and a modeled peak outcome of approximately 237.66 points. With the $20 NQ options multiplier, those amounts correspond to approximately $1,490 and $4,753.20 respectively.
That produces a modeled peak-to-debit relationship of roughly 3.19:1 under the assumptions used in that snapshot. It should not be interpreted as a fixed reward-to-risk ratio. The shape and location of the calendar's payoff profile change as time passes and volatility changes.
The Economic Calendar Matters Too
The technical setup is developing during an unusually relevant sequence of U.S. economic releases.
On September 4, the U.S. Bureau of Labor Statistics reported that August nonfarm payrolls increased by 162,000 while unemployment remained at 4.1%. Average hourly earnings increased 0.3% during the month and 3.1% over the previous year.
That combination creates two competing interpretations for equity markets. Labor-market resilience can support expectations for continued economic activity, while stronger employment can also affect expectations for monetary policy.
Technology shares nevertheless showed relative strength during the September 4 session. Semiconductor stocks were among the stronger areas of the equity market even as broader U.S. indexes traded lower.
The next inflation releases add another layer. As scheduled by the Bureau of Labor Statistics, August Producer Price Index data are due September 10, followed by the Consumer Price Index on September 11.
If inflation data were to come in softer than market expectations, lower interest-rate pressure could potentially support longer-duration growth shares, which are influential within the Nasdaq-100. A stronger inflation reading could produce the opposite response and make nearby technical resistance more relevant.
There is an additional timing consideration: the September 11 CPI release occurs on the same date as the expiration of the short call used in this calendar.
Then, on September 15–16, the Federal Open Market Committee is scheduled to meet. The long September 18 call therefore remains alive through that event.
The two calendar legs are consequently exposed to different portions of the event calendar. That can influence implied volatility and makes active management particularly important.
September 11 Is a Management Decision, Not Just an Expiration
A common misconception with calendars is that the shorter-dated option is simply sold repeatedly until the longer-dated option eventually expires.
In practice, each expiration creates a new decision.
If NQ remains below 30,200 as September 11 approaches, the short call may have lost substantial time value. The trader could close that option, allow an out-of-the-money option to expire, or reassess the entire structure.
If NQ is near 30,200, the calendar may be close to the area around which its payoff profile was originally constructed. At that point, price, remaining time and implied volatility become more important than the original chart target.
If NQ has moved substantially above 30,200, the position requires particularly careful attention.
E-mini Nasdaq-100 weekly options are European-style. At expiration, an in-the-money option is automatically exercised based on the applicable fixing, with exercise resulting in a position in the underlying NQ futures contract.
That means allowing an in-the-money short call to reach expiration is not simply an accounting event. It can create a short NQ futures position while the September 18 long call remains open.
A trader who does not want that resulting futures exposure would normally need to make the management decision before expiration.
What Does Rolling Actually Mean?
After the September 11 short call has been removed, several different choices may exist.
The entire calendar could be closed.
The September 18 long call could be retained by itself, which would transform the position into a directional long call with a different risk profile.
Another September 18 call at a different strike could be sold, converting the remaining long call into a same-expiration vertical spread.
Alternatively, if the trader wants to continue using a calendar-style approach beyond September 18, the longer-dated option could first be rolled farther into the future. A new shorter-dated call could then be sold against that extended long option, creating another calendar or a diagonal depending on the strikes selected.
There is an important limitation: the original long call expires only one week after the September 11 short call. That leaves little room for repeated rolling while keeping the original September 18 long option.
Selling a new call that expires after the long call without first extending the long side would create a very different and potentially uncovered risk after September 18.
Rolling therefore should not be automatic. It is a new trade decision based on the market structure that exists at that time.
Defining Invalidation Before Managing the Position
The chart also provides an important reference below price.
A support area begins around 29,213 and extends lower toward approximately 28,930. If price were to break decisively through that region, the bullish interpretation of the falling wedge and potential double bottom would become materially weaker.
That provides a technical invalidation framework.
For the original unadjusted calendar, the initial net debit of approximately 74.50 points represents the defined maximum monetary risk of the spread itself, excluding transaction costs. A trader could therefore use either an options-based risk threshold, a chart-based invalidation level, or a combination of both when deciding whether the original thesis remains intact.
Those are different concepts.
The technical invalidation level describes when the chart thesis has changed. The maximum debit describes the maximum amount committed to the initial options structure. Neither should be confused with futures margin.
Any adjustments can also change the original risk profile.
NQ, MNQ and Contract Size
The chart uses E-mini Nasdaq-100 futures, ticker NQ, while the same underlying market can also be followed through Micro E-mini Nasdaq-100 futures, ticker MNQ.
According to current contract specifications, one NQ futures contract has a multiplier of $20 times the Nasdaq-100 Index and a minimum price movement of 0.25 index points, equal to $5 per tick.
MNQ is one-tenth that size: $2 times the index, with the same 0.25-point minimum movement equal to $0.50 per tick.
Around the index level shown on the chart, that places the notional value of one NQ futures contract near $591,000 and one MNQ contract near $59,000.
The options structure illustrated here specifically uses options on NQ. Each E-mini Nasdaq-100 option represents one NQ futures contract and uses the $20 multiplier. CME also lists options on Micro E-mini Nasdaq-100 futures, but they are separate contracts with their own market characteristics.
Exchange performance-bond requirements for futures positions vary with market volatility and can change. They are separate from the maximum debit of the calendar spread. This distinction becomes especially important if an option is exercised and produces an underlying futures position. Currently:
NQ Margin is ~$42,000 per contract
MNQ Margin is ~$4,200 per contract
The Transferable Lesson
The most important part of this case study is not whether NQ eventually reaches 30,200 or 31,000.
It is the decision process.
Technical analysis may identify a bullish direction while simultaneously identifying an obstacle before the theoretical target. Options provide ways to structure a position around that conflict rather than pretending the conflict does not exist.
Here, the falling wedge, possible double bottom and moving-average interaction create the bullish evidence. The 30,170–30,200 area creates the constraint. The call calendar then uses that constraint as part of the structure itself.
That leads to a broader principle:
Direction tells us what we think price may do. Location helps determine how we may want to express that view.
Sometimes the highest chart target is less important than understanding what price has to overcome first.
Data Consideration
When charting futures, the data provided could be delayed. Traders working with the ticker symbols discussed in this idea may prefer to use CME Group real-time data plan on TradingView: www.tradingview.com - This consideration is particularly important for shorter-term traders, whereas it may be less critical for those focused on longer-term trading strategies.
General Disclaimer
The trade ideas presented herein are solely for illustrative purposes forming a part of a case study intended to demonstrate key principles in risk management within the context of the specific market scenarios discussed. These ideas are not to be interpreted as investment recommendations or financial advice. They do not endorse or promote any specific trading strategies, financial products, or services. The information provided is based on data believed to be reliable; however, its accuracy or completeness cannot be guaranteed. Trading in financial markets involves risks, including the potential loss of principal. Each individual should conduct their own research and consult with professional financial advisors before making any investment decisions. The author or publisher of this content bears no responsibility for any actions taken based on the information provided or for any resultant financial or other losses.  Education
CAT: Excavator digs for bottom. Found it?NYSE:CAT
It seems Caterpillar is getting ready to build not just data centers, but also new all-time highs in our brokerage accounts.
On the industrial horizon, one of the cleanest reversal setups of the year is taking shape. CAT shares have completed a large-scale correction from the all-time high of $1,073.46 and are approaching the most important point of the cycle. The chart is forming a classic potential double bottom pattern right at the 200-day moving average, the primary long-term reference for institutional capital.
The first bottom in July at $776, a local bounce to $934, and then a second bottom in early September at $771 — a precision liquidity sweep just $5 below the July low, followed by a strong impulsive reaction to the upside. The pattern will be confirmed on a break above the neckline at $934 on elevated volume. Until then, the scenario remains potential.
The most interesting part is happening in the fundamentals. On August 4, Caterpillar posted a historic earnings report: revenue exceeded $20 billion for the first time in a single quarter, adjusted EPS of $8.17 beat consensus by 31.99%, and backlog reached a record $72 billion, growing 92% year-over-year. Following such a report, institutional capital has been methodically accumulating positions on the correction, visible through the character of the decline on diminishing volume.
This technical setup is perfectly synchronized with the company's real business. On September 2, Caterpillar announced a partnership with FieldAI to deploy physical AI and autonomous systems on construction sites using NVIDIA technology. The Power & Energy segment grew 72% quarter-over-quarter on the data center construction boom. CAT is no longer a cyclical industrial player — it is a key infrastructure player in the AI era. Management raised full-year revenue guidance to mid-to-high teens and increased the quarterly dividend to $1.63 per share.
Current levels around $813.94 look optimal for positioning. The first target is $912.66, a profit-taking zone. The global target is $1,046.53, returning the asset to pre-correction levels. The scenario would be invalidated by a daily close below $755, where the MA200 loses its role as support. The industrial sector has no mercy for over-risking — we enter strictly by the system.
This publication is for analytical purposes only and does not constitute individual investment advice. Share your thoughts in the comments and don't forget to support the idea with a like if you found the analysis useful! Bitcoin: D-Bottom as the Engine of a Potential Failure H and SMost traders will immediately focus on the large bearish Head & Shoulders structure visible on the chart. However, I believe the more interesting story is not the Head & Shoulders itself, but what happened after the pattern reached its completion area.
The key observation is that the recent Double Bottom did not form randomly.
The second bottom developed almost exactly at the projected completion point of the descending Head & Shoulders structure. In other words, the level where sellers were expected to remain in control became the location where buyers started to absorb supply and build a reversal structure.
Head & Shoulders Perspective
The larger structure shows:
• Left Shoulder
• Head
• Right Shoulder
• Descending neckline
Unlike a traditional textbook pattern with a horizontal neckline, this structure is sloping downward. Because of this, the completion area of the pattern migrated lower over time and eventually aligned with the 59.8K region.
That area became extremely important because price did not continue to accelerate lower after reaching it.
Instead, the market started building a base.
The Double Bottom Changes the Narrative
After reaching the Head & Shoulders completion zone, price created a clear Double Bottom.
What makes this particularly interesting is the position of the neckline:
• Double Bottom lows formed around the Head & Shoulders completion area.
• Double Bottom neckline formed near 82.2K.
• The 82.2K region also corresponds with the previous Right Shoulder/SR Flip zone.
This creates a powerful structural relationship:
Former resistance from the Head & Shoulders became the breakout level of the Double Bottom.
From a market structure perspective, this is far more important than viewing the patterns separately.
Measured Move Projection
Double Bottom low:
≈ 59.8K
Neckline:
≈ 82.2K
Pattern height:
≈ 22.3K
Measured move target:
≈ 104.5K
The projected target lands almost exactly at the marked 104.5K zone.
Why 104.5K Matters
The target itself is not the most interesting part.
The more important observation is that the 104.5K projection aligns closely with the descending blue trend line that has been defining the larger structure.
Due to the slope of that trend line:
• Near current date → around 101K-102K
• Further in time → gradually decreases toward 95K
This means the Double Bottom target and the major trend resistance are converging into the same region.
Potential Failed Head & Shoulders Scenario
A failed Head & Shoulders does not necessarily mean the original pattern never worked.
In this case, the pattern did reach its projected completion zone.
The question is what happens afterward.
The sequence can be interpreted as:
1. Head & Shoulders completes.
2. Price reaches the descending neckline completion area.
3. Buyers defend that area aggressively.
4. A Double Bottom forms.
5. The Double Bottom reclaims the former Right Shoulder zone.
6. The measured move targets the major descending trend resistance.
If price eventually reaches the 100K-105K region, the market would effectively retrace the entire bearish influence of the Head & Shoulders structure.
At that point, the chart would no longer be telling a simple bearish continuation story.
Instead, it would start looking like a classic Failed Head & Shoulders setup, where the bearish pattern attracts sellers, completes, and then reverses hard enough to drive price back toward the primary trend resistance.
Final Thought
The most compelling aspect of this chart is not the Head & Shoulders alone and not the Double Bottom alone.
It is the relationship between them.
The Head & Shoulders completion area became the Double Bottom support.
The former Right Shoulder became the Double Bottom neckline.
And the Double Bottom target aligns with the major descending trend resistance.
That structural symmetry is what makes this setup worth monitoring.
This is not financial advice. Always do your own research and risk management.  Long
Long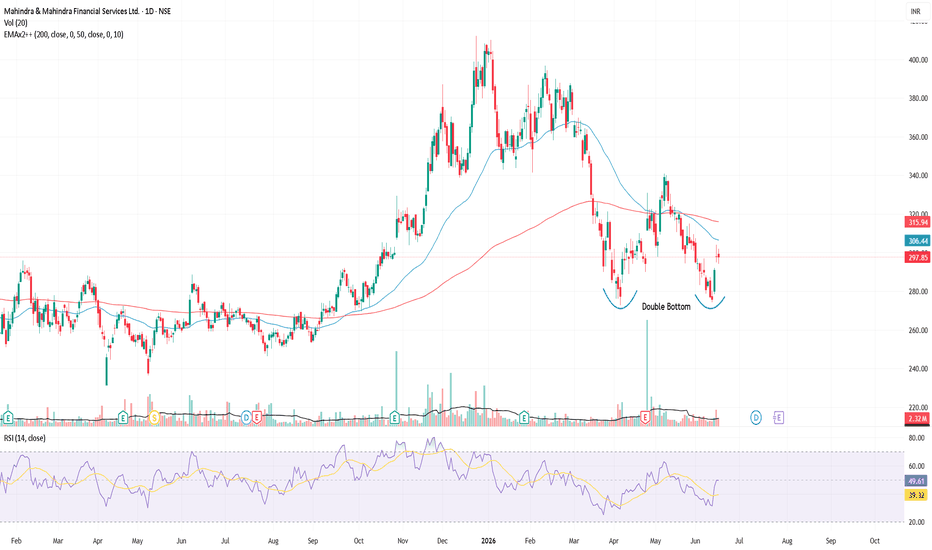
 Long
Long
 Long
Long
BTCUSDT: Monthly Close Above the Line Would Confirm an SFPWorth flagging what this month's close actually does structurally, since it's not just a big green candle, it's sitting right at a level with real implications either way.
Price tagged 81,499.90 intramonth, comfortably above the orange line, then pulled back to close at 79,612.80, currently just below it. If the month finishes above that line rather than fading back under, that's a monthly SFP pointing up: a sweep of the level followed by a close that holds above it rather than rejecting back through, the same swing-failure mechanic this feed has flagged repeatedly on shorter timeframes, just playing out here on the monthly candle itself.
That matters given what came before it. Five consecutive months of decline from the November 2025 top into the February low, a choppy recovery, another leg down into June, and now this month pushing straight back through the level that's acted as a pivot across the entire chart. An SFP confirming here wouldn't just be a strong candle, it would be the monthly timeframe's version of a CHoCH, the character of the entire past year potentially shifting on this close.
Under Continuation Acceleration Protocol, this is gate three sitting unresolved until the candle actually closes. A wick above the line during the month means nothing on its own, SFPs are defined by the close, not the high. The close is what turns a sweep into a confirmed signal rather than a level getting tested and rejected.
What invalidates the SFP read: the month closing back below the orange line, turning this into a rejection rather than a reclaim, no different from the wick failing to hold. What confirms it: a close above the line, the sweep resolving as a genuine SFP rather than a fakeout.
Seneca wrote that luck is what happens when preparation meets opportunity. The wick to 81,499 was the opportunity showing up. Whether the close finishes the job is still a few days from being decided.  Long
Long
 Long
Long
 Long
Long
 Long
Long