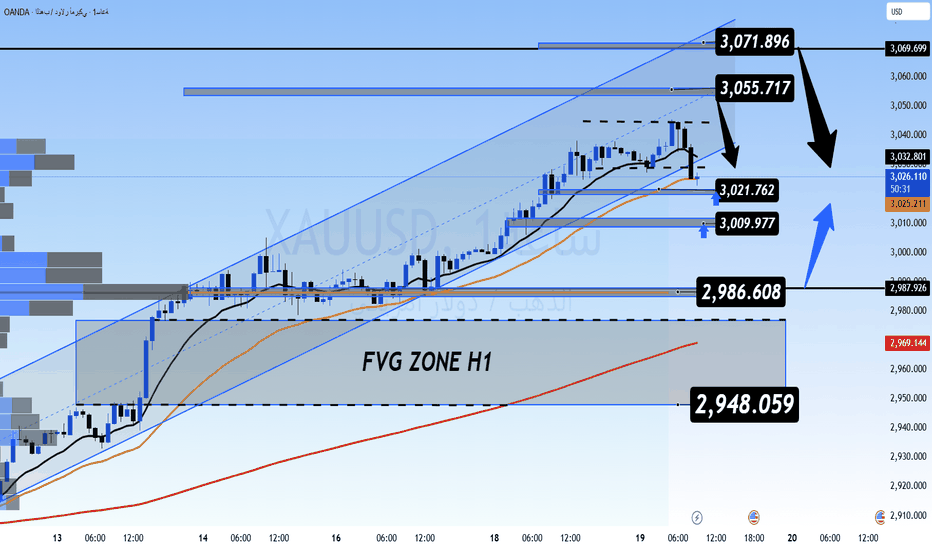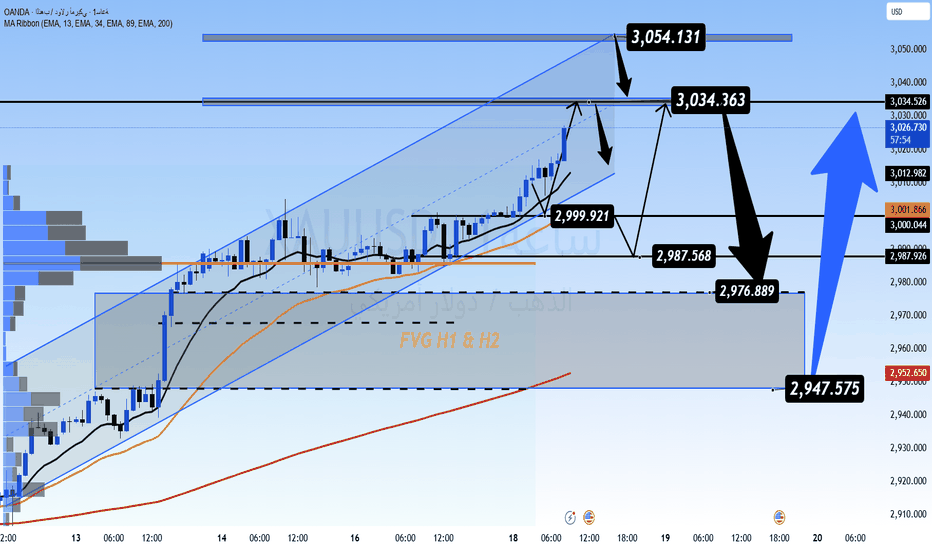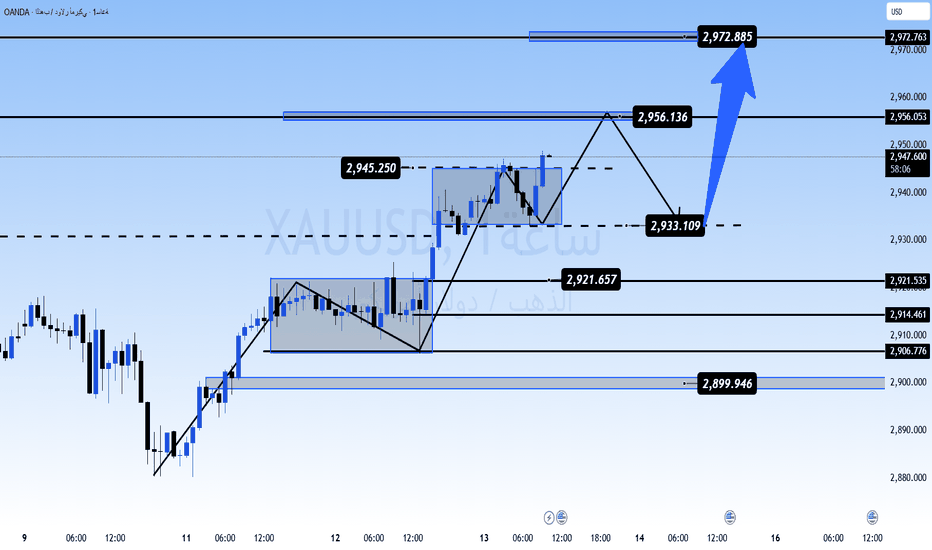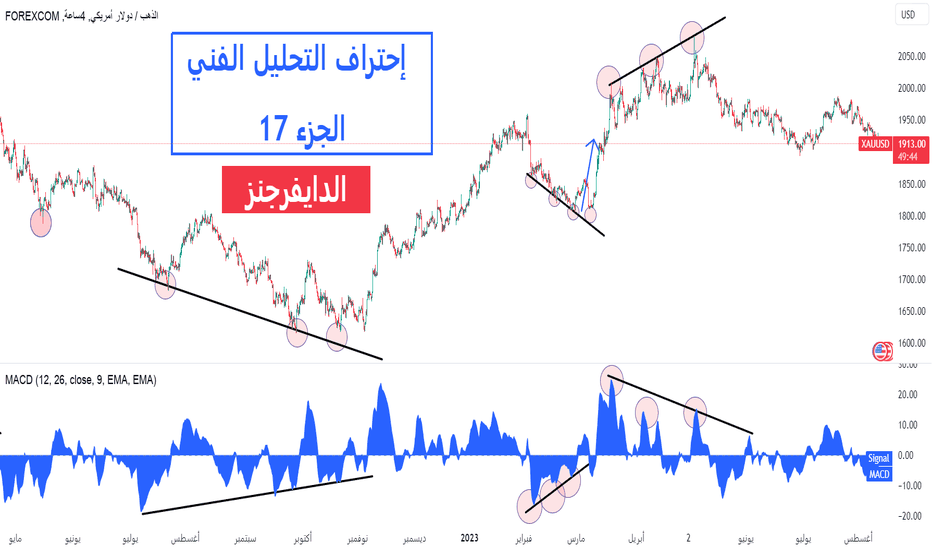
NIFTY Bearish Channel Breakdown Setup📊 NIFTY (4H)
🔍 Analysis:
• Price is trading within a well-defined descending channel, respecting both resistance and support boundaries.
• Multiple rejections from the upper trendline confirm strong seller presence in the market.
• Recent price action shows weakening bullish momentum and continued lower highs formation.
• As long as price remains below the channel resistance zone, downside pressure is expected to persist.
🎯 Targets:
• 1st Target: 22,997
• 2nd Target: 22,611
⚠️ Invalidation:
• A sustained break and close above 23,650 would invalidate the bearish outlook.
📈 Bias: Bearish 🔴
Technical Analysis
DXY Bullish Breakout Setup | Targets at 100.08 & 100.50📊 **DXY (US Dollar Index) – H4 Timeframe**
🔍 **Analysis:**
• Price has broken out of the descending channel, signaling a potential bullish reversal ✅
• Strong support zone remains intact around **99.50 – 99.60**
• Current consolidation above channel resistance suggests accumulation before continuation
• Bullish market structure is developing with higher lows forming
• Momentum favors a move toward key resistance levels if buyers maintain control
🎯 **Projected Targets:**
• **1st Target:** **100.085** 🎯
• **2nd Target:** **100.450 – 100.550** 🎯
⚠️ **Invalidation:**
A sustained break below **99.50** would weaken the bullish outlook and could trigger a deeper retracement.
📈 **Bias:** **Bullish** 🟢
#DXY #DollarIndex #Forex #TradingView #PriceAction #LiquidityTrader #SmartMoneyConcepts #TechnicalAnalysis #BullishSetup #MarketStructure
ETHUSD | Bullish Breakout Eyes Higher Targets📊 ETHUSD (H4 Timeframe)
🔍 Analysis:
• Strong recovery after breaking out of the descending channel ✅
• Price is consolidating above the reclaimed support zone ✅
• Buyers continue defending the 1,610–1,625 demand area
• Bullish structure remains intact above support
🎯 Bullish Targets:
✅ TP1: 1,736.69 (1st Projected Level)
✅ TP2: 1,812.19 (2nd Projected Level)
📌 Support Zone:
1,610 – 1,625
🛑 Stop Loss:
Below 1,580
🚀 Trade Idea:
BUY on bullish confirmation or continuation from the support zone.
📈 Outlook:
As long as price remains above the 1,610–1,625 support area, buyers could push ETHUSD toward 1,736.69 first and potentially 1,812.19 in the coming sessions.
US500 Bearish Retest Setup | Sellers Target 7,350 Demand Zone📊 US500 / SPX500 (H4 Timeframe)
🔍 Analysis:
• Strong bearish displacement from the 7,500 resistance zone ✅
• Previous support has turned into resistance
• Price is retracing after a sharp sell-off and may revisit supply before continuing lower
• Bearish market structure remains intact below 7,487
🎯 Bearish Targets:
✅ TP1: 7,350 (Demand Zone)
✅ TP2: 7,325 (Extended Support)
📌 Resistance Zone:
7,487 – 7,509
🛑 Stop Loss:
Above 7,625
🚀 Trade Idea:
SELL on rejection from the resistance zone.
📈 Outlook:
As long as price remains below 7,487–7,509, sellers could drive the market toward 7,350 first and potentially 7,325.
SOLUSD Breakout Signals Further Upside PotentialSOLUSD has successfully broken out of a well-defined descending channel, signaling a potential shift in market structure from bearish to bullish. Following a strong reaction from the $60 demand zone, buyers regained control and pushed price into a series of higher highs and higher lows, confirming improving momentum.
The recent recovery suggests that the correction phase may be complete, with price now holding above a key support region around $63–$64. This area is expected to act as an important demand zone, where buyers may continue to defend the bullish structure on any pullbacks.
As long as SOLUSD remains above this support, the path of least resistance remains to the upside. The first major objective is located near $68.45, a level that could attract short-term profit-taking. A decisive breakout above this resistance would strengthen bullish momentum and open the door for a move toward the next projected target at $72.05, which aligns with a significant liquidity and supply area.
Key Levels
📍 Support Zone: $63.00 – $64.00
🎯 1st Projected Target: $68.45
🎯 2nd Projected Target: $72.05
📈 Market Bias: Bullish
Technical Highlights
✅ Descending channel breakout confirmed.
✅ Strong bullish reaction from the $60 demand zone.
✅ Higher highs and higher lows continue to develop.
✅ Buyers remain in control above support.
✅ Momentum favors a continuation toward $68.45 and potentially $72.05. 🔥📊
BTCUSD Eyes $60K After Rejection at the resistance pressure BTCUSD is currently trading within a well-defined ascending structure, supported by a strong bullish trendline that has been respected multiple times throughout the recent recovery phase. The repeated trendline retests confirm that buyers have remained in control, consistently defending key support levels and pushing the market higher.
Despite this bullish momentum, Bitcoin has now entered a major resistance zone between $64,000 and $64,500, an area that has historically attracted significant selling pressure. The current price action suggests that the market is struggling to establish a strong breakout above this level, increasing the possibility of a bearish rejection.
The chart clearly shows a sequence of higher lows connected by the ascending support trendline. While this structure remains valid, continued failure to break resistance may encourage profit-taking from short-term buyers and fresh selling activity from market participants looking for a correction.
A rejection from the highlighted resistance area could result in a breakdown below the rising trendline, which would be the first indication of weakening bullish momentum. Such a move could trigger a decline toward the first downside objective near $60,037, where buyers may attempt to re-enter the market. If selling pressure remains strong, the correction could extend toward the second projected target around $57,006, a key support and liquidity zone shown on the chart.
From a bullish perspective, Bitcoin must achieve a decisive breakout above $64,500 and maintain price acceptance above this level. A successful breakout would invalidate the bearish setup and likely attract additional buying momentum, opening the door for a move toward the next major liquidity area near $68,000.
Market Structure Highlights
✅ Multiple successful trendline retests confirm strong support.
✅ Higher lows indicate buyers remain active.
✅ Price is testing a significant resistance zone.
✅ Failure to break resistance increases bearish risk.
✅ Trendline breakdown could accelerate selling pressure.
✅ Downside targets remain at $60,037 and $57,006.
✅ Breakout above $64,500 could fuel a rally toward $68,000.
With BTC trading directly beneath a major resistance level, the market is approaching a high-probability reaction zone. The battle between buyers and sellers around $64K will likely determine whether Bitcoin continues its recovery or enters a deeper corrective phase in the coming sessions. 📈🔥
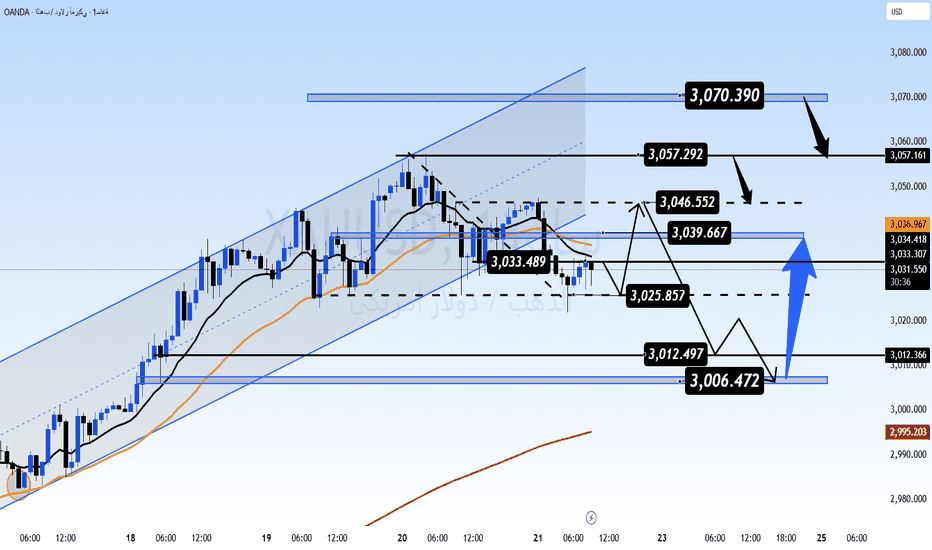
MASON XAUUSD –Bullish Structure Still Holding Above Key Buy Zone
XAUUSD is trading around 4,330 and still holding a short-term bullish structure on H1.
Price remains above the rising trendline and Ichimoku cloud, showing that buyers are still defending the trend. The current movement is mainly sideways below the High Liquidity Zone, so a pullback may create a cleaner buy setup.
Technical View
Trendline: bullish structure still valid
Price Action: consolidation below resistance
Ichimoku: price above the cloud, buyers still have control
Key Zones
Current price: 4,330
Key Buy Zone: 4,295–4,310
High Liquidity Zone: 4,340–4,365
Resistance: 4,404 / 4,428
Main liquidity target: 4,475–4,490
Invalidation: below 4,285
Trading Plan
Buy Priority: 4,295–4,310
Condition: wait for bullish rejection, higher low, or strong recovery above 4,320.
SL: below 4,285
TP1: 4,340–4,365
TP2: 4,404
TP3: 4,428
Final target: 4,475–4,490
Alternative Scenario
If price breaks and holds above 4,365, wait for a retest before looking for continuation toward 4,404–4,428.
Sell View
Sell is not priority while price stays above the trendline. Only consider short-term sell if price breaks below 4,295 and loses the Ichimoku cloud.
Final View
Overall, gold remains bullish as long as 4,295–4,310 holds. A clean reaction from this zone may support the next move toward 4,365, then 4,404–4,428.
Will gold retest the Key Buy Zone first, or break above liquidity directly?
APOLLO: Bullish Breakout and Momentum Continuation Setup 📊 Apollo Micro Systems Ltd. (APOLLO) - Daily Chart Breakdown
This post is for EDUCATIONAL PURPOSES ONLY and reflects my personal view on the price action. It is not financial or investment advice.
🟢 Technical Observations:
1. Structural Breakout: The price has successfully broken out of a consolidation range, clearing major resistance levels around 402.50 with strong volume support.
2. Moving Average Alignment: The stock is trading comfortably above its key short and medium-term moving averages, demonstrating healthy bullish alignment and strong upward momentum.
3. Price Action: The recent daily candles show aggressive buying interest, though a minor intraday cool-down or a retest of the immediate support zone could offer a cleaner risk-to-reward ratio.
🎯 Educational Trade Setup:
• Entry Zone: 420.00 – 435.45 (Looking for stability around current levels or minor pullback support)
• Target 1: 470.00 (Near-term psychological resistance / recent highs)
• Target 2: 500.00 (Major round-number physiological target)
• Invalidation / Stop-Loss: 395.00 (A daily close below structural support invalidates this bullish swing view)
• Expected Duration: 2 to 4 Weeks (Swing View)
⚠️ Risk Disclaimer:
Always manage your risk according to your personal trading plan. Position sizing is key, especially when momentum stocks are trading at near-term extensions.
HOW-TO: Swing Trade DDOG with the Swing Squeeze indicatorThe Swing Squeeze indicator has turned blue one agin indicating a massive squeeze taking place for NASDAQ:DDOG . When it turns blue this is a sign of a massive squeeze. Just the yellow bars shows a regular squeeze. I like to only trade during a massive squeeze. Additionally the stock is testing a support line. The last few times this was on a support line and the massive squeeze signaled the stock made some really nice runs, even those smaller arrows are 20% + swings. If it closes below the nearest support the trade is most likely over and a bust. This looks like a solid swing trade, $250-260 trade targets. I would sell half there then see if the other half can test the highs.
HOW-TO: Swing ADM with the Swing Squeeze indicatorThe Swing Squeeze indicator has turned blue indicating a massive squeeze taking place for NYSE:ADM . When it turns blue this is a sign of a massive squeeze. Just the yellow bars shows a regular squeeze. I like to only trade during a massive squeeze. The bullish trend (top center) has also signaled. Additionally the stock is testing a support line that was generated by the Swing Squeeze. The last few times every single one of these were able to actually align, the stock made some really nice runs. If it closes below the nearest support the trade is most likely over and a bust. This looks like a solid swing trade, $82 and $85 trade targets.
Why Gold Fell Through $4,268 — And Why It Matters This Week$4,268 had held as support for weeks. Then on June 10, it broke in a single session.
Here's why it mattered.
When a level that has held multiple times finally breaks, two things happen: sellers who were waiting confirm their thesis, and buyers who were defending it stop defending. That creates a vacuum — price doesn't just fall through the level, it accelerates.
That's the large red candle in the box. Not panic. Structure breaking.
Once broken, $4,268 flips. Support becomes resistance. The Iran deal bounced price straight through $4,268 and all the way up to $4,363 — the resistance above. That's where sellers returned.
$4,268 is now the gate. A daily close back below it reopens the path to $4,000. Above it, the picture changes.
FOMC Wednesday. Dot plot decides which side wins.
This is part of a weekly series breaking down real market events in plain language — no jargon, no hindsight.
— The Why Behind The Move
UBER — Buy the Pullback or Wait for the Breakout?UBER remains in a broader bullish market structure, with price currently testing the lower boundary of the bullish broadening wedge, a dynamic support area that has guided the trend over recent periods.
As long as this structure remains intact, this region may offer an opportunity to look for trend-following long setups, particularly if price shows signs of support and bullish confirmation.
An alternative scenario is to monitor a break above the 81 level. A decisive breakout supported by strong momentum, followed by a successful retest, could strengthen the bullish case and open the door for continuation toward higher levels.
On the other hand, risk management remains essential.
If the current support fails to hold, the next area of interest appears between 58–64, where a strong historical support and demand zone is located. This region has previously generated multiple clear rejections and may become an important location to reassess bullish opportunities.
For now, the focus remains on two possible paths:
→ Bullish reaction from current trend support
→ Breakout and retest above 81 for continuation
If neither scenario develops and support breaks, attention shifts toward the deeper demand zone.
This is a scenario-based analysis — not a prediction.
Disclaimer: This analysis is shared for educational purposes only. It reflects personal market observations and does not constitute financial advice or a trading recommendation.
Rayan Nasser
#UBER #Stocks #TechnicalAnalysis #PriceAction #TrendFollowing #SwingTrading #StockMarket #RiskManagement
XAUUSD – Gold Builds Bullish Continuation Above Buy Zone
Gold is showing a stronger recovery structure after reacting from the monthly low around 4,025. On the H2 chart, price has reclaimed the short-term sellside liquidity area and is now holding above the buy zone around 4,300 – 4,324, showing that buyers are starting to regain control.
FUNDAMENTAL ANALYSIS
Gold is still reacting to the U.S. dollar, Treasury yields and upcoming U.S. data. However, the latest price action shows a stronger technical recovery after lower liquidity was swept.
For now, if buyers continue to defend the current buy zone, gold may extend the bullish correction toward higher resistance and liquidity levels.
TECHNICAL ANALYSIS – SMC + FIBONACCI
From an SMC perspective, gold swept the monthly low near 4,025, then created a strong bullish reaction. This move shows that sellside liquidity was taken before buyers stepped back into the market.
The price has now broken above the 4,203 sellside liquidity level and filled the opening gap area. More importantly, gold is holding around the buy zone near 4,300 – 4,324, which becomes the key area for bullish continuation.
The next important level is the support around 4,366. If price reclaims this area, the structure may continue to shift stronger, opening the path toward the strong support-turned-resistance zone around 4,420 – 4,440.
Above that, the market may target 4,476, 4,515 and the upper liquidity area near 4,595. As long as gold stays above the buy zone and does not lose 4,269, the bullish continuation scenario remains valid.
KEY PRICE ZONES TO WATCH
Current price area: 4,324
Buy zone: 4,300 – 4,324
Opening gap support: 4,269
Sellside liquidity: 4,203
Month low: 4,025
Nearest resistance: 4,366
Strong support-turned-resistance: 4,420 – 4,440
Next resistance: 4,476
Bullish target 1: 4,515
Bullish target 2: 4,595
Invalidation area for buy view: Below 4,269
TRADING SCENARIOS
Buy Scenario – Priority H2 View
If gold holds above the 4,300 – 4,324 buy zone, I will watch for bullish continuation toward the higher resistance areas.
Buy Zone: 4,300 – 4,324
Entry Condition: Bullish rejection, liquidity sweep, lower-timeframe CHoCH, or continuation above the current buy zone.
Stop Loss: Below 4,269 or below the nearest swing low.
Take Profit:
TP1: 4,366
TP2: 4,420 – 4,440
TP3: 4,476
Continuation Buy Scenario
If gold breaks and holds above 4,366, buyers may continue to push price toward the higher liquidity levels.
Buy Condition: Wait for a clean break above 4,366, then watch for a retest and bullish rejection.
Target: 4,476 – 4,515
Sell Scenario – Only Short-Term Reaction
A sell setup is not the main view now. However, if gold reaches the 4,420 – 4,440 zone and shows strong rejection, a short-term pullback may appear.
Sell Zone: 4,420 – 4,440
Entry Condition: Bearish rejection, failed breakout, or lower-timeframe bearish CHoCH.
Take Profit:
TP1: 4,366
TP2: 4,324
Invalidation: If price breaks and holds above 4,440, the sell reaction idea becomes weaker.
MY VIEW ON GOLD
My current view for gold is bullish continuation while price holds above the 4,300 – 4,324 buy zone. The chart shows a clear recovery after sweeping the monthly low, and buyers are now trying to build a stronger structure above the previous sellside liquidity.
The cleaner plan is to watch the lower timeframe for confirmation around the buy zone. If buyers defend this area, gold may continue higher toward 4,366, then 4,420 – 4,440.
Overall, gold is showing a stronger recovery phase. The bullish view remains valid as long as price stays above 4,269 and continues to form higher reactions from the current buy zone.
Do you think gold will hold the 4,300 – 4,324 buy zone and continue toward 4,440 this week?
XPROINDIA 52-Week Breakout with Exceptional Volume Expansion📊 STWP Equity Snapshot
________________________________________
MARKET STRUCTURE SNAPSHOT | NSE: XPROINDIA | DAILY
________________________________________
• Closing Price: ₹1,393.80 (+₹183.80 | +15.19%)
• Core Trend: Uptrend (Swing Structure)
• Market State: 52-Week High Breakout in Progress
• Price Structure: Strong bullish expansion emerging from upper-range resistance
________________________________________
OPERATIONAL PRICE GRID & KEY REFERENCE LEVELS
________________________________________
• Model Reference Level: ₹1,439.00
• Hard Invalidation Level: ₹1,157.35
• Structural Risk: ₹281.65 (19.57%)
• Resistance Levels: R1 ₹1,485.53 | R2 ₹1,577.27 | R3 ₹1,715.53
• Support Levels: S1 ₹1,255.53 | S2 ₹1,117.27 | S3 ₹1,025.53
• Range Structure: Low ₹822.60 | High ₹1,263.00
• Higher Timeframe Observation Zones: ₹1,720.65 | ₹2,002.30
________________________________________
MOMENTUM, PARTICIPATION & CPR DATA
________________________________________
• Volume Profile: 974.37K Shares
• Volume Character: Extremely High Relative Participation
• RSI Metric: 77.31 (Strong Momentum Zone)
• ADX Reading: 39.02 (Strong Trend Strength)
• ROC: +20.39%
• MACD Status: Strong Positive Momentum Structure
• Stochastic Reading: 87.13 (Extended Momentum Zone)
• Current Bias: WAIT & WATCH
• CPR State: Bullish Zone | CPR Moving Up (Wide)
• Today's CPR: Pivot 1222.50 | Top 1216.25 | Base 1228.75
• Tomorrow's CPR (Projected): Pivot 1347.25 | Top 1370.55 | Base 1324.00
________________________________________
📚 EDUCATIONAL OBSERVATION
________________________________________
XPRO India has delivered an exceptionally strong bullish session, advancing more than 15% while being supported by significant volume expansion. Trading activity surged to approximately 974 thousand shares, representing more than ten times the recent average participation according to the dashboard statistics. Such volume expansion often reflects heightened market interest and increased institutional participation behind the move.
From a structural perspective, the stock has completed a decisive breakout above its previous range high near ₹1,263. The chart is simultaneously displaying multiple strength characteristics including a 52-week breakout, 52-week volume breakout, short-term trend breakout, Bollinger Band expansion, and bullish VWAP alignment. Price has successfully transitioned from a prolonged consolidation phase into an expansion phase, indicating a notable shift in market structure.
Momentum indicators remain firmly aligned with the prevailing uptrend. RSI has advanced to 77.31, reflecting strong bullish momentum, while ADX at 39.02 indicates a well-established trend environment. ROC remains exceptionally strong at 20.39%, MACD continues to support the bullish structure, and Stochastic readings above 87 highlight powerful momentum participation. While these readings confirm strength, they also indicate that price is operating in an extended momentum environment where volatility can increase.
The projected CPR for the next session has shifted substantially higher, with a projected Pivot level of ₹1,347.25. A rising CPR structure generally reflects improving market acceptance of elevated price levels. Although the dashboard continues to classify the immediate bias as "Wait & Watch," the broader technical structure remains constructive, supported by strong trend readings, elevated participation, and sustained momentum.
The current structural risk between the Model Reference Level and the Hard Invalidation Level stands at ₹281.65 or approximately 19.57%. This provides context regarding the distance between the current structure and the level where the prevailing technical framework would require reassessment. Immediate observation remains focused on the resistance cluster between ₹1,485 and ₹1,577, while the higher timeframe observation zones near ₹1,721 and ₹2,002 remain relevant for longer-term market structure analysis.
Support and resistance levels should be treated as observation zones rather than predictive targets. Chart patterns, momentum indicators, volume analysis, and CPR frameworks are educational tools that help market participants understand evolving market structure within a disciplined risk-management framework.
________________________________________
⚠️ Disclaimer
________________________________________
• This analysis is provided strictly for educational and informational purposes.
• This is not financial, investment, or trading advice and should not be considered a recommendation to buy or sell any security.
• Stock market investments are subject to market risks, including the possible loss of capital.
• Past performance, historical observations, chart patterns, and technical indicators do not guarantee future results.
• Please conduct your own research and consult a SEBI-registered financial advisor before making investment decisions.
• STWP assumes no responsibility or liability for any financial loss arising directly or indirectly from the use of this information.
CHFJPY — BOJ Rate Hike — Is the Downtrend Ready to Resume?Today, the Bank of Japan raised its policy interest rate to 1.00% from 0.75% , marking the highest level in decades and reinforcing expectations of a more supportive environment for the Japanese Yen. In theory, tighter monetary policy tends to strengthen the currency over time, which could create downside pressure on CHFJPY.
From a technical perspective, CHFJPY remains in a broader bearish structure, with price continuing to move inside the descending red channel that defines the current directional bias.
At the moment, price appears to be in a corrective phase, approaching the upper boundary of the bearish channel, which is also aligned with a key green resistance zone. This confluence area becomes important because it may act as a decision point for the next move.
If price shows rejection and confirms weakness around this region, the setup could offer a potential trend-following sell opportunity, in line with the broader bearish momentum.
However, confirmation remains essential — a clean break above resistance and channel structure would weaken the bearish thesis.
For now, the focus is simple:
Will resistance hold and allow the broader downtrend to resume, or is the market preparing for a structural shift?
Disclaimer: This analysis is shared for educational purposes only. It reflects personal market observations and does not constitute financial advice or a trading recommendation.
Rayan Nasser
#CHFJPY #JPY #CHF #Forex #TechnicalAnalysis #PriceAction #BankOfJapan #InterestRates #Trading #RiskManagement
SPY - Pushed Into Resistance Yesterday and...SPY Pushed Into Resistance Yesterday and Has Gone Completely Quiet Since.
RCZ and ATR are both sitting near the floor this morning.
Structural Assessment
SOM is reading Impulse Cont. Bull transitional on SPY 1H.
26 primary FVGs alive, 2 touched. The pool from this leg
higher remains largely unengaged -- price hasn't gone back
to test most of what it built on the way up.
ACE is GREEN with Q4 SHORT. CQI 30. Last Ann was Bull
CQI 71.22, 204 bars ago. Direction has flipped to SHORT
despite the green light and the bull announcement history
-- a meaningful disagreement between the light and the
quartile read.
IMP is scoring 0/5. NONE mode. WAIT.
RCZ at 5th percentile, ATR at 2nd. Vol Elev at 4th.
Everything is compressed after yesterday's push into the
752-756 cluster. The move happened, and now the market
has gone still.
Yesterday's resolution played out -- price reached 756.68,
just shy of the session High, then settled. The LONG
path from two mornings ago completed. The question now
is whether this compression resolves into a continuation
above the cluster or a retreat back into the base.
Tactical Cheat Sheet
Resistance: 756.68 -- yesterday's high
Hard resistance: 758.02-759.32 -- next structure above
Current price: 754.87
Support: 750.3-752.15 -- base of the move
Key support: 741.22-742 -- prior consolidation
Thesis line: 721.23
Continuation path:
Vol Elev climbs off 4th percentile with RCZ following,
IMP scores 1+ in PART mode, clears 756.68 cleanly
Target: 758-759
Retreat path (matching the Q4 SHORT direction):
Price fails to hold 752 with Vol Elev entering on a
down move, IMP loads EXT as ATR expands off 2nd
Target: 742 retest
What the Stack Is Watching
ACE's GREEN light against a Q4 SHORT quartile is the
detail worth tracking today. That kind of disagreement
between the surface signal and the underlying read often
resolves when volume returns. Right now there is none.
---
Built with SYNTHESIS v3.3 | SOM / ACE / IMP / SYNTHESIS
Study, not financial advice.
NVDA Cleared a Two-Week Ceiling Yesterday. Today...NVDA Cleared a Two-Week Ceiling Yesterday. Today It Is Sitting Completely Still.
12 of 14 FVGs have now been touched. The structure is getting worked through.
Structural Assessment
SOM is reading Impulse Cont. Bear on NVDA 1H, despite
the move higher. 14 primary FVGs alive, 12 touched,
3 obligations resolved. That ratio -- 12 of 14 touched --
means the pool built during the recent consolidation has
been almost entirely engaged. Very little fresh structure
remains untested above current price.
ACE is YELLOW with Q4 SHORT. CQI 30.4. Last Ann was Bull
CQI 59.29, 11 bars ago -- a very recent bull announcement
that the current SHORT direction is already working against.
IMP is scoring 0/5. NONE mode. WAIT.
RCZ at 1st percentile, ATR at 3rd. Vol Elev at 6th.
This is about as compressed as the dashboard gets --
essentially every component sitting at the floor after
yesterday's breakout through the 210-212 cluster.
The cluster ceiling from the last two weeks of posts is
now behind price. With 12 of 14 FVGs touched, the next
move is likely to be working through whatever structure
remains rather than building new obligation pools.
Tactical Cheat Sheet
Resistance: 212.98-214.55 -- next structure above
Key resistance: 217.76-219.7 -- broken pool zone
Current price: 211.63
Support: 209.34-210.45 -- yesterday's breakout level, now floor
Key support: 204.65-205.75 -- prior cluster base
Thesis line: 198.88
Continuation path:
Vol Elev climbs off 6th percentile, RCZ and ATR follow
from 1st/3rd, IMP scores 1+ in PART mode
Clears 212.98, opens 214.55
Retreat path (matching Q4 SHORT direction):
Price fails to hold 209.34 with Vol Elev entering on
a down move, IMP loads EXT
Target: 205.75 retest
What the Stack Is Watching
The 11-bar-old bull announcement and the current Q4
SHORT direction are pointing different ways at near-zero
volume. With almost the entire FVG pool already touched,
whatever happens next is more likely to be a clean move
through open space than a fight through structure.
---
Built with SYNTHESIS v3.3 | SOM / ACE / IMP / SYNTHESIS
Study, not financial advice.
BTC - Pulled Back From 67,264 Overnight But...BTC Pulled Back From 67,264 Overnight But Hasn't Given Up Much Ground.
The range it's consolidating in tells you more than the pullback does.
Structural Assessment
SOM is reading Choppy Bull transitional on the 1H.
2 primary FVGs alive, 0 touched. On the 15m, 3 primary
alive. Structure is thin -- this move has not built dense
obligation pools, consistent with the fast, clean character
of the run from 60K to 67K this week.
1H: ACE GREEN, Q3 neutral. CQI 44. Last Ann was Bull
CQI 79.11, 92 bars ago -- conviction has faded somewhat
from that high but remains positive. IMP 0/5, NONE, WAIT.
RCZ at 75th percentile, ATR at 77th. Both still elevated
from yesterday's expansion -- this hasn't fully reset.
Vol Elev at 49th. BTC Thu Gate: Tuesday.
15m: price is consolidating in a defined range between
65,860 and 66,254, with Vol Elev at 78th percentile against
RCZ at 37th and ATR at 40th. Volume is more active than the
range suggests it should be. That combination -- elevated
volume inside a tightening range -- is the same contested
compression signature seen earlier this month, where
participation continues while range refuses to expand.
Yesterday's EXT exhaustion thesis got a partial answer:
price reached 67,264, just short of the 67,524 hard
resistance, then pulled back. Not a clean rejection, not
a continuation.
Tactical Cheat Sheet
Resistance: 66,678-66,800 -- nearest overhead cluster
Key resistance: 67,264 -- yesterday's high
Hard resistance: 67,524.92 -- the level from two posts ago
Current price: 66,441
Support: 65,890.29 -- key structural level
Key support: 65,033-65,607 -- consolidation floor
Thesis line: 63,796.21
Two paths from the 65,860-66,254 range:
Continuation toward 67,524:
Vol Elev sustains above 70th on the 15m as price clears
66,254, RCZ and ATR resume climbing on the 1H from
75th/77th, IMP scores 1+ in PART mode
Gap-fill thesis gains weight:
Price fails to clear 66,678 again, breaks below 65,890
with volume, RCZ drops back toward the floor as the
1H resets, opening the 64,000-64,759 zone
What the Stack Is Watching
The 1H hasn't reset from yesterday's expansion -- RCZ
and ATR are still elevated rather than fully compressed.
That's unusual for an overnight session and suggests the
move isn't finished resolving. The 15m range is the
near-term tell. Whether it breaks up toward 67,524 or
down toward the gap fill zone is today's question.
---
Built with SYNTHESIS v3.3 | SOM / ACE / IMP / SYNTHESIS
Study, not financial advice.
USOIL BULLS WILL DOMINATE THE MARKET|LONG
USOIL SIGNAL
Trade Direction: long
Entry Level: 78.41
Target Level: 81.84
Stop Loss: 76.13
RISK PROFILE
Risk level: medium
Suggested risk: 1%
Timeframe: 1h
Disclosure: I am part of Trade Nation's Influencer program and receive a monthly fee for using their TradingView charts in my analysis.
✅LIKE AND COMMENT MY IDEAS✅
USDCHF, 4H Bullish Set Up
USDCHF has broken out of a consolidation pattern on the 4H timeframe, signalling a potential bullish continuation. Price is currently retesting the upper boundary of the breakout zone, which may now act as support.
If the retest holds, buyers could step back in and drive the pair higher toward the next key resistance level.
TP1: 0.80125
TP2: 0.80950
Japan 225: History made at 70,000 MACD is flashing a warning?History was made in Tokyo on 16 June 2026. The Nikkei 225 touched the 70,000 level intraday for the first time since Japan's asset bubble burst back in 1989 thanks to a unique combination of macro tailwinds. News of the preliminary peace accord between the US and Iran announced over the weekend sparked a rally in Asian markets. After gaining 4.99% to close at 69,317 on Monday, the index continued the momentum on Tuesday when it was confirmed that Bank of Japan had raised interest rates by 25 basis points to 1.0% the highest policy rate since 1994. What's remarkable about this scenario is that the expected yen-based selloff never materialized, with the index managing to close higher again by 0.46%. This structural bull market has been supported by foreign investment of around 16 trillion yen since April 2025, an unprecedented AI-driven semiconductor industry featuring companies such as Advantest and Disco Corp, and 14% YOY earnings growth in the Q1 2026 TOPIX constituents.
The daily chart, nevertheless, has started delivering a message that merits close consideration. The truth of the matter is that what price behavior is actually indicating is that the market has worked for its trend but is showing signs of exhaustion at its very core. The technical set up of EMAs is still bullish , prices have honored their dynamic support through all the moving averages along the rally, and every time price retreated, a new leg up was forged. Such commitment to trading discipline distinguishes the momentum market from the runaway trend. In much the same vein, the RSI indicator is bullish its level lies above the signal line suggesting that bullish pressure continues to mount and most importantly, it has not crossed the overbought range yet.The ADR is becoming more volatile as ranges are widening, and such volatility shows that traders are highly confident and are not distributing their positions. As far as the technical indicators on the chart are concerned, there is one aspect about the MACD that can be questionable. The MACD line stays above the signal line, thus the bullish setup remains intact, however, the histogram bars start to shrink and turn into red color gradually. That is no sign of a trend reversal but rather signals that the market needs some time to digest the new level of 70,000 that has been broken during the day but is not closed yet.
Trade recommendation
Direction : Long
Entry : 67,000 – 68,000 (retest of breakout zone on post BOJ consolidation)
Primary target : 70,000
Secondary target : 72,000
Stop loss : 65,430
Technical scenarios
Bullish continuation : The outlook stays positive if the index holds above the 9-day EMA. Sustaining RSI over 60 and reclaiming green MACD momentum after a daily close above 70,000 would confirm structural support, targeting 72,000.
Pullback and reload : Post-70,000 profit-taking may cause red MACD histogram bars. A retest of the 67,000–68,000 breakout zone is likely; provided the 20-day EMA holds, this consolidation offers a strategic entry point for traders.
BOJ shock unwind : Hawkish BOJ policy could drive the yen past 155, triggering carry trade liquidations. Breaking RSI 50 and the 20-day EMA would expose 63,000 and the 61,800 Fibonacci level, though this remains secondary unless a close below 65,427 occurs.
EUR/USD BEARS ARE STRONG HERE|SHORT
EUR/USD SIGNAL
Trade Direction: short
Entry Level: 1.160
Target Level: 1.158
Stop Loss: 1.162
RISK PROFILE
Risk level: medium
Suggested risk: 1%
Timeframe: 1h
Disclosure: I am part of Trade Nation's Influencer program and receive a monthly fee for using their TradingView charts in my analysis.
✅LIKE AND COMMENT MY IDEAS✅