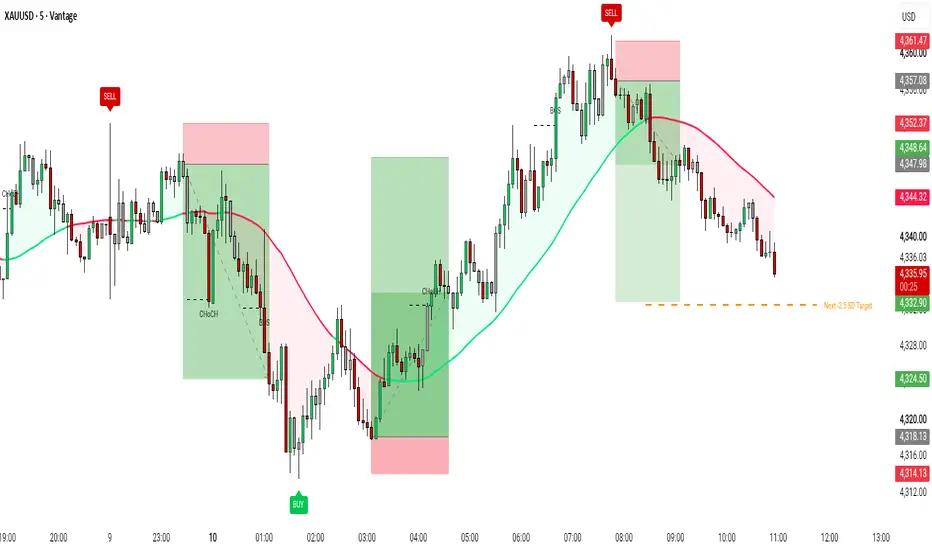
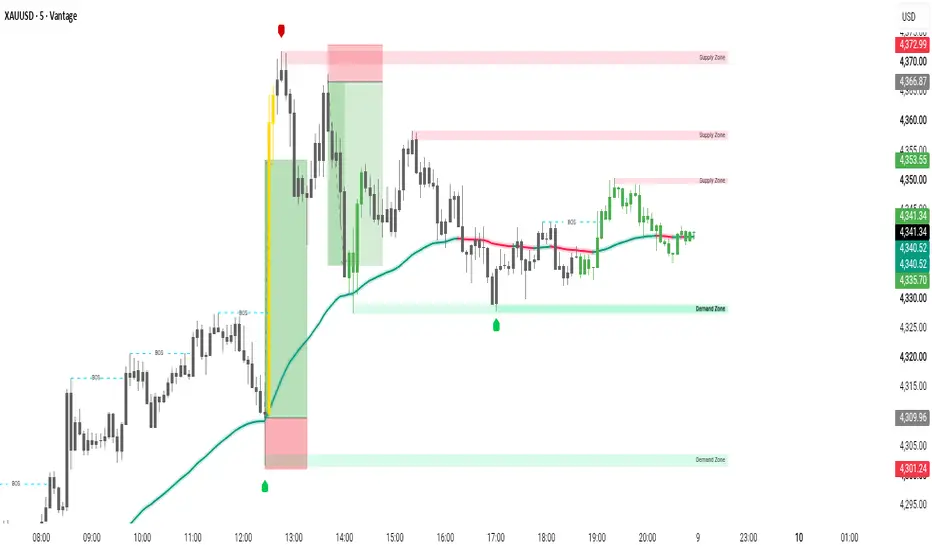
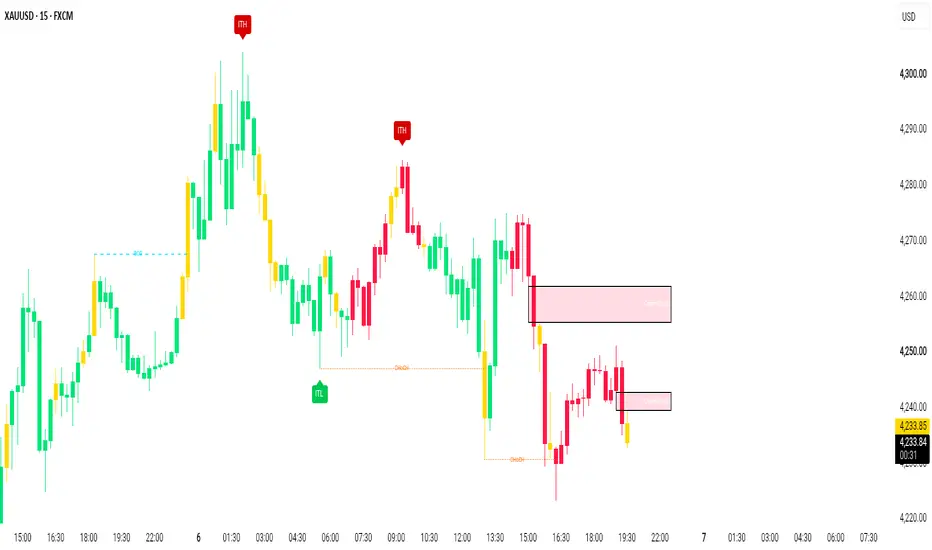
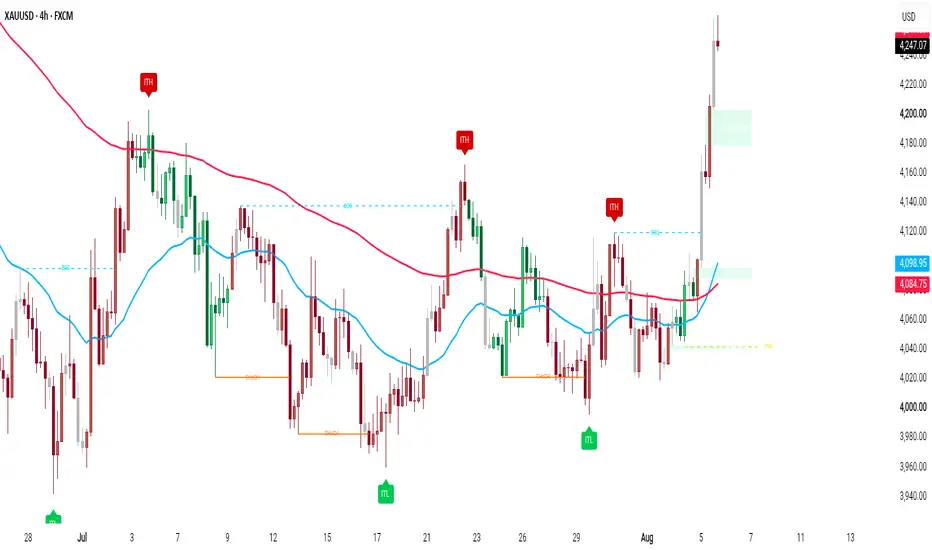
Breaking Ray [vganesh]Breaking Ray — Anchor a Level, Watch It Break
## Overview
Breaking Ray anchors a horizontal ray to a single candle you click on — its top, bottom, or both. The ray extends forward indefinitely, exactly like TradingView's built-in Ray drawing tool, until price actually breaks it. At that moment it freezes into a fixed line segment running from the anchor candle to the candle that broke it, so your chart keeps a permanent, uncluttered record of exactly when and where a level gave way.
It works the same way the built-in Anchored VWAP does: add the indicator, click the candle you want to anchor to, and you're done. Want to track several candles at once? Add another instance of the indicator for each one — every instance is independent.
## How It Works
- **Anchoring**: click any candle (or reposition later via the target icon in Settings) to set the ray's origin. You choose whether it originates from that candle's high, low, or both.
- **Breaking**: each bar, the script checks whether price has broken the level (wick or close, your choice). The instant it does, the ray stops extending and locks into a plain line segment — a visual record of exactly how long that level held.
- **Multi-timeframe aware**: set "Anchor Candle's Timeframe" to the timeframe you clicked on (e.g. "D" for a Daily candle), and the ray will show the correct level and starting point no matter what timeframe you switch the chart to afterward.
## Key Features
- Click-to-anchor UX — no manual price/time entry required
- Draw from the candle's Top, Bottom, or Both
- Break detection by wick touch or candle close
- Optional halo line and a price label (Left / Center / Right anchored) so the ray stays legible even on busy, lower-timeframe charts
- Broken rays can be kept as a permanent segment or discarded entirely
- Built-in alerts, including a dynamic message with the ticker, which side broke, and the exact price
- On-chart diagnostics (an optional debug label) if a ray isn't behaving as expected
## How To Use
1. Add the indicator to your chart.
2. Click the candle you want to anchor to when prompted.
3. If you plan to view the ray on a timeframe other than the one you clicked on, set "Anchor Candle's Timeframe" to match (e.g. "D", "4H").
4. Choose Top, Bottom, or Both under "Draw Ray From".
5. Adjust style, break sensitivity, and label settings to taste.
6. Repeat with a new indicator instance for each additional candle you want to track.
## Alerts
Create an alert on this indicator with the condition **"Any alert() function call"** and set the alert's Message field to `{{alert_message}}` to receive the dynamic message: `{{ticker}} Top ray broken at ` (or Bottom). A generic "Ray Broken" condition is also available for a simple yes/no trigger.
## Notes
- One indicator instance tracks one anchor candle by design — this keeps each ray independently configurable (its own color, break rule, timeframe, etc.).
- The ray's exact starting bar is timeframe-dependent: it points to the specific candle where the high/low actually printed, so the same anchor can look slightly different in position (never in price) depending on what timeframe you're viewing.
## Disclaimer
This script is provided for informational and educational purposes only. It does not constitute financial advice, and past levels holding or breaking are not indicative of future price behavior. Always do your own research and manage risk appropriately.
Indicador

52 Week Quarterly Previous Day High Low Mid52-Week High/Low, Quarterly High/Low (13-Week) & Previous Day High / Low / Mid
**A clean, all-in-one context indicator combining intraday reference levels and long-term high/low structure — built for traders who want key levels without cluttering the chart.**
---
🔹 What It Plots
1. Previous Day High / Low / Mid
Draws live, auto-updating horizontal lines at the prior trading day's high, low, and midpoint. These lines extend in real time as the current session develops, giving you an instant read on where price stands relative to yesterday's range — a level watched closely by intraday and swing traders alike for breakout, reversal, and mean-reversion setups.
2. 52-Week High / Low
Calculated from weekly data, this plots the true 52-week high and low (1-year lookback) — a level closely followed for breakout confirmation, momentum screens, and macro trend context. Choose whether the calculation uses candle highs/lows or closing prices to match your preferred definition of "range."
3. Quarterly High / Low (13-Week)
The same logic applied to a 13-week (one quarter) lookback, useful for spotting intermediate-term range breaks and consolidation zones that longer 52-week levels can miss.
4. Smart Merged Labels
Instead of stacking overlapping "YH," "QH," "YL," "QL" tags on top of each other when the yearly and quarterly levels converge, the indicator automatically merges them into a single clean "YH/QH" or "YL/QL" label — keeping your chart readable even when the two timeframes align.
---
🔹 Why Use It
Most traders juggle several separate indicators to track daily levels and long-term range context. This script consolidates all three into one lightweight overlay:
- ✅ Spot intraday breakouts against yesterday's range
- ✅ Identify major support/resistance from Yearly High/Low (52-week) and Quarterly High/Low (13-week) extremes
- ✅ Keep the chart clean with automatic label merging and full visibility toggles
---
🔹 Customization
Every component can be shown, hidden, or recolored independently:
- Toggle previous day High/Low/Mid colors
- Toggle Yearly and Quarterly High/Low visibility
- Choose High/Low vs. Close basis for the range calculations
---
🔹 How to Use It
- Intraday traders: Watch for reactions and breakouts at the previous day's high/low/mid, especially during the first hour of the session.
- Swing traders/Position/breakout traders: Treat the 52-week and 13-week highs/lows as major structural levels; a decisive close beyond them often signals a shift in the dominant range.
---
*As with any tool, this indicator is designed to provide context, not standalone signals. Combine it with your own risk management and trade plan.* Indicador

Precedent [ThrowMaster]===============================================================
WHAT IT IS
===============================================================
Precedent does not predict. It measures.
Every time a defined market event confirms on your chart, Precedent
records what price actually did over the following N bars. Once enough
comparable records have accumulated, it displays the empirical
distribution of those recorded outcomes: how far price travelled, how
often it reached a given distance, and how many bars that took.
The question it answers is narrow and deliberately so:
"On this symbol, on this timeframe, when this kind of event happened
at this kind of price level in this kind of market condition, what
followed afterwards, and across how many cases?"
Every number shown is measured from the visible history of the chart you
are looking at. Nothing is imported from another market, no outcome
percentages are hard-coded, and no distribution shape is assumed. If the
chart has not yet produced enough comparable cases, the indicator stays
silent and tells you how many it has.
This is a context tool. It produces no buy or sell signals, no entry
prices, and no stop levels, and it is not designed to be used as one.
Please read the section titled THE MOST IMPORTANT WARNING before using
it on a live chart.
===============================================================
HOW IT WORKS
===============================================================
1. LEVEL MAP
A running inventory of prices that carry structural meaning is
maintained bar by bar:
- Swing pivots confirmed with a symmetrical left/right lookback
(default 21 bars each side for external structure, 5 for internal).
- Equal highs and equal lows: when a new pivot lands within the merge
tolerance of an existing level, that level's touch count increases
rather than a second level being created.
- Unfilled fair value gaps: a three-bar imbalance where the current
bar's low is above the high from two bars ago (or the mirror for
the bearish case). Each additional gap overlapping the same price
adds to that level's weight, so three gaps stacked at one price
are recorded as one level carrying three factors.
- Order blocks: the extreme of the last opposite-coloured candle
immediately before a displacement bar, where displacement means a
body in the top 15 percent of the last 100 bodies AND the move
takes out the most recent internal pivot. Displacement alone is not
enough; it must be tied to a structural break.
- Previous day and previous week high and low, requested with a
one-bar offset so no unclosed higher-timeframe data is used.
Each level accumulates a WEIGHT equal to the number of independent
factors coinciding there, plus a bonus for repeated touches and for age
beyond 200 bars. Two factors closer together than the merge tolerance
(default 0.25 x ATR) are treated as one level with two factors, never as
two levels. This prevents an order block that naturally sits inside a
fair value gap from being counted twice.
A level whose weight reaches the MAJOR threshold (default 4) is
classified MAJOR; weight 1 to 3 is MINOR; anything else is NONE.
Note on interpretation: a heavily touched level is treated as more
SIGNIFICANT, not as stronger. Repeatedly tested highs and lows are
exactly the prices that attract sweeps. The indicator does not assume
which way that resolves; it measures what actually followed.
2. EVENT CLASSES
Six event types are detected. Every one of them locks its state at bar
close.
SWP Sweep Price trades beyond a mapped level and closes back
inside it, with a wick in the top quartile of the
last 100 wicks on that side.
SHF Shift A close beyond the most recent confirmed external
swing, in either direction (break of structure or
change of character).
SQZ Squeeze Bollinger Bands (20, 2.0) contract entirely inside
Keltner Channels (20, 1.5 x ATR) for at least five
consecutive bars, then expand back out.
CLX Climax Volume in the top 5 percent of the last 200 bars
combined with a bar range in the top 10 percent.
Where volume is unavailable, range plus body size is
used instead and the dashboard states which.
REJ Reject A bullish or bearish engulfing bar, or a pin bar with
a wick in the top quartile of the last 100, but only
when it occurs at a mapped level. A rejection candle
floating in empty space is not recorded at all.
DIV Divergence Price makes a lower low while cumulative flow makes a
higher low, or the mirror case, measured at confirmed
pivots. Flow is signed by body position within the
bar range and scaled by volume where volume exists.
Divergence is measured against volume-weighted flow, not against an
oscillator. An oscillator derived from price and then compared back to
price adds no independent information; volume is a separate data source.
Two events of the same class are never recorded closer together than the
full horizon. This is a deliberate statistical constraint: it costs
sample size, and it buys the guarantee that no two stored outcomes share
an overlapping future.
3. CONTEXT SCORE
Three voices contribute to an additive score from 0 to 100. Nothing
gates. No voice can block a signal; each only adds weight.
STRUCTURE 35 Whether the recent sequence of confirmed swing highs
and lows agrees with the event's direction.
FLOW 30 The percentile rank of the bar's signed flow over the
last 200 bars, cut to one fifth when its sign
disagrees with the event direction.
HTF 35 Whether the higher timeframe close sits above or below
its own 50-period EMA, in agreement with the event.
The score is then discounted by regime and renormalised back to a 0-100
scale, so scores remain comparable across regimes:
RANGE structure x 0.70 (structure breaks constantly and means
little inside a range)
TRANSITION higher tf x 0.80 (higher timeframe bias is least
reliable while it is turning)
TREND flow x 0.85 (large volume is ordinary in a trend
and therefore less informative)
One correction is applied automatically: Climax and Divergence are
themselves defined from flow, so for those two classes the flow weight
is halved and the freed weight is split evenly between structure and
higher timeframe. Without this, the flow voice would confirm an event
that flow itself created.
The score is converted into a two-level tier by comparing it to the 60th
percentile of past scores for the same event class on this chart. There
is no fixed cut-off number.
4. SIGNATURE AND BACKOFF
Each recorded event is filed under a discrete key:
event class x location class x regime x direction x score tier
Direction is never merged at any level, because upward and downward
outcomes are not symmetrical.
When a new event confirms, the engine looks for stored outcomes sharing
that key. If fewer than the minimum sample (default 20) exist, it drops
the finest component and looks again:
L3 event + location + regime + direction + tier
L2 event + location + regime + direction
L1 event + regime + direction
L0 event + direction
The first level with a sufficient sample is used, and the dashboard
always states which level was used and how many records it contained.
If even L0 is short, nothing is drawn and the dashboard shows
CALIBRATING with the current count.
Seeing L1 or L0 rather than L3 is normal, not a fault. Non-overlapping
sampling produces a limited number of independent cases per chart, and
the backoff exists precisely to handle that honestly rather than
displaying a percentage built on four observations.
5. OUTCOME STORE
For each recorded event the engine tracks, for the following H bars
(default 24):
- excursion at H/4, H/2, 3H/4 and H, expressed in R where R is the
ATR(14) value at the event bar
- maximum favourable and maximum adverse excursion
- the bar number at which the move first reached +1R, +2R and +3R,
or zero if it never did
The record is written to the store only after H bars have fully elapsed.
A projection displayed today is therefore built exclusively from events
that had already finished before it was issued. This is a structural
property of the design, not a discipline that has to be maintained.
6. WHAT IS DRAWN
- An empirical quantile fan. The outer envelope traces the 5th and
95th percentiles of the matched outcomes at each of the four
checkpoints; the inner envelope traces the 25th and 75th; the
dashed centre line traces the 50th. The shape is asymmetric and
heavy-tailed whenever the underlying data is, because the values
are measured percentiles rather than a fitted curve.
- A target line. The median maximum favourable excursion of the
matched set is converted to a price, then snapped to a mapped
structural level if one lies within half an ATR. Statistics choose
the zone; structure chooses the exact price. The label states
"level" when a snap occurred and "stat" when it did not.
- Hit rate and expected bars. Both are read at the nearest whole R
ring (+1R, +2R or +3R) to the target distance, and the ring is
named on the label. Hit rate is the share of matched records that
reached that ring within H bars. The bar count is the median
first-passage time among those records that reached it.
7. RUN TRACKER
A run begins at a confirmed structure shift and ends at the next
confirmed shift in the opposite direction. Within a run, occurrences of
each event class and direction are counted. When the run closes, one
record per class is stored: how many had occurred before the reversal.
The observation unit is therefore the run, not the event. This matters:
counting events directly would produce heavily overlapping samples,
since several events inside one run share the same future. Counting runs
does not.
The panel answers a question most tools ignore entirely: given that a
third bearish divergence has now printed in this uptrend, in what
fraction of past runs on this chart did the reversal arrive by the
third, and in what fraction did the run extend to a fourth or beyond.
8. SELF-AUDIT
Every displayed projection resolves into exactly one of four states, and
these are never merged:
HIT the target was reached first
ADV the -1R reference was reached first
AMB both were touched inside the same bar, so the order is
unknowable from bar data and the case is discarded rather
than claimed
EXP H bars elapsed with neither touched
The dashboard reports the running counts, and separately compares the
average hit rate the tool projected against the hit rate it actually
realised. If those two numbers diverge, the tool is telling you its own
estimates are miscalibrated on this chart.
Two further panels report whether the classification axes carry any
information at all: median outcome for tier A versus tier B, and median
outcome for MAJOR versus MINOR versus NONE locations. If a pair does not
separate, that axis is not contributing, and you are meant to see that.
===============================================================
WHAT MAKES IT ORIGINAL
===============================================================
- Outcome statistics are conditioned on a discrete event signature
and computed from the chart's own history, rather than assumed from
a parametric distribution or imported as fixed percentages.
- Projection targets are snapped onto mapped structural levels, so
the displayed price is a real level rather than a quantile value
floating in empty space.
- The hierarchical backoff makes sparse conditioning explicit: the
display always names the level of specificity that was achievable
and the sample size behind it.
- Sequence statistics use the completed run as the observation unit,
which removes the sample overlap that direct event counting creates.
- The indicator scores its own past projections against outcomes and
displays projected versus realised hit rate on the chart.
===============================================================
HOW TO READ THE CHART
===============================================================
HORIZONTAL LINES
The image below shows the level map alone, with the projection layer
switched off, so the two grades of level can be compared directly: gold
solid lines mark MAJOR levels, thin dotted lines mark MINOR ones.
Two families of horizontal line exist, and they are drawn so that they
can never be confused with each other.
THE LEVEL MAP owns thin dotted lines and gold:
Gold, solid, width 2 A MAJOR level: four or more independent
structural factors coincide at this price.
Washed white, DOTTED, A MINOR level: one to three factors.
width 1
THE TARGET FAMILY owns solid width-2 lines in mint, coral and slate.
No target line is ever drawn dotted or at width 1.
Mint, solid, width 2, The target of the live projection.
full opacity Extends to the right. Only one is live at
a time.
Coral, dotted, width 1 The -1R adverse reference of the live
projection. Removed the moment the
projection resolves. This is a measurement
boundary used to classify the outcome. It
is NOT a stop loss and must not be used as
one.
Once a projection resolves, its target line keeps its full width and
stays solid. Only its colour and opacity change:
Mint, faded HIT: price reached it within the horizon.
Coral, faded ADV: price reached the -1R reference
first.
Slate blue-grey, faded EXP or AMB: the horizon elapsed with
neither touched, or both were touched in
the same bar and the case was discarded.
Resolved lines are retained deliberately. A price that the statistics
selected, and that was then snapped onto a structural level, often
remains structurally relevant afterwards, and it is useful to see where
those prices were. The number retained is configurable and defaults to
six.
Read the fade as expiry of a claim, not as expiry of the price. The
faded line is a record that this price was once selected as a target and
of what happened next. It is not a live target and carries no ongoing
claim about the future.
The image below shows several resolved projections on one chart, so the
three outcome colours can be compared side by side: a faded mint line
where price reached the target, a faded coral line where it reached the
adverse reference first, and a faded slate line where the horizon
elapsed without either being touched. The markers carry the matching
three-letter outcome. Projections that did not work out are shown here
deliberately; the indicator records its own failures and so should its
description.
Level lines are redrawn on each new bar and only levels within six ATR
of current price are displayed, up to fourteen at a time.
THE FAN
Outer shaded band 5th to 95th percentile of matched
historical outcomes.
Inner shaded band 25th to 75th percentile.
Dashed centre line 50th percentile, the median path.
Teal the event pointed upward.
Coral the event pointed downward.
The fan is frozen at the moment the projection is issued and is never
recalculated. It reaches forward exactly H bars.
The next image shows a single live projection close up: the two shaded
bands, the dashed median path, the mint target line, and the label
carrying hit rate, sample size and remaining bars. Note that the bands
are not symmetrical around the median, because they are measured
percentiles rather than a fitted curve.
EVENT MARKERS
A small label prints at each recorded event, below the bar for upward
events and above for downward ones. It contains a three-letter code and
a number:
SWP sweep SHF shift SQZ squeeze
CLX climax REJ rejection DIV divergence
The number is the count of that event class and direction so far inside
the current run. "DIV 3" means this is the third divergence of that
direction since the last structure shift.
When a projection resolves, its marker gains a suffix and changes
colour:
HIT green target reached first
ADV red the -1R reference reached first
AMB amber both touched in the same bar; discarded
EXP amber the horizon elapsed with neither touched
THE TARGET LABEL
Three lines at the right end of the projection:
line 1 the target price, followed by "level" if it was snapped onto
a mapped structural level or "stat" if no level was near
line 2 hit rate and sample size, for example: hit 61% n=38
line 3 while the projection is live: bars remaining and the R ring
the hit rate refers to. Once it resolves, this line is
replaced by "RESOLVED" followed by HIT, ADV, AMB or EXP, and
the whole label takes the matching colour.
The bar count was frozen when the projection was issued and only counts
down. Nothing behind it is recalculated.
THE DASHBOARD
EVENT class, direction, and sequence number in this run
LOCATION MAJOR / MINOR / NONE and the level weight
REGIME RANGE / TRANS / TREND, the context score, tier
SIGNATURE backoff level used and sample size
WITH q50 q75 q95 terminal excursion quantiles measured ALONG the
event's own direction, in R
AGAINST q25 q05 the same distribution's tail measured AGAINST the
event's direction, in R
TARGET price and hit rate
ETA bars remaining and the R ring, or "no open
projection"
RUN EXT how far the current run has extended, in R
FLOW SOURCE "volume" or "proxy"
SEQ 1 / 2 / 3 / 4+ share of past completed runs that reversed after
that many events of this class
RUNS median median count before reversal, and number of runs
TIER A / B median outcome in R for each tier, with counts
LOC MAJ/MIN/NONE median outcome in R for each location class
LEDGER running totals of hit, adv, amb and exp
CALIBRATION average projected hit rate against realised
The dashboard is reproduced below at readable size, since every claim
made in the HOW IT WORKS section is meant to be verifiable there: the
backoff level actually used, the sample size behind it, the quantiles,
the sequence distribution, the two axis-health rows, and the running
comparison of projected against realised hit rate.
WITH and AGAINST are measured relative to the event's own direction, not
relative to the chart. For a downward event, a WITH value of +1.4R means
price fell by 1.4 ATR, and an AGAINST value of -1.8R means price rose by
1.8 ATR before the horizon closed. AGAINST is the row that tells you how
violent the route can be, and it is the row most worth reading before
deciding on any position size.
===============================================================
THE MOST IMPORTANT WARNING
===============================================================
DO NOT TREAT THE GREEN LINE AS A TARGET TO TRADE TOWARD, AND DO NOT
TREAT ANY MARKER AS AN ENTRY SIGNAL.
You will observe the following, and it is the single most dangerous
thing about this indicator:
The projection expires. The bars run out. The label reads "closed". And
then, twenty or fifty bars later, price finally reaches the green line.
It is tempting to read that as the tool having been right after all. It
was not, and here is why that reading destroys accounts:
1. The green line is snapped to a structural level. Structural levels
get revisited eventually, because that is what they are. Price
arriving there after the horizon has expired is not evidence of
anything. It is what levels do.
2. The expected bar count is a median of the cases that reached the
ring. By definition, roughly half of the successful cases took
longer than that. "The estimate elapsed and it is not there yet"
is an ordinary outcome, not a malfunction.
3. Route is not measured. The indicator records where price ended up
and how far it travelled. It does not promise that the path there
was survivable. Price can travel far against you first, and still
arrive. The AGAINST row is the only place the route appears at all,
and even there it is a summary, not a guarantee.
A faded line is a closed case. It has no ETA, no live claim and no
implication that price is still heading there. If price later reaches a
faded line, that is not a delayed hit. It is a structural level being
revisited, which is what structural levels do.
That third point is what actually costs money. A leveraged position
opened on the strength of a hit rate can be liquidated by an adverse
excursion long before the target is reached. The account is closed; the
target being reached afterwards is irrelevant to it. This is not a
remote scenario. It is the ordinary case whenever leverage is applied to
a statistic that describes destinations rather than routes.
The -1R red line does not protect you either. It is a measurement
boundary chosen so outcomes can be classified consistently. It is not a
risk parameter and was never sized to be one.
Precedent is a context tool. It tells you what has typically followed
this kind of moment on this chart, with the sample size attached. Entry
timing, position size, stop placement, leverage and the decision to
trade at all remain entirely yours and must come from a method this
indicator does not contain and does not attempt to contain.
If the only thing you take from a projection is "hit 61 percent, so buy"
you have misread it. The intended reading is closer to: "in 38
comparable cases on this chart, price reached this level within 24 bars
in 61 percent of them, taking a median of 9 bars, and the adverse tail
of that distribution ran to -1.8R."
===============================================================
LIMITATIONS AND REPAINT POLICY
===============================================================
REPAINT BEHAVIOUR, ELEMENT BY ELEMENT
- Event detection, tier assignment and score sampling are locked at
bar close. They do not change afterwards.
- Swing pivots confirm with a delay equal to the pivot length in bars
(default 21). A level cannot appear before its pivot is confirmed.
That delay is the cost of not looking ahead, and it is not avoided
anywhere in this script.
- Higher timeframe values are requested with a one-bar offset, so
only completed higher timeframe bars are used. On the chart
timeframe this means the higher timeframe bias lags by one higher
timeframe bar.
- The fan, the target line and the adverse line are computed once, at
the confirmed bar that issued them, and are never recalculated.
- The dashboard and the countdown update live within the forming bar
by design. The countdown only subtracts from a number that was
frozen at issue; no statistic behind it is recomputed.
KNOWN LIMITATIONS
- The statistics are descriptive, not predictive. They summarise what
has already happened on the chart in front of you. They are not a
forecast and are not out-of-sample.
- Sample sizes are small by construction. Requiring non-overlapping
outcomes limits the number of independent cases available, which is
why the backoff and the visible sample counts exist.
- Until enough completed outcomes exist, nothing is drawn at all. The
image below shows that state: the dashboard reports CALIBRATING and
the current count against the required minimum, and no fan, target
or hit rate appears anywhere on the chart.
- Chart history is finite. On low timeframes the available bars may
cover only a matter of weeks, and possibly only one market regime.
Treat a large sample drawn from a single regime with caution.
- Outcomes are measured at bar resolution. When a bar touches both
the target and the adverse reference, the order is unknowable and
the case is marked ambiguous and discarded rather than assumed.
- Statistics apply only to events this indicator itself defined. If
you identify a setup it did not mark, no displayed percentage
describes it. Borrowing a number from a different occasion is a
misuse.
- Where a symbol provides no usable volume, flow falls back to a
body-position proxy on the same percentile scale. The dashboard
states which is in use. Mixing the two would corrupt the store, so
the fallback applies to the whole session or not at all.
- Changing the higher timeframe from Auto to Manual changes what the
signature key means. The stored outcomes are therefore cleared and
rebuilt from zero when you do it. This is intentional.
- Nothing here is tuned. There is no optimiser and no fitted weight.
Thresholds are percentiles over disclosed rolling windows. If a
parameter is changed, the level map and the statistics change with
it, and the sample must accumulate again.
===============================================================
DISCLAIMER
===============================================================
This script is published for educational and analytical purposes. It is
not financial advice, not a recommendation to buy or sell any
instrument, and not a trading system. It produces no entry signals, no
stop levels and no position sizing.
Historical measurement does not indicate future results. Markets change
regime, and a distribution measured on past bars may not describe the
next ones. Trading carries risk of loss, and leveraged trading carries
risk of total loss. Any decision taken while this indicator is on the
chart remains entirely the responsibility of the person taking it.
Indicador

Statistical Reversal ZonesStatistical Reversal Zones
Statistical Reversal Zones is an intraday support and resistance indicator designed to identify potential price reaction and reversal areas based on statistical distance from the Daily Open.
Instead of plotting traditional single support and resistance lines, the indicator creates configurable reversal zones above and below the day's opening price. Resistance zones are displayed as R1–R4, while support zones are displayed as S1–S4.
When price enters a zone and subsequently rejects it, the indicator tracks each confirmed reaction. Repeated reactions from the same zone are numbered 1, 2, 3, 4..., helping traders visually identify zones that price has respected multiple times during the session.
The built-in dashboard provides the current price range and status of every zone:
WAITING: Price has not interacted with the zone
IN/TOUCHED: Price has reached the zone
REJECTED: Price entered the zone and subsequently closed back through its inner boundary
BROKEN: Price closed beyond the outer boundary of the zone
Once a zone is broken, its BROKEN status remains active for the rest of that trading day.
The indicator also provides customizable zone widths, optional center lines, Daily Open display, zone-entry alerts, rejection indications, and individual controls for displaying each R/S zone.
Important: These zones represent statistical price-reaction areas and should not be interpreted as guaranteed reversal points or standalone Buy/Sell signals. They are best used alongside price action, trend, volume, VWAP, or other confirmation methods.
Recommended use: Intraday trading and identifying potential support, resistance, rejection, breakout, and reversal areas. Indicador

Support and Resistance Zones, Key Levels & Hold Rate [LunqFX]Support and resistance indicators all draw the same picture: a set of key levels and SR zones detected from swing pivots, every one of them looking as important as the next. Five price levels on the chart and no way to tell which one the market actually respects — so you place the order at whichever support or resistance price bounced off last, and call it analysis.
This support and resistance indicator keeps score. Each auto-detected SR zone carries the number of times it has been tested and how many of those tests it held, printed on the level itself:
1.15370 · 71% · 5 of 7 1.14344 · 50% · 1 of 2 1.13763 · 67% · 2 of 3
A key level that has held five of seven tests and one that has held one of six are not the same object, and until that number is on the chart you are trading them as if they were.
Included: automatic support and resistance zone detection from confirmed pivots, a hold-rate record on every level, strength-weighted drawing, a dashboard showing the nearest support and resistance either side of price, and optional buy and sell signals with a trend filter and alerts.
❶ HOW THE SUPPORT AND RESISTANCE ZONES ARE BUILT
Swing points come from confirmed pivots, so a level only exists once the bars on both sides of it have closed — nothing appears and then vanishes. Pivots that land close to each other are merged into a single zone rather than stacked as near-duplicate lines, with the merge distance measured in ATR so it adapts to the instrument.
A zone widens as new pivots join it, but only up to a ceiling. Past that it re-centres on the pivot that just touched it. Without that rule a level slowly swallows everything around it and turns into a band, and the count then measures touches of a band instead of touches of a price.
❷ THE HOLD RATE — what no other support and resistance tool shows
A test opens when price trades into the zone. It resolves on a CLOSED bar, one of two ways:
▸ HELD — price closed back out the side it came from, clear of the zone by a fraction of ATR. The margin matters: without it, a close one tick beyond the edge counts as a rejection, which is how level indicators manufacture events out of noise. ▸ BROKEN — price closed through to the other side.
Nothing is counted while a test is still open. And a fresh test cannot begin until the previous one has had room to breathe, because price chopping inside a zone for a week is one consolidation, not twenty separate tests of the level.
Samples of fewer than four tests are marked with a tilde. Two tests producing "100%" is noise, and the chart says so rather than letting the number stand.
❸ LEVEL STRENGTH YOU CAN SEE
Fill density, border thickness and the halo behind each zone all scale with how often the level has been tested, and levels holding above 60% are drawn in a brighter shade. The chart ranks its own levels — the strongest one is the one that looks strongest, with no arithmetic required from you.
❹ THE DASHBOARD — nearest support and resistance
The nearest level above and the nearest level below, each with its price and its record. When there is no tracked level on one side the panel says exactly that, rather than printing a dash that reads like a fault.
❺ BUY AND SELL SIGNALS — built in, switched off
The indicator includes buy and sell signals: a buy label when a support test holds, a sell label when resistance holds. Turn them on in the Signals section — the switch is the first setting in the group, and every alert works from them.
They ship switched OFF, and the reason is worth stating plainly. A rejection at a support or resistance level is a fact. What price does afterwards is not. A level also tends to weaken with each test as the orders behind it are consumed, so "this level held four times" is not evidence that it will hold a fifth — if anything the reverse. Any indicator that hands you an arrow on every bounce is selling you that assumption without saying so.
When switched on, a signal has to clear six filters before it prints: the level must have been tested enough times to have a record, it must hold more often than it breaks, the rejection must close clear of the zone by a fraction of ATR, price must still be near the level, the trend must agree with the direction, and both the chart as a whole and that particular level must have been quiet since the last one. Set that way they are rare. Treat them as a prompt to look, not as a call to act.
HOW TO USE IT
1 — Choose where to place a resting order. Between two levels the same distance away, the one with the better record is the better limit.
2 — Choose where to expect a break. A level holding one test in six is telling you something too: price is likely to go through it, which makes it a poor place to fade and a reasonable place to trade a breakout.
3 — Place stops behind proven levels. A stop tucked behind a level that has held five of seven has a structural reason to be there.
4 — Read the whole set at once. This is the reading most traders never get. If every level on the chart is showing 30–40%, the market is not respecting levels at all right now — it is trending or reacting to news, and level trading is the wrong approach for the session. When most levels sit at 70%+, the market is rotating and levels are worth trading. That judgement usually takes weeks of screen time; here it is on the chart.
HOW IT WORKS
Pivots of your chosen length define candidate levels. Each new pivot either joins the nearest existing zone within the merge distance or opens a new one; zones are capped in width and the oldest is dropped once the limit is reached. Every zone tracks four numbers: tests, holds, the bar its last test resolved on, and the bar it last signalled on. Tests resolve on closed bars only, with a rejection margin in ATR and a minimum gap between tests. The hold rate is simply holds divided by tests, and the drawing weight is derived from the test count.
Works on any symbol and timeframe. On daily charts and above, leave the minimum test count at one — a level there rarely gets a second test before it matters. On fast intraday charts raise it, since levels are tested often.
SETTINGS
▸ Levels — pivot length, how many levels are kept, how far back they draw, merge distance, zone thickness, maximum width, minimum tests to draw, and the gap between tests. ▸ Signals — off by default; prior holds required, minimum tests before a level may speak, minimum hold rate, cooldowns, distance from price and rejection strength. ▸ Trend Filter — direction requires both price position and the slope of the average, so a range satisfies neither side. ▸ Visuals — extension, labels, candle colouring, dashboard position.
ALERTS — buy signal, sell signal, and any signal. All fire on closed bars only.
NON-REPAINTING — levels are built from confirmed pivots and every test resolves on a closed bar. A record that has printed never changes retroactively, and a level that has appeared never disappears from history.
WHY THESE PARTS ARE ONE SCRIPT
The levels, the record and the visual weight describe one object. Detection alone gives you lines with no way to rank them. The record alone has nothing to attach itself to. The weighting exists only so the record can be read at a glance instead of counted. Take any one away and the other two stop being useful, which is why they ship together rather than as three indicators.
This indicator is an educational market-analysis tool, not financial advice. The hold rate describes what has already happened at a level on the loaded chart; it does not predict what will happen next. Always confirm with your own analysis and manage your risk. Indicador

Sattam Supply | DemandSATTAM Supply | Demand Zones (Multi-Timeframe)
OVERVIEW
This indicator maps supply and demand zones from a timeframe you choose and draws them on your current chart. Instead of marking every swing point, it only accepts a swing that is followed by a genuine displacement move away from that level, measured against volatility (ATR). The goal is a chart with a small number of meaningful zones rather than dozens of overlapping boxes. Zones are drawn as boxes with a 50% midline, extended to the right until price invalidates them.
HOW A ZONE IS CREATED
A zone is created in two stages.
1) Pivot detection
The script looks for a pivot high (for supply) or a pivot low (for demand) on the selected timeframe. A pivot needs "Pivot Length" bars on each side to confirm, so the swing is a completed structural turning point and not a temporary extreme.
2) Displacement confirmation
A confirmed pivot is not enough on its own. After the pivot confirms, the script watches the next few bars ("Displacement Window") for a decisive close away from the level:
- Supply: a close below the pivot candle's low by more than ATR(14) x displacement factor
- Demand: a close above the pivot candle's high by more than ATR(14) x displacement factor
The ATR value used is the one captured at the pivot bar itself, so the confirmation threshold reflects the volatility that existed when the level formed, not the volatility at the moment of the breakout. If no qualifying close appears inside the window, the pivot is discarded and no zone is drawn.
The displacement factor is derived from the "Sensitivity" input: max(0.10, 1.15 - Sensitivity x 0.10). Higher sensitivity means a smaller required move, which produces more zones. Lower sensitivity demands a stronger reaction and produces fewer, more selective zones.
ZONE BOUNDARIES
Each zone is anchored at the pivot candle's own time, so the box starts where the level actually formed.
- Supply: the top is the pivot high, the bottom is the pivot candle's body top, min(open, close).
- Demand: the bottom is the pivot low, the top is the pivot candle's body bottom, max(open, close).
If that body-to-wick distance is unusually thin, the height is expanded to a volatility-based minimum (ATR at the pivot x width factor) so the zone stays usable on quiet candles. The "Width" input scales that minimum.
ZONE MANAGEMENT
Overlap filter: a new zone is rejected if it overlaps an existing zone by more than 45% of the smaller zone's height, or if it forms close in time with a nearly identical midpoint. This prevents clusters of near-duplicate boxes around the same level.
Zone limit: "Max Zones Per Side" caps how many supply and demand zones stay on the chart. When the limit is reached, the oldest zone is removed.
Invalidation: with "Hide Invalidated Zones" enabled, a supply zone is deleted after a close above its top and a demand zone after a close below its bottom. Disable it to keep broken zones visible for context.
Extension: active zones extend to the right by "Zones Offset" bars of the current chart so they stay visible ahead of price.
REPAINTING
Zones are committed only from closed bars of the selected timeframe. When a new higher-timeframe bar opens, the script reads the signal produced by the bar that just closed, and request.security is called with lookahead_off. A zone that has been drawn will not move or disappear on a later refresh, and no zone appears from a still-forming higher-timeframe bar.
Because of this, a zone always appears with a delay of at least "Pivot Length" bars plus the displacement bars on the selected timeframe. That delay is inherent to pivot-based confirmation.
SETTINGS
Source
- Timeframe: the timeframe the zones are calculated from (default 4H). Leave empty to use the chart timeframe.
- Pivot Length: bars required on each side of a swing for it to count as a pivot.
- Sensitivity: 1 to 10. Higher values loosen the displacement filter and allow more zones.
- Displacement Window: how many bars after a pivot confirms the script keeps waiting for a displacement close before discarding the pivot.
Zones
- Width: scales the volatility-based minimum zone thickness.
- Zones Offset: how far zones extend to the right.
- Max Zones Per Side: maximum simultaneous supply and demand zones.
- Hide Invalidated Zones: remove zones after price closes through them.
Style : fill and border colors for supply and demand, plus midline style (dashed, dotted, solid).
Timeframe Label : an on-chart label showing which timeframe the zones come from, with position, size and color options.
HOW TO USE IT
Set the Timeframe higher than your chart timeframe, for example 4H zones on a 15m chart, so you keep a structural reference while working on a lower timeframe. Zones mark areas where an imbalance formed and price left the level quickly. They are areas of interest for observing price behaviour, not signals in themselves.
Reduce Sensitivity and raise Pivot Length on noisy or lower timeframes if too many zones appear. Raise Sensitivity on higher timeframes or slow instruments if too few appear.
ALERTS
Two alert conditions are available: New Supply Zone and New Demand Zone. Both fire when a zone is confirmed from a closed higher-timeframe bar.
NOTES AND LIMITATIONS
- The indicator describes structure that has already formed. It does not predict direction and produces no buy or sell signals.
- Zone quality depends on the selected timeframe and instrument. Settings that work on one market will not automatically suit another.
- Very illiquid symbols or timeframes with wide gaps may produce fewer valid displacement confirmations.
This script is published for educational and analytical purposes only. It is not financial advice and does not guarantee any result. Always test any tool on your own instruments and timeframes before relying on it.
مؤشر مناطق العرض والطلب - متعدد الفريمات
نظرة عامة
يرسم المؤشر مناطق العرض والطلب من فريم تختاره أنت ويعرضها على الشارت الحالي. بدلاً من تعليم كل قمة وقاع، لا يقبل المؤشر السوينق إلا إذا تبعته حركة اندفاع حقيقية بعيداً عن المستوى، تُقاس نسبةً إلى تذبذب السوق عبر ATR. الهدف شارت فيه عدد قليل من المناطق المهمة بدل عشرات الصناديق المتداخلة. تُرسم المنطقة على شكل صندوق مع خط منتصف عند 50% ويمتد لليمين حتى يُبطله السعر.
كيف تتكوّن المنطقة
المرحلة الأولى: البحث عن قمة بيفوت للعرض أو قاع بيفوت للطلب على الفريم المختار. يحتاج البيفوت إلى عدد الشموع المحدد في Pivot Length على كل جانب حتى يتأكد، حتى يكون نقطة انعكاس بنيوية مكتملة لا مجرد طرف مؤقت.
المرحلة الثانية: البيفوت وحده لا يكفي. بعد تأكده يراقب المؤشر الشموع التالية خلال Displacement Window بحثاً عن إغلاق حاسم بعيداً عن المستوى:
- العرض: إغلاق أسفل قاع شمعة البيفوت بمسافة أكبر من ATR(14) مضروباً في معامل الاندفاع.
- الطلب: إغلاق أعلى قمة شمعة البيفوت بمسافة أكبر من ATR(14) مضروباً في معامل الاندفاع.
قيمة ATR المستخدمة هي القيمة المسجّلة عند شمعة البيفوت نفسها، أي أن حد التأكيد يعكس التذبذب الذي كان قائماً وقت تكوّن المستوى لا وقت الاختراق. وإذا لم يظهر إغلاق مؤهّل داخل النافذة يُلغى البيفوت ولا تُرسم منطقة.
معامل الاندفاع مشتق من إدخال Sensitivity بالمعادلة: max(0.10, 1.15 - Sensitivity x 0.10). كلما ارتفعت الحساسية قلّت المسافة المطلوبة وزاد عدد المناطق، وكلما انخفضت تطلّب المؤشر رد فعل أقوى وأعطى مناطق أقل وأكثر انتقائية.
حدود المنطقة
المنطقة مثبّتة على وقت شمعة البيفوت نفسها، فيبدأ الصندوق من حيث تكوّن المستوى فعلاً.
- العرض: القمة هي قمة البيفوت، والقاع هو أعلى جسم الشمعة أي min(open, close).
- الطلب: القاع هو قاع البيفوت، والقمة هي أسفل جسم الشمعة أي max(open, close).
وإذا كانت هذه المسافة رفيعة بشكل غير معتاد يُوسَّع الارتفاع إلى حد أدنى مبني على ATR عند البيفوت مضروباً في معامل العرض، حتى تبقى المنطقة قابلة للاستخدام على الشموع الهادئة. ويتحكم إدخال Width في هذا الحد الأدنى.
إدارة المناطق
فلتر التداخل: تُرفض أي منطقة جديدة تتداخل مع منطقة قائمة بأكثر من 45% من ارتفاع الأصغر بينهما، أو تتكوّن قريباً منها زمنياً بمنتصف شبه مطابق. هذا يمنع تراكم صناديق شبه مكررة حول المستوى نفسه.
حد المناطق: يحدّد Max Zones Per Side أقصى عدد للمناطق على كل جهة، وتُحذف الأقدم عند تجاوز الحد.
الإبطال: مع تفعيل Hide Invalidated Zones تُحذف منطقة العرض بعد إغلاق فوق قمتها، ومنطقة الطلب بعد إغلاق تحت قاعها. ويمكن تعطيله للإبقاء على المناطق المكسورة كسياق.
الامتداد: تمتد المناطق النشطة لليمين بمقدار Zones Offset من شموع الشارت الحالي لتبقى ظاهرة أمام السعر.
إعادة الرسم
تُعتمد المناطق من الشموع المغلقة فقط على الفريم المختار. عند فتح شمعة جديدة على الفريم الأعلى يقرأ المؤشر الإشارة الناتجة عن الشمعة التي أُغلقت للتو، وتُستدعى request.security بخيار lookahead_off. لذلك المنطقة بعد ظهورها لا تتحرك ولا تختفي عند التحديث، ولا تظهر أي منطقة من شمعة لم تُغلق بعد.
ونتيجة لذلك تظهر المنطقة متأخرة بمقدار شموع البيفوت زائد شموع الاندفاع على الفريم المختار، وهو تأخير ملازم لأي تأكيد مبني على البيفوت.
الإعدادات
المصدر
- Timeframe: الفريم الذي تُحسب منه المناطق، والافتراضي 4 ساعات. اتركه فارغاً لاستخدام فريم الشارت.
- Pivot Length: عدد الشموع المطلوبة على كل جانب لاعتماد البيفوت.
- Sensitivity: من 1 إلى 10، والقيم الأعلى تخفف فلتر الاندفاع وتسمح بمناطق أكثر.
- Displacement Window: عدد الشموع التي يواصل المؤشر خلالها انتظار إغلاق الاندفاع بعد تأكد البيفوت قبل إلغائه.
المناطق
- Width: يتحكم في الحد الأدنى لسماكة المنطقة المبني على التذبذب.
- Zones Offset: مدى امتداد المناطق لليمين.
- Max Zones Per Side: أقصى عدد متزامن لمناطق العرض والطلب.
- Hide Invalidated Zones: حذف المناطق بعد إغلاق السعر خلالها.
الستايل: ألوان التعبئة والحدود للعرض والطلب، ونمط خط المنتصف متقطع أو منقّط أو متصل.
مؤشر الفريم: لوحة صغيرة على الشارت تبيّن الفريم الذي جاءت منه المناطق، مع خيارات الموضع والحجم واللون.
طريقة الاستخدام
اجعل الفريم في الإعدادات أعلى من فريم الشارت، مثل مناطق 4 ساعات على شارت 15 دقيقة، لتحتفظ بمرجع بنيوي وأنت تعمل على فريم أصغر. المناطق تعلّم أماكن تكوّن اختلال في التوازن غادر السعر مستواها بسرعة، وهي مناطق اهتمام لمراقبة سلوك السعر لا إشارات بحد ذاتها.
خفّض Sensitivity وارفع Pivot Length على الفريمات الصغيرة أو الأسواق المزعجة إذا ظهرت مناطق كثيرة، وارفع Sensitivity على الفريمات الكبيرة أو الأدوات البطيئة إذا كانت المناطق قليلة.
التنبيهات
تنبيهان متاحان: منطقة عرض جديدة، ومنطقة طلب جديدة، ويُطلقان عند تأكيد المنطقة من شمعة مغلقة على الفريم الأعلى.
ملاحظات وحدود
- المؤشر يصف بنية سعرية تكوّنت بالفعل، ولا يتنبأ بالاتجاه ولا يعطي إشارات شراء أو بيع.
- جودة المناطق تعتمد على الفريم والأداة المختارة، والإعدادات التي تناسب سوقاً لا تناسب غيره تلقائياً.
- الرموز ضعيفة السيولة أو الفريمات ذات الفجوات الواسعة قد تعطي تأكيدات اندفاع أقل.
يُنشر هذا المؤشر لأغراض تعليمية وتحليلية فقط، وليس نصيحة مالية ولا يضمن أي نتيجة. اختبر أي أداة على أدواتك وفريماتك قبل الاعتماد عليها. Indicador

ICT Killzones + Session Liquidity Levels [ForexCracked]🔵 OVERVIEW
Most killzone indicators shade the London and New York windows and stop there. This one uses the sessions as the starting point and then answers the question you actually open the chart for: which session highs and lows are still sitting there untaken, how deep price usually runs past a level like that when it does get taken, and whether the next session is even big enough to reach it.
Asia, London and New York are boxed with their ranges in pips. Every completed session leaves its high and low behind as a liquidity zone. The moment one gets swept it is deleted, so everything you can see is still in play.
🔵 THE ZONES ARE BANDS, NOT LINES, AND THE THICKNESS IS MEASURED
This is the part that is different. When a session high gets taken, price rarely stops exactly at it. It runs past, and how far it runs is a property of the symbol and the session, not a round number.
So the engine records the overshoot every single time a level of that session and side is taken, keeps the last forty, and draws the zone with a thickness equal to the median of those overshoots in ATR units. The upper edge of a pink zone is therefore a measured price: the level where the run past this kind of high has historically finished. Below eight recorded samples the zone falls back to a default height and the label says so, so you always know whether the number has anything behind it.
🔵 SESSION HANDOFF TALLIES
Under each Asia and London level is a count of what the sessions after it have actually done with levels like it.
An Asia high shows two counts: how often London swept it, and how often New York did. A London level shows what New York did with it. New York is the last session of the day, so its levels carry no handoff count, they are simply untapped until swept. The counts read like "LDN swept 34/60 sessions", counted price events from the chart in front of you with the sample size attached. On very low timeframes the chart does not hold 60 sessions, so n will be smaller. The label always shows the real n.
🔵 THE FORWARD ENVELOPE
Right of the last bar, the session that has not opened yet is drawn as a dashed box, sized by the median range of that session over its recent history, with both edge prices labelled.
That is there to keep you honest about distance. An untapped Asia high forty pips above price means something different when London's median range is seventy pips than when it is thirty. The envelope shows you which situation you are in before you plan the trade.
🔵 WHAT IS ON THE CHART
• Navy session boxes for Asia, London and New York, each labelled with its range in pips
• A faint tint over the London and New York killzone windows
• Pink zones for liquidity above price, teal for liquidity below, each with its price, its distance, its measured depth, and, on Asia and London levels, its handoff tallies
• A dashed forward envelope for the next session, with edge prices
• A compact panel: the live session, today's ranges against their medians, how many levels are untapped each side, and the nearest one
🔵 HOW TO USE
• Read the untapped levels as destinations, not entries. They are where resting orders sit, which is where price is often drawn.
• Use the far edge of the zone for invalidation. That edge is the measured median overshoot, so a stop just beyond it sits past where the run usually finishes rather than at a round number inside it.
• Check the forward envelope before you commit to a level as a target. If the level sits outside the next session's median range, reaching it is the exception rather than the expectation.
• Treat the handoff tally as base rate, not prediction. Thirty-four out of sixty tells you it is close to a coin flip. Fifty out of sixty tells you something much stronger about that symbol.
• Set your own session hours. The defaults are the common GMT windows, but the timezone dropdown and the three session inputs let you match your broker or your own killzone definitions.
🔵 SETTINGS
• Intraday only, 4H or faster. Sessions have no meaning on daily bars, and the script says so on the chart if you try
• Timezone, and the three session windows (defaults are Asia 0000-0800, London 0800-1600, New York 1300-2100 GMT)
• Skip weekend sessions in statistics (default on): on 24/7 symbols the quiet weekend sessions still draw their levels, but they stay out of the medians and tallies so they do not drag the numbers down
• Two killzone windows, shaded faintly, defaulting to the London and New York opens
• Statistics window: how many completed sessions the medians and tallies are counted over
• Minimum zone height in ATR, so a zone never becomes too thin to see on a small chart
• Days of session boxes to keep, untapped levels per side, dashboard position, colours
🔵 ALERTS
• A session opens, or a killzone opens
• An untapped session level is swept
• Price comes within a quarter of an ATR of the nearest untapped level
⚠️ DISCLAIMER
"ICT" is used here as the community vocabulary for killzones and session liquidity concepts. This script is independent work and is not affiliated with or endorsed by Inner Circle Trader.
The tallies and median depths are counted descriptions of what has already happened on this symbol, not forecasts. A level that has been taken fifty out of sixty times can hold today. Sample sizes vary by symbol and timeframe and small samples are unreliable by nature. Nothing here is a trade signal. Results depend on market conditions, settings, and your own execution and risk management. Shared for educational and research purposes. Not financial advice. Indicador

Consolidation Ranges & Breakout Map [MQLSoftware]Consolidation Ranges & Breakout Map reads the market's sideways regime as a measurable object. It detects compression with an authored Range Compression Index, fixes the consolidation box only after enough confirmed evidence, tracks how the box resolves — breakout, measured-move projection reached, false break, or expiry — and reports the measured base rates of those outcomes counted on the chart's own history.
This is a visual analytical tool for chart study. It does not execute trades and does not provide financial advice.
Key Features
Consolidation boxes fixed on confirmed evidence only: a candidate must hold the compression threshold for a minimum number of confirmed bars before it becomes a live range — borders never move backwards once fixed
Amber forming frame while compression is still building, so you see the candidate before it commits
Breakouts by confirmed CLOSE beyond the border plus an ATR buffer — wicks and gaps alone never trigger a breakout
Measured-move projections (1× and 1.618× the range height by default) drawn from the broken border — a geometric reference derived from the range's own size
Outcome tracking on confirmed bars: ✓ printed when the 1× projection is reached, ✕ false break when price closes back inside within the fakeout window, quiet expiry when the resolution window runs out
Range invalidation discipline: a box that "breathes" beyond its edge-update budget or outgrows the maximum width is annulled and excluded from the statistics, so pseudo-ranges never contaminate the base rates
Measured base rates in the panel: share of upside breakouts, share that reached the 1× projection, share of false breaks, median bars to 1×, median range length — each with its sample size
Higher-timeframe context band (rolling HTF high/low), optional volume-expansion quality gate, four panel modes, five confirmed-bar alerts plus one dynamic JSON alert
Core Concept — what is original here
TradingView has many box-drawing and Darvas-style tools; most fix a rectangle from a simple highest/lowest lookback and leave the interpretation to the reader. This script makes the detector itself measurable and then closes the loop by counting what actually happened. Three specific algorithmic elements:
1. The Range Compression Index (RCI). A 0–100 composite authored for this script: RCI = 100 · (0.40 · ineff + 0.35 · vc + 0.25 · cont), where ineff = 1 − min(ER, 1) is movement inefficiency (the inverse Kaufman efficiency ratio — net displacement over the evaluation window divided by the bar-to-bar path traveled), vc is volatility compression (short ATR against a 4× longer ATR window, rescaled to 0..1), and cont is containment — the share of closes inside the central 90% of the candidate box. Each component measures a different facet of "sideways": no net progress, contracting volatility, clustering closes. A candidate also has to pass a geometry gate — its width may not exceed a configurable multiple of ATR. The sensitivity presets set the RCI threshold (Low 70, Normal 62, High 55).
2. The consolidation → breakout state machine. SEEKING → FORMING → LIVE → BREAK UP / BREAK DOWN → RESOLVED / FALSE BREAK / EXPIRED, with every transition on confirmed bars only. The box is fixed only after the minimum number of confirmed compression bars. A fixed border may be widened by a wick within the edge tolerance a limited number of times — each update on a confirmed bar and counted; beyond the budget the box is invalidated and never enters the statistics. A breakout requires a confirmed close beyond the border plus the ATR buffer; a bar that pierces both borders resolves by its close; a close back inside within the fakeout window is classified as a false break (checked before the projection within the same bar, deliberately conservative). The resolution window defaults to three times the range's own duration, capped at 200 bars.
3. Measured base rates. The panel reports observed frequencies counted on this chart's loaded history: how often ranges broke upward, how often the breakout reached the 1× measured-move projection, how often the break turned out false, the median bars to 1× and the median range length — each with its sample size. Below a minimum sample the panel prints the sample gate instead of a percentage, so small-sample noise is never dressed up as a statistic. Observed frequencies, not assumptions, and no claims attached to them.
Anatomy of the Display
Live range box — steel border with a faint fill, header with the range's duration and height in ATR; midline optional
Amber dashed frame — a FORMING candidate: compression is building but the box is not yet committed
▲ / ▼ breakout markers on the confirmed breakout bar (Descriptive or Compact style)
Dashed projection lines from the broken border with 1× and 1.618× labels at the right edge
✓ 1× printed where the projection is reached, ✕ false break where price closed back inside
Translucent higher-timeframe band with the rolling HTF high/low and a timeframe tag
Panel (Off / Minimal / Normal / Large): state in plain words (SEEKING / COMPRESSING n/m / RANGE LIVE / BROKE UP / BROKE DOWN / FALSE BREAK), the live Range Compression Index with a five-block meter, range height and duration, position inside the range, and in Large mode the measured base-rate section
Notes on Repainting
All state transitions, breakout/outcome markers, statistics counters and alerts fire on confirmed bars only and never move once printed
Box borders are fixed on the confirming bar and never move backwards; the only permitted change is a forward widening within the edge tolerance, on a confirmed bar, a limited number of times
The live box's right edge, the FORMING candidate frame and the panel's live rows update intrabar — visual context, not signals
The higher-timeframe band uses one request.security call with lookahead off and reads the previous confirmed HTF value — no future data anywhere
Display inputs only gate drawing; they never change the state machine, the counters or the alerts
Typical Analysis Workflow
Watch the panel's Compression row: a rising RCI with an amber forming frame means a candidate is building
When RANGE LIVE prints, read the box header — a 40-bar range 1.2 ATR tall is a different regime than an 8-bar pause
Treat the breakout marker as a measured event, not an invitation: the base rates tell you how often breakouts on this chart reached the projection versus failed back into the box
Use the false-break share as regime context — some markets punish breakout chasing far more often than others, and the panel will say so with a sample size
Check the higher-timeframe band: a local range at the edge of the senior range is a different situation than one in the middle of it
Configuration
Range Detection — compression sensitivity preset (RCI threshold), evaluation window, minimum confirmed bars to fix a box, maximum width in ATR, containment threshold, edge tolerance and the edge-update budget
Breakout — ATR buffer for the confirmed close, fakeout window, both projection multiples, resolution window (auto = 3× range duration), optional volume-expansion gate with its multiple
Higher-Timeframe Context — band on/off, HTF (empty = auto: 4× chart timeframe capped at 1W), HTF range length
Statistics — base-rate section on/off, minimum sample to display a percentage
Visual — panel size and position, marker style (Descriptive / Compact), projections, midline, how many past ranges to keep, and the four identity colors (all inputs; dark-theme defaults)
Markets and Timeframes
Any symbol and timeframe. All thresholds are expressed in ATR and percentiles of the chart's own behavior, so the detector self-calibrates per instrument. On symbols without volume data the volume gate is ignored automatically and the panel says so. On slow timeframes (1D/1W) the sample gate will hide the percentages until enough ranges have resolved — that is the honesty rule, not a defect.
Alerts
Range confirmed · Range breakout up · Range breakout down · False break · 1× projection reached — all evaluated on confirmed bars from the same event flags that draw the markers, plus one dynamic alert() with a JSON payload (event, symbol, timeframe, box borders, break level, height in ATR). Indicador

SMC Swing Structure + Order Blocks + CHoCH VolumeOrderBlock Radar — SMC Swing & Volume CHoCH
A Smart Money Concepts (SMC) toolkit that maps market structure and order blocks the way institutional order flow is typically read — without drowning your chart in noise from minor pivots.
What it does:
📊 Swing Structure (BOS / CHoCH) — Tracks the market's real trend using major swing highs and lows, not every small wiggle. A break with the trend is marked BOS (Break of Structure); a break against the trend is marked CHoCH (Change of Character) — the earliest, most reliable signal that momentum may be shifting.
📦 Order Blocks — Automatically plots the last opposing candle before each structural break — the classic "footprint" of where smart money likely entered before the move. Boxes extend forward and auto-delete once price mitigates them, so your chart only shows blocks that are still relevant.
🔊 Volume-Confirmed CHoCH — Not all character changes are equal. This indicator checks volume against its recent average at the moment of a CHoCH — when a break comes with a volume spike, it's tagged separately ("CHoCH ⚡Vol") and fires its own dedicated alert, helping you filter high-conviction reversals from low-volume fakeouts.
🔔 Built-in Alerts — Six alert conditions ready to go: bullish/bearish CHoCH, bullish/bearish CHoCH with volume confirmation, and bullish/bearish BOS. Set them once and get pinged the moment structure shifts.
Customizable settings:
Swing pivot sensitivity (how "major" a swing needs to be to count)
Optional internal (minor) structure overlay for extra context
Order block count limits, lookback range, and mitigation method (wick vs. close)
Volume average length and spike threshold
Full color and label control
How to use it: Best used as a structural context tool — combine CHoCH signals with your own entry confirmation (order block retest, FVG fill, liquidity sweep, etc.) rather than trading the label in isolation. Works on any timeframe and asset class; higher timeframes and liquid instruments tend to give the cleanest structure.
This is a technical analysis tool, not financial advice — always manage risk and confirm signals with your own strategy. Indicador

Support & Resistance Zones [HexaTrades]
This indicator automatically finds the price levels where the market has turned around before the places where buyers stepped in (support) and where sellers took over (resistance) and draws them as clean rectangular zones on your chart.
Instead of a thin line, each level is drawn as a zone with real thickness, because support and resistance are never one exact price; they are areas where price reacts. The zones update live, extend forward as long as they are valid, and turn into light "ghost" boxes once price finally breaks through them, so you always keep the full picture of the market's history.
Bitcoin 4h: the indicator marking support and resistance zones
How it works
- Finds swing points. A swing high is a candle whose high is higher than the 10 candles on each side of it (the "Swing Length" setting). A swing low is the same idea upside down. These are the exact spots where the market turned.
- Builds a zone from the candle. The zone covers the candle's wick from the extreme tip to the candle body. That wick is where orders actually pushed price back, so it becomes the zone.
- Keeps zone size sensible. Very small wicks get padded to a minimum height, and no zone can grow taller than a maximum height (both measured in ATR, so they adapt automatically to each market's volatility).
- Merges duplicate levels. If a new swing forms at a level that already has a zone, the two are combined into one box instead of stacking clutter on your chart.
- Watches for breaks. When a candle closes beyond a zone, the zone is "broken." what happens next is up to you (see below).
What happens after a zone breaks?
The indicator provides three different zone-management options.
Keep As Past Zone: The broken zone stops extending and remains visible as a faded historical zone. This makes it easier to review how price behaved around previous levels.
Flip Support/Resistance: A broken resistance zone becomes support, while a broken support zone becomes resistance.
This is useful for studying the common market concept of role reversal, where old resistance may act as new support and old support may act as new resistance.
Delete Zone: The zone is completely removed after it breaks. This option is useful for traders who prefer a cleaner chart showing only active zones.
Optional volume filter:
Volume-Confirmed Zones Only can be enabled to filter out lower-volume swing points.
When enabled, the volume of the swing candle must be higher than: Average Volume × Volume Multiplier
For example, with a Volume Multiplier of 1.2, the swing candle’s volume must be greater than 120% of its average volume.
The volume filter is automatically ignored when volume data is unavailable. Volume quality can vary between markets, exchanges and brokers.
Indicator settings
- Swing Length: Controls how significant a swing must be. Lower values create more zones, while higher values create fewer but potentially more significant zones.
- Maximum Zones: Limits the number of active zones displayed. When the limit is exceeded, the oldest active zone is removed.
- ATR Length: Sets the calculation period used to measure volatility.
- Minimum Zone Height: Sets the minimum zone thickness as a multiple of ATR.
- Maximum Zone Height: Prevents zones from becoming excessively wide.
- Merge Overlapping Zones: Combines overlapping or nearby active zones.
- Merge Distance: Controls the ATR-based distance used when deciding whether zones should be merged.
- Maximum Past Zones: Limits how many broken historical zones remain on the chart.
- Past Zone Transparency: Controls how clearly broken zones are displayed.
Alerts
- Built-in alerts
- Zone Touched — price entered a support or resistance zone.
- Resistance Broken — a candle broke above a resistance zone.
- Support Broken — a candle broke a support zone below.
- Set them up from TradingView's alert dialog: Create Alert → Condition → S/R Zones.
How to use it in trading
🔶Bounce trades: when price falls into a support zone and prints a rejection candle, that's a long setup with a stop just below the zone.
A blue support zone represents an area where buyers previously entered the market.
When price returns to support:
- Wait for price to enter or test the zone.
- Look for evidence that buyers are responding.
- Consider an entry only after confirmation.
- Place the stop beyond the opposite side of the zone, with an appropriate buffer.
- Use the next resistance zone as a possible target.
Possible bullish confirmation includes:
- A candle rejecting the lower part of the zone.
- A long lower wick followed by a bullish close.
- A bullish engulfing candle.
- Price closing back above the support zone.
- Increasing volume during the reaction.
- A higher low forming near the zone.
A support touch by itself is not a long signal. Price can move directly through the zone, especially during a strong downtrend.
Example image below:
🔶Rejection from resistance
A pink resistance zone represents an area where sellers previously entered the market.
When price reaches resistance:
- Wait for price to test the zone.
- Look for signs of selling pressure.
- Consider an entry only after bearish confirmation.
- Place the stop beyond the upper edge of the zone, with a suitable buffer.
- Use the next support zone below as a possible target.
Possible bearish confirmation includes:
- A long upper wick inside the resistance zone.
- A bearish engulfing candle.
- Price entering the zone and closing back below it.
- A lower high forming near resistance.
- Increasing selling volume during the rejection.
A resistance touch alone is not a short signal. Strong bullish momentum can break through resistance without producing a meaningful reversal.
Example image:
🔶Trading a breakout
A breakout occurs when price moves beyond an active zone.
- A break above resistance may indicate increasing bullish strength.
- A break below support may indicate increasing bearish strength.
For more conservative confirmation, select Close under Break Confirmation. In this mode, a resistance zone breaks only after a candle closes above it, while a support zone breaks only after a candle closes below it.
The Wick option reacts as soon as price trades beyond the zone. It responds faster but is more sensitive to temporary spikes and false breakouts.
Before considering a breakout trade, traders may look for:
- A strong candle closing beyond the zone.
- A candle body that closes clearly outside the zone.
- Higher-than-average volume.
- Momentum in the breakout direction.
- Alignment with the broader market trend.
- A successful retest of the broken zone.
🔶Trading a role reversal
Support and resistance can sometimes exchange roles after a breakout.
-Broken resistance may later act as support.
- Broken support may later act as resistance.
Select Flip Support/Resistance under the When Broken setting to display this behaviour automatically.
For example, after price closes above a pink resistance zone, the indicator converts that area into a blue support zone. If price later returns to it, traders can watch for a bullish reaction.
Similarly, when price breaks below blue support, the indicator converts the zone into pink resistance. A later retest may provide an area to watch for bearish confirmation.
Role reversal is a commonly observed price-action concept, but it does not occur successfully after every breakout. Wait for confirmation instead of entering only because price has returned to a flipped zone.
🔶Using zones for targets and stops
Zones can also help organise trade management.
For a long setup:
- A stop may be placed below the support zone.
- The next resistance zone may be used as an initial target.
- A higher resistance zone may be considered as a secondary target if momentum remains strong.
For a short setup:
- A stop may be placed above the resistance zone.
- The next support zone may be used as an initial target.
- A lower support zone may be considered as a secondary target.
Avoid placing the stop exactly on the edge of a zone. Price may briefly move beyond the boundary before reacting. The appropriate buffer depends on the symbol, timeframe, volatility and the trader’s risk plan.
Always calculate the potential risk and reward before entering a trade. A visible zone does not automatically make a setup worth taking.
🔶 Using multiple timeframes
Higher-timeframe zones can provide broader market context, while lower timeframes can help refine entries.
A simple process is:
- Identify important support and resistance on a higher timeframe.
- Determine whether the broader structure is bullish, bearish or ranging.
- Move to the preferred trading timeframe.
- Wait for price to reach a relevant zone.
- Use candle structure, volume or momentum for confirmation.
Higher timeframes generally produce fewer but more widely watched zones. Lower timeframes produce more zones and may contain more market noise.
Support and Resistance Zones help traders identify and manage important price areas with less chart clutter. Its volatility-based sizing, zone merging, break confirmation, role reversal, and alerts make it suitable for different markets and timeframes. Use the zones as areas to watch—not automatic trade signals and always combine them with price confirmation, broader market structure and proper risk management.
We would love to hear your suggestions. If you have ideas for new features, indicators, analytics, or improvements, please share your feedback. Your input helps guide future updates and improve the indicator for all traders.
Wedge pattern detector indicator is for educational and analytical purposes only. It is not financial advice. Trading involves risk. Always use proper risk management and combine this indicator with your own analysis before taking any trade.
Indicador

Supply & Demand Zones - Zone Forge [AFD]
Two zones on your chart. One came from a four-bar coil that price left in a single decisive candle. The other took twenty bars to go nowhere and slid out the bottom. Your indicator drew them identically.
That difference is measurable at the moment each zone forms - how tight the base was, how hard price left it - and it is measurable from the same two numbers the tool already had to compute in order to find the zone at all. Almost every zone tool computes them on the way past and throws them away.
Zone Forge keeps them. Every zone is scored on how it was constructed, and the score is painted rather than printed: a well-built zone carries more glow and deeper fill, a marginal one recedes into the background. No letter, no number, nothing to decode. The chart sorts itself.
Why it matters
A supply or demand zone is a fussy construction pretending to be a simple one. It needs a short, tight cluster of bars - the base - that price then left decisively in one direction. Both halves are measurable, and the ratio between them separates a coil that broke from a range that drifted. This describes how an area formed, and says nothing about what price does next.
At a glance
Four patterns, each switchable - rally-base-drop and drop-base-drop become supply; drop-base-rally and rally-base-rally become demand. Turn off the ones you do not trade.
A grade on every zone - built from two ratios the engine already computes, tiered Strong, Standard and Weak, and shown as vividness rather than as a label.
A one-way lifecycle - Fresh, Tested, Broken. A broken zone never returns to fresh, and a tested zone steps further back with each additional test.
Detection in one click - Scalp, Intraday or Swing set base length, tightness and departure strength together. Custom exposes all three.
Measured against your chart's own volatility - base height and departure distance are both in ATR(14) units, so one setting means the same thing on a $4 stock and a $400 one.
Nine colour themes - Signature, Neon, Muted, Mono, Terminal, Midnight, Ocean, Ember, and Paper for light charts, plus Custom. Three appearance presets over the top - Signature, Clean and Minimal - plus a Custom that leaves every control acting on its own.
Four alert conditions - new demand zone, new supply zone, zone tested, zone broken, as four separate entries in the alert dialog rather than one.
Three Data Window values for screening - distance to the nearest demand zone, distance to the nearest supply zone, and whether price is inside one.
How a zone is built
A base is a run of bars whose whole height fits inside Base tightness x ATR(14). A departure is a bar that CLOSES beyond that base by at least Departure strength x ATR(14) - the close, never the high or the low, so a spike that closes back inside draws nothing.
Both halves must be complete. A zone is created from a finished base and a finished departure, and appears on the bar that closes the departure, not before.
Two rules that change what you see:
A tight run LONGER than Base max length is rejected as a range. It is not trimmed to its last few bars and admitted anyway.
The departure is measured against the PREVIOUS bar's ATR, so the departure bar's own range cannot inflate the threshold it has to clear.
The grade, stated plainly
grade score = (departure distance / required distance) / max(base height / height limit, 0.50)
A zone that cleared the departure requirement by 3x off a base using half its allowed height scores well above one that cleared it by 1.1x off a base that used all of it. Only just qualifying on both counts scores 1.0x.
Weak, Standard and Strong are fixed thresholds on that score, and the tier is decided on the bar that creates the zone.
The score is computed once and is never recomputed. A zone already on your chart does not restyle itself later.
Grade emphasis sets how far apart the three tiers LOOK, from nearly identical to a wide visual split. It changes appearance only, never which tier a zone is in.
The tiers describe construction. They are not a ranking of what is likely to happen at a zone, and no tier is presented as the one to trade.
The lifecycle
Fresh - price has not come back yet. Brightest.
Tested - price traded into the zone and it held. The fill and glow step back, and each further test steps them back again up to a fixed limit, so an area that has been worked repeatedly recedes on its own rather than vanishing.
Broken - price closed through it. Hidden by default, because showing them roughly triples what is on the chart.
You choose what counts as each. Break rule is close-through or wick-through; Test rule is wick-touch or close-inside. Break beats test on the same bar, and the lifecycle only ever runs one way - a broken zone never becomes fresh again.
Flip broken zones, off by default, draws a fresh zone of the OPPOSITE type at the same levels when a zone breaks. The broken zone stays broken - this creates a new zone rather than reversing an old one, so nothing already on your chart changes what it claims to be. One generation only.
How it differs from a standard zone tool
The grade is a consequence of the construction, not a bolt-on - a swing-pivot band inflated by a fixed ATR width has no tightness to measure, and a fair-value gap has no base at all. Only something that finds a consolidation and THEN measures the move away from it has the two numbers to divide.
Strength is the visual language - the ranking is carried by glow and fill depth, so the chart is read at a glance instead of decoded. No letter appears on the box unless you ask for one.
The chart is kept bounded on purpose - a cap per side, a maximum age, broken zones hidden, and an overlap rule that will not admit a new zone sitting on top of a live one.
A theme system, not a colour picker - nine curated palettes, one of them built for a light chart, and three appearance presets over the top.
Nothing about the grade is hidden - the score is one division, the two thresholds it divides are the same ones detection already applied, and every constant is a named value in source you can read. A trust signal, not the pitch: what you are here for is the zones.
The visuals
Layered glow, not a flat rectangle - concentric halo boxes off a single Glow intensity control, with a floor so no layer is ever invisible. Glow spread sets how far the halo reaches.
Fill, border and edges are independent - each carries its own colour, width and style, and each can be switched off. Border off leaves the fill and the glow; fill off leaves an outline.
Emphasise nearest zone - thickens the border of the zone closest to price on each side.
50% line - the midpoint mitigation level, off by default, with its own colour and style.
Labels - Type, Type + age, Type + grade, Type + touches or Age; four positions, four sizes, a bar offset; worded Supply/Demand, the full pattern name or the trade shorthand. Every label carries a hover breakdown: pattern, span, state, age and grade.
Zone count table - a small optional panel counting what is on the chart.
Master opacity - fades every colour together in one control, without touching any individual setting.
Alerts
New demand zone
New supply zone
Zone tested
Zone broken
Create these from TradingView's alert dialog. How often an alert re-fires while its condition holds is set in that dialog, not in the script. A running alert keeps the inputs, symbol and timeframe it was created with - recreate it after changing any of them.
How to use it
Pick a detection style first - Scalp, Intraday or Swing. It is the only setting that changes WHAT gets found; everything else changes how what was found looks.
Works best on a 5-minute chart or lower - a zone needs a completed base and a completed departure to print, and that pattern completes far more often per session on a fast chart than a slow one, so a 5-minute-or-lower timeframe gives you more zones to read.
Read the fresh zones first - they are the brightest, and they are the areas price has not returned to.
Read the grade as build quality - a Strong zone came from a tight base and a decisive departure, a Weak one only just cleared both tests. Both are drawn, because knowing which is which is the point.
Watch a zone dim - each test steps it further back. A zone tested three times looks like what it is.
Set the look once - Preset gives you the vivid default, a clean one and a minimal one in a click, or Custom to set everything yourself; Colour theme gives nine palettes; Master opacity fades the lot. Then leave it alone.
Hover anything unclear - all 63 inputs carry a tooltip, and every zone label carries a breakdown.
What it deliberately does not do
It reads the open, high, low, close and volume of the chart you have open, and nothing else. There are no request.security() calls, no other symbol, no higher-timeframe import, and no options or order-book data of any kind.
So it does not know about order flow, dealer positioning, or where anyone's orders actually are. Supply and demand here name where a price move ORIGINATED. They do not name a measured book, and the words that would imply otherwise are kept out of every string this script ships.
It draws no entries, exits, targets or arrows, and makes no accuracy, reliability, profitability, probability or future-result claim of any kind. The grade describes an area built from bars that have already printed: a construction score establishes neither future direction nor the quality of any trade. Educational chart context only - not financial advice.
Data, timeframes and what to check yourself
Zones are created from confirmed bars only - a completed base and a completed departure. Once created, a zone's geometry does not move: its top, bottom and left edge are fixed, and only its lifecycle state changes, one way, on closed bars. Confirm it with the bar-replay tool on your own symbol and timeframe before relying on it - a description of mechanism is not that check, and nothing here claims to be.
The three Data Window values read the live close - the two distances and the inside-zone flag. They create, test, break and prune nothing.
The zone count is bounded by Pine's drawing limits - the source declares budgets of 500 boxes, 500 lines and 100 labels, and every glow layer, edge line and label spends from them. Max zones per side and Max zone age are the controls that keep you inside.
Standard time-based candles - on Heikin Ashi, Renko or Range the engine measures those synthetic values rather than traded prices, so the bases it finds are not the bases on your price chart.
Base tightness is not a strictness dial - the zone count peaks in the middle of its range and falls away at both ends, which is why the range stops where it does. Loosening it past the peak draws FEWER zones, not more.
Detection needs history - ATR(14) must exist before anything can be measured against it, so the opening bars of a chart produce nothing.
Originality and credit
Supply and demand zones are old ground. What is new is that the construction is measured, and the measurement is what you see: base tightness and departure distance resolved into one score, that score frozen on the bar that creates the zone, and the ranking expressed as glow and fill depth rather than as a label to decode.
Open source under the Mozilla Public License 2.0. (c) Auction Foundry.
Indicador

SMC Institutional Clean Wave & Structure PROSMC Institutional Clean Wave & Structure PRO
SMC Institutional Clean Wave & Structure PRO is a refined technical analysis indicator engineered to provide institutional order flow insights, precise market structure tracking, and uncluttered visual clarity on both light and dark trading themes. It replaces unnecessary chart noise with clean dynamic trend wave fills, smart consolidation candle color detection, and confirmed structure shifts.
Key Features Overview
1. Dynamic Single Trend Wave & Background Fill
Provides a smooth continuous structural trend wave. Renders vibrant green during bullish expansion phases and solid red during bearish contraction phases with a soft, unobtrusive background fill.
2. Smart Consolidation Candle Engine
Automatically highlights price action state. Bullish candles render in bright green, bearish candles in red, while tight consolidation or inside bar candles dynamically shift to a distinct grayish-white color to quickly highlight market compression.
3. Clean Market Structure Shifts (BOS & CHoCH)
Tracks key market structure breakouts. Identifies initial trend reversals as Change of Character (CHoCH) and structural extensions as Break of Structure (BOS), rendered with centered non-overlapping labels.
4. Confirmed Major Swing BUY & SELL Badges
Highlights major institutional high and low pivots with confirmed BUY and SELL badges. Pivot sensitivity and badge styling can be customized independently.
5. Target Standard Deviation Level (-2.5 SD)
Calculates real-time structural volatility and projects a dynamic -2.5 Standard Deviation Target line to help anticipate key potential market reaction levels.
Settings Overview
Trend Wave Settings
- Show Trend Wave Line: Toggle wave line and fill display.
- Colors & Opacity: Adjust trend line colors and background opacity.
Candle Engine Settings
- Enable Smart Candle Color Engine: Toggle adaptive candle colors.
- Custom Colors: Define unique colors for bullish, bearish, and inside bars.
Structure Settings
- Show BOS & CHoCH Shifts: Toggle structure labels.
- Structure Sensitivity: Fine-tune pivot detection rules for cleaner charts.
Signal Badges
- Show Confirmed BUY / SELL Badges: Toggle buy and sell markers.
- Signal Swing Sensitivity: Adjust lookback periods for pivot signals.
Standard Deviation Settings
- Show -2.5 SD Target Line: Toggle volatility target line.
- Custom Style: Adjust line thickness, color, and line style options.
Disclaimer
This script is built strictly for educational, analytical, and charting enhancement purposes. It does not offer financial advice or guaranteed trading results. Practice strict risk management.
Indicador

Manual Zone & Level PlotterDraws price zones and horizontal levels from a short text input, so you can keep a manually-defined map of the market on your chart without re-drawing it by hand every day.
WHY
Many traders keep a small set of levels and zones they care about (a directional target area, one or two areas where they wait for entries, and the nearest support/resistance). Re-drawing them by hand on every timeframe and every device is tedious and error-prone. This script keeps that map in two short text fields, so it survives timeframe changes, chart reloads and switching devices.
HOW IT WORKS
You type (or paste) two strings in the settings.
Zones field (settings: "Zones") - groups separated by ";", items separated by ","
G = primary zone, O = secondary zone, X = marker levels.
A range like 4371.83-4400 is drawn as a box; a single number is drawn as a line.
Example: G4371.83-4400;O4325-4350;X4350
Levels field (settings: "Levels") - R = levels above, S = levels below
Example: R4350,4400;S4325,4311.89
Everything is drawn with extend on both sides, so the zones stay visible wherever you scroll. Optional price tags can be turned off. Box transparency and line width are adjustable. Malformed numbers are skipped instead of breaking the whole drawing.
NOTES
- The script contains no signals, no alerts, no buy/sell logic and no automatic level detection. It only draws what you type. All numbers come from you.
- Nothing is repainted: the drawing is rebuilt on the last bar from your input only.
- Works on any symbol and timeframe.
This is a drawing utility for personal chart notes. It is not investment advice and it does not tell you when to buy or sell. Trading involves risk; make your own decisions. Indicador

Trend Angle Momentum [MarkitTick]💡 This tool measures market structure not just as a sequence of highs and lows, but as a rate of directional change. It detects confirmed swing pivots and then calculates the geometric angle of the trendline connecting each pivot to the one before it, translating pure price action into a single, intuitive metric: degrees of trend steepness. Instead of asking traders to infer momentum from candle shape or oscillator divergence, it hands them a number — the actual angle of ascent or descent between structural turning points — along with an optional smoothed reading of how that angle is evolving over time.
✨ Originality and Utility
Most swing-detection tools stop at marking the high or low. This script goes a step further by quantifying the relationship between consecutive swings using trigonometry. Each swing-to-swing move is converted into a percentage price change, which is then run through an arctangent function to produce a true geometric angle in degrees, independent of the instrument's absolute price scale. A move on a $2 stock and a move on a $2,000 stock that share the same percentage steepness will report the same angle, making the readings comparable across symbols and timeframes in a way that raw price-based slope calculations cannot achieve.
The utility here is twofold. First, the angle itself acts as a quantified momentum proxy: a shallow angle after a strong prior swing signals decelerating momentum well before a lagging oscillator would confirm it, while a steepening angle on successive swings signals acceleration. Second, an optional Angle Momentum layer tracks a rolling average of the last several swing angles, smoothing out single-swing noise and revealing whether the broader structural rhythm of the market is strengthening or weakening. This combination — geometric normalization plus rolling angle smoothing — gives traders a structural momentum read that is not available from stock pivot tools or generic slope indicators alone.
🔬 Methodology and Concepts
• Confirmed Pivot Detection
The script identifies swing highs and swing lows using a symmetric fractal method: a bar is only confirmed as a pivot high if it is higher than a defined number of bars to its left and right, and likewise for a pivot low. The "Left Bars" and "Right Bars" inputs control how many bars on each side must confirm the extreme. Because the right-side bars must fully close before a pivot can be validated, every pivot marked on the chart is confirmed historical structure, not a live, moving estimate — the marker is deliberately plotted with a backward offset equal to the right-bar count so that its horizontal position matches where the actual swing extreme occurred, not where it was confirmed.
• Percent-to-Angle Conversion
Once two consecutive confirmed pivots of the same type (high-to-high or low-to-low) are available, the script calculates the percentage price change between them. This percentage is then optionally normalized by the number of bars separating the two pivots (via the "Normalize Angle by Bars" input), which converts the reading from "how much did price move" into "how much did price move per bar," a more useful measure of steepness when swings vary widely in duration. The resulting rate is passed through an arctangent function and converted from radians to degrees, producing a bounded, intuitive angle: values approaching plus or minus ninety degrees represent extremely steep percentage moves, while values near zero represent flat, sideways structure.
• Angle Momentum (Optional Smoothing Layer)
When enabled, the script maintains a running array of the most recent swing angles (separately for highs and lows) and reports their simple average over a user-defined lookback length. This produces a second-order reading: rather than looking at a single swing's angle in isolation, it shows whether the sequence of recent swing angles is, on average, steep or shallow, positive or negative — a way of gauging whether structural momentum is building or fading across several swings rather than just the most recent one.
• Live Dashboard
A compact on-chart table continuously summarizes the last confirmed high pivot price, the last confirmed low pivot price, the most recent high-swing angle, the most recent low-swing angle, and whether Angle Momentum smoothing is currently active, giving traders a persistent numerical snapshot without needing to hover over chart objects.
🎨 Visual Guide
Diagonal trend lines connecting consecutive swing highs (default red/green by angle sign) and consecutive swing lows are drawn directly between the two pivot points, visually representing the geometric slope being measured.
A small numeric label at the midpoint of each swing line displays the calculated angle in degrees, colored green for a positive (upward) angle and red for a negative (downward) angle by default.
When Angle Momentum is enabled, an additional label appears at the most recent pivot showing the smoothed "Mom" value in a distinct color (orange for highs, blue for lows by default), separated visually from the raw single-swing angle label.
Cross-style markers plot at each confirmed pivot high and pivot low directly on price, offset backward to align with the actual bar where the extreme occurred.
The dashboard table (position configurable) shows the symbol, timeframe, last high and low pivot prices, the latest angle readings for each, and the current on/off state of Angle Momentum.
📖 How to Use
Treat the angle label on each swing line as a normalized momentum reading for that specific leg of price action: steep angles indicate strong directional conviction, shallow angles indicate a weakening or consolidating move.
Compare the angle of the most recent swing to the angle of the swing before it. A sequence of progressively shallower high-to-high angles during an uptrend can indicate fading bullish momentum even while price is still making new highs, a structural early warning that pure price action alone may not show.
When Angle Momentum is enabled, use the smoothed "Mom" reading as a broader confirmation layer: a rising average angle across several swings supports the idea that momentum is genuinely building, rather than reacting to a single outlier swing.
Divergences between price structure and angle behavior — for example, higher swing highs paired with a declining angle momentum reading — can be used as a discretionary caution signal ahead of a potential trend deceleration.
The two alert conditions ("High Pivot Formed" and "Low Pivot Formed") can be used to build automated or semi-automated workflows that trigger only once a swing point is fully confirmed, rather than on every bar.
⚠️ Confirmation Lag Notice
All pivots and their associated angle calculations are confirmed structure. Because a pivot cannot be validated until the required number of bars on its right side have closed, every marker, line, and label is necessarily plotted a number of bars after the actual high or low occurred, equal to the "Right Bars" setting. The plotted markers are intentionally offset backward to align visually with the true location of the swing extreme — this does not mean the indicator is predicting or anticipating pivots in real time. Traders should treat swing confirmations as lagging structural events by design, not as leading signals.
⚙️ Inputs and Settings
Left Bars / Right Bars: Define the symmetric lookback and lookahead window used to validate a swing high or low. Larger values filter out minor fluctuations and confirm only more significant structural turning points, at the cost of a longer confirmation delay. Smaller values confirm pivots faster but are more sensitive to short-term noise.
Show High Swing Lines / Show Low Swing Lines: Independently toggle the diagonal trend lines connecting consecutive high or low pivots.
Show Swing Point Dots: Toggles the cross markers plotted directly at each confirmed pivot price.
Normalize Angle by Bars: When enabled, divides the percentage move between two pivots by the number of bars separating them before calculating the angle, producing a "steepness per bar" measure rather than a raw total-move angle. Useful for comparing swings of different durations on a more equal footing.
Use Angle Momentum: Enables the rolling average smoothing layer over the last several swing angles, plotted as an additional label at each new pivot.
Angle Momentum Length: Sets how many recent swing angles are averaged together for the smoothed momentum reading. Shorter lengths react faster to recent swings; longer lengths produce a smoother, slower-changing average.
Dashboard Position / Show Dashboard: Controls visibility and screen placement of the summary table.
High Pivot Action / Low Pivot Action: Custom text tags embedded into the JSON alert payload for each pivot type, useful for routing alerts to external automation systems that key off a specific action string.
Color inputs: Independently control the color of swing lines, angle text, pivot cross markers, momentum labels, and dashboard theming to match personal charting preferences.
🔍 Deconstruction of the Underlying Scientific and Academic Framework
The core of this indicator rests on classical trigonometric slope analysis rather than any single named technical analysis school. Converting a price move into an angle is mathematically equivalent to computing the arctangent of a rate of change, the same operation used broadly in engineering and physics to express a gradient as an angular measure rather than a raw ratio. Expressing the swing-to-swing move as a percentage change before applying the arctangent function normalizes the calculation across instruments of different absolute price levels, addressing a well-known limitation of naive "price-per-bar" slope measures, which are not comparable between a low-priced and high-priced instrument, or between two different timeframes without adjustment. The optional bar-normalization step draws on the same logic used in rate-of-change and momentum oscillators broadly, where a raw price delta is scaled by the time or bar interval over which it occurred to produce a comparable velocity-style reading rather than a simple magnitude.
The pivot detection mechanism itself is a fractal/symmetric extremum test, a widely used method in swing-structure analysis (related in spirit to Bill Williams' fractal indicator and to classical Dow Theory's emphasis on confirmed swing highs and lows as the building blocks of trend structure) that requires a candidate bar to dominate a defined number of bars on both sides before being accepted as a genuine local extremum. This symmetric confirmation requirement is a standard technique for filtering transient noise out of swing-point identification, at the deliberate cost of confirmation lag, a well-documented trade-off in any lookback-based extremum detection method. The Angle Momentum layer applies a simple moving average — one of the most foundational smoothing techniques in time-series analysis — to the sequence of discrete angle readings themselves rather than to price, effectively treating "swing angle" as its own derived data series and smoothing it the same way a moving average would smooth a price or oscillator series, in order to separate signal (the underlying trend in momentum) from noise (single-swing outliers).
⚠️ Disclaimer
All provided scripts and indicators are strictly for educational exploration and must not be interpreted as financial advice or a recommendation to execute trades. We expressly disclaim all liability for any financial losses or damages that may result, directly or indirectly, from the reliance on or application of these tools. Market participation carries inherent risk where past performance never guarantees future returns, leaving all investment decisions and due diligence solely at your own discretion. Indicador

Perfect Trading Entry Exit FinderA trading entry/exit finder that searches retained structural swings for positive terminal-to-terminal opportunities, anchors each qualifying entry and exit to the actual retained terminal extremes, and preserves the corresponding causal confirmation for direct timing and opportunity comparison. Results are search and review outputs, not a guarantee of profitability or future performance.
Name:
Perfect Trading Entry Exit Finder
Searchable Name:
Perfect Trading Entry Exit Finder
Technical Name:
Retained Terminal-to-Terminal Perfect Entry Exit and Causal Confirmation Finder
Short title:
Perfect Entry Exit
Summary
Perfect Trading Entry Exit Finder is an experimental finder for locating complete retained terminal-to-terminal opportunities while preserving the corresponding causal signal timing for comparison.
The retrospective Perfect terminals are the completed ideal entry and exit endpoints defined by the Perfect search, but those exact terminal entries or exits are only causally executable at those same bars when the corresponding causal confirmation actually becomes available there.
A BUY can confirm after the retained trough has already occurred.
A SELL can confirm after the retained peak has already occurred.
Multiple signal attempts can develop before a completed structural swing establishes the retained signal identity.
A signal can appear very close to the terminal or only after part of the move has already occurred.
An earlier signal can be superseded before the structural swing finishes.
A retained signal can also survive structurally while the move to the next opposite retained terminal still produces a non-positive result.
A strong terminal-to-terminal move can begin before the corresponding causal confirmation becomes available.
Perfect Trading Entry Exit Finder attempts to expose this difference directly.
Within this script, Perfect has a specific meaning.
A Perfect Opportunity is a completed retained opposite-terminal relationship whose directional terminal-to-terminal result is positive.
The first retained terminal becomes the:
PERFECT BUY
or PERFECT SELL
The next retained opposite terminal becomes the corresponding:
PERFECT EXIT
The interval between those retained terminals becomes:
PERFECT HOLD
The Perfect Entry, Hold, and Exit remain attached to the retained terminal structure.
The corresponding causal confirmation remains separately preserved.
That allows the finder to expose both:
the complete retained terminal-to-terminal opportunity
and
the portion represented from the actual causal confirmation
without redefining one as the other.
The finder can therefore expose:
Perfect Buy and Perfect Sell terminals
Perfect Exit terminals
Perfect Hold paths
complete terminal-to-terminal opportunity
corresponding causal confirmation
confirmation timing difference
Causal Result
Opportunity Capture
Confirmation Loss
false/non-perfect signal context
completed structural relationships
and the current unfinished search state
The primary search is based on completed retained structural relationships.
An additional preview mode can expose the currently implied unfinished result at the chart edge.
Because that newest structural state is incomplete, preview-only output can change as additional bars arrive.
How it works
Perfect Trading Entry Exit Finder combines a causal signal foundation with a completed terminal-to-terminal search.
The causal signal foundation preserves what could actually become available through the forward signal process.
The Perfect search evaluates the completed retained structural opportunity.
Those two reference systems remain separate.
That separation is deliberately engineered into the finder: the completed terminal result can be reviewed alongside the causal confirmation without allowing the later result to replace what was actually available through the causal process.
The completed terminal opportunity shows the full retained swing after structural finalization.
The causal confirmation shows where the corresponding signal became available through the causal process.
The finder brings those references together for direct review without treating one as the other.
Terminal opportunity and causal confirmation
A completed terminal opportunity and the signal timing actually available through causal confirmation can differ substantially.
Once a swing has reached structural finalization, its retained terminal can be identified precisely within the completed structure.
At that terminal itself, however, the signal that ultimately corresponds to the completed opportunity may not yet have confirmed.
Price can move before confirmation becomes available.
An earlier signal can fail or be superseded.
The opposite terminal can later reveal that a retained signal did not produce a positive completed opportunity.
The finder keeps these relationships visible.
The Perfect terminal remains the Perfect terminal.
The causal confirmation remains the causal confirmation.
This allows direct comparison between:
where the complete retained opportunity began
and
where the corresponding causal signal became available
without moving either reference point to make them appear equivalent.
Perfect search structure
The Perfect search evaluates structurally finalized retained opposite-terminal relationships.
For a BUY-side opportunity, the completed structure runs from a retained trough toward a retained opposite peak.
For a SELL-side opportunity, the completed structure runs from a retained peak toward a retained opposite trough.
The finder evaluates the complete retained swing rather than an isolated signal bar.
The first retained terminal supplies the Perfect Entry reference.
The later opposite retained terminal supplies the Perfect Exit reference.
A positive directional result qualifies the completed relationship as a Perfect Opportunity.
The terminal relationship defines the Perfect search.
Causal signal foundation
The Perfect results remain connected to an underlying causal signal process.
This matters because identifying the finalized Perfect terminal retrospectively does not make that exact terminal entry or exit causally executable when the terminal bar originally occurred.
The associated causal confirmation remains separately preserved.
That provides the causal comparison reference for the completed Perfect opportunity.
Structural resolution
Structural resolution determines when a retained swing reaches structural finalization and becomes available to the completed Perfect search.
The script provides selectable structural approaches for reviewing this relationship.
These approaches can produce differences in finalization timing and retained structural presentation.
They do not change the central definition of a Perfect Opportunity:
a structurally finalized retained entry terminal followed by its retained opposite terminal with a positive directional result.
Earliest Terminal
Earliest Terminal provides an alternative structural view emphasizing earlier retained terminal context.
Original Grouping
Original Grouping provides the script's primary grouped structural view.
Conditional Accelerated
Conditional Accelerated provides an alternative earlier-finalization structural view when its conditions are satisfied.
These modes affect structural finalization and retained terminal identity while preserving the same Perfect Opportunity definition.
Retained signal identity
More than one causal signal attempt can occur during a structural swing.
The completed finder result does not treat all of those attempts as equivalent.
A retained signal identity provides the connection between the causal signal process and the structurally finalized terminal result.
Other signal attempts can remain visible as superseded or false/non-perfect context.
Retained terminal association
The finder preserves two conceptually different references:
Terminal reference
the retained structural extreme belonging to the structurally finalized opportunity.
Causal reference
the corresponding signal confirmation that was actually available through the causal signal process.
These references describe different parts of the same completed opportunity.
Neither replaces the other.
Retained terminal chain
Structurally finalized retained terminals provide the sequence used by the Perfect search.
A newest retained terminal by itself does not yet provide a complete terminal-to-terminal opportunity.
A later opposite endpoint is needed before the completed pair can be evaluated.
This prevents the normal retrospective search from treating unfinished structure as though its later endpoint were already known.
Eligible terminal pair
A structurally finalized retained opposite-terminal relationship provides the potential Perfect Entry and Perfect Exit.
The directional terminal-to-terminal result determines whether that completed relationship qualifies as a Perfect Opportunity.
The Perfect endpoints remain the retained structural terminals.
The search does not redefine them using the causal confirmation or an arbitrary interior price.
Perfect Opportunity
A Perfect Opportunity is a qualifying structurally finalized retained opposite-terminal relationship with a positive directional terminal-to-terminal result.
For a BUY-side opportunity, the retained trough is followed by a higher retained opposite terminal.
For a SELL-side opportunity, the retained peak is followed by a lower retained opposite terminal.
A zero or negative completed directional result does not qualify as Perfect.
Perfect is therefore a search definition applied to structurally finalized retained structure.
It is separate from whether the causal confirmation captured all, some, or little of that move.
Perfect Entry
The Perfect Entry is the first retained terminal of a qualifying completed opportunity.
For a BUY-side opportunity, this becomes the Perfect Buy .
For a SELL-side opportunity, this becomes the Perfect Sell .
The marker remains anchored to the retained terminal used by the completed search.
It is not moved forward to the causal confirmation.
Perfect Exit
The Perfect Exit is the retained opposite terminal that completes the qualifying opportunity.
The finalized structural endpoint defines the exit.
The finder does not replace it with an arbitrary interior price simply because that price would have produced a larger temporary result.
This preserves a consistent terminal-to-terminal definition.
Perfect Hold
PERFECT HOLD spans the complete qualifying retained opportunity.
For a Perfect BUY, it represents the retained trough-to-opposite-peak movement.
For a Perfect SELL, it represents the retained peak-to-opposite-trough movement.
The displayed hold therefore represents the complete Perfect opportunity between the two retained endpoints.
Shared Perfect Exit and next Perfect Entry
One retained terminal can conceptually complete one opportunity and begin another.
For example, a retained peak can complete a BUY-side Perfect opportunity and also become the starting terminal of a later SELL-side opportunity.
Likewise, a retained trough can complete a SELL-side opportunity and begin a later BUY-side opportunity.
The chart can present these shared terminal relationships without changing the underlying Perfect definitions.
Causal confirmation comparison
The finder can display the causal confirmation associated with a Perfect terminal opportunity.
The causal reference shows where the corresponding surviving signal became available.
The Perfect reference remains at the structurally finalized retained terminal.
This produces a direct comparison between:
Perfect terminal opportunity
and
causal signal availability
without treating the Perfect terminal as though it were known causally at that point.
Terminal-to-confirmation delay
The finder measures the timing difference between the retained Perfect Entry terminal and its corresponding causal confirmation.
A same-bar relationship has no bar delay.
A later confirmation represents a later causal availability point.
The purpose of this measurement is to expose the timing gap between the completed Perfect benchmark and the signal timing actually represented by the causal process.
Perfect result
Perfect Result is the directional percentage result between the retained Perfect Entry and retained Perfect Exit of a qualifying opportunity.
It represents the full completed terminal-to-terminal opportunity identified by the finder.
Causal result
Causal Result uses the corresponding causal confirmation as the entry reference while preserving the same completed exit context.
This allows the causal result and Perfect result to be compared within the same completed opportunity.
The two measurements answer different questions and are not interchangeable.
Opportunity Capture
Opportunity Capture describes how much of the completed Perfect opportunity is represented by the corresponding causal result.
It provides a normalized comparison between:
the complete retained opportunity
and
the result represented from causal confirmation.
Its purpose is interpretation, not to redefine either reference.
Confirmation Loss
Confirmation Loss describes the difference between the Perfect Result and corresponding Causal Result.
It shows how much of the completed terminal-to-terminal movement was not represented from the causal confirmation reference.
Perfect Result, Causal Result, Opportunity Capture, and Confirmation Loss therefore provide different views of the same completed opportunity.
False / non-perfect context
The finder can expose causal signal activity that did not become part of a qualifying Perfect Opportunity.
This can include:
1. signal attempts that were later superseded
2. structurally finalized retained relationships whose directional result was not positive
These categories help distinguish the wider causal signal stream from the subset of completed relationships classified as Perfect.
Superseded attempts
Several causal signal attempts can occur while the underlying structure is still developing.
Not every attempt becomes the retained identity associated with the structurally finalized opportunity.
Non-retained attempts can remain visible as superseded context.
This allows users to see that the eventual Perfect terminal association does not imply every earlier causal signal was correct.
Retained non-positive pairs
Structural retention alone does not automatically create a Perfect Opportunity.
A structurally finalized retained relationship must still satisfy the Perfect Opportunity definition.
If the completed directional terminal-to-terminal result is zero or negative, it does not qualify as a Perfect Opportunity and remains non-perfect context.
Unmatched newest retained terminal
The newest retained terminal remains incomplete until a later opposite terminal provides the second endpoint needed for structural finalization of the terminal-to-terminal relationship.
The normal retrospective search therefore does not prematurely classify that newest terminal as Perfect or non-perfect.
The optional preview can temporarily expose what the unfinished structure currently implies.
That preview remains separate from structurally finalized retained history.
Finder modes
The script contains two search modes:
Retrospective
Repainting Preview
They use the same conceptual Perfect Entry/Exit definition.
Their difference is whether the newest unfinished chart-edge structure is temporarily included.
Retrospective
Retrospective uses structurally finalized retained relationships.
Its Perfect results are based on swings whose terminal relationship has already reached structural finalization.
This is the primary review mode.
Repainting Preview
Repainting Preview temporarily extends the same search concept to the unfinished chart-right structure.
It shows what the newest result currently looks like before structural finalization has occurred.
Because the latest structural state is unfinished, preview-only output can change as future bars arrive.
The preview therefore repaints by design.
It should not be interpreted as a permanent causal Perfect signal.
Permanent completed history and preview state
The finder keeps structurally finalized retained history separate from temporary preview completion.
Finalized retrospective results belong to the completed search.
Preview-only results belong to the unfinished chart-edge state.
This allows the finder to expose both:
structurally finalized Perfect Entry/Exit structure
and
the currently implied unfinished structure
without treating them as equivalent.
Perfect Entry / Exit display
The primary display can show:
Perfect Buy
Perfect Sell
Perfect Exit
Perfect Hold
terminal-to-terminal result
causal confirmation comparison
and supporting opportunity context
These visuals represent the underlying search result.
Display settings do not redefine what qualifies as a finalized Perfect Opportunity.
False-context display
False/non-perfect context can be displayed separately from Perfect results.
This allows the chart to show the broader causal signal activity around finalized opportunities without changing which retained terminal relationships qualify as Perfect.
Structural context
The finder retains structural context around the signals and finalized opportunities being reviewed.
This context can help distinguish finalized, unresolved, retained, or superseded relationships.
The Perfect Opportunity itself remains defined by the structurally finalized retained terminal relationship and its directional result.
Search reconstruction
The finder reconstructs the historical search context needed to display causal signal relationships, structurally finalized opportunities, and the current unfinished state.
The purpose is to preserve the distinction between causal signal timing and finalized terminal identity across loaded chart history.
Perfect Opportunity Rate
The finder calculates a Perfect Opportunity Rate describing how often eligible finalized retained terminal relationships satisfy the Perfect Opportunity definition.
Perfect Opportunity Rate is not a trading win rate.
It describes the completed search classification.
It does not establish the result of an executed strategy using causal entries, transaction costs, slippage, sizing, or external risk rules.
Search statistics
The finder provides summary statistics describing the finalized Perfect search, causal comparison, false/non-perfect context, and current search state.
These statistics are designed to help interpret the search result.
Status pages
The script includes a compact status interface for reviewing the current Perfect search, causal comparison, timing, and interpretation context.
The status display supports chart review without requiring every measurement to be placed directly on the chart.
Alerts and execution
Perfect Trading Entry Exit Finder is not an execution engine.
Retrospective Perfect terminal results identify the completed ideal entry and exit endpoints. Those exact terminal entries or exits are only causally executable at those same bars when the corresponding causal confirmation actually becomes available there.
The Perfect structure and causal confirmation are retained for search, review, and comparison.
When causal confirmation occurs later, the executable causal entry or exit occurs later; the retrospective Perfect terminal remains the completed ideal endpoint rather than an entry or exit that was available at that earlier terminal bar.
The optional preview also remains a search preview rather than an execution-ready Perfect signal source.
Finder behavior
Perfect Trading Entry Exit Finder combines causal signal identity with finalized terminal-to-terminal opportunity searching.
Its broad workflow is:
causal signal activity develops
retained structural relationships reach finalization
a completed terminal-to-terminal relationship becomes available for review
positive finalized relationships can qualify as Perfect Opportunities
Perfect Entry, Hold, and Exit remain attached to the retained terminal structure
and the corresponding causal confirmation remains separately available for comparison
The optional preview can temporarily extend the same search concept to the unfinished newest structure.
Features
Perfect terminal-to-terminal Entry/Exit finder
Perfect Buy identification
Perfect Sell identification
Perfect Exit identification
Perfect Hold paths
retained trough-to-peak opportunity review
retained peak-to-trough opportunity review
positive finalized opportunity classification
actual retained terminal anchoring
causal confirmation preservation
direct Perfect-versus-causal comparison
confirmation timing comparison
Perfect Result
Causal Result
Opportunity Capture
Confirmation Loss
false/non-perfect context
superseded signal context
unresolved newest-terminal handling
selectable structural views
finalized historical search mode
Repainting Preview
false-context visualization
Perfect Hold visualization
causal comparison markers
supporting search statistics
Perfect Opportunity Rate
compact review/status interface
review-focused standalone finder
completed ideal Perfect entry/exit endpoints compared directly with whether those exact endpoints were causally executable at the time
Strengths
Perfect Entry/Exit Search — directly finds qualifying finalized terminal-to-terminal opportunities rather than stopping at the original causal signal.
Terminal-to-Terminal Structure — Perfect Entry and Perfect Exit remain tied to retained structural endpoints.
Complete Swing Representation — Perfect Hold represents the full retained opportunity between those endpoints.
Causal Identity Preservation — keeps the corresponding causal confirmation connected to the finalized opportunity for comparison.
Direct Perfect-versus-Causal Comparison — shows both the complete retained opportunity and the result represented from causal confirmation.
Opportunity Capture Measurement — quantifies how much of the completed Perfect opportunity is represented by the causal result.
Confirmation Loss Measurement — measures the difference between Perfect and causal results.
No Arbitrary Exit Substitution — does not replace the retained opposite terminal with an arbitrary interior best price.
False-Context Separation — keeps superseded and non-positive finalized relationships distinct from qualifying Perfect Opportunities.
Unfinished-Terminal Discipline — normal retrospective results are not finalized until the necessary opposite structural endpoint exists.
Structural Choice — selectable structural views can be compared while preserving the same central Perfect concept.
Finalized-History Separation — finalized search results remain distinct from temporary chart-edge preview output.
Preview Capability — the currently implied unfinished Perfect structure can be inspected while remaining explicitly identified as repainting.
Search Diagnostics — timing, capture, confirmation loss, false context, and opportunity context remain measurable.
Weaknesses
Opposite-Terminal Requirement — the complete Perfect Entry/Exit opportunity is not known until the later retained opposite endpoint structurally finalizes the relationship.
Terminal Hindsight — the finalized retained terminal and causal confirmation are different reference systems and can occur at different times and prices.
Confirmation Delay — part of the complete terminal-to-terminal movement can occur before causal confirmation becomes available.
Superseded Signals — multiple causal attempts can occur before structural finalization establishes the retained relationship.
Non-Positive Retained Relationships — structural retention alone does not guarantee a positive Perfect Opportunity.
Perfect Definition Scope — Perfect refers specifically to the positive finalized terminal-to-terminal search definition.
No Interior Exit Optimization — the retained opposite terminal remains the Perfect Exit even if another temporary price would have produced a larger result.
Structural Dependence — different structural views can affect finalization timing and retained terminal presentation.
Causal-Signal Dependence — the comparison remains connected to an underlying causal signal process.
Preview Repainting — unfinished preview output can move, disappear, or change before structural finalization.
Perfect-Terminal Executability Is Conditional — a finalized Perfect terminal is the completed ideal entry or exit endpoint, but it is executable at that exact terminal bar only when the corresponding causal confirmation actually becomes available there.
Perfect Opportunity Rate Is Not Win Rate — it measures search classification rather than executed strategy performance.
No Execution Engine — the standalone finder does not turn Perfect search output into automated trading decisions.
No Full Strategy Return Calculation — it does not establish complete returns after sizing, transaction costs, slippage, and external trading rules.
Who it’s for
This tool is best suited for:
advanced TradingView users
users investigating the Perfect Entry/Exit problem
users searching for complete retained terminal-to-terminal opportunities
users comparing causal signal timing with structurally finalized terminal structure
users studying how much of a move occurs before confirmation
users examining trough-to-peak and peak-to-trough opportunities
users comparing Perfect Result and Causal Result
users studying Opportunity Capture
users studying Confirmation Loss
users examining false and superseded signal activity
users studying structural finalization and retained terminal relationships
users who want entry and exit markers anchored to actual retained endpoints
users who do not want arbitrary interior prices substituted for Perfect Exit
users who want the complete hold path between retained terminals
users comparing finalized structural results with an unfinished preview
users developing or evaluating separate causal methods against an explicit Perfect benchmark
Who it’s not for
This tool is not best suited for:
users expecting Perfect terminal markers to be live causal signals
users expecting final retained extremes to be known at the exact moment they occur
users expecting every causal signal to survive structural finalization
users expecting every finalized retained terminal relationship to qualify as Perfect
users expecting Perfect Opportunity Rate to represent an executed trading win rate
users expecting unfinished preview results to remain fixed
users expecting preview-only terminal markers never to repaint
users looking for broker execution from retrospective Perfect markers
users looking for automated position management from Perfect results
users looking for a complete trading strategy
users expecting causal confirmation and Perfect terminal timing to always coincide
users expecting the finder to remove confirmation delay
users expecting a guarantee of profitability or future performance
Known limitations
The finder is better at:
finding finalized retained terminal-to-terminal opportunity structure
identifying positive finalized terminal relationships
preserving complete Perfect Entry/Hold/Exit geometry
anchoring results to retained structural extremes
linking Perfect opportunity identity with causal signal confirmation
comparing complete opportunity with causal availability
measuring confirmation delay
measuring Opportunity Capture
measuring Confirmation Loss
exposing superseded and non-perfect context
comparing finalized and unfinished search structure
and reviewing how causal signals relate to complete terminal swings
than it is at:
identifying the final retained terminal causally before structural finalization
eliminating delayed confirmation
eliminating false or superseded signals
guaranteeing that every retained relationship produces a positive result
turning Perfect terminal markers into operational entries
determining whether the newest unfinished preview terminal will remain final
or determining a complete future trading result
A Perfect Opportunity is defined by the structurally finalized retained terminal relationship.
The causal confirmation can represent all, some, or very little of the complete terminal-to-terminal movement.
That difference is part of what the finder exposes.
A large Perfect Result can therefore coexist with a much smaller Causal Result.
Opportunity Capture and Confirmation Loss describe that difference.
Likewise, a retained signal can remain structurally relevant while its finalized opposite-terminal result still fails the Perfect qualification.
The term Perfect therefore belongs to the finalized search definition.
It does not imply that the finalized terminal was causally available as a Perfect signal when it originally occurred.
The optional Repainting Preview introduces an additional limitation.
It evaluates unfinished chart-right structure before structural finalization.
Future bars can therefore change preview-only output.
Finalized retrospective results remain separate from that temporary preview.
Perfect result scope
The Perfect result represents the complete retained terminal-to-terminal directional opportunity of a qualifying structurally finalized relationship.
It can include:
Perfect Buy or Perfect Sell
Perfect Exit
Perfect Hold
retained entry and exit terminals
terminal-to-terminal result
corresponding causal confirmation
Causal Result
Opportunity Capture
Confirmation Loss
and false/non-perfect context
These measurements preserve the complete opportunity and causal signal result as separate but directly comparable references.
Final note
Perfect Trading Entry Exit Finder is an experimental finder for the entry-and-exit problem that remains when the complete terminal opportunity and the causal signal available during that opportunity are not the same thing.
Its central capability is the retained terminal-to-terminal search.
Positive structurally finalized terminal relationships can become Perfect Opportunities.
The corresponding:
Perfect Entry
Perfect Hold
and Perfect Exit
remain attached to the retained terminal structure.
The causal confirmation remains separately preserved.
This allows the finder to expose both:
the complete retained entry-to-exit opportunity
and
the result represented from the corresponding causal confirmation
inside the same finalized swing.
False, superseded, or non-perfect signal context remains separately visible.
The optional preview can extend the same search concept to unfinished chart-edge structure, with its repainting behavior kept separate from structurally finalized results.
Perfect Trading Entry Exit Finder therefore remains centered on the problem it attempts to address:
locating the complete retained terminal entry, hold, and opposite-terminal exit opportunity while preserving the causal signal that was actually available for comparison.
Profitability is not guaranteed.
Future performance is not guaranteed.
The finder reports the Perfect opportunity, its terminal structure, corresponding causal result, timing difference, capture, confirmation loss, and false/non-perfect context. The retrospective Perfect terminals are the completed ideal entry and exit endpoints, but those exact terminal entries or exits were only causally executable at the time when the corresponding causal confirmation actually occurred at those same terminal bars; otherwise the executable causal timing occurred elsewhere. Indicador

Liquidity Magnet TerminalLiquidity Magnet Terminal
Liquidity Magnet Terminal is a volume-weighted liquidity mapping tool that helps traders identify the price levels where the market has historically accumulated the most trading interest — the zones most likely to act as magnets for future price movement.
Most support/resistance tools plot every swing high and low individually, which quickly clutters the chart with dozens of overlapping lines of equal visual weight. This script takes a different approach: it treats pivots as raw data points, clusters the ones sitting close together into unified zones, and weights each zone by the volume that traded at those levels. The result is a small, ranked set of levels — the ones that actually matter — instead of visual noise.
How the zones are built
The script continuously scans for pivot highs and lows using a configurable lookback window, recording the price, volume, and direction (resistance vs. support) of each one. As new pivots form, nearby pivots of the same direction are merged into a single zone using a volume-weighted average — meaning a pivot backed by high volume pulls the zone's price toward itself more strongly than a low-volume pivot would. This mimics how real liquidity accumulates: not at one exact tick, but across a cluster of prices where repeated buying or selling interest has occurred.
Each resulting zone is then scored by its total accumulated volume and normalized against the strongest zone on the chart, producing a relative strength score from 0 to 1. Only the top-ranked zones (configurable count) that clear a minimum strength threshold are kept and drawn — everything else is filtered out automatically.
What you see on the chart
Horizontal lines marking each liquidity zone, color-coded by direction (resistance zones in red, support zones in green), with line length and opacity scaling to zone strength — the strongest, most "magnetic" levels stand out visually without any manual adjustment
A star marker (⭐) highlighting zones in the top strength tier (≥75% relative strength)
A compact terminal-style panel showing current price alongside all active zones, their price levels, and a strength bar for at-a-glance comparison
Inputs
Pivot strength, lookback period, number of zones to display, zone merge tolerance (%), minimum strength filter, line width, and toggles for the panel, price labels, and star markers — all adjustable to fit different timeframes and instruments.
How to use it
Liquidity Magnet Terminal is designed as a contextual map, not a standalone signal generator. Use the ranked zones to anticipate where price is likely to react, get drawn toward, or reverse from — then combine that context with your own entry triggers, market structure analysis, and risk management. Zone strength reflects historical volume clustering; it does not predict direction or guarantee a reaction. Indicador

Trade Wzrd - Null Range [Rampage Series]✨ TRADE WZRD - NULL RANGE
Every range has two middles. The one price draws - the midpoint - and the one VOLUME draws: the exact price where everything traded inside the range nets to nothing. Half the participation above, half below. The balance point where the tug-of-war reads null .
Null Range plots that line, builds a channel out of volume's own deviation, and fades the pokes that venture beyond it - out where participation thins to nothing. Not a promise - a receipt.
⚡ THE RAMPAGE SERIES ⚡
Null Range is a release in the Rampage Series - a growing family of volume-and-levels tools built by Trade Wzrd. Every Rampage script ships with the same built-in automation layer: signals don't just paint, they speak. One alert, one webhook, and every entry, exit and fill fires a plain-text order string.
✨ THE NULL RANGE ✨
The dealing range's volume is distributed across a hundred invisible bins, and the 50/50 split becomes a single glowing line. Not a midpoint. Not an average. The price where the crowd's money actually nets to zero. And the line itself is the regime read: it runs CYAN when volume's center of mass sits in the cheap half, RED when it sits in the expensive half. Its right-edge tag carries VOL CENTER - the exact percentage. Hover it for the full story.
⚡ THE VOLUME CHANNEL ⚡
The same bins yield volume's standard deviation - so Null Range draws the channel where participation actually lives: two glowing sigma walls around the line with graded fills, and nothing else. ~95% of traded volume lives inside. Price beyond the wall is price out where volume goes null - extended, exhausted, and ripe for the trap.
✨ KINETIC FUEL ✨
Under the structure, a fuel strip burns: volume times speed, candle by candle, normalized against recent history. Bull fuel hangs off the discount wall in cyan, bear fuel off the premium wall in red - spike squares mark the bars that moved real mass, and WALL SLAM diamonds stamp the bars where that mass physically hit a wall. When a trap springs off a slam, the whole crowd pushed - and still failed.
⚡ THE MARGIN PROFILE ⚡
In the right margin, the range's own bins draw themselves quietly - spanning exactly wall to wall, because that's where the volume that matters lives. Every row is tinted by who owned that price: cyan where buyers dominated, red where sellers did. The Point of Control is ringed in gold. Width, offset, delta coloring - all yours. It's the same engine as the line, laid on its side.
✨ FLOW HEAT ✨
No labels. No lines. Just heat. When price sinks while buy pressure quietly rises, the tape washes faint cyan - someone is loading into weakness. When price rises while sell pressure builds, it washes faint red - someone is unloading into strength. The disagreement between pressure and price, painted as weather. The dashboard's FLOW HEAT row names the shift when it's live.
✨ THE FILTERS ✨
Trade only what the database believes in. Min Win Probability skips signals from cold buckets (once they have enough samples to judge - TRACKING signals always pass). Max Extension skips blow-off pokes. Balance Alignment demands volume's center be on your side. Every active filter shows on the dashboard's FILTERS row, so you always know what the engine is allowed to take.
✨ THE TRAP ✨
The signal: price pokes beyond the two-sigma wall - out into the null - and closes back inside within the trap window. The fakeout. Fade it back toward the line - the default target IS the null range itself, because mean-reversion trades deserve mean-reversion targets. Premium traps short from above, discount traps long from below. EQ Reclaim mode (decisive crosses back through the line, 0.2 ATR minimum, no whipsaw) is there for continuation players.
⚡ THE CONVICTION SCORE ⚡
Here is where Null Range stops asking for trust. Every signal carries one compact number - CONVICTION - that no single ingredient could give you. Underneath it sits this chart's own live database: traps bucketed by how deep the extension ran (0–0.25, 0.25–0.5, 0.5–1.0, 1.0+ ATR beyond the wall), reclaims bucketed by whether volume's center was on their side. That historical win rate is the base - then the score bends with the scenario: volume's center on your side or against you, a tidy poke or a blow-off, a spike bar or thin air. History + balance + depth + fuel, fused into one grade from 5 to 95. Early on, before the buckets earn their samples, the score runs on structure alone - and says so.
And the hover is REACTIVE . Point at any signal and the verdict breaks the score into its parts: the conviction line, thin-sample warnings when a bucket is young, hot/cold bucket verdicts, depth-risk notes on blow-off extensions, balance alignment with the crowd's cost basis, and a fuel read on the participation behind the poke. Same model, different situation, different answer.
✨ THE RECEIPTS ✨
Signals stay on the chart as compact conviction chips - ▲ T 72, ▼ R 64 - one glance, one grade. Every closed trade stamps ✓ TP HIT or ✗ SL HIT exactly where it died. The dashboard tracks the VOL CENTER and PRICE POS gauges, the regime word, EQ/POC/channel width, the last signal with its conviction, the FLOW HEAT state, the database total, and a 10-dot streak row. The trade box carries entry, dashed stop, solid target with live R:R - and the conviction rides inside the entry tag.
⚡ YOURS TO SHAPE ⚡
Every visible piece answers to you: walls on or off, the line gradient or solid, EQ and POC tags toggleable, POC width, profile width and offset, delta colors or one solid tone, fuel strip, slam markers, flow heat, channel fills. The defaults are the house look - the knobs are all yours.
⚡ BUILT-IN AUTOMATION ⚡
One alert ("Any alert() function call") + your webhook URL, and Null Range speaks TradeWzrd order strings:
⚡ Entries with SL/TP prices attached
⚡ Optional opposite-signal close prepended to new entries
⚡ TP/SL-hit close alerts that mirror the on-chart trade box
The same readable comma syntax drives automation across 7+ platforms - percent-risk or fixed-volume sizing, magic numbers, order comments. No lock-in: plain text, any endpoint.
✨ HOW TO READ IT ✨
⚡ One glowing line = where the range's volume nets to null. Cyan = volume built low, red = volume built high
⚡ The graded channel = where ~95% of the volume lives. Price outside the wall = out in the null, extended
⚡ Fuel candles below/above the walls = kinetic energy per bar; squares = spike bars; diamonds = wall slams, mass meeting structure
⚡ Faint cyan/red wash behind the tape = flow heat: pressure and price disagreeing
⚡ The quiet profile in the margin, wall to wall = who owns each price: cyan rows buyers, red rows sellers, gold ring POC
⚡ ▲ T / ▼ T chips = the trap just failed - the number is conviction: this chart's track record bent by balance, depth and fuel. Hover for the breakdown
⚡ ▲ R / ▼ R chips = decisive reclaims of the line, same conviction engine
⚡ Dashboard: gauges, regime, FILTERS row, FLOW HEAT row, DATABASE row (trap and reclaim rates separately), streak dots
⚡ HOW TO USE ⚡
⚡ Drop it on any liquid symbol, 5m to 4H - tuned defaults for XAUUSD 15m
⚡ Let it run. The database is empty at first - conviction runs on structure alone until the buckets earn their samples
⚡ Compare buckets: if shallow traps earn 70% and deep ones earn 40%, you know exactly which pokes to take
⚡ Wire one alert when you're ready to automate
✨ LIMITATIONS ✨
⚡ Conviction starts from this chart's own history, bucketed - a sample, not a promise. Small samples lie confidently; the hover tells you when a bucket is young
⚡ The database resets when you change symbols, timeframes, or core settings - every context earns its own track record
⚡ Traps fade extensions - in a runaway trend, the outer wall keeps getting hit and the trap window is the honest filter
⚡ On symbols without volume data, the line falls back to midpoint and sigma to range/4
✨ CREDITS ✨
Kinetic fuel concept inspired by "Kinetic Momentum Vectors" by BigBeluga (CC BY-NC-SA 4.0). Concept only and Null Range's fuel is re-engineered from zero: volume times speed, burning off our own volume-channel walls. No code or geometry shared with the original.
Rift maps WHERE the volume traded. Null Range knows WHERE THE VOLUME NETS TO NOTHING - and what fading the void has been worth.
Educational shell. Not financial advice. Not a signal service. Indicador

SMC Institutional Execution & Liquidity Matrix PROSMC Institutional Execution & Liquidity Matrix PRO
SMC Institutional Execution & Liquidity Matrix PRO is an advanced, institutional grade technical analysis framework engineered for modern technical traders and quantitative analysts. It provides an intuitive, high definition visual presentation of Smart Money Concepts, dynamic liquidity zones, market structure shifts, and institutional order flow bias without cluttering price action.
Key Features Overview
1. Glowing Trend Wave Engine
Features an ultra smooth dynamic trend wave layer with a soft glow effect. It seamlessly adapts color according to current market momentum, helping traders instantly identify overall dynamic directional bias.
2. Clean Split Line Market Structure
Maps Break of Structure (BOS) and Change of Character (CHoCH) points with extreme precision. The structure line splits neatly in the center with a dedicated gap around the text label, keeping price action clear and uncluttered.
3. Auto Cleaning Institutional Liquidity Zones
Automatically detects Supply and Demand imbalances and key liquidity pools. To maintain visual clarity, mitigated zones automatically adjust and delete themselves as soon as price fills the imbalance.
4. Text Free Major High and Low Badges
Isolates major macro swing high and low extremes using solid colored badges without text clutter. Highlights Intermediate Term High and Low alternatives for instant turning point identification.
5. Smart Candle Heatmap & Displacement Highlights
Dynamically colors price candlesticks based on overall macro trend state, while highlighting high momentum volume displacement expansion candles in a distinct gold color.
How to Use
Step 1: Determine Macro Bias
Observe the Glowing Trend Wave and dynamic candle theme to assess overall institutional trend bias and momentum.
Step 2: Monitor Clean Structure Signals
Look for precise Break of Structure lines and Change of Character signals to identify structural continuity or reversals.
Step 3: Execute in Active Liquidity Zones
Utilize active, unmitigated Supply and Demand boxes for high probability entry and exit locations aligned with order flow.
Settings Overview
Glowing Wave Settings
- Show Glowing Trend Wave: Toggle display of the dynamic trend wave.
- Wave Period & Line Thickness: Adjust wave sensitivity and visual halo glow.
Market Structure Settings
- Show BOS & CHoCH Lines: Toggle market structure signals.
- Customization: Independently adjust line styles, line width, and font size.
Liquidity Zone Settings
- Show Auto Liquidity Zones: Toggle Supply and Demand boxes.
- Zone Fill Transparency: Customize fill opacity from 0 to 100.
Major Swing Settings
- Show Clean Major Swing Badges: Toggle directional pivot badges.
Disclaimer
This script is built strictly for educational, analytical, and charting enhancement purposes. It does not provide financial advice, automated trade signals, or guaranteed results. Always practice strict risk management.
Indicador

HTF Swing Highs & LowsAn open-source multi-timeframe market structure indicator that automatically identifies and projects confirmed swing highs and swing lows from the Weekly, Daily, and 4-Hour timeframes onto any lower timeframe chart.
The indicator is designed to provide clean, non-repainting support and resistance levels based on confirmed market structure rather than developing pivots.
Features
- Weekly, Daily and 4H swing highs and lows
- Non-repainting confirmed pivots
- Automatic higher timeframe detection using request.security()
- Horizontal levels extended until invalidated
- Independent visibility controls for each timeframe
- Hierarchical timeframe filtering
- Custom colours and line widths for every timeframe
- Adjustable pivot strength
- Wick, Close or Never invalidation options
- Stop or Delete broken levels
- Automatic level management to prevent exceeding TradingView object limits
How it works
The script uses confirmed pivot highs and lows from higher timeframes.
Unlike developing pivots, a swing is only confirmed after the selected number of candles has formed on both sides of the pivot. Once confirmed, a horizontal level is created at the swing price and extended to the right.
Because only confirmed pivots are used, historical levels do not repaint.
Pivot Strength
Pivot Strength controls how significant a swing must be before it becomes a level.
A strength of 3 means the pivot candle must have:
- three lower highs (or higher lows) before it
- three lower highs (or higher lows) after it
Higher values filter market noise and identify more significant market structure.
They also produce fewer levels and require longer confirmation.
Lower values detect smaller swings, produce more levels, react faster.
Level Invalidation
Choose how a level is treated once price trades through it.
Wick - Invalidates when price wicks beyond the level.
Close - Invalidates only after a candle closes beyond the level.
Never - Levels remain permanently.
Broken levels can either:
- Stop extending while remaining visible
- Be deleted completely
Hierarchical Visibility
The indicator can automatically display only relevant higher timeframe levels.
For example:
- Weekly levels appear on Weekly and all lower timeframes.
- Daily levels appear on Daily and all lower timeframes.
- 4H levels appear on 4H and lower charts.
This helps reduce clutter when analysing higher timeframe charts.
Notes
- Uses confirmed higher timeframe pivots only.
- Levels are anchored to the original swing candle.
- Designed for support and resistance, market structure, liquidity analysis, and confluence with other tools.
- Works on all symbols and asset classes supported by TradingView. Indicador

Automated Liquidity & Key Levels Matrix PROAutomated Liquidity & Key Levels Matrix PRO
Automated Liquidity & Key Levels Matrix PRO is an advanced, multi functional technical analysis script designed for quantitative traders and technical analysts. It automatically isolates high probability support and resistance zones, tracks real time market structure breakouts with split line clarity, highlights high volume expansion candles, and provides an attractive glowing trend wave layer.
Key Features Overview
1. Ultra Attractive Glowing Trend Wave
Includes a smooth dynamic trend wave with adjustable halo glow effects, line width, and colors to easily visualize dynamic trend direction.
2. Clean Split Line Market Structure Signals
Features refined Break of Structure and Change of Character signals. The structure line splits cleanly around the centered label, leaving a gap so the text stands out clearly without line overlap.
3. Text Free Clean Major Swing Badges
Isolates major macro swing high and low extremes using text free, solid color directional badges to keep chart visuals clean and minimal.
4. Dynamic Support and Resistance Zones
Automatically maps key supply and demand ranges across price action. To keep your chart clean and easy to read, broken or mitigated zones automatically disappear as soon as price breaks through them.
5. Volume Weighted Smart Candlestick Heatmap
Combines dynamic structural trend direction with volume expansion detection. High volume expansion bars render in distinct neon pink highlights for instant volatility identification.
6. Comprehensive Customization Panel
Includes independent controls for line thickness, text colors, line colors, font sizes, wave parameters, and zone fill opacity.
How to Use
Step 1: Trend Identification
Observe the Glowing Trend Wave and Volume Weighted Smart Candlestick theme to gauge underlying trend direction.
Step 2: Monitor Dynamic Key Zones
Look for price interactions around active, unmitigated support and resistance zones.
Step 3: Analyze Clean Structure Signals
Watch for Break of Structure and Change of Character signals displayed with split lines and centered labels.
Settings Overview
Glowing Wave Settings
- Show Glowing Wave Layer: Toggle display of the dynamic trend wave.
- Wave Period & Line Thickness: Adjust wave sensitivity and visual halo glow.
Market Structure Settings
- Show Breakout Signals: Toggle structural lines and labels.
- Independent Colors & Sizes: Customize BOS/CHoCH line colors, text colors, and font sizes separately.
Support and Resistance Settings
- Show Dynamic Support & Resistance: Toggle zone rectangles.
- Zone Fill Transparency: Customize fill opacity from 0 to 100.
Major Swing Settings
- Show Clean Major Swing Badges: Toggle text free ITH/ITL pivot badges.
Disclaimer
This script is built strictly for educational, analytical, and charting enhancement purposes. It does not provide financial advice, trade recommendations, or guaranteed results. Always practice proper risk management. Indicador

Institutional SMC & Order Flow Matrix PROInstitutional SMC & Order Flow Matrix PRO
Institutional SMC & Order Flow Matrix PRO is a clean, modern, and highly versatile technical charting tool engineered for traders practicing Smart Money Concepts and Order Flow Trading. Built with a focus on visual clarity, it eliminates unnecessary chart clutter by utilizing auto mitigating execution zones, swing anchored market structure lines, and an intelligent trend heatmap.
Key Features Overview
1. Precision Anchored Market Structure
Tracks Break of Structure and Change of Character signals with extreme precision. Lines originate directly from actual swing high or low pivot prices, while structure text labels sit neatly in the center of lines to prevent candle overlap.
2. Smart Auto Mitigating Order Block Zones
Automatically maps active institutional order blocks and imbalance execution zones. Mitigated zones automatically vanish from your chart once price fills the imbalance, keeping your workspace clean and professional.
3. Institutional Candle Heatmap
Features dynamic candlestick coloring driven by macro structural pivots. Bullish trend phases render in clean vibrant green, bearish phases in deep red, and high momentum displacement candles highlight in glowing gold.
4. Major Intermediate Term High and Low Badges
Automatically detects macro structural extremes. Displays solid red Intermediate Term High badges at major resistance tops and green Intermediate Term Low badges at major support bottoms.
5. Complete Manual Customization Suite
Includes comprehensive user settings for every element. Customize line styles, line thickness, border widths, box transparency, text alignment, text colors, and font sizes.
How to Use
Step 1: Identify Macro Trend Bias
Observe the Institutional Candle Heatmap theme to quickly determine current directional order flow.
Step 2: Monitor Centered Structure Signals
Look for precise Break of Structure lines and Change of Character signals anchored directly from swing points.
Step 3: Spot Gold Displacement Candles
Identify gold highlighted expansion candles that create fresh institutional order blocks.
Step 4: Trade Active Execution Zones
Utilize unmitigated bullish and bearish order block zones for high probability entries.
Settings Overview
Market Structure Settings
- Show Market Structure: Toggle structural line displays.
- Line Style and Thickness: Choose between Solid, Dashed, or Dotted lines with adjustable width.
Order Block Zone Settings
- Show Active Order Blocks: Toggle order block rectangles.
- Zone Fill Transparency: Adjust fill opacity from 0 to 100.
- Zone Text Settings: Customize display text, text alignment, font size, and text color.
Major Pivot Settings
- Show Major ITH / ITL Badges: Toggle visibility of macro pivot badges.
- Sensitivity: Adjust pivot lookback sensitivity.
Candle Heatmap Settings
- Enable Trend Candle Heatmap: Toggle dynamic trend candles and gold displacement highlights.
Disclaimer
This indicator is built strictly for educational, analytical, and charting enhancement purposes. It does not provide financial advice, trade recommendations, or guaranteed results. Always apply proper risk management principles. Indicador

Volume Profile Anchored VWAP, AVWAP Bands & Deviation [LunqFX]Most anchored VWAP tools make you drag the anchor by hand, and it goes stale the moment structure changes. This one places the anchor automatically at confirmed swing pivots, wraps it in volume weighted standard deviation bands, hangs the leg's volume profile off the right edge, and then measures whether those bands are being respected on the symbol in front of you.
The annotated charts below explain the script's output element by element.
❶ AUTO ANCHORED VWAP
An anchored VWAP is only meaningful from a point that mattered. Anchor it at an arbitrary bar and it describes nothing; anchor it where the market last turned and it becomes the average price everyone trading THIS leg is carrying — which is exactly the level they defend.
The anchor is placed at confirmed swing pivots, with two guards that matter more than they sound:
▸ MINIMUM LEG — a fresh pivot cannot take over until the running leg has had room to form. Without that rule a cluster of pivots chops the curve into stubs and the VWAP never describes anything. ▸ MAXIMUM LEG — a leg that outlives its usefulness resets rather than growing into a whole-history average.
Session, weekly and monthly anchors are available for traders who prefer calendar anchoring.
❷ STANDARD DEVIATION BANDS
Around the anchored VWAP the script draws volume weighted standard deviation bands at three depths, filled as a gradient so distance from fair value is readable without measuring. Three details make them behave:
▸ WARM-UP — at the anchor the deviation is zero by definition, so the first bars of every leg would draw as a collapsing funnel. Those bars are still measured; they are simply not drawn. ▸ MINIMUM WIDTH — an ATR floor stops the bands pinching shut during dead stretches. ▸ DISPLAY SMOOTHING — the deviation path is box-filtered for drawing only. The VWAP itself and every statistic use the raw values, so nothing you act on is smoothed.
❸ VOLUME FLOW
Each bar's participation is drawn as fine texture reaching inward from the band edges: buy pressure rises from the lower edge, sell pressure falls from the upper one, split by where the bar closed inside its own range. The bands are the baseline, so the leg's pressure reads along the structure instead of on a separate pane.
❹ VOLUME PROFILE OF THE LEG
At the right edge the script hangs the volume distribution of the whole leg, split buy against sell, with a seam line at the join and a traced outline. Each bar is binned against its OWN slice of the channel rather than a fixed price grid, so a sloping leg does not smear the distribution — a detail most profile overlays skip, and the reason the shape stays honest on a trending market.
❺ BAND REACTION STATISTICS
Bands tell you where price is. They do not tell you what that has meant here. So the script measures it: for every touch of the chosen band inside the current leg it checks whether price returned to the VWAP within your window, and reports the share that did, together with the number of touches.
That single number changes how the same picture is read. A leg where touches of the upper band came back to VWAP most of the time is mean-reverting, and the band is a fade. A leg where they did not is trending, and the same touch is continuation. Samples too small to conclude anything from are marked with a tilde rather than presented as a result.
❻ WHAT YOU SEE ON THE CHART
▸ Dashed vertical line with the ANCHOR badge — where the current leg begins. ▸ Three teal bands below and three red bands above, filled as a gradient — deviation depth from the VWAP. ▸ Dark line through the middle — the anchored VWAP itself. ▸ Fine ticks along the band edges — per-bar buy and sell participation. ▸ Horizontal rows at the right edge — the leg's volume profile, teal for buy, red for sell. ▸ Panel — side of the VWAP, distance in σ with a position ruler, the VWAP and band levels, and the reaction statistics.
❼ HOW TO TRADE IT
1 — Read the header. Above or below the anchored VWAP is the leg's bias; the σ figure is how stretched price is right now. 2 — Check the reaction row before deciding what a band touch means. High return rate means the bands are fades. Low return rate means they are continuation. 3 — Use the VWAP as the leg's fair value. Pullbacks into it in the direction of the leg are the cleanest entries this tool produces. 4 — Use the volume profile to find where the leg actually traded. Thin rows are areas price passed through quickly and tends to pass through quickly again. 5 — Watch the anchor. A new anchor means structure turned and the previous leg's levels stopped applying.
❽ NON-REPAINTING
This is the part that separates an anchored VWAP from a rolling regression channel, and it is worth being precise about. The anchor is a CONFIRMED pivot and only ever moves forward. A VWAP is cumulative, so once a bar closes its contribution to the average is fixed forever — every band value already printed stays exactly where it is. Nothing is recalculated behind you. Every statistic is built from closed bars only.
SETTINGS
▸ Anchor — anchor mode (swing pivot, session, week, month), pivot length, minimum and maximum leg. ▸ Bands — three deviation depths, warm-up bars hidden, minimum width in ATR, display smoothing, gradient fill and VWAP line toggles. ▸ Volume Flow — texture height in ATR and thickness. ▸ Volume Profile — rows, width, thickness, seam and outline toggle. ▸ Band Reaction — which band counts as a touch, the reaction window, optional touch markers. ▸ Visuals — candle colouring, anchor marker, dashboard position.
ALERTS — upper band touch, lower band touch, VWAP reclaimed, VWAP lost, and new anchor. All fire on closed bars only.
WHY THESE PARTS ARE ONE SCRIPT
They describe one object at four resolutions. The anchor defines the leg; the standard deviation bands measure dispersion inside it; the flow and the volume profile show where its volume actually went; and the reaction statistics say whether that structure is being respected. Take the anchor away and the VWAP averages a period nobody traded as a unit. Take the profile away and the bands float above an unknown distribution. Take the statistics away and the bands become decoration you have to interpret by feel. None of them stands alone, which is why they ship together.
Works on any symbol with volume — forex, metals, indices, crypto and stocks — on intraday and higher timeframes alike. Symbols without real volume data will report a flat profile.
This indicator is an educational market-analysis tool, not financial advice. The reaction statistics describe the recorded historical behaviour of the current leg on the loaded chart; past behaviour does not predict future results. Always confirm with your own analysis and manage your risk. Indicador

ICT Dynamic Entry Model & Structure Matrix PROICT Dynamic Entry Model & Structure Matrix PRO
ICT Dynamic Entry Model & Structure Matrix PRO is a clean, professional institutional charting script designed for traders following ICT mentorship principles and Smart Money Concepts. It delivers precise swing anchored market structure lines, dynamic trend candle themes, auto disappearing key levels, and gold highlighted expansion candles.
Key Features Overview
1. Precision Anchored BOS and CHoCH Structure
Market structure lines start exactly from the precise swing high or swing low origin price point. Text labels are positioned cleanly in the middle center of structure lines to avoid overlap with candlesticks.
2. Smart Trend Candle Engine
Driven by Intermediate Term High and Low levels. Once a red ITH prints, subsequent price candles dynamically adopt a solid bearish color scheme. When a green ITL prints, candles automatically convert to a bullish color scheme.
3. Gold Glowing FVG Expansion Candle Highlight
Identifies high momentum Fair Value Gap expansion candles, coloring the specific impulse candle in a distinct glowing gold yellow shade for instant institutional displacement detection.
4. Major ITH and ITL Level Badges
Features solid red Intermediate Term High badges and solid green Intermediate Term Low badges strictly at macro structural extremes.
5. Auto Disappearing Previous Day Boundaries
Tracks active Previous Day High and Previous Day Low boundaries. Daily lines automatically clean up and vanish as soon as price breaks or mitigates the level.
How to Use
Step 1: Identify Macro Shift
Look for green ITL badges for bullish bias or red ITH badges for bearish bias, which automatically adapts your overall candle colors.
Step 2: Monitor Centered Structure Signals
Observe precise dashed Break of Structure lines and solid Change of Character lines anchored directly from swing points with center aligned text.
Step 3: Spot Institutional Displacement
Identify gold glowing expansion candles that signal high volume displacement creating active Fair Value Gaps.
Settings Overview
Moving Average Settings
- Show Dual Moving Averages: Toggle visibility of EMAs.
- Period and Thickness Settings: Customize fast/slow periods and line width.
Market Structure Settings
- Show Precision BOS & CHoCH: Toggle centered structural lines.
- Sensitivity Period: Adjust pivot lookback calculations.
Smart Candle Settings
- Enable Smart Trend & Gold FVG Candles: Toggle dynamic trend colors and gold FVG expansion highlights.
Previous Day High and Low Settings
- Show Active PDH / PDL: Toggle display of auto disappearing daily key levels.
Entry Zone Settings
- Show Active Entry Zones: Toggle entry model rectangles and customize zone display text, text color, and fill opacity.
Disclaimer
This script is created strictly for educational, analytical, and charting enhancement purposes. It does not provide financial advice, trade recommendations, or guaranteed results. Always practice proper risk management.
Indicador