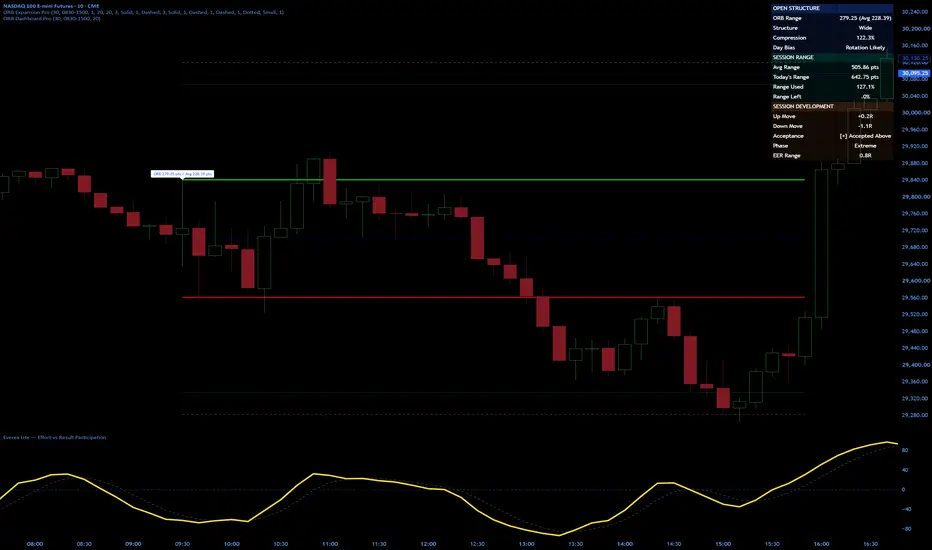
Sentinel Cascade [JOAT]Sentinel Cascade
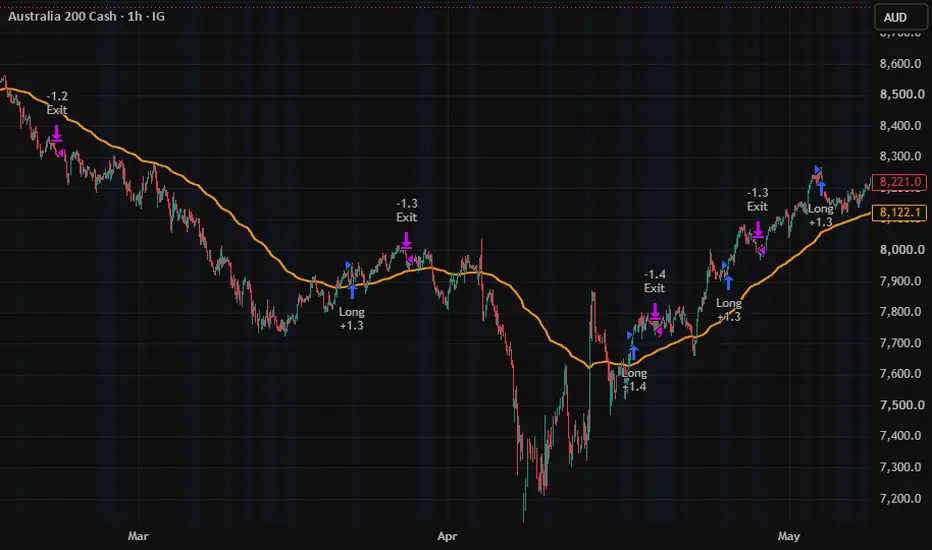
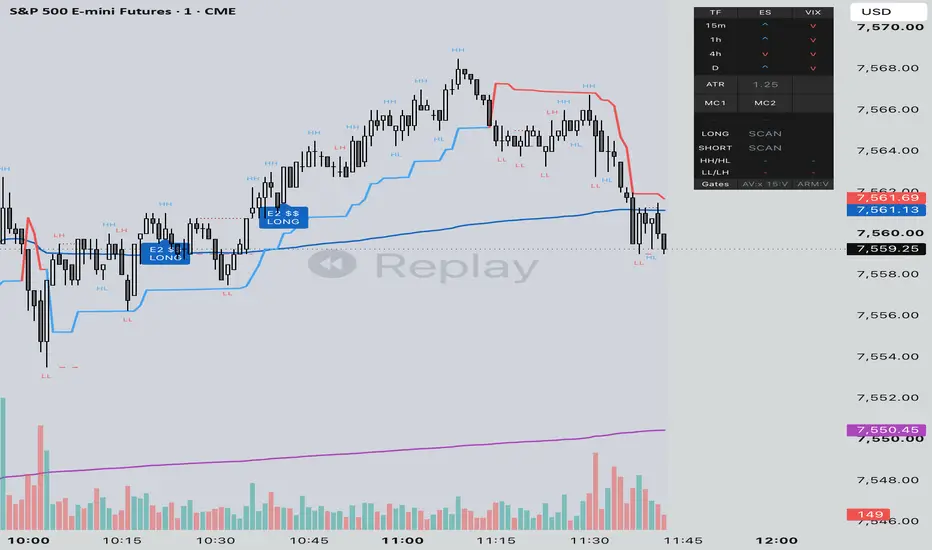
Sentinel Cascade is a three-stage adaptive Supertrend overlay. Where a classic Supertrend uses one fixed-ATR band, this script chains three Supertrend stages on top of each other and modulates each stage's width with a different regime signal. Bands tighten when the market is trending cleanly and widen when volatility expands or behavior turns mean-reverting.
What makes it different
A standard Supertrend gives one binary direction state. Sentinel Cascade gives three nested direction states that act like a confluence stack. Alignment of all three is the highest-conviction read.
The ATR feeding the Supertrend is smoothed through a Kaufman Efficiency Ratio. Trend-efficient periods get a faster ATR response. Choppy periods get a slower response.
Stage 2's width scales with a volume Z-score. High-volume bars widen the band so transient noise is less likely to flip the stage.
Stage 3's width scales with a lightweight two-point Hurst estimator (R/S over short and long windows). Trending Hurst above 0.5 widens. Mean-reverting Hurst below 0.5 tightens.
A Sentinel pulse fires only when Stage 3 flips AND Stage 2 confirms the new direction within three bars. A coincidence filter for higher-quality regime shifts.
How it works
Compute a basis price as the midpoint of the recent highest high and lowest low.
Compute a KAMA-smoothed ATR from the basis.
Build Stage 1 as a Supertrend on the basis using the KAMA-ATR and the Stage 1 factor.
Build Stage 2 as a Supertrend on Stage 1's output, with its factor multiplied by a clamped volume-Z modulator.
Build Stage 3 as a Supertrend on Stage 2's output, with its factor multiplied by a clamped Hurst modulator.
Track the Sentinel pulse, the ATR-percentile regime (squeeze / normal / expansion), and a running count of intraday Stage 3 flips.
Reading the chart
Three stacked trend lines. Stage 1 thickest, Stage 3 thinnest. Colors flip between bull and bear on direction changes.
A gradient ribbon between Stage 1 (or Stage 2 by user choice) and Stage 3 brightens when the stack is spread, fades when it converges.
An optional iridescent candle recolor scales tint with distance from Stage 3.
A horizontal sight-line projects Stage 3's current level back into history so past respect or rejection at that level is visible.
Persistent flip markers record each Stage 3 flip and retroactively append an OK or FAIL tag after a user-defined persistence window.
A right-edge state block summarizes alignment of all three stages plus the ATR squeeze and expansion read.
Signals
Stage 3 bull / bear shift (any flip)
Cascade alignment (all three stages agree)
Stage 2 retest / bounce inside an active trend
ATR squeeze and expansion entry (percentile-based)
All signals are gated on barstate.isconfirmed or barstate.ishistory. No future-bar referencing. No lookahead_on.
Inputs
Cascade : range basis length, ATR period, KAMA efficiency length, Stage 1 / 2 / 3 factors.
Regime : volume-Z lookback, Hurst short / long windows.
Visual : bullish color, bearish color, toggles for ribbon, sentinel pulse, iridescent candles, bounce markers, ribbon anchor.
On-chart : stage value labels, flip timeline labels, squeeze background tint, Stage 3 cloud, sight-line, state block, daily flip counter.
Dashboard : position, size, watermark row.
How traders use this
Trend continuation : take in the direction of Stage 3 when price retests Stage 2 from the trending side.
High-conviction entries : wait for cascade alignment (all three stages agree) before sizing up.
Mean-reversion fades : when Hurst is clearly below 0.5 and a Stage 3 flip prints near recent extremes, the new trend is statistically less likely to persist.
Volatility context : ATR percentile regime tells you whether the move is happening in a compressed, normal, or extended volatility environment. Sizing should account for that.
Limitations
The two-point Hurst estimator is a fast approximation, not the full rescaled-range statistic. It is monotonically meaningful but is not a precise persistence coefficient.
Like every Supertrend variant, this is a trend-following construct. It is best on instruments with clear directional regimes and worst in extended choppy ranges.
Pivots and percentile-based regime classifications need warm-up bars before their values stabilize.
Past behavior is not a guarantee of future behavior. No indicator can remove market uncertainty.
Compatibility
Pine Script v6, single-file open-source indicator. Works on any symbol and any timeframe. Uses no request.security calls. Non-repainting beyond the normal Supertrend right-bar reactivity inherent to band ratchet logic.
Defaults
Mint bullish color, red bearish color, top-right medium dashboard, all on-chart visualizations on. Open the inputs panel to tune for your instrument or to declutter for screenshots.
Indicador

MACD Dive [TTM Squeeze | Dual Lock %R]Disclaimer : This indicator is not financial advice and is strictly for educational and informational purposes only. The metrics and signals provided herein (including momentum crosses, trend saturation state icons, and squeeze markers) are calculated based on historical market data and do not guarantee future performance. Trading stocks and commodities involves significant risk of loss. The user assumes full responsibility for all trading decisions and should always perform their own due diligence before executing trades.
MACD Dive is a multi-state momentum and volatility context engine. By layering momentum oscillation (MACD/PPO/MACD-V) with market stalemates (volatility squeeze) and trend exhaustion (Dual %R saturation), this suite transforms a standard MACD into a multi-dimensional 'No-Go' gatekeeper. This synergy is what gives the engine its edge: it actively blocks the trader from whipsawing in sideways chop or buying into a dying trend, highlighting high-probability market turns where momentum, volatility, and trend capacity perfectly align.
Standard oscillators have a scaling problem. This script lets you choose your engine:
MACD (Classic): Measures momentum in absolute dollars. Great for visual reactivity, but a "2.0" reading means something different on a $5 stock versus a $500 stock.
PPO (Percentage): Measures momentum in percentages. Standardizes the reading across all assets, making it ideal for fixed-rule algorithmic trading.
MACD-V (Volatility Normalized): This divides the MACD by the Average True Range (ATR). It measures momentum in "Units of Volatility," mathematically adapting to market chaos so that signals remain consistent across both different assets and shifting volatility regimes (quiet markets vs chaotic markets).
This suite includes a fully optimized divergence detection engine:
Regular Divergence (Solid Lines): Identifies Trend Reversals. Price pushes to a new extreme, but momentum fails to follow, signaling exhaustion.
Hidden Divergence (Dashed Lines): Identifies Trend Continuations (Slingshots). Price pulls back, but momentum fully resets, signaling a high-probability entry in the direction of the dominant trend.
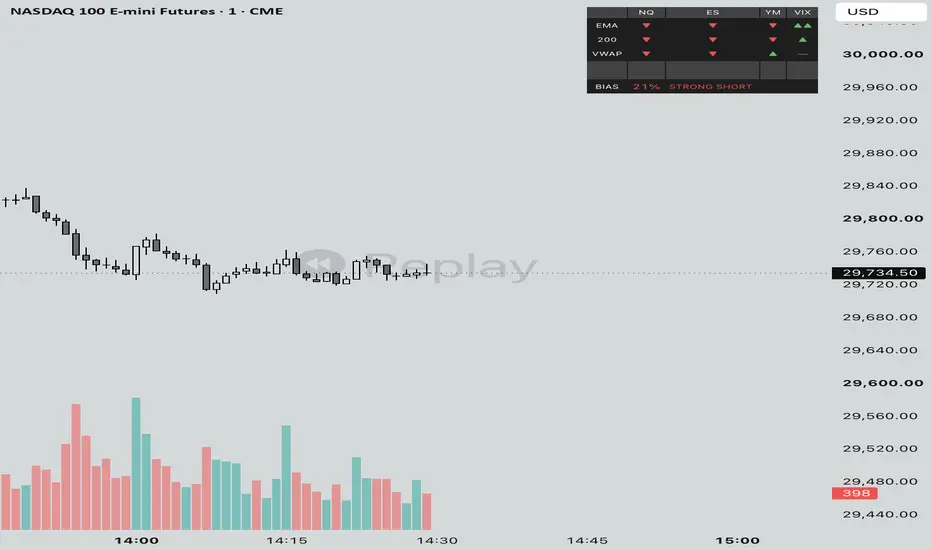
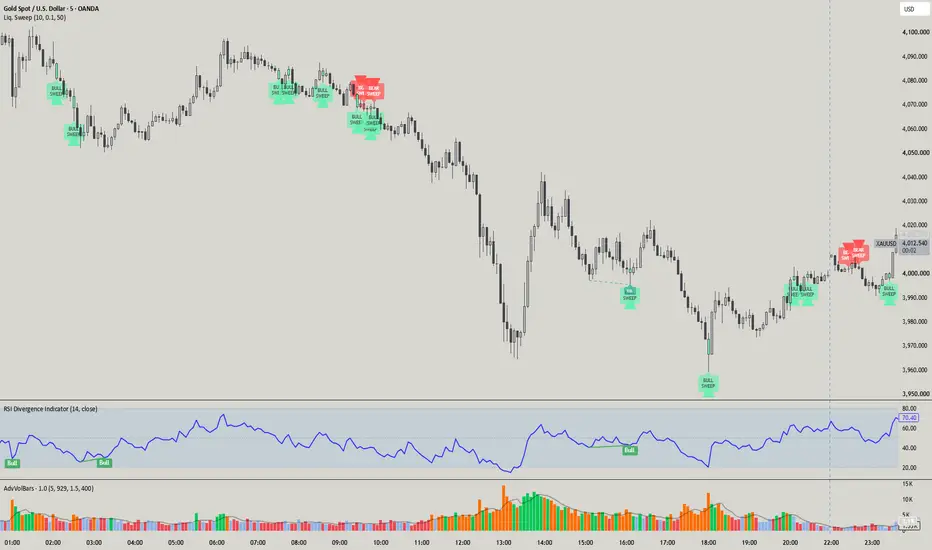
Located in your chosen corner, the HUD provides an instant visual readout with hover tooltips for active Engine Mode, %R Fatigue state, Oscillator crossover validation, and Squeeze environment. Vertical background highlights in green or red represent filter-passed momentum crossovers, like the MACD bullish cross. Use the extensive inline tooltips in the indicator's settings panel for a comprehensive breakdown of every tunable parameter.
Adaptive Time-Frames & RSI Gatekeeper
Think of this as an automated gear shifter. When looking at lower timeframes (below a user-defined boundary, e.g. 1 hour), the engine automatically scales down to tight, agile lookback periods. When viewing high timeframes, it dials up to filter out noise.
Buying a bullish MACD cross when the RSI is already at 85 increases risk of buying the top when the tank is empty. The optional RSI Safety Filter acts as a strict ceiling/floor blocker. If momentum crosses upward but the asset is mathematically overbought, the indicator suppresses the background highlight. It prevents signals on MACD crosses that have no fuel left.
VOLATILITY ENGINE: BB-KC Squeeze Radar
Building on John Carter’s TTM Squeeze by mapping the contraction of Bollinger Bands inside Keltner Channels to identify market stalemates. The implementation here color codes between a Loose Squeeze (BB inside 1.5 KC) and a hyper-compressed Tight Squeeze (BB inside 1.0 KC) to show the staged intensity of the coiled spring.
While the market coils sideways, a 20-period Linear Regression calculates the trajectory of price deviation inside the bands. The directional bias is shown by customizable markers on the zero line (default ⌃ or ⌄). This reveals hidden institutional accumulation or distribution before the trigger is pulled. To bypass "dead money" risk, the script tracks the first clean candle close or intraday pierce outside the Keltner bounds following a squeeze, catching the expansion phase exactly as it starts.
Furthermore, it accounts for the "Disappearing Mark" phenomenon. Bollinger Bands expand instantly when price moves, causing standard squeeze signals to vanish 1-3 bars before the real breakout candle. This script uses a memory state to remember recent compression, firing a "squeeze release" marker (default ❖) the exact moment price closes outside the Keltner bounds. Trade the release, not the waiting room.
Note: While MACD Dive tracks this compression mathematically on its zero-line, you can see the actual physical boundaries of the breakout by pairing it with my companion Swing Data suite . Plotting its Keltner Channel at 1.5 multiplier over your price chart allows you to visually verify the exact moment the squeeze release mark is ignited.
SATURATION ENGINE: Dual-Lock %R and Momentum Rot
This suite tracks sustained trend maturity using a fast/slow dual Williams %R setup. The conceptual pairing of a fast and slow %R to identify overbought/oversold exhaustion is credited to upslidedown's excellent Trend Exhaustion indicator . I highly recommend applying their script to your chart if you want to visually learn how the two %R lines interact.
While upslidedown’s implementation offers multiple display modes to paint visual boxes and exhaustion zones directly over price action, the focus here is on the discrete icons for trend status at the top and bottom of the MACD pane: Ignition (·), Saturation (□), and Fatigue (×). This suite adapts native ta.wpr() math assuming the trader is already familiar with Dual %R mechanics. Specific "Sprint" and "Marathon" tuning guidance is provided in the tooltips: heavily smoothing the fast line to ignore intraday noise, while lightly smoothing the macro slow line to preserve its reach into extreme zones.
It also features one major addition: the Stall. While Dual %R tracks Price Location (confirming price is structurally pinned at the highs), it doesn't track Velocity (confirming energy is sustained). To solve this, a Stoch RSI "Rot" detector runs quietly inside the saturation state. If price continues to float at the highs but internal velocity drops below a critical threshold, the script overlays a Stall marker (•). Designed as a "one-shot" early warning, it fires only on the first detection per trend saturation leg to prevent chart clutter. This differentiates a strong trend lock from a rotting lock, warning us that the move is running on fumes: giving us the exact cue to tighten stops, trim into parabolic strength, and strictly avoid adding new size.
BACKTESTER READY
Out-of-the-box compatibility with a comprehensive built-in README guide is available directly inside the settings menu. For traders who prefer a "Diamond Hands" approach, the indicator fully maps to Jason5480's TTS Framework convention, outputting strict integer states (1, -1, 2, -2) to hold full position size until the trailing macro baseline completely fractures. My personal backtester, Cosmos Signal Commander (which may be released to the public in the future), broadcasts a composite float signal capable of managing active trade positioning. It tracks entries, hard stops, and partial take-profits (swapping the trailing stop from tight to a wide "runner" buffer upon hitting extended ATR targets).
PERFORMANCE OPTIMIZATION
O(1) Memory States: Replaced lag-heavy ta.barssince() and 50-bar for loops in the Divergence engine with O(1) var state trackers.
String Caching: HUD table strings are built once in the global var scope to prevent constant memory allocation and garbage collection lag.
UI Mutation: The HUD uses table.cell_set_* to alter data dynamically, bypassing the stutter caused by destroying and redrawing tables on every tick.
Native C++ Backend: Replaced custom highest/lowest math arrays with native ta.wpr() functions for the %R engine to maximize computation speed.
Ghost State Resets: When switching the backtester logic to "Long Only" mode, the engine actively hunts and kills lingering short-memory variables so they don't inadvertently suppress valid long signals.
Indicador

Indicador

Edo SuperTrend CoreEdo SuperTrend Core — Clean Single-Line SuperTrend with RSI Trend Confirmation, Directional Intensity Fill and Trend Duration Counter
SuperTrend, created by Olivier Seban, is one of the most widespread trend-following indicators: it uses the Average True Range (ATR), introduced by J. Welles Wilder, to build a dynamic trailing stop that switches sides when price crosses it. It is clear and effective, but it has a known limitation: in sideways or noisy markets it produces false flips —trend changes that reverse within a few bars— and, drawn the classic way with its two bands, it clutters the chart.
Edo SuperTrend Core was built to solve those two things. It keeps the original SuperTrend algorithm, but adds a momentum confirmation filter that requires the RSI to agree before accepting a trend change, and simplifies the representation to a single line with an intensity fill and a duration counter. The goal is a clean trend reading with fewer false turns, without giving up the classic logic.
Edo SuperTrend Core does not generate automatic buy or sell signals: it visualizes the state and the maturity of the trend so the trader can integrate it into their own judgment.
WHAT THE INDICATOR DOES
The indicator combines four elements on a single layer. The SuperTrend line is a single dynamic level that acts at once as a trend reference and as the flip level, the closing price that, if crossed, would change the trend. The RSI confirmation filter requires momentum to agree in order to validate a trend change. The directional intensity fill, between price and the line, highlights the phase of the move. And the duration counter shows how many bars the current trend has been active.
CONCEPTUAL CALCULATION BASIS
The base is the classic SuperTrend: the ATR measures volatility and, from a multiple of that ATR, a dynamic level is computed that sits below price in an uptrend and above price in a downtrend. In the classic implementation two bands are plotted; here only the active level is shown, which keeps the chart cleaner.
On top of that base, Edo SuperTrend Core adds its own layer: when the SuperTrend signals a trend change, that change is only accepted if the 14-period RSI confirms it, above 50 to validate a bullish turn and below 50 to validate a bearish one. If momentum does not agree, the indicator keeps the previous trend. This filter is the central difference versus a standard SuperTrend: it discards part of the flips that noise generates in sideways markets. The basic reading is direct: with the SuperTrend below price the trend is bullish, and with the SuperTrend above price, bearish.
SENSITIVITY PROFILES
A single selector adjusts the behavior of the SuperTrend by modifying the internal ATR parameters. The Fast profile uses ATR 7 and factor 2.0: higher sensitivity, reacts sooner and produces more changes, useful on lower timeframes. The Balanced profile uses ATR 10 and factor 2.3: it is the default setting, balancing reactivity and stability. The Slow profile uses ATR 14 and factor 3.0: smoother and more stable detection, with fewer turns, useful on higher timeframes.
INTENSITY FILL
Between price and the SuperTrend line a fill is drawn whose color follows the direction of the trend and whose opacity is configurable. Its purpose is to make the phase and the magnitude of the separation between price and level visible at a glance: the greater the distance, the more extended the move is relative to its trailing stop. The RSI, besides filtering the trend changes, provides the momentum context that accompanies that phase, whether expansion, consolidation or exhaustion.
TREND DURATION COUNTER
Each time the trend changes, the indicator writes at the midpoint of the previous leg the number of bars that trend lasted. It is a purely informative figure that helps judge the maturity of the move: a trend that has already accumulated many more bars than the previous ones may be more extended, whereas a freshly started one is barely beginning to develop.
ALERTS
Edo SuperTrend Core includes four alert conditions configurable from the standard TradingView alerts dialog, split into two levels according to the momentum filter. The confirmed bullish trend change fires when the flip to bullish has passed the RSI filter, with momentum agreeing; it is the indicator's definitive trend signal. The confirmed bearish trend change is its downside equivalent. The raw flip up warns that price has crossed the SuperTrend line upward, still pending RSI confirmation, and serves as an early warning of a possible turn not yet validated; the raw flip down is its bearish equivalent. The confirmed and raw pair lets the trader choose their level of anticipation: the raw flip warns sooner but may reverse, while the confirmed one arrives a step later but has already filtered out part of the false turns.
HOW TO READ IT
The position of the line relative to price defines the trend and its side, and the color confirms the state at a glance. When a trend change occurs it is worth remembering that it has already passed the RSI filter, that is, that momentum was agreeing: turns confirmed by momentum tend to be more reliable than a pure SuperTrend flip. The fill and the separation between price and line indicate whether the move is expanding or losing strength. The duration counter places the current trend against the previous ones, and a trend well above the usual duration invites watching the flip level more closely. That flip level, the level of the line, is the closing price that would change the trend and serves as a dynamic stop reference.
ORIGINALITY AND JUSTIFICATION
Olivier Seban's SuperTrend and Wilder's RSI and ATR are public-domain classics, and Edo SuperTrend Core names and credits them without reservation. What it adds over a standard SuperTrend is specific: an RSI confirmation filter that discards part of the false flips of the classic SuperTrend in sideways markets, a single-line representation instead of the two bands, an intensity fill that makes the phase of the move legible, and a duration counter that adds a maturity reading. The combination of momentum filter, phase reading and duration is what distinguishes this version, not the base algorithm.
CONFIGURATION
Profile: Fast, Balanced or Slow, which adjusts the ATR and the factor. Gradient Opacity: the visual intensity of the fill, from 10 to 100%. All calculations adapt automatically to the chart's timeframe.
OPEN SOURCE
Edo SuperTrend Core is published as an open source and free indicator. The full Pine Script is publicly available on TradingView for study, adaptation and integration into any workflow.
This indicator is a technical analysis tool intended exclusively for educational and informational purposes. It does not generate automatic buy or sell signals and should not be considered financial advice. Trading in financial markets carries a significant risk of capital loss. Past results do not guarantee future results. Always use proper risk management.
Indicador

ATR EMA MultipleA TradingView (Pine Script v6) oscillator that measures how far price has stretched from its moving average, expressed in units of ATR (Average True Range).
Instead of asking "how many dollars/points is price away from its average?", this indicator asks "how many typical bars of volatility is price away from its average?" That makes the reading comparable across different symbols, timeframes, and volatility regimes.
WHAT IT PLOTS
The main line (white) is the oscillator:
oscillator = (close - EMA(close, maPeriod)) / ATR(atrPeriod)
A value of +2 means price is currently 2 ATRs above its EMA.
A value of -1.5 means price is 1.5 ATRs below its EMA.
The yellow line at 0 marks price sitting exactly on its EMA.
A red line above and a green line below act as reference bands. How those two
bands are placed is controlled by the Line Mode setting (see below).
Typical use: when the oscillator pushes into or beyond the red band, price is
unusually extended to the upside; the green band marks unusual extension to the
downside. How you act on that (mean-reversion, breakout confirmation, etc.) is
up to your strategy.
SETTINGS
ATR and EMA Settings
ATR Period (default 14)
Lookback for the ATR used as the volatility unit.
Moving Average Period (default 21)
Lookback for the EMA that price is measured against.
Reference Lines
Line Mode (default Manual)
Chooses how the red/green bands are positioned:
"Manual" or "Std Deviations".
Manual mode
You set the band levels directly, in ATR units.
Manual: red line ATR level (default 3)
Red band drawn at this fixed oscillator value (e.g. +3 ATRs).
Manual: green line ATR level (default -3)
Green band drawn at this fixed oscillator value (e.g. -3 ATRs).
The bands are flat, fixed horizontal lines. Good when you want a constant, opinionated threshold.
Std Deviations mode
The bands adapt to the symbol's recent behaviour. You specify how many standard deviations from 0 each band should sit, and the script measures the actual standard deviation from the data.
Std Dev: red line std devs above 0 (default 2)
Red band at this many standard deviations above 0.
Std Dev: green line std devs below 0 (default 2)
Green band at this many standard deviations below 0.
Std Dev: lookback length (bars) (default 200)
How many recent bars are sampled to measure the standard deviation.
The bands move over time as volatility behaviour changes, automatically tightening in calm conditions and widening in stretched ones.
HOW "STD DEVIATIONS" MODE IS CALCULATED
This is worth understanding before you rely on it, because it is a deliberate, slightly non-standard choice.
The standard deviation is measured separately for the positive and negative sides of the oscillator, and anchored at 0 (not at each side's own average):
sigma_positive = sqrt( mean( oscillator^2 over bars where oscillator > 0 ) )
sigma_negative = sqrt( mean( oscillator^2 over bars where oscillator < 0 ) )
red band = (+ std devs above) x sigma_positive
green band = (- std devs below) x sigma_negative
Two consequences of this design:
Anchored at 0, not at the mean. Because the bands are described as "N standard deviations above 0 / below 0", the spread is measured as the root-mean-square of values around 0 -- not the textbook standard deviation around the sample mean. This keeps 0 (price = EMA) as the true center of the scale.
Asymmetric by design. The upside and downside are measured independently, so a market that stretches further on rallies than on sell-offs (or vice versa) will get an asymmetric pair of bands that reflects that.
On a freshly loaded chart the bands stay blank until the lookback window contains at least one positive and one negative reading.
READING THE COLOURS
Oscillator White Price distance from EMA, in ATR units.
Upper band Red Upside extension threshold.
Lower band Green Downside extension threshold.
Zero line Yellow Price equals its EMA.
NOTES & LIMITATIONS
The indicator is not a standalone trading system -- it's a normalization/context tool. Combine it with your own entry/exit logic and risk management.
Readings are only comparable when the ATR Period and Moving Average Period are held constant.
The red/green reference bands are drawn as dashed lines to distinguish them from the solid white oscillator.
On instruments with periods of zero volatility (ATR = 0), the oscillator value is undefined for those bars.
LICENSE
Open source -- published for the TradingView community. Attribution appreciated.
Indicador

Indicador

AetherEdge - Autoencoder Anomaly🖊️ Overview
AE-ANO is a self-evolving detector of market dislocations. It turns the current bar's state into a feature vector and passes it through a linear autoencoder — compress to a narrow bottleneck, decode back — with weights trained online by gradient descent to minimize reconstruction error on normal structure. Once it has learned the normal manifold, a bar that breaks the usual relationships between features (a flash move, a structure break, a shock) cannot be reconstructed well — a high reconstruction error = an anomaly. The error is standardized into a sigma score, a Mahalanobis-style distance flags magnitude outliers, and the most dislocated feature is named.
🔶 Key Features
Linear autoencoder engine — compresses and reconstructs a 6-dimensional state vector, measuring deviation from normal via reconstruction error.
Self-evolving online learning — encoder/decoder weights learn by gradient descent, continually updating the definition of "normal" to the market.
Reconstruction-error thermometer — the anomaly score (σ) over time as a neon-gradient filled area (calm → hot).
Anomaly pulses — bars whose score exceeds the threshold are marked on price with a glowing marker and background flash (intensity scales with magnitude).
Mahalanobis distance — a Euclidean distance in standardized space flags magnitude outliers (distance from center), complementing the autoencoder.
Feature panel — colors which feature (return/vol/range/body/momentum/trend) is dislocated and names the lead driver.
Live statistics panel — anomaly score, reconstruction error, Mahalanobis distance, lead feature, bottleneck, and last anomaly.
Non-repainting design — learning on confirmed bars only; each bar is judged against what was learned before it, with no look-ahead.
🧠 Technical Architecture
The feature vector is six standardized features — return, volatility (log squared return), range expansion, body/candle character, momentum (RSI), and trend deviation. On each confirmed bar, a forward pass with the current weights (learned through t−1) computes code = We·x (encode), x̂ = Wd·code (decode), and err = x − x̂, giving the reconstruction error ‖err‖. This is standardized by the error's EMA mean and standard deviation into a sigma score (err − mean)/std. After judging, the encoder and decoder weights are updated by backprop SGD (stabilized with weight decay and clipping).
This "judge-then-learn" order flags one-off anomalies before they're absorbed into normal. Yet if an anomaly persists, the weights learn the new structure — adapting to a non-stationary market (the self-evolution). The Mahalanobis-style distance is ‖x‖ in standardized space (distance from the normal center, expected ≈ √D under normality), measuring magnitude outliers to complement the autoencoder (which captures correlation-breaking, structural anomalies). The lead feature is the dimension with the largest reconstruction error — showing what is dislocated now.
🎯 Three design choices stand out. First, the linear autoencoder learns the usual correlations between features and flags bars that break them (e.g., a large move with no accompanying range) as high error. Second, standardizing the error into σ enables an instrument-independent threshold. Third, judging before learning and confining updates to confirmed bars keeps historical anomaly scores non-repainting.
⚙️ Recommended Settings & Tuning Guide
As a crypto starting point — BTC/ETH (1D, 4H): bottleneck 2, learning rate 0.02, standardization length 100, error window 100, threshold 2.5σ; flash moves and structure breaks are clearly marked. High-volatility names (SOL, XRP): raise the learning rate toward 0.03 for faster adaptation, and the threshold to 3.0σ to catch only genuine anomalies amid normal volatility. For more sensitivity, set the bottleneck to 1 (a tighter normal manifold) and the threshold to 2.0σ.
Per parameter: Bottleneck (k) sets sensitivity — smaller defines "normal" more tightly and is more sensitive to deviation. Learning rate sets adaptation speed (higher is nimbler but too high destabilizes). Standardization length sets the feature baseline. Error window sets the anomaly-score baseline (shorter is more locally adaptive). Threshold (σ) sets pulse sensitivity.
💡 How to Use in Practice
The core read is anomaly score × lead feature. While the score stays calm (NORMAL), the market is within its learned normal structure — existing logic tends to work. The moment the score spikes above the threshold (pulse fires) signals structure has temporarily broken — the start of a breakout, a liquidity shock, a flash move, or a news reaction. The lead feature tells you what is anomalous (e.g., a spike with no volume shows up as Body/Range), helping characterize it. The EXTREME level marks especially strong dislocations — a cue for risk management (revisit stops, cut size).
For multi-timeframe work, read higher-timeframe anomalies for major structure breaks and time execution on a lower timeframe. Because it shows when structure breaks (not direction), pair it with trend or directional signals (e.g., avoid trend-following during anomalies).
⚠️ Important Notes
Nothing displays until the warmup period (default 150 bars) completes. Reloading the indicator retrains the weights from scratch — learning state is not persisted. This is a linear autoencoder and does not fully capture nonlinear normal structure (reconstruction error measures deviation from a linear manifold). If an anomaly persists, it is by design learned as the new "normal" (adaptation to non-stationarity). The Mahalanobis distance is a simplified version assuming diagonal covariance (Euclidean in standardized space). The anomaly score shows no direction, only structural breakage. Judging precedes learning, and updates occur on confirmed bars only.
🚨 Disclaimer
This indicator is for educational and informational purposes only and does not constitute financial or investment advice. Past performance is not indicative of future results. All trading involves risk. Use it alongside your own thorough testing and sound risk management; all trading decisions remain solely your own responsibility. Indicador

AetherEdge - Bayesian Changepoint Detection🖊️ Overview
AE-BCP is a Bayesian detector of structural breaks (Adams & MacKay, 2007). Rather than flagging regime shifts with a hard threshold, it maintains a posterior distribution over the run length — the number of bars since the last changepoint — and updates it recursively with every new observation. A Gaussian conjugate predictive (on standardized returns or log-volatility) scores how surprising each bar is under each run-length hypothesis. Beliefs self-evolve recursively, and P(run length = 0) is the live probability that a structural break just occurred. The classic triangular run-length posterior is painted as a heatmap.
🔶 Key Features
BOCPD engine — recursively updates the run-length posterior into growth and changepoint probabilities, outputting structural breaks as a probability.
Self-evolving recursive Bayesian update — each run-length hypothesis's predictive model (sufficient statistics) and the posterior update online with every observation.
Changepoint probability (soft detection) — P(run length = 0) as a continuous 0–1 probability; threshold crossings are marked on price.
Run-length posterior heatmap — the time × run-length × probability triangular heatmap (BOCPD's signature visual), aligned to the price timeline.
Expected run length (regime age) — estimates how many bars the current regime has lasted, collapsing to zero at changepoints (shown as a line).
Volatility or drift — monitor log squared returns to detect volatility-regime changes, or returns to detect drift changes.
Live statistics panel — changepoint probability, regime age, MAP run length, last changepoint, and hazard rate.
Non-repainting design — all updates on confirmed bars only, with no look-ahead.
🧠 Technical Architecture
The monitored feature (Volatility mode = log squared return, Returns mode = return) is standardized over a long window, fixing the predictive variance at ~1. On each confirmed bar, the predictive probability of each run-length hypothesis r is pred(x_t|r) = N(x_t | m_r, σ²(1+1/r)) (m_r = the run's mean). From these, growth P(r_t=r+1) ∝ P(r_{t-1}=r)·pred·(1−H) and changepoint P(r_t=0) ∝ Σ_r P(r_{t-1}=r)·pred·H are computed and normalized. H is the hazard rate (= 1 / mean regime length), the prior probability of a changepoint.
Each run-length's sufficient statistics (sum of the run's observations) update as sum = sum + x_t on growth and sum = 0 (prior) on a changepoint. Run length is truncated at Rmax for tractability. Outputs are the changepoint probability P(r_t=0), expected run length E =Σr·P(r), and MAP run length argmax P(r). The posterior is binned into a rolling buffer and, on the last bar, drawn as a heatmap (boxes) aligned to the price timeline.
🎯 Three design choices stand out. First, standardization fixes the predictive variance, allowing a robust Gaussian-conjugate implementation with no gamma functions. Second, monitoring log squared returns turns "variance changes" into "mean changes," so a simple mean-change model captures volatility-regime breaks. Third, confining updates to confirmed bars keeps the historical posterior non-repainting.
⚙️ Recommended Settings & Tuning Guide
As a crypto starting point — BTC/ETH (1D, 4H): Monitor = Volatility, mean regime length 60, standardization length 200, max run length 100, changepoint threshold 0.30; volatility-regime breaks are clearly marked. For more frequent turns: lower mean regime length toward 30 (higher hazard, more sensitive) and lower the threshold to 0.25. To suppress noise: raise mean regime length to 100 and the threshold to 0.40.
Per parameter: Mean regime length is the key knob (hazard = its reciprocal) — shorter detects changepoints more often, longer is conservative. Monitor selects Volatility (vol breaks) or Returns (drift changes) for your purpose. Standardization length sets the baseline scale window (longer is steadier). Max run length sets how far back regimes are retained. Changepoint threshold sets marker sensitivity.
💡 How to Use in Practice
The core read is changepoint probability × regime age. When the changepoint probability is low and stable and the regime age keeps rising, the current regime (trend or range) is persisting — strategies aligned with that premise tend to work. The moment the changepoint probability spikes above the threshold (diamond marker fires) signals the volatility or drift structure has changed — a point to review existing positions or switch strategy to the new regime. Each time the heatmap triangle resets (run length collapses to zero), you can see the market entering a new phase visually.
For multi-timeframe work, read higher-timeframe changepoints for major structural turns and execute on a lower timeframe. It also serves as a meta-filter to run trend or mean-reversion strategies only while the regime is stable.
⚠️ Important Notes
Nothing displays until the warmup period (default 200 bars) completes. Reloading the indicator rebuilds the posterior from scratch — learning state is not persisted. This is a Gaussian-conjugate model with a known (≈1, via standardization) predictive variance that detects mean changes in the monitored feature (Volatility mode captures volatility changes via the log-squared transform). Run length is truncated at Rmax, so for very long regimes the expected run length saturates near the cap. The changepoint probability is a posterior belief, not a certain verdict, and detection requires evidence to accumulate, so it lags by a few bars. Updates occur on confirmed bars only.
🚨 Disclaimer
This indicator is for educational and informational purposes only and does not constitute financial or investment advice. Past performance is not indicative of future results. All trading involves risk. Use it alongside your own thorough testing and sound risk management; all trading decisions remain solely your own responsibility. Indicador

AetherEdge - Principal Component Analysis🖊️ Overview
AE-PCA extracts the market's eigen-state from the correlation structure of a basket of assets. It builds a rolling correlation matrix online and extracts the leading principal components — PC1 (market factor), PC2 (rotation/dispersion) — via power iteration with deflation. From the eigenvalues it derives the Absorption Ratio (λ₁/N) — the share of basket variance explained by one factor — which reveals, at a glance, the "everything moves together" systemic fragility of the market. The eigenbasis continuously re-orients each bar to the current correlation structure.
🔶 Key Features
Online PCA engine — builds a rolling correlation matrix with forgetting and extracts the top two principal components by power iteration (heavy use of the matrix type).
Absorption Ratio (systemic stress) — λ₁/N quantifies market concentration = fragility; sharp rises capture the "correlation convergence" that precedes crashes.
Self-evolving eigenbasis — eigenvectors are warm-started and re-converged each bar, tracking shifts in correlation smoothly (subspace tracking) with sign continuity preserved.
Phase-space comet — projects the live return vector onto PC1/PC2 and traces the market's path through factor space as a comet trail on a floating canvas to the right of the chart.
Factor loadings — identifies the asset that loads most heavily on PC1 (the one leading the market).
Dispersion gauge — 1 − Absorption Ratio shows the degree of diversification.
Live statistics panel — absorption ratio, cumulative (PC1+PC2), eigenvalues λ₁/λ₂, dispersion, lead asset, and PC1/PC2 scores.
Macro-overlay design — the basket is independent of the chart symbol, so you can overlay market-wide stress on any chart you view. Confirmed-bar updates, no look-ahead.
🧠 Technical Architecture
From 6 asset returns, first and second moments (means, covariances) are updated online with forgetting factor λ, then divided by each asset's standard deviation to build the correlation matrix R (N×N). PC1 is found by power iteration v ← Rv/‖Rv‖, with eigenvalue λ₁ from the Rayleigh quotient. Then deflation R₂ = R − λ₁v₁v₁ᵀ is applied, and PC2 obtained by power iteration with Gram-Schmidt orthogonalization. Since the correlation matrix has trace N, the absorption ratio is λ₁/N and the cumulative is (λ₁+λ₂)/N.
Factor scores are computed by projecting the standardized current returns z_i=(r_i−μ_i)/σ_i onto the eigenvectors (PC1 score = Σz_i·v₁_i). Eigenvectors are warm-started from the previous bar for fast convergence and sign stability across bars (PC1 is oriented so Σv₁ > 0). A high absorption ratio means "correlation convergence = single-factor dominance = fragility"; a low one means "dispersion = diversification." All updates occur on confirmed bars.
🎯 Three design choices stand out. First, using the correlation (not covariance) matrix yields a scale-free absorption ratio that isn't dominated by a single high-volatility asset. Second, warm-starting the eigenvectors suppresses sign flips and flicker, giving smooth scores. Third, confining updates to confirmed bars keeps historical values non-repainting.
⚙️ Recommended Settings & Tuning Guide
As a crypto starting point — a basket of the 6 majors (BTC/ETH/SOL/BNB/XRP/ADA), 1D/4H: adaptation λ = 0.97, Calm threshold 0.40, Stress threshold 0.60; crypto-wide risk-on/off separates cleanly. For nimbler anomaly detection: lower λ toward 0.95 to react faster to correlation shifts, and raise the Stress threshold to 0.65 so only genuine convergence triggers, reducing noise.
Per parameter: Adaptation λ is the main knob — near 0.99 correlations are smooth and long-run; near 0.95 they respond quickly to shocks. Calm/Stress thresholds should be tuned to your basket's composition and its typical absorption ratio (closer to uncorrelated → lower λ₁/N; strongly correlated → higher). Comet length / canvas width tune the phase-space display. The basket can be freely swapped for the assets whose correlation you want to track.
💡 How to Use in Practice
The core read is the absorption-ratio regime. When the ratio is low and stable (CALM), the market is diversified and stock-picking tends to work. When it spikes into the Stress zone, correlations have converged into an "everything moves together" fragile state — a cue to reduce concentration as a leading sign of self-reinforcing declines or risk-off. When the phase-space comet stretches strongly in one direction, the market is factor-driven (trending); when it swirls near the center, it's ranging/rotating. The Lead Asset is the one currently driving the whole market.
For multi-timeframe work, read the higher-timeframe absorption ratio for the macro risk backdrop and execute single-name trades on the lower timeframe. Paired with trend and volatility tools, it serves as a top-level risk filter (e.g., avoid fading during stress spikes).
⚠️ Important Notes
This indicator fetches external data (request.security) for 6 symbols. Specifying invalid or illiquid symbols drops their contribution and degrades accuracy — compose the basket from liquid symbols. Nothing displays until warmup completes. Reloading the indicator rebuilds the correlation moments from scratch — learning state is not persisted. The absorption ratio is a proxy for systemic fragility (akin to Kritzman's absorption ratio), not a directional signal by itself. The sign of the PC2 score is arbitrary. The phase-space comet is drawn in the chart's right margin, so display requires right-side space. Power iteration is an approximation of the top two components, and updates occur on confirmed bars only.
🚨 Disclaimer
This indicator is for educational and informational purposes only and does not constitute financial or investment advice. Past performance is not indicative of future results. All trading involves risk. Use it alongside your own thorough testing and sound risk management; all trading decisions remain solely your own responsibility. Indicador

AetherEdge - Gaussian Mixture Regimes🖊️ Overview
AE-GMM is a self-evolving regime detector that treats the market as a probability distribution rather than carving it up with rigid rules. It models the joint distribution of momentum × volatility as a mixture of K Gaussian components — one per regime — and keeps learning their means, variances, and weights through online Expectation-Maximization with forgetting. Every bar receives a soft probability vector (a posterior) over regimes, rendered as a flowing probability ribbon that lets the market's state blend and shift before your eyes.
🔶 Key Features
Gaussian mixture + online EM engine — the E-step (responsibilities) and M-step (sufficient statistics) run every bar, estimating the regime distribution incrementally.
Self-evolving forgetting mechanism — a forgetting factor λ weights recent data, so the model quietly reshapes itself as regimes emerge and dissolve.
Soft probability ribbon — the K regime probabilities, stacked into a flow in the lower pane; not hard boundaries, but "how much of each regime is present now."
Semantic regime coloring — each component is auto-colored by the character of its learned centroid (Risk-On / Range / Risk-Off / Stress), sidestepping the label-switching problem.
Projection onto price — force_overlay tints the main chart's background by the dominant regime, deepening with confidence.
Live statistics panel — dominant regime, confidence, per-regime probabilities, regime duration, the adaptation factor λ, and model fit (log-likelihood).
Diagonal-covariance robustness — no matrix inversion, numerically stable; learning on confirmed bars only, with no look-ahead.
🧠 Technical Architecture
The feature space is two-dimensional — a momentum axis (z-scored ATR-unit trend deviation) and a volatility axis (z-scored log realized-volatility). Each component is a diagonal-covariance Gaussian with mean μ_k, variance σ²_k, and weight π_k. Every bar, responsibilities (posteriors) are computed as γ_k(x) = π_k·N(x|μ_k,σ²_k) / Σ_j π_j·N(x|μ_j,σ²_j), normalized stably via log-sum-exp in the log domain.
Learning proceeds by incremental EM. On each confirmed bar, the sufficient statistics (responsibility mass N_k, Σγx, Σγx²) are updated with a forgetting factor λ, and π_k, μ_k, σ²_k are re-derived from them. Lower λ weights recent data and adapts quickly; higher λ acts as longer memory and stays steady. Components are initialized spread around a ring in feature space, starting from diverse regimes and migrating toward the data. Each regime's color is decided every bar from its learned centroid (high volatility → Stress; positive momentum → Risk-On; negative → Risk-Off; in between → Range).
🎯 Three design choices stand out. First, soft responsibilities let regime transitions be expressed as a blend of probabilities — the "in-between" is visible. Second, character-based coloring keeps colors meaningful regardless of index shuffling. Third, confining parameter updates to confirmed bars — with only the forming bar's posterior updating live — keeps historical output non-repainting.
⚙️ Recommended Settings & Tuning Guide
As a crypto starting point — BTC/ETH (1D, 4H): K = 3, λ = 0.99, standardization length 200, vol length 20; Risk-On / Range / Stress separate cleanly. High-volatility names (SOL, XRP): lower λ toward 0.97 for faster adaptation, and set K = 4 to split Stress into upside vs downside stress, revealing the internal structure of rough action.
Per parameter: λ (adaptation) is the key knob — near 0.999 regimes are smooth and persistent; near 0.95 they switch nimbly. K (regimes) ranges from 2 (on/off) to 4 (finer states). Standardization length sets the feature baseline window — longer is steadier, shorter more locally adaptive. Stress Vol (z) sets how much of a volatility rise counts as "Stress."
💡 How to Use in Practice
The core read is dominant regime × confidence. When the ribbon is thick in a single color (high confidence) and stable, strategies aligned with that regime tend to work (trend-following in Risk-On, fading in Range). When ribbon colors blend, it signals a regime transition — a cue to cut size or stand aside. When the Stress (amber) probability rises, volatility is expanding — useful for staging breakouts or de-risking.
For multi-timeframe work, read the higher-timeframe regime for the backdrop and execute on a lower timeframe. With the price-chart background tint enabled, regime "epochs" sit directly over the candles, making context easy to combine with trend or volume tools.
⚠️ Important Notes
Regimes are hidden until the warmup period (default 200 bars) completes. Reloading the indicator, or changing settings, makes the model relearn across the entire history from scratch — learning state is not persisted. This is a diagonal-covariance approximation and does not explicitly model correlation between features. Regime probabilities are the model's probabilistic beliefs, not certain forecasts. Parameters update on confirmed bars, while the forming bar's probabilities move live.
🚨 Disclaimer
This indicator is for educational and informational purposes only and does not constitute financial or investment advice. Past performance is not indicative of future results. All trading involves risk. Use it alongside your own thorough testing and sound risk management; all trading decisions remain solely your own responsibility. Indicador

AetherEdge - Q-Learning Regime Agent🖊️ Overview
AE-QRA is a reinforcement-learning agent that learns its policy from experience, right on your chart. It discretizes the market into 27 regimes (Trend × Momentum × Volatility) and learns which action to take in each — Short, Flat, or Long — by maximizing reward through tabular Q-learning. No instructions, no labels: the agent relies on reward alone, sharpening its judgment as it shifts from exploration to exploitation.
🔶 Key Features
A real Q-learning engine — the TD(0) update Q(s,a) ← Q(s,a) + α runs every bar, updating a value table over states × actions.
Reward function — reward = position × next-bar return − turnover cost. Profitable decisions are reinforced; needless trading is penalized.
Exploration–exploitation, made real — an ε-greedy policy whose ε decays over time, automatically shifting from random exploration to exploiting the learned policy.
Policy heatmap — the learned policy across 27 regimes, visualized as a 9-cell color grid at the live volatility slice; the cell for the current regime glows.
Regime coloring — bars and background are tinted by the agent's current stance, growing more saturated with conviction.
Action-flip markers — triangle markers mark switches to Long or Short.
Live statistics panel — action, conviction, exploration rate ε, cumulative reward (policy P&L), regime coverage, and the current state.
Fully deterministic, non-repainting design — the exploration RNG is seed-fixed; learning and decisions occur on confirmed bars only, on a one-bar lag.
🧠 Technical Architecture
The state space is built from three discrete features — ATR-unit trend deviation (↓/·/↑), RSI momentum (↓/·/↑), and volatility percentile rank (low/mid/high). Their product gives 27 states, with three actions (Short = −1 / Flat = 0 / Long = +1). The value table Q is persisted as a var matrix (27 × 3).
On each confirmed bar, the agent first observes the reward of its previous action (position × realized return − switching cost), then updates that value via TD(0) using the maximum Q at the next state. It then selects the next action ε-greedily. ε decays as ε = ε_min + (ε_start − ε_min)·exp(−step/decay) — exploratory early on (frequent random actions), exploiting the learned policy as it matures. Conviction is computed as the separation of the three Q-values at the current state and feeds both the background tint and the panel. Because the RNG is a deterministic LCG, the policy is reproducible under identical settings.
🎯 Three design choices stand out. First, embedding a switching cost in the reward suppresses over-trading at the learning level and makes Flat a meaningful choice. Second, confining learning and decisions to confirmed bars on a one-bar lag eliminates future leakage. Third, the deliberately compact 27-state design helps the policy converge even on shorter histories.
⚙️ Recommended Settings & Tuning Guide
As a crypto starting point — BTC/ETH (1D, 4H): α = 0.10, γ = 0.95, ε-Start = 0.90, ε-Decay = 500, switching cost 3 bps; this yields clean trend adaptation. High-volatility names (SOL, XRP): raise switching cost to 5–8 bps to curb trade frequency, and shorten ε-Decay toward 300 so the agent reaches the exploitation phase faster through the noise.
Per parameter: Learning rate α sets adaptation speed — 0.15–0.25 in fast-rotating regimes, 0.05–0.10 in stable ones. Discount γ sets foresight — higher weights long-run reward (0.95–0.99 for swings, 0.85–0.92 for scalps). ε-Decay sets the length of the exploration phase — larger explores longer and learns more cautiously. Switching cost doubles as a direct knob on trade frequency.
💡 How to Use in Practice
The core read is the agent's stance × conviction. A flip to Long (triangle marker) with high conviction and a rising cumulative reward reads as a tailwind for buying dips. The policy heatmap is a powerful context tool: by reading the colors of the cells adjacent to the current regime (the glowing cell), you can anticipate how the agent will act if the market shifts slightly. When ε is still high, the policy is undecided, so treat signals as informational only.
For multi-timeframe work, confirm the macro bias from the higher-timeframe stance (1D), then execute aligned flips on a lower timeframe (1H–4H). Layered over market structure (S/R, order blocks) or volume, it adds which regime, and with what conviction, the agent chooses to go long — useful confirmation context.
⚠️ Important Notes
Until the warmup period (default 300 bars) and the exploration phase pass, actions are largely exploratory (random). Reloading the indicator, or changing settings/seed, makes the agent relearn across the entire history from scratch — learning state is not persisted. The panel's "Policy P&L" is an in-sample, while-learning metric that does not fully account for switching cost or fill slippage; it is not a backtest or forward result. The 27-state tabular design is intentionally coarse — it learns a regime policy, not fine price structure. Decisions update on confirmed bars, and the agent's stance is not a direct buy/sell instruction.
🚨 Disclaimer
This indicator is for educational and informational purposes only and does not constitute financial or investment advice. Past performance is not indicative of future results. All trading involves risk. Use it alongside your own thorough testing and sound risk management; all trading decisions remain solely your own responsibility. Indicador

Volatility Bands Using t-Distribution & Prediction IntervalsThis indicator is a statistical tool designed to project a dynamic range where the next asset price is expected to fall within a specific level of confidence.
Unlike standard volatility bands, a prediction interval is a statistical range that estimates where a single future observation will fall, given a specific probability. Because predicting a single future outcome introduces more inherent uncertainty than predicting an average, these bands are wider and mathematically tighter for forecasting next-bar anomalies.
How it Works
This indicator uses a Student's t-distribution (or an optional z-distribution for performance) to calculate historical volatility thresholds.
Finding the Estimated t-distribution
When you select a 95% Confidence Level, the script sets an error alpha of 5% (1 - 0.95). Because asset price movement can deviate to either the upside or downside, it splits this error equally into both tails (a two-tailed test). The script normalizes this, targeting an exact area of 0.025 (2.5%) in the extreme tails of the curve.
To find where that target area lies, the script reconstructs the Probability Density Function (PDF) of the Student's t-distribution. The height of the curve depends heavily on the Degrees of Freedom (df = length - 1).
Because Pine Script doesn't have a native Gamma function, the script uses double factorials to calculate the complex math coefficients. If your sample size (length) is exceptionally high (>300), the t-distribution naturally mirrors a regular normal distribution, so it switches to a standard Gaussian curve equation to save some time.
// Calculate double factorial
double_fac(int n) =>
float res = 1.0
int curr = n
while curr > 1
res := res * curr
curr := curr - 2
res
// t-distribution formula
cur_dist(float x, int cur_df) =>
float res = 0.0
if cur_df > 300
res := 0.3989422804014326779 * math.exp(-x * x * 0.5)
else
float coeff = double_fac(cur_df - 1) / (math.sqrt(cur_df) * double_fac(cur_df - 2) * (cur_df % 2 == 0 ? 2.0 : math.pi))
res := coeff * math.pow(1.0 + x * x / cur_df, -0.5 * (cur_df + 1))
res
To find the approximate t-value that corresponds to our target tail area, the script performs numerical integration using the Trapezoid Rule (trapezoid_reverse). This is the most time consuming part.
// Reverse trapezoidal to calculate t-value from area
trapezoid_reverse(float p, int cur_df) =>
float max_p = 0.5
float max_stat = 300.0
float add_prec = 1.0
float result_i = 0.0
if p == max_p
result_i := 100000000.0 // Infinity
else
float trap_sum = 0.0
float gap_width = p / (add_prec * 1250.0)
float i = 0.0
float last_func = cur_dist(0.0, cur_df)
while trap_sum < (2500.0 * add_prec) and i < max_stat
i := i + gap_width
trap_sum := trap_sum + last_func
last_func := cur_dist(i, cur_df)
trap_sum := trap_sum + last_func
result_i := i
result_i
Calculating the Prediction Interval
Once the t-critical value is found, it is then put into the standard prediction interval formula. The script uses EMA instead of SMA to improve responsiveness to current trends.
float prediction_interval_top = mean + tCrit * stdev * math.sqrt(1 + 1/length)
float prediction_interval_bot = mean - tCrit * stdev * math.sqrt(1 + 1/length)
Because the calculations for the t-distribution estimates are computationally expensive, you can select the lookback window for using the t-distribution. You can also choose to use the faster z-score for historical bars.
Note 1: The larger the sample size, the smaller you may have to set your lookback window in order to fit within the execution time limits.
You can use this for:
Overbought/Oversold, Mean reversion signals
Dynamic Stop-loss/Take-profit (SL/TP)
1. Overbought/Oversold/Mean Reversion
The indicator creates a red background to indicate that the candlestick has broken above the top 95% prediction interval band. It can be interpreted as a potential reversal.
2. Dynamic Stop-loss/Take-profit (SL/TP)
You can utilize the plotted mean and the confidence interval as entry/exit points. For example, you could put a stop-loss at the bottom band, and a take profit at the top band.
Alerts:
Price Above Top PI (Close crossed out)
Price Below Bottom PI (Close crossed out)
High Above Top PI (Wick touched/pierced top)
Low Below Bottom PI (Wick touched/pierced bottom)
Settings:
Length: The size of the sample for the standard deviation & mean calculations. 30 is recommended.
Source: Used for standard deviation & mean calculations. For example: Changing the source to 'high' would make the indicator predict the range of the next 'high'.
Confidence Level: Dictates how wide the bands should be. A 95% confidence level is default. Must be entered as a decimal between 0 and 1.
Lookback Length: Used to limit the amount of bars to back calculate the prediction interval using the t-distribution. Default is 300.
Use z-score: Use the z-score to calculated past values. Note that this will introduce error. For example, for a sample size of 30 and a 95% confidence level, using a z-score instead of a t-score will introduce a ~4.2% error in your interval width, causing your actual prediction interval to drop from 95% down to ~94.0%.
Background Colors:
Green: The low/close of the candle breached the lower band. Potential bullish reversal.
Red: The high/close of the candle breached the upper band. Potential bearish reversal.
Limitations:
The indicator assumes that the data follows a bell curve, which the markets do not.
The indicator may lag behind actual price action.
The indicator may produce false signals.
The indicator does not predict future prices.
Disclaimer: All trading decisions and responsibilities rest solely on the user of the indicator. Indicador

50-MA Extension Dot [ATR / % / Points]50-MA Extension Dot marks when price has moved a defined distance above a daily moving-average anchor. The goal of the script is to help traders study when price becomes extended relative to its daily trend structure, rather than judging a move by price alone.
The script supports three extension methods: ATR Extension, Percent, and Points. ATR Extension compares the distance from price to the daily moving average against the instrument’s daily ATR, making the reading volatility-adjusted. Percent mode measures how far price is above the moving average in percentage terms. Points mode measures the raw point distance above the moving-average anchor.
The moving-average type, moving-average length, threshold method, threshold value, ATR length, and extension source are customizable so traders can study past moves and build their own rules. For example, users can test how a symbol historically behaved when it became one ATR, two ATRs, a fixed percentage, or a fixed point distance above its daily moving-average reference.
When the selected threshold is reached, the script plots a small dot above the candle. The dot is not a standalone buy or sell signal. It is a visual marker showing that price has reached a defined extension zone relative to the chosen daily moving-average reference.
The script can also display the daily moving average, an optional threshold line, and a small table showing the current daily moving average, daily ATR, extension price, percentage distance from the moving average, ATR percentage, and ATR extension value.
This tool is useful for studying stretched moves, breakout extensions, momentum exhaustion, and conditions where price may be moving too far too quickly above its daily trend anchor. Because different symbols have different volatility profiles, the customizable inputs allow traders to compare past extensions and develop rules that fit their own process.
This indicator does not predict future price movement. It is a contextual extension tool designed to measure distance from a daily trend reference and help traders research historical extension behavior. Indicador

Squeeze Vector [Gabremoku]Squeeze Vector is a squeeze-based volatility breakout tool that combines Bollinger/Keltner compression detection, directional pressure flow, and a first-expansion state machine to help traders identify high-probability post-squeeze breakout setups.
The core idea is simple: compression precedes expansion. When Bollinger Bands shrink inside Keltner Channels, the market is coiling — and when that squeeze releases, the first directional signal can carry strong momentum. This script gives that process a structured visual and logical framework.
Core Concept — Squeeze → Release → Direction
A BB/KC squeeze occurs when Bollinger Bands, which reflect price volatility through standard deviation, contract inside Keltner Channels, which reflect typical range through ATR. This gap between the two envelopes is used as a proxy for volatility compression.
When BB width becomes smaller than KC width, the script identifies a Squeeze state. When it releases, the script enters an Armed state and opens a short post-squeeze window during which it looks for the first valid directional expansion.
Importantly, the squeeze release alone does not confirm direction. That is why the script adds multiple expansion confirmation filters before triggering a signal.
What it shows
Squeeze Vector Oscillator — a single line that rises as BB/KC compression increases. When it crosses above 50, the squeeze is active. The oscillator turns purple during squeeze states for fast visual identification.
Pressure Flow Histogram — a volume-weighted directional pressure value that reads where price closed within the candle range and weights it by volume relative to its moving average. Positive values indicate bullish pressure, negative values indicate bearish pressure.
Bollinger Overlay on Price — during squeeze states, the script renders Bollinger Bands directly on the main chart with gradient fills, making it easy to see where price is relative to the compressed structure.
LONG / SHORT signals — primary directional signals are placed on the main chart after a post-squeeze expansion bar meets all required conditions. Optional lighter repeat markers can be shown for follow-through confirmation.
Dashboard with live checklist — the on-chart dashboard shows the current state, regime, pressure, vector value, and a 6-point checklist for both long and short setups, with filled/empty circles to show how many conditions are currently met.
Signal Logic
The signal engine works as a state machine with three phases:
Squeeze — BB/KC compression is active. No signal is generated. The dashboard shows SQUEEZE.
Armed — the squeeze just released. The script opens a short expansion window and waits for directional confirmation. The dashboard shows ARMED.
Expansion signal — within the expansion window, if a valid directional bar forms with sufficient pressure, body size, and break condition, a LONG or SHORT label is placed on the main chart.
Signal direction is confirmed by checking:
Basis side: price above or below the BB basis
Pressure: smoothed directional pressure above threshold
Strong pressure: optional stronger filter
Body quality: minimum body-to-candle-range ratio
Break condition: higher high or lower low
Regime: optional EMA 200 trend filter
When both long and short conditions are simultaneously valid, the stronger pressure side wins. If pressure is equal, raw pressure bias decides.
States and Dashboard
The dashboard tracks the full machine at a glance:
Row Content
SQZ Squeeze ON / OFF
SEQ ARMED or READY
REG Trend regime (BULL / BEAR / OFF)
BIAS Current directional pressure bias
P Pressure Flow value
V Vector Oscillator value
Checklist 6-point LONG and SHORT condition matrix
The checklist can be set to appear only during Squeeze or Armed states to reduce visual noise when no setup is forming.
Features
✅ Bollinger/Keltner squeeze detection via ratio oscillator
✅ Volume-weighted directional pressure flow
✅ Post-squeeze first expansion state machine
✅ Armed → signal transition logic
✅ 6-point entry checklist for both long and short
✅ EMA 200 regime filter
✅ Bollinger overlay with gradient fill during squeeze
✅ LONG / SHORT signal labels on main chart
✅ Optional follow-through repeat markers
✅ Repeat window filter to suppress signal clustering
✅ Strategy mode: Long, Short, or Both
✅ Fully configurable dashboard with size and offset settings
✅ Alert conditions for BUY, SELL, and squeeze activation
How to use
A practical workflow:
Watch for the Vector Oscillator to cross above 50 and turn purple — that is the squeeze state.
When it releases below 50, the dashboard switches to ARMED.
In the expansion window, check the checklist: more filled circles on one side indicate stronger directional alignment.
A LONG or SHORT label confirms a valid first expansion signal.
Use the Pressure Flow histogram to gauge how strong and consistent the directional push is.
The squeeze release alone is not a signal. Direction is only confirmed when the expansion bar quality, pressure, and structure checks all align.
Notes
Like all squeeze-based tools, Squeeze Vector is most effective when used alongside price structure context. Squeezes release into strong moves, but not every release produces a sustained trend — volume, higher timeframe context, and support/resistance levels can all affect follow-through quality.
Author: Gabremoku
Pine Script v6 Indicador

Adaptive Trend Ribbon [Alpha Extract]A sophisticated adaptive trend-following framework that combines volatility-responsive moving averages, ribbon stack analysis, ATR-based trend rails, ADX confirmation, pullback continuation signals, and a real-time confidence dashboard into one complete market regime tool. The indicator is designed to identify bullish and bearish trend environments, filter weak conditions, highlight confirmed trend flips, and provide structured stop guidance through an adaptive ATR rail. By adjusting ribbon sensitivity based on current volatility, the system aims to stay responsive during expansion phases while remaining smoother during quieter market conditions.
🔶 Adaptive Volatility-Based Ribbon Engine
Implements a multi-layer adaptive EMA ribbon that automatically modifies its effective moving-average lengths based on current volatility conditions. When volatility expands, the ribbon becomes more responsive by shortening its dynamic length. When volatility contracts, the ribbon lengthens to reduce noise and avoid unnecessary whipsaw.
volRatioRaw = atrAverage > 0 ? atr / atrAverage : 1.0
volRatio = clamp(volRatioRaw, 0.35, 2.75)
emaFast = adaptiveEma(src, baseFast, volRatio, adaptStrength)
This creates a trend ribbon that adapts to the market environment instead of relying on fixed moving-average behaviour across all conditions.
🔶 Six-Layer Trend Structure
Uses six adaptive moving averages ranging from fast to anchor length to define market structure across multiple trend speeds. The ribbon includes fast, mid, slow, and anchor components, allowing traders to see whether short-term momentum is aligned with broader trend direction.
A clean bullish trend forms when the ribbon is stacked from fastest above slowest, while a clean bearish trend forms when the ribbon is stacked from fastest below slowest. Mixed ribbon conditions indicate compression, transition, or weaker directional conviction.
🔶 Bullish & Bearish Stack Detection
Identifies strong directional alignment through full ribbon stack confirmation. Bullish stack conditions require every faster ribbon layer to sit above the slower layer beneath it, while bearish stack conditions require the opposite alignment.
This gives traders a simple way to distinguish clean trend environments from sideways or indecisive price action.
🔶 ATR Trend Rail System
Features a built-in ATR-based trend stop that acts as the main regime rail. The rail flips direction when price breaks through the active stop level, creating a clear bullish or bearish trend state.
longCandidateStop = railBasis - atr * atrMult
shortCandidateStop = railBasis + atr * atrMult
railDirection := close < trendStop ? -1 : 1
The stop can be based on the ribbon midline, close, or HL2, giving traders flexibility in how the trend rail is anchored.
🔶 Regime Flip Signal Logic
Generates long and short signals when the trend rail flips direction and the confirmation conditions are satisfied. A bullish signal occurs when the regime flips into bullish structure, while a bearish signal occurs when the regime flips into bearish structure.
Signals are filtered through ADX and directional movement confirmation when enabled, helping reduce low-quality flips during weak or choppy market conditions.
🔶 ADX & Directional Movement Confirmation
Integrates ADX confirmation to measure whether the market has enough directional strength to justify a trend signal. The system also checks directional movement by comparing +DI and -DI, allowing bullish regimes to favour positive directional pressure and bearish regimes to favour negative directional pressure.
This confirmation layer helps separate true trend expansion from random price movement.
🔶 Pullback Continuation Alerts
Includes optional pullback continuation logic designed to identify trend resumption after price interacts with the adaptive ribbon. When price pulls into the ribbon area and then closes back in the trend direction, the system can trigger continuation alerts.
This is useful for traders who prefer entering after a trend has already been established rather than only trading the initial regime flip.
🔶 Confidence Scoring Framework
Calculates a real-time trend confidence score by combining multiple components of trend quality, including ribbon stack alignment, price position relative to the ATR rail, ADX strength, directional movement, and spread between fast and anchor ribbon layers.
The score provides a quick snapshot of how strong and confirmed the current trend environment is.
🔶 Dynamic Trend Coloring System
Uses adaptive color logic to visually represent bullish, bearish, and neutral/mixed conditions. Candles, ribbon lines, fills, the ATR stop rail, and the status panel all update according to the current regime.
When ADX confirmation is enabled but the filter has not passed, the system fades the trend color to show that the regime exists but confirmation is weaker.
🔶 Real-Time Status Panel
Features a compact dashboard that displays the most important trend information directly on the chart. The panel includes:
• Current regime
• Confidence percentage
• Confirmation status
• ADX value
• Volatility ratio
• Ribbon stack condition
• Active stop level
This allows traders to quickly assess whether the market is bullish, bearish, filtered, mixed, or entering a stronger trend phase.
🔶 Flexible Risk Rail Basis
Allows the ATR stop rail to be calculated from different price references depending on the trader’s preferred style. Ribbon Mid creates a smoother institutional-style trend rail, Close makes the rail more reactive, and HL2 provides a balanced price reference.
This flexibility makes the indicator suitable for both faster trend-following styles and slower swing-trend systems.
🔶 Clean Overlay Visual Design
Displays the full adaptive ribbon directly on price with optional candle coloring, background regime shading, trend stop plotting, and signal markers. The ribbon uses layered transparency to maintain chart readability while still showing the strength and direction of the trend structure.
The result is a clean visual layout that can be used as a primary trend framework or as a confirmation layer alongside other systems.
🔶 Comprehensive Alert System
Includes alerts for the most important trend events:
• Adaptive Ribbon Long
• Adaptive Ribbon Short
• Bullish Pullback Continuation
• Bearish Pullback Continuation
• Long Trend Exit
• Short Trend Exit
These alerts allow traders to monitor trend flips, pullback continuations, and invalidation events without needing to constantly watch the chart.
🔶 Why Choose Adaptive Trend Ribbon ?
This indicator provides a complete adaptive trend-following environment by combining responsive moving-average structure, volatility-adjusted behaviour, ATR-based trend rails, ADX confirmation, continuation logic, and live confidence scoring. Instead of relying on a single moving average or fixed trend signal, it evaluates multiple layers of trend quality before confirming direction.
The adaptive ribbon helps traders understand whether the market is strongly aligned, weakening, transitioning, or mixed. The ATR rail provides a clear trend invalidation reference, while the confidence panel gives immediate context on whether the trend has enough structure and strength behind it. Perfect for trend-following traders, swing traders, momentum traders, and systematic traders who want a cleaner way to identify confirmed bullish and bearish regimes with built-in risk guidance. Indicador

SoSa Smart Trend ProSoSa Smart Trend Pro
Advanced All-in-One Trading Indicator
SoSa Smart Trend Pro is a powerful institutional-grade trading indicator designed to help traders identify high-probability opportunities through advanced trend analysis, volume confirmation, momentum filters, Fair Value Gap detection, market structure analysis, and session-based trading tools.
Built for Forex, Stocks, Futures, Indices, and Cryptocurrency markets, SoSa Smart Trend Pro combines multiple professional trading concepts into a single indicator, allowing traders to make faster, smarter, and more confident decisions.
🚀 Core Features
📈 Advanced Trend Detection
Choose from multiple moving average types:
EMA
SMA
WMA
VWMA
RMA
HMA
DEMA
TEMA
Bollinger Basis
The moving average dynamically changes color to instantly identify market conditions:
🟢 Bullish Trend
🔴 Bearish Trend
🟡 Neutral Market
🕯️ Smart Engulfing Pattern Detection
Automatically detects:
Bullish Engulfing Patterns
Bearish Engulfing Patterns
Advanced body-size filtering helps eliminate weak setups and highlights stronger reversal opportunities.
📊 Volume Confirmation System
Filters market signals using real-time volume analysis.
Features include:
Volume SMA comparison
Adjustable volume multiplier
High-volume breakout confirmation
Helping traders avoid low-quality entries during weak market participation.
⚡ Institutional Fair Value Gap Detection
Automatically identifies market imbalances used by professional traders.
Includes:
Bullish Fair Value Gaps
Bearish Fair Value Gaps
ATR-based minimum gap sizing
Adjustable zone extensions
Dynamic FVG management
Ideal for identifying retracements, continuation setups, and liquidity zones.
🗽 New York Session Tracker
Monitor the most active trading session with:
Automatic New York Session Box
Session High & Low Tracking
Session Labels
Extended High/Low Levels
Perfect for traders who focus on market open volatility and liquidity sweeps.
🔵 Dynamic Support & Resistance Levels
Automatically plots key market structure zones based on pivot analysis.
Benefits:
Identifies potential reversal areas
Highlights important reaction zones
Improves entry and exit timing
📉 RSI Momentum Filter
Built-in Relative Strength Index analysis:
Custom RSI Length
Overbought Detection
Oversold Detection
Trade Confirmation Filter
Adds an additional layer of momentum validation.
〰️ MACD Confirmation Engine
Uses MACD crossover and histogram strength to confirm momentum.
Detects:
Bullish Momentum
Bearish Momentum
Trend Continuation Opportunities
Reducing false entries and increasing signal quality.
〰️ Bollinger Bands Integration
Monitor market volatility with built-in Bollinger Bands.
Features:
Adjustable Length
Adjustable Deviation Multiplier
Volatility Expansion Detection
Useful for breakout and mean-reversion strategies.
🎯 Smart Buy & Sell Signals
Signals are generated only when multiple confirmations align.
Signal conditions may include:
✅ Trend Direction
✅ Moving Average Confirmation
✅ Engulfing Pattern Detection
✅ Volume Confirmation
✅ RSI Validation
✅ MACD Confirmation
This multi-layer approach helps filter market noise and improve trade quality.
📊 Confidence Score Technology
Every trade signal includes a confidence rating from 0% to 100%.
The score is calculated using:
Trend Strength
Volume Activity
Fair Value Gap Confirmation
Engulfing Patterns
MACD Momentum
Price Structure Alignment
Allowing traders to quickly assess the quality of each setup.
🖥️ Professional Market Dashboard
The integrated information panel displays:
Market Trend
Volume Status
RSI Condition
MACD Status
Fair Value Gap Activity
New York Session Status
Confidence Score
Current Trading Signal
All critical market information is available in one location.
🔔 Real-Time Trading Alerts
Receive alerts for:
Buy Signals
Sell Signals
RSI Overbought Conditions
RSI Oversold Conditions
Bullish FVG Detection
Bearish FVG Detection
New York Session Open
Stay connected to the market without constantly watching the chart.
💎 Why Traders Choose SoSa Smart Trend Pro
✔ Combines multiple indicators into one
✔ Reduces chart clutter
✔ Improves signal quality
✔ Identifies institutional market imbalances
✔ Tracks trend, momentum, volume, and volatility
✔ Provides confidence-based trade scoring
✔ Suitable for scalpers, day traders, swing traders, and position traders
✔ Works across Forex, Crypto, Stocks, Futures, and Indices
Trade Smarter. Trade With Confidence.
SoSa Smart Trend Pro is built to provide a complete market analysis solution, combining trend identification, momentum confirmation, institutional concepts, and intelligent signal generation into one professional-grade trading tool. 📈🔥
Tagline:
"See the Trend. Trust the Signal. Trade with Confidence." 🚀 Indicador

Gaspard98 - Carter Squeeze On Chart / Signals# Gaspard98 — Carter Squeeze On Chart / Signals
## Overview
The **Carter Squeeze** is an on-chart implementation of John Carter's well-known *TTM Squeeze* concept, rebuilt as a clean overlay with discrete **Buy / Sell signals**. It detects periods of volatility compression — when a market coils up before an expansion move — and fires a directional signal the moment that energy is released.
Unlike a classic momentum-pane squeeze, everything here lives directly on the price chart: compression state, momentum bias, trend, and entries are all visible at a glance, with no second window to monitor.
---
## The Concept Behind the Squeeze
Carter's method is built on a single, elegant observation: **when Bollinger Bands contract inside the Keltner Channels, the market is in a low-volatility "squeeze."** Volatility is mean-reverting, so a tight squeeze tends to be followed by a sharp expansion. The trade is not the squeeze itself — it's the *release* (the "fire"), taken in the direction of momentum.
This script measures that compression at **three intensity levels** (TTM Squeeze Pro style) rather than a single on/off state, so you can distinguish a mild coil from an extreme one.
---
## How It Works
**1. Compression detection**
Bollinger Bands (default 20, 2.0) are compared against three Keltner Channels built from the average True Range, at multipliers 2.0 / 1.5 / 1.0:
- **No squeeze** — bands are outside the widest Keltner (market is expanding)
- **Low compression** — mild coil
- **Mid compression** — moderate coil
- **High compression** — the tightest state; bands sit inside the narrowest channel
**2. Momentum**
A linear-regression oscillator measures price relative to the mid-channel (the classic Carter momentum formula). Its sign defines directional bias (bullish / bearish) and its slope defines whether momentum is accelerating or fading.
**3. Signals**
The default trigger is the **squeeze fire**: the bar where compression releases. A **BUY** prints if momentum is positive at the release, a **SELL** if it is negative. An optional alternative mode triggers on a **momentum zero-cross** instead.
---
## Signal Logic & Filtering
- **Trigger — Squeeze fire** (default): entry on the release of a compression, in the direction of momentum. This is the purest expression of Carter's method.
- **Trigger — Momentum cross**: entry when momentum crosses the zero line, regardless of squeeze state.
- **Require accelerating momentum** (default on): only allows a BUY when momentum is rising and a SELL when it is falling, filtering out weak, fading releases.
- **Confirm on close** (default on): signals evaluate only on closed bars, making them **non-repainting**. Disable it for faster, intrabar-reactive signals at the cost of mid-bar flicker.
---
## Visual Features
- **Buy / Sell labels** plotted directly below / above the bars.
- **Squeeze state dots** along the bottom of the chart, color-coded by intensity:
- green = no squeeze
- blue = low compression
- orange = mid compression
- red = high compression
- **Background tint** while a squeeze is active (color reflects intensity).
- **Candle coloring** driven by momentum (bright = accelerating, faded = fading).
- **Trend line** (the basis) colored by momentum bias.
- **Status table** in the top-right corner showing squeeze level, momentum value + direction, current bias, and the last signal.
- Optional **Bollinger + Keltner band overlay** so you can visualize the compression itself.
---
## Settings
**Squeeze**
- Source, Bollinger length & multiplier
- Keltner length and the three compression multipliers (low / mid / high)
**Signals**
- Trigger mode (Squeeze fire / Momentum cross)
- Require accelerating momentum
- Confirm on close (non-repaint)
**Visual**
- Toggle bands, background, dots, candle coloring, trend line, status table
- Custom Buy / Sell colors
---
## How to Use It
1. Watch for a tightening sequence — dots moving from green toward orange and red signal building compression.
2. The **brighter the candles** and the larger the momentum value, the stronger the directional conviction.
3. A signal prints when the squeeze releases. Treat the release as a *timing* tool, not a standalone system — combine it with structure, higher-timeframe trend, and your own risk management.
4. Tighter compressions (red) before a fire tend to precede the cleanest expansions.
Works on any market and timeframe (futures, indices, FX, crypto, equities). Higher timeframes generally yield fewer but cleaner signals.
---
## Alerts
Two alert conditions are built in — **BUY** and **SELL** — ready to attach in TradingView's alert dialog. The default message embeds the ticker and close price and can be reshaped for any webhook or automation endpoint.
---
## Notes
- Default Bollinger / Keltner parameters follow Carter's classic 20-period configuration; adjust to your instrument's volatility profile.
- With *Confirm on close* enabled, signals are fixed once the bar closes and do not repaint.
---
*This indicator is a technical-analysis tool provided for educational and informational purposes only. It is not financial advice and does not guarantee any outcome. Trading involves substantial risk of loss — always test thoroughly and manage risk according to your own plan.* Indicador

Guppy MMA Mean Reversion SignalsThe Guppy MMA Mean Reversion System is a trend-following mean reversion tool designed to identify high-probability pullbacks within established trends. By combining the classic Guppy Multiple Moving Average (GMMA) with volatility, volume, and momentum filters, this script aims to reduce the "noise" often found in standard moving average cross strategies.
The Concept: Why this Works
Standard GMMA indicators are excellent for visualizing trend strength but often lack precise entry triggers or filters to avoid entering during periods of low volume or extreme exhaustion. This script addresses these limitations by integrating four distinct analytical components:
- GMMA Ribbons (Trend & Reversion Zones) : We use two groups of EMAs (Short-term and Long-term). The Long-term group defines the "institutional" trend. Our entry logic looks for price to revert from the short-term trend back into the long-term trend zone—a classic sign of a healthy pullback.
- CVD Confluence (Volume Confirmation) : Using Cumulative Volume Delta (CVD) based on candle-body delta approximations, the script ensures that volume flow supports the entry direction. This prevents entering pullbacks that lack the necessary buying/selling pressure to resume the trend.
- ATR Volatility Filter (Statistical Spacing) : To avoid "choppy" entries, this filter requires the price to be at a statistically significant distance from the EMA based on market volatility (ATR). This ensures you are entering at a true "discount" rather than in a sideways market.
- RSI Exhaustion Filter (Momentum Safety) : We utilize RSI to ensure that a reversion hasn't reached an overextended state. For example, it prevents buying a pullback if the RSI indicates the asset is already in an overbought exhaustion phase.
How to Use
- Long Entries (Green Circles) : Triggers when the Long-term ribbon is bullish, and price pulls back to touch the Long-term EMA group, provided the CVD, ATR, and RSI conditions are met.
- Short Entries (Red Circles) : Triggers when the Long-term ribbon is bearish, and price rallies to touch the Long-term EMA group, filtered by volume and momentum.
- Exits (Labels) : Exit signals appear when price successfully reverts back to the "fast" Short-term group, marking the completion of the mean reversion move.
Key Features & Customization
- Independent Toggles : You can independently turn on/off buy signals, sell signals, and their respective exits to suit your specific trading style (e.g., only trading the long side).
- Signal Cooldown : Includes a customizable "bar count" cooldown to prevent multiple overlapping signals during high-volatility periods.
- Comprehensive Settings : Fully adjustable EMA lengths, ATR multipliers, and RSI thresholds to adapt the system to different timeframes and asset classes (Crypto, Forex, Stocks).
Settings Guide
- Use ATR Filter : Increase the multiplier for more conservative, wider entries.
- Use CVD Filter : Enable to ensure volume delta is trending with your entry.
- Use RSI Filter : Helps avoid "catching falling knives" by filtering out trades during extreme momentum spikes. Indicador

Indicador

Bollinger Band [scoopup]Overview
A Bollinger Bands–based indicator that shows trend direction (up/down) through the basis line color, displays band width (volatility) as a percentage, and marks the most recent meaningful lows (demand zones) on the weekly and daily timeframes as boxes. It lets you view statistical volatility and the real low zones where buying previously stepped in — all on a single chart.
Default settings are Length 21 and StdDev 1.618, based on the Fibonacci number (21) and the golden ratio (1.618).
Components
1. Bollinger Bands (Upper / Basis / Lower)
Defaults: Length 21, StdDev 1.618
Upper band, basis (middle), and lower band. The bands widen and narrow with volatility.
2. Basis Line Trend Color (Daily-based)
The color of the middle basis line indicates trend direction.
Logic: over a set lookback, it compares the cumulative size of the "close-to-lower" area (red) versus the "upper-to-close" area (green).
Red area dominant → uptrend → basis line GREEN
Green area dominant → downtrend → basis line RED
The longer the close stays near the lower band (larger red area), the more it is read as base-building before a move higher.
This color is always calculated from Daily data, regardless of the chart timeframe. Whether you view it on the 15m, 1h, or 4h chart, the daily trend color stays consistent.
3. Fill
Upper band ↔ close: semi-transparent green
Close ↔ lower band: semi-transparent red
Lets you quickly read where the close sits within the bands.
4. Band Width (%)
Formula: (Upper − Lower) / Basis × 100
Displays the current band width in a corner table as Band Width: X.XX%.
Lower = volatility contraction (squeeze) → often precedes a large move; higher = volatility expansion.
The Data Window also shows band width % and band width (price difference), including on historical bars.
5. Recent Lows
Weekly recent low = yellow box / Daily recent low = red box
Shows only the most recent pivot (swing) low that sits below the current close. (Lows above the close are skipped; if the latest low is above the close, the prior low is used instead.)
Box height spans the low ↔ the close at that point, and extends to the right to show a still-valid support/demand zone.
How to Read It
Basis green + close near the lower band → watch for a potential bounce after base-building.
Basis red + close near the upper band → watch for overextension/pullback risk.
Band Width % contracting (squeeze) → watch for an upcoming volatility expansion.
Recent low boxes (yellow/red) act as first support candidates on a pullback. A close below the box signals support failure.
Key Settings
Bollinger Bands: Source, Length (default 21), StdDev (default 1.618), Band Color / Width / Style
Basis Line: Show Basis, Basis Width, Ratio Length, Up / Down Color
Fill: Show Fill, Upper / Lower Fill Transparency
Band Width: Show Band Width %, Table Position, Text Size
Recent Lows: weekly/daily toggles, Pivot Length, Box Color
Tips
This is a supporting tool for reading trend direction + volatility + support zones together, not a standalone trade signal.
Reliability increases when the daily trend color and a recent low box line up in the same area.
Adjust StdDev and Ratio Length to fit each instrument's volatility.
Disclaimer
This indicator is for reference only and does not guarantee trading profits. All trading decisions and responsibility rest solely with the user. Indicador

Tristan HTF Master - Multi Timeframe OverlayWelcome to my indicator, a powerful multi-timeframe (MTF) visualization tool designed specifically for traders who rely on "Candle Behavior Strategies" and precise timing strategies. I use this indicator as an orientation
If you base your trades on the internal mechanics of Higher Timeframe (HTF) candles—such as tracking the open, high, low, and close of a 1-hour candle while executing on the 1-minute or 5-minute chart—this indicator is built for you.
The Core Concept: Time-Based Candle Behavior: Depending on your strategy in my opinion it is best suited for Time Based Strategies.
This indicator was developed with a specific structural trading strategy in mind (heavily inspired by concepts of "Tom Trades" Candle Behavior Reversal. So respects to him. The core philosophy revolves around observing how a Higher Timeframe candle (e.g., the 1H candle) behaves during its lifespan.
Often, in ranging or consolidating markets, a 1H candle will exhibit a distinct pattern:
First 30 Minutes (The Trap): The market creates a sudden Liquidity Sweep accompanied by an Overextension. This often traps breakout traders.
The Reversal (At ~30 Mins): Right around the midpoint of the candle's lifespan, the market loses momentum, reverses, and creates a Type 3 Market Shift / Break of Structure (BoS) on the lower timeframes.
Last 30 Minutes (The Retrace): The price retraces back into the HTF candle's range, often pulling back up to 50% of the initial overextension before the candle closes.
Because precise timing is everything in this strategy, the Tristan HTF Master visually draws the HTF candle directly onto your lower timeframe chart from the very first second it opens. You can visually track exactly when the 30-minute mark is reached without having to constantly switch timeframes or check the clock.
How to Trade the Strategy Using This Indicator
While this tool can be used for any MTF strategy, here is the optimal step-by-step setup it was designed for:
Market Condition: Identify a ranging market. Avoid massive, aggressive trending environments. Look for longs in the lower third of the range, and shorts in the upper third.
The Setup: Wait for a Liquidity Sweep and an Overextension during the first half of the HTF candle (e.g., the first 30 mins of the 1H box).
The Trigger: Look for a Type 3 Market Shift (Break of Structure) on the lower timeframe, confirming the exhaustion of the overextension.
The Entry: Pull your Fibonacci tool over the Type 3 shift. Place a limit order at the 50% retracement level of that shift (ideally backed by a factual shift confirmation).
Stop Loss (SL): Placed strictly above the local high (for shorts) or below the local low (for longs) of the sweep.
Take Profit (TP): Target the 50% retracement level of the entire initial overextension.
Indicator Features
Dynamic HTF Boxes: Overlays 15m, 30m, 1H, or 4H candles perfectly onto your current LTF chart. The boxes span the full width of the time period from the moment they open.
100% Transparent Bodies: The HTF box bodies are fully transparent. This allows you to clearly read the internal Lower Timeframe (LTF) price action without visual clutter.
Real-Time Wicks: The wicks of the HTF candle update dynamically in the center of the box as new highs and lows are formed.
Live Countdown Timer: Includes a clean, built-in countdown label attached to the active HTF candle, showing exactly how much time is left until the candle closes.
Disclaimer: This script and the described strategy are for educational purposes only and do not constitute financial advice. Past performance is not indicative of future results. Always backtest strategies thoroughly and manage your risk appropriately. Indicador

quick levels and zonesManual Levels and Zones Plotter is a lightweight, high-utility tool designed to instantly map out your entire technical analysis framework from a single text block. Simply paste your raw text notes, level levels, or automated scanner outputs directly into the indicator settings, and the script handles the rest.
🚀 Key Features
Instant Bulk Plotting: Parses multiple lines of text simultaneously. No more manual line drawings or repeating actions for every single price point.
Dynamic Range & Zone Detection: If a line contains a price range (e.g., 742–746 major resistance zone), the script automatically detects it and draws a shaded visual box (zone) instead of a single line.
Smart Color Coding: Automatically identifies key market terms within your text notes and applies contextual color profiles:
🔴 Red: Exhaustion, Resistance, Outliers
🟢 Green: Support, Expansion Targets
🟠 Orange: Pivot points, Line-in-the-sand levels
⚪ Gray: Standard micro or unclassified levels
Smart Label Staggering: Labels are dynamically staggered off the right edge of the price action (bar_index + spacer) to prevent overlap and maintain a pristine, readable chart view.
Replay & Real-Time Performance Optimized: Built using persistent garbage-collection arrays running strictly on barstate.islast. It renders flawlessly during historical Bar Replay sessions without lagging your chart or cluttering background memory.
🛠 How to Use It
Open the indicator settings window.
In the "Paste Levels Here" text area, paste your levels. Each level must be on its own line, starting with the numeric price value.
Example format:
Plaintext
766.70 outlier monthly resistance
742–746 major resistance zone
733.55 daily pivot / line in the sand
708.43 weekly support
Toggle "Extend Across Entire Screen?" to choose between historical infinite projections or localized, clean right-side tracking. Indicador

Ultimate Scalp MoBo + RSI + Mult-MA + MACD ConfigurationOverview
The Ultimate Scalp Configuration is a comprehensive trend-following and pullback execution system designed specifically for scalpers and day traders. Rather than simply overlaying indicators, this script synchronizes three distinct technical layers—Trend, Volatility-Adjusted Momentum, and Price Action—to identify high-probability entries at the precise moment a pullback ends and a trend resumes.
How It Works (The "Synergy")
This script uses a modular approach to filtering out "market noise," which is the primary challenge in lower-timeframe scalping:
- The Trend Layer (Multi-MA Engine): The script utilizes a fanned-out Moving Average structure (9, 50, and 200 lengths). Users can choose from 12 advanced MA types, including Zero-Lag EMA (ZLEMA) and Fractal Adaptive Moving Average (FRAMA). These are used to determine the "Path of Least Resistance." A signal only fires when the trend is perfectly aligned (Fast > Medium > Slow).
- The Volatility Layer (MoBo Bands): Momentum Breakout (MoBo) Bands are derived from Standard Deviation. They act as a volatility filter, ensuring that a "Buy" or "Sell" signal only occurs when the price has enough momentum to break out of its immediate value area.
- The Momentum Filter (RSI & MACD): To prevent "buying the top," the script cross-references the Relative Strength Index (RSI) and MACD Histogram. These ensure that momentum is not only trending but is actively accelerating in the direction of the trade.
- The Execution Layer (EMA Touch & Price Action): The primary trigger is a mean-reversion "touch" of the 9-period Fast EMA. To confirm the reversal, the script scans for one of eight institutional candlestick patterns (e.g., Morning/Evening Stars, Tweezers, or Pin Bars).
Key Features
- 12 Selectable MA Types: Adapt to different market conditions (Forex, Crypto, or Futures) by switching between GMA, VIDYA, KAMA, and more.
- Advanced Price Action Detection: Integrated logic for Hammer, Shooting Star, Tweezer, Inside Bar, and Dark Cloud patterns as signal requirements.
- Secondary Volatility Filters: Built-in ADX (Trend Strength) and ATR (Volatility) filters to keep you out of sideways, low-volume markets.
- Signal Cooldown: Prevents repetitive "over-trading" by enforcing a minimum bar distance between consecutive signals.
- Dynamic TP/SL Zones: The 50 and 200 MAs are highlighted as primary dynamic levels for taking profit or placing trailing stops.
How To Use
Identify the Trend: Ensure the 50 (Orange) and 200 (Blue) MAs are fanned out and the price is above/below them.
- Wait for the Pullback: Look for the price to return and "touch" the 9 EMA (Signal Line).
The Entry: Enter on the BUY or SELL label, which signifies that the pullback has met all MoBo, RSI, MACD, and Candlestick requirements.
- Management: Use the Orange MA (50) as your first Take Profit or "Break Even" zone, and the Blue MA (200) as your ultimate trend reversal stop. Indicador